
Check and Manage External Chat Logs
External chat logs gather every messaging session and individual message that reaches your organization through your connected channels into one place. From this log you can inspect a session’s details, trace what happened to it over time, read the full conversation, and reassign or remove sessions and messages when needed.
Requirements
Section titled “Requirements”Your Cloud Voice system must be running firmware version 84.23.0.24 or later.
Open the external chat logs
Section titled “Open the external chat logs”-
Sign in to the Cloud Voice management portal and go to Reports and Recordings > External Chat Logs.
-
Optional: Narrow the list with the available filters (time range, channel type, and other objects). Matching sessions appear in the table.
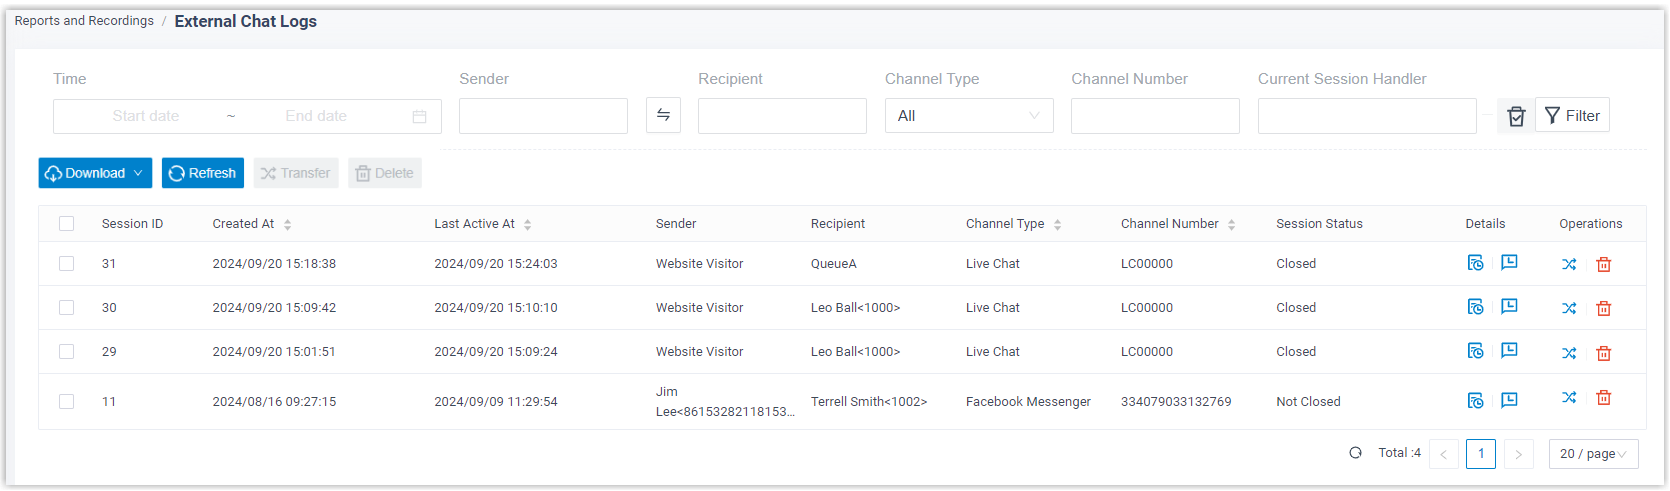
Once the sessions you want are on screen, use the actions below to review or manage them.
Manage chat sessions
Section titled “Manage chat sessions”View a session’s activity timeline
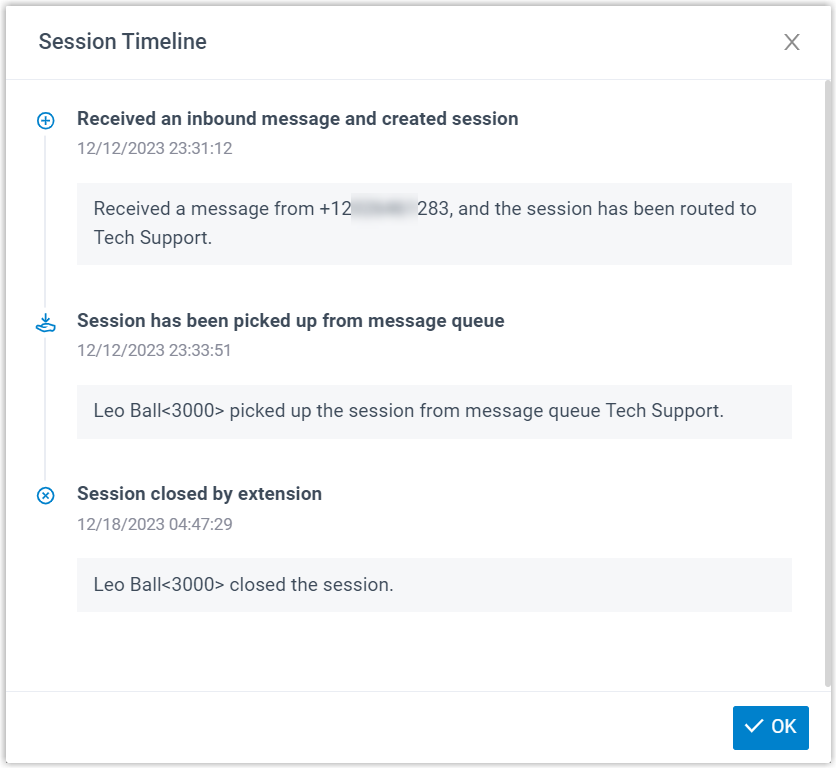
Section titled “View a session’s activity timeline”Click the timeline icon ( ) next to a session.

A window opens showing that session’s operation history laid out on a timeline.
Transfer a session
Section titled “Transfer a session”You can move one session or several at once to another destination, which is useful for reassigning conversations after an agent’s extension has been removed. A session can be transferred to an extension, a message queue, or a third-party message analytics platform (delivered through the API, the system’s Application Programming Interface).
To transfer a single session:
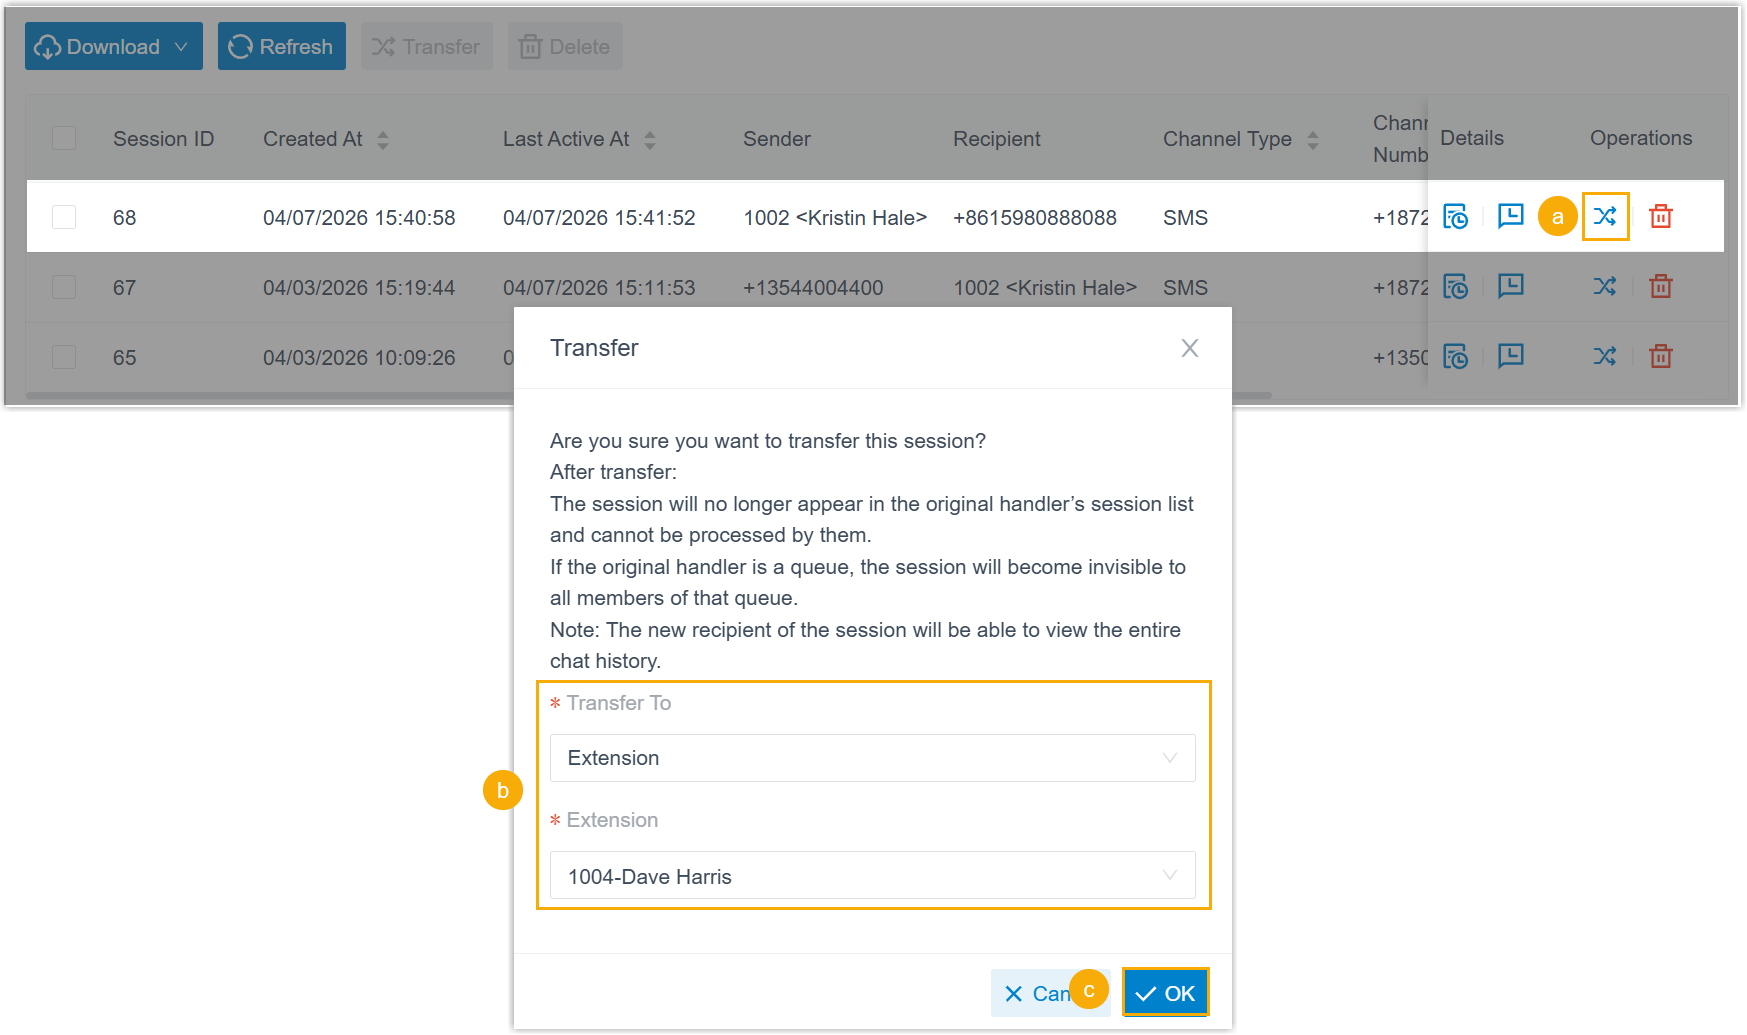
- Click the transfer icon (
 ) next to the session.
 - In the pop-up window, choose a destination type, then select the specific destination.
- Click OK.
The session leaves the original handler’s list and moves to the chosen extension, message queue, or analytics platform along with its complete chat history.
To transfer several sessions at once:
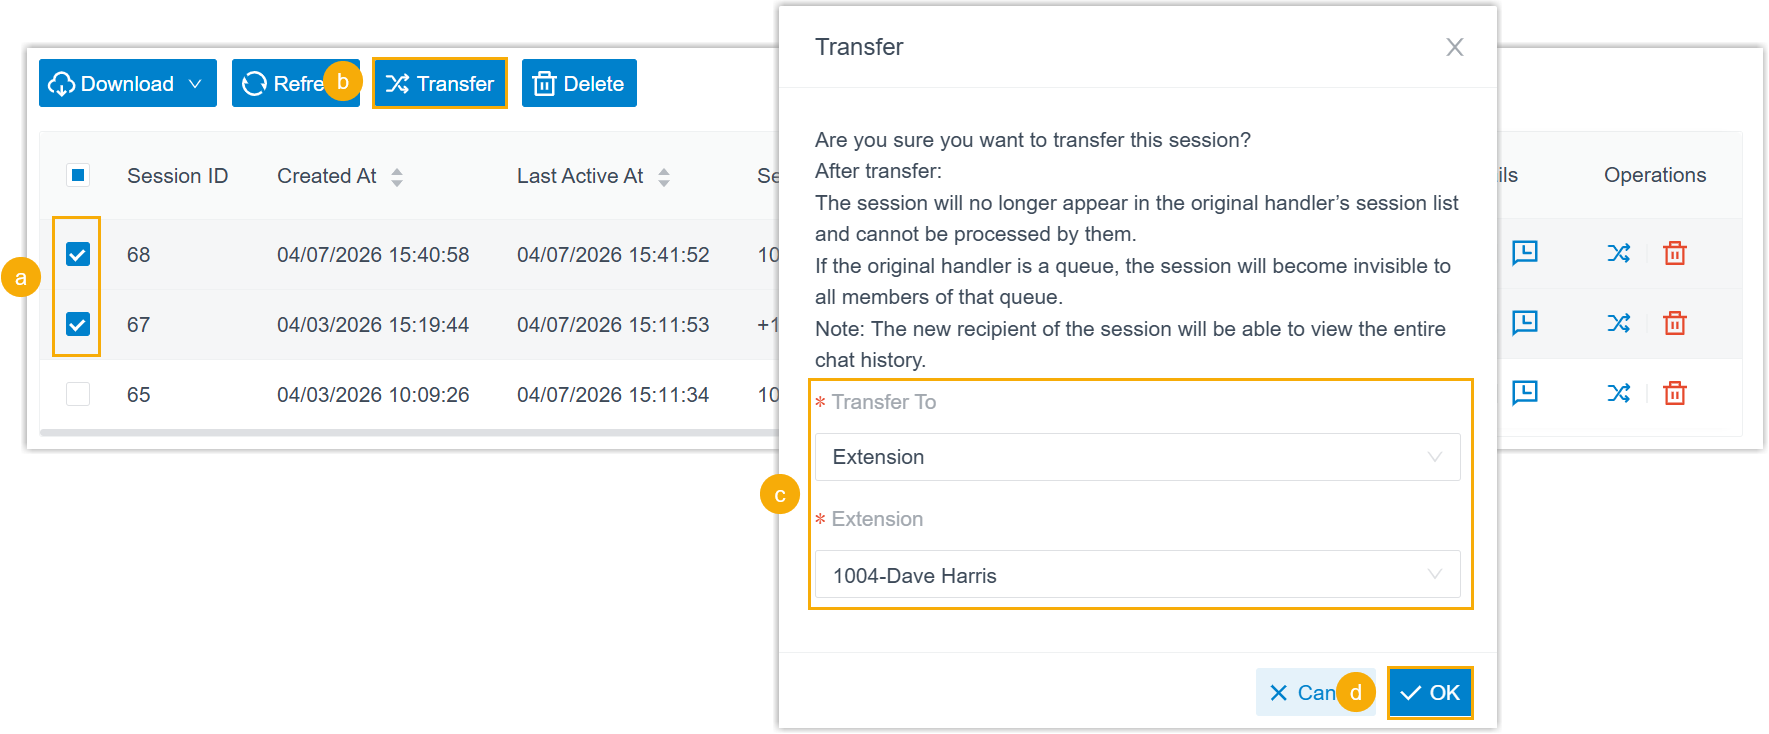
- Select the sessions you want to move.
- Click Transfer at the top of the list.
- In the pop-up window, choose a destination type, then select the specific destination.
- Click OK.
The selected sessions leave the original handler’s list and move to the chosen extension, message queue, or analytics platform along with their complete chat histories.
Delete sessions
Section titled “Delete sessions”To delete a single session:
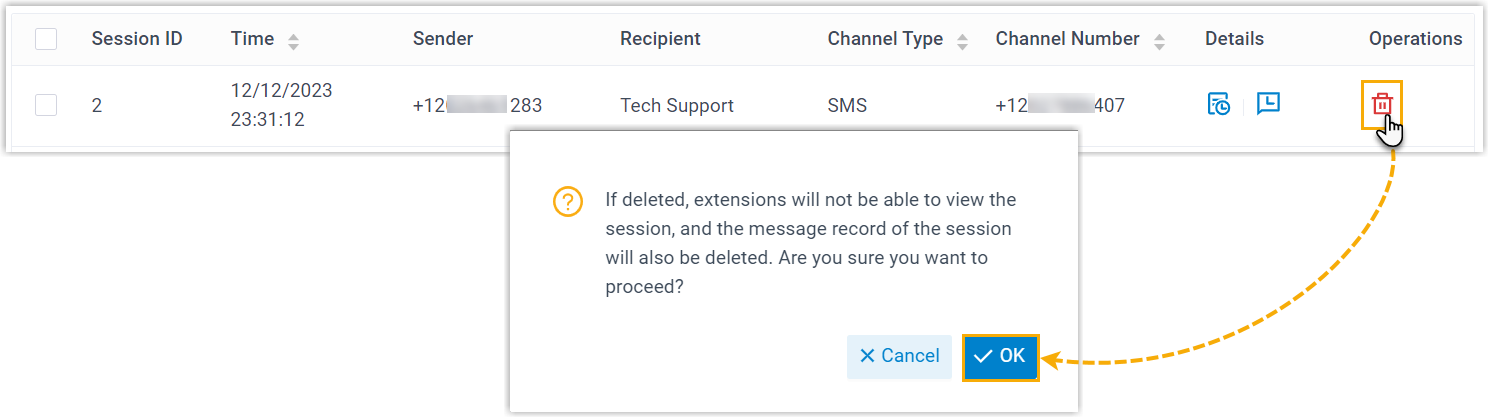
- Click the delete icon (
 ) next to the session.
 - In the pop-up window, click OK.
To delete several sessions at once:
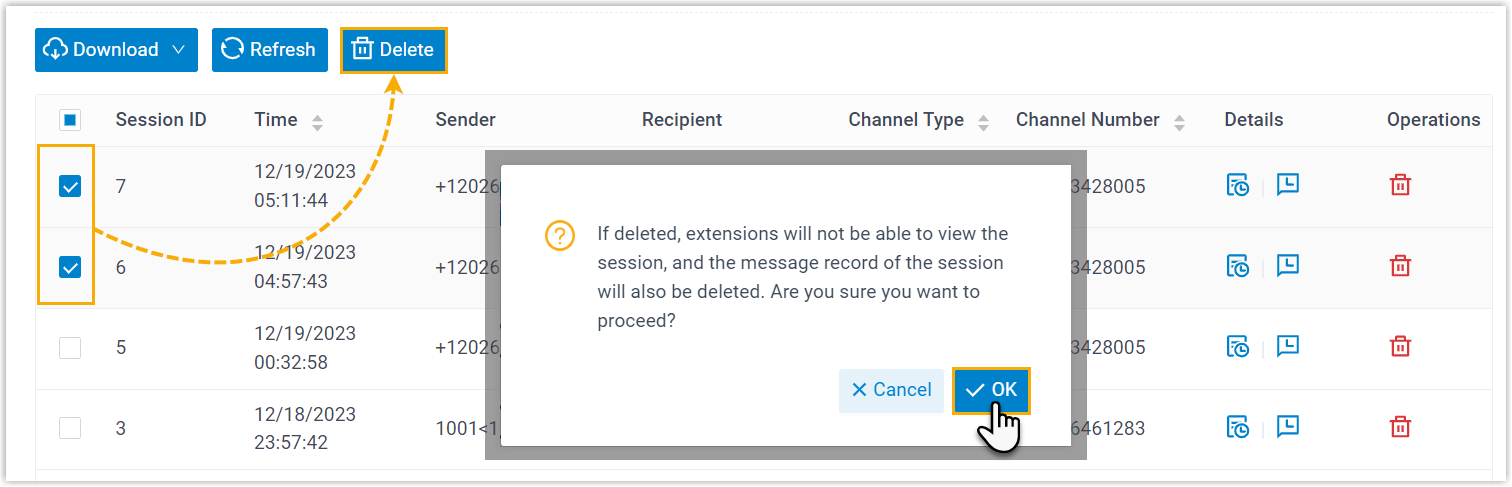
- Select the sessions you want to remove, then click Delete.
- In the pop-up window, click OK.
Manage chat histories
Section titled “Manage chat histories”Read a session’s messages
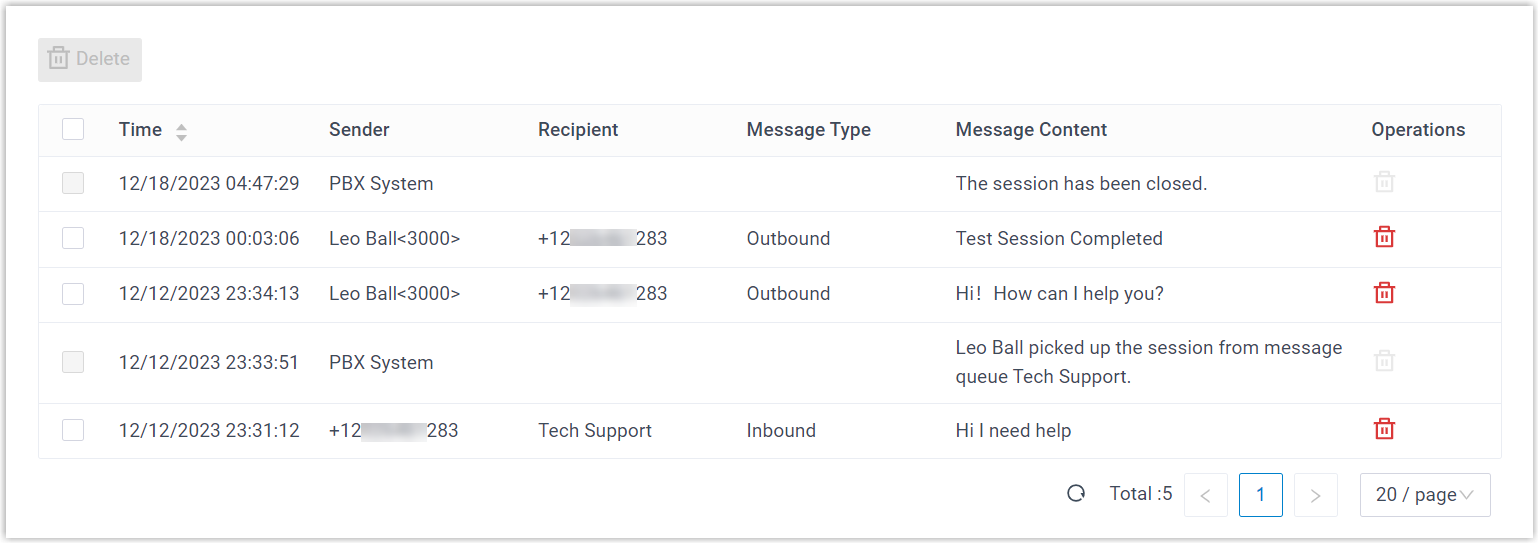
Section titled “Read a session’s messages”Click the chat records icon ( ) next to a session.

The full set of messages exchanged in that session is displayed.
Delete messages
Section titled “Delete messages”-
Click the chat records icon (
) next to the session to open its message history. -
To delete a single message:
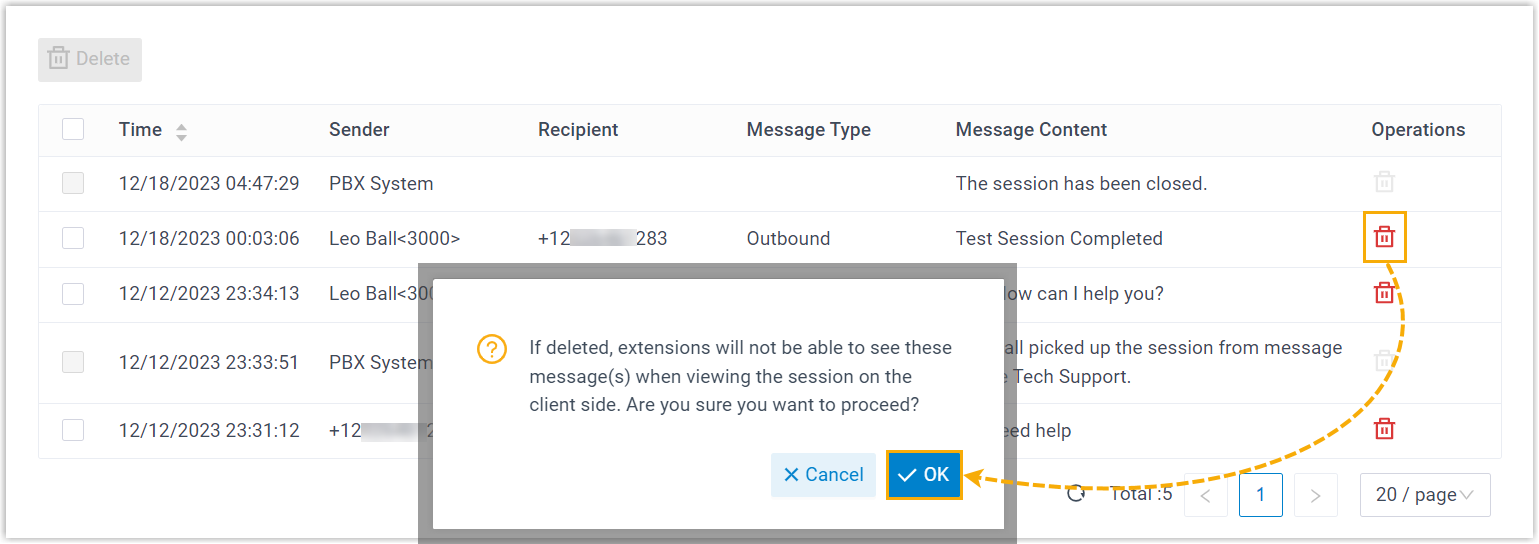
- Click the delete icon () next to the message.
- In the pop-up window, click OK.
- Click the delete icon (
-
To delete several messages at once:
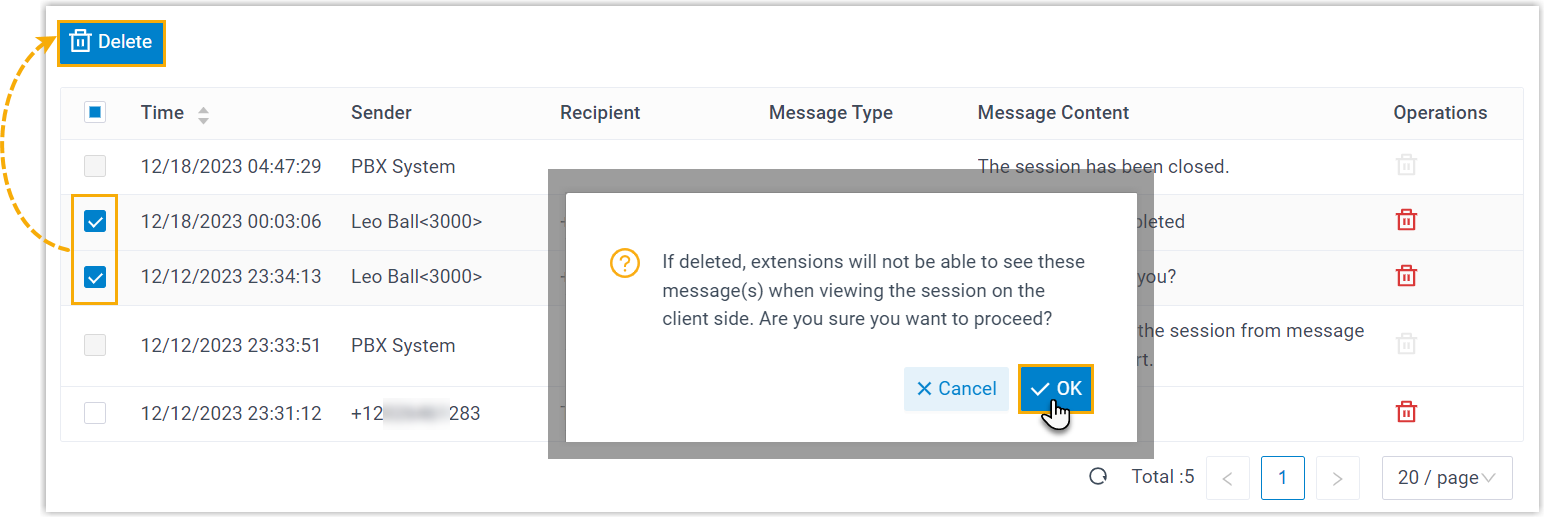
- Select the messages you want to remove, then click Delete.
- In the pop-up window, click OK.
Question about this page?
Ask the AI assistant. It starts from this page, then searches the rest of the docs.
Ask Cloud Voice AI
Answers are AI-generated from the docs and may contain mistakes. Verify with the linked pages.