
Enable Live Chat on a Drupal Website
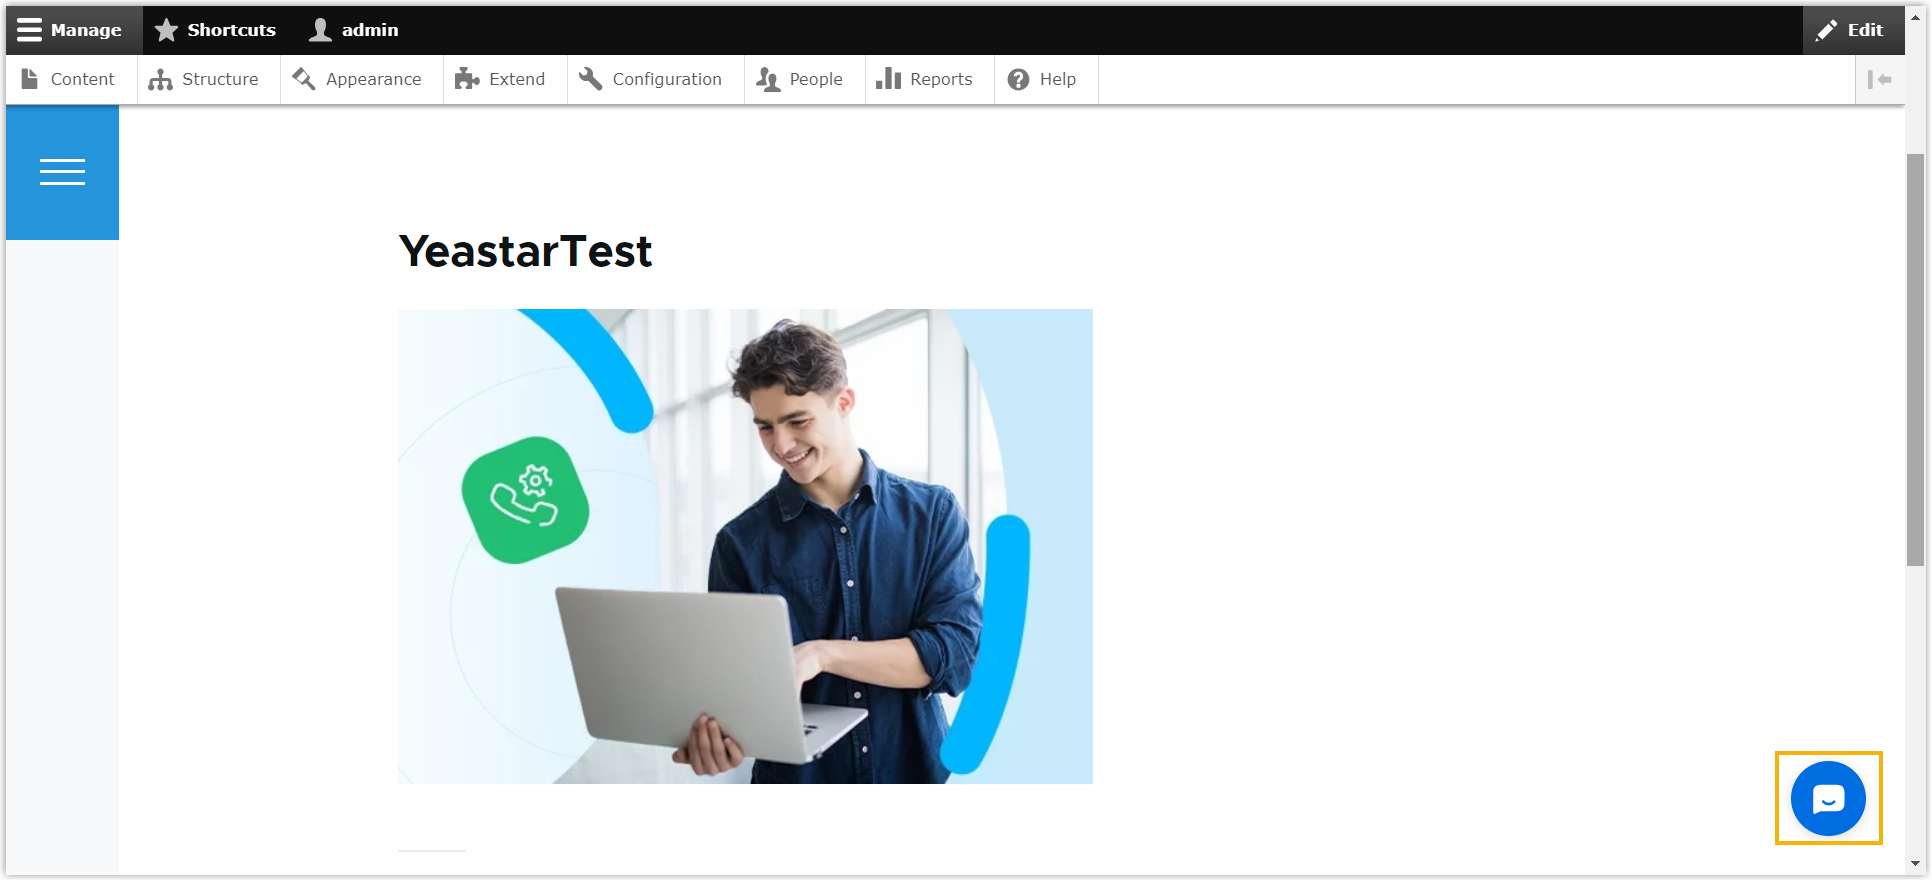
Once you have generated the Cloud Voice Live Chat code snippet, you can embed it in a Drupal site. The snippet renders a chat widget in the lower-right corner of your pages, giving visitors a direct line to your agents.
The steps below apply to Drupal 9.
Add the widget to your Drupal site
Section titled “Add the widget to your Drupal site”-
Sign in to the admin panel of your Drupal site.
-
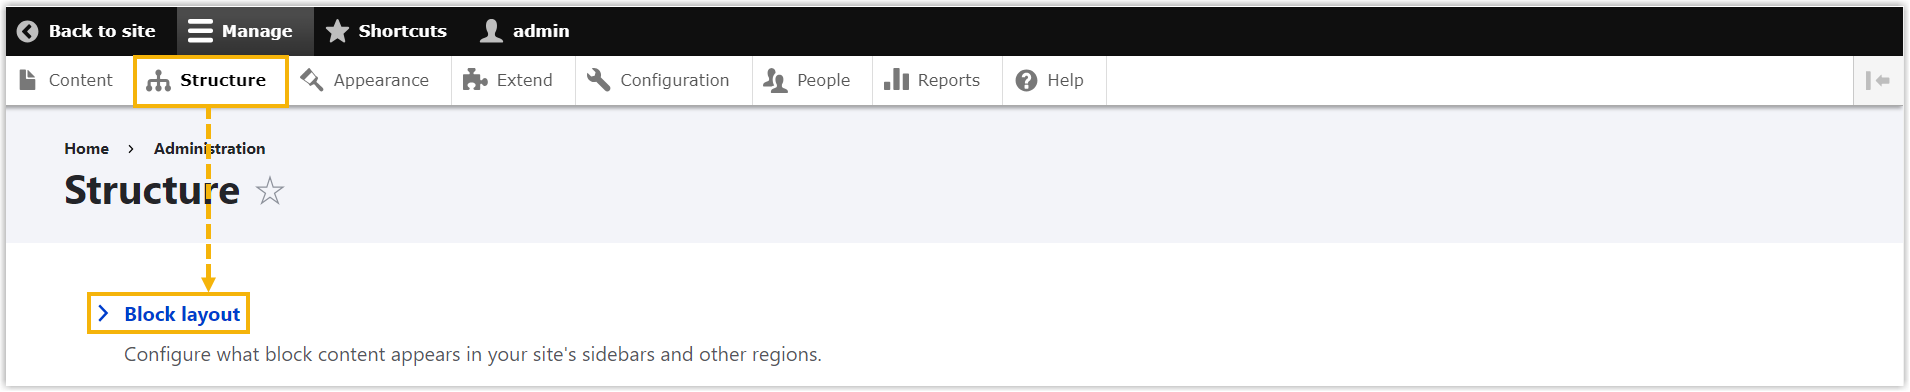
In the top navigation bar, choose Structure > Block layout.
-
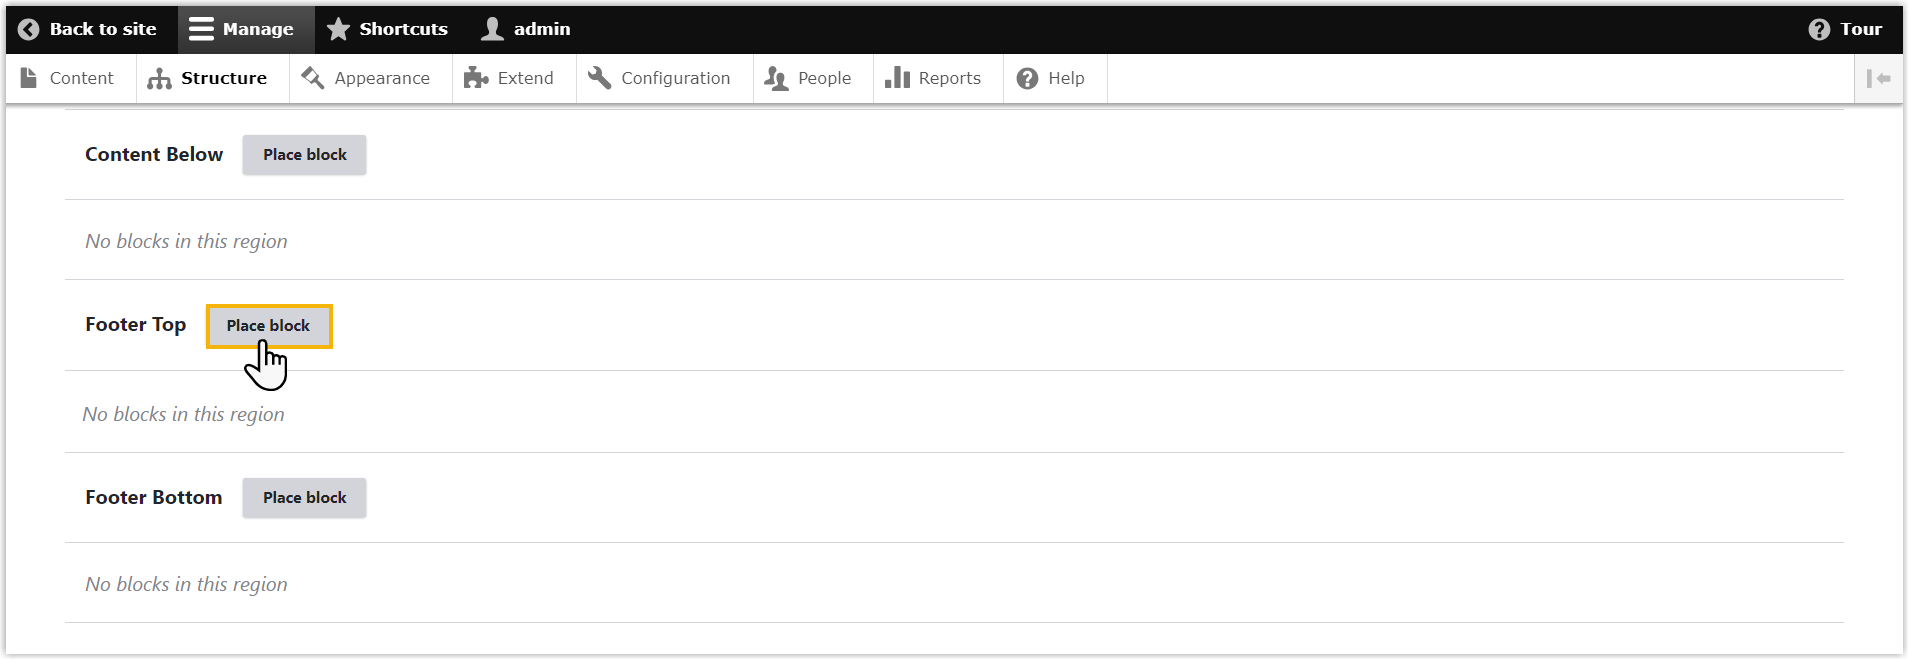
Scroll to the bottom of the page and select Place block next to Footer Top.
-
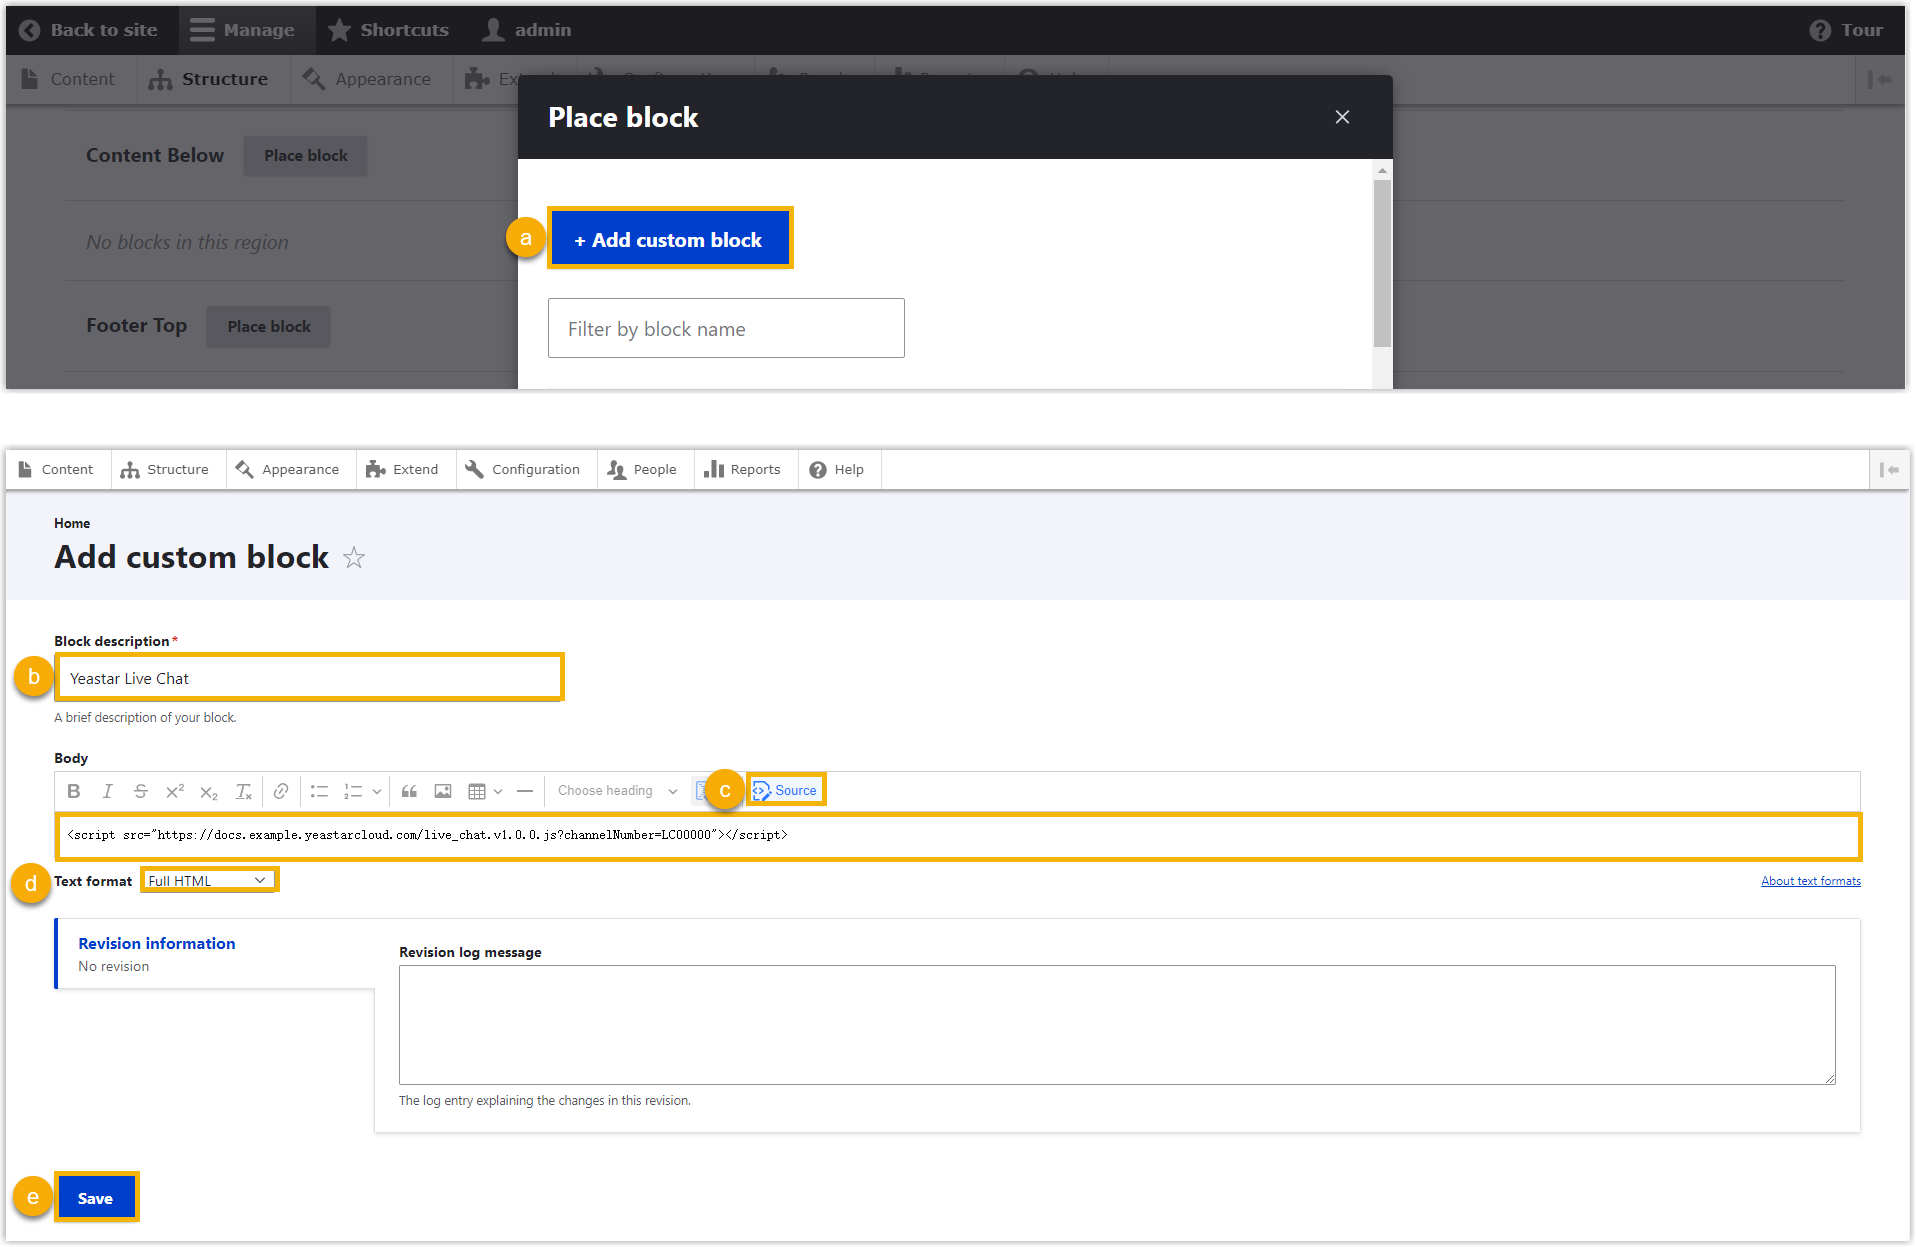
Create a custom block:
-
Click Add custom block.
-
In the Block description field, type a brief label for the block (for example,
Live Chat widget). This name is for your reference only and is not shown to visitors. -
In the Body field, click Source, then paste the code snippet.
-
From the Text format drop-down list, select Full HTML.
-
Click Save.
-
-
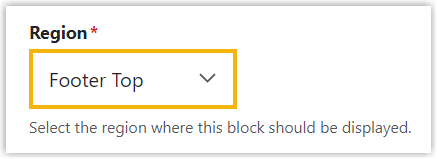
Scroll to the bottom of the page and select Footer Top from the Region drop-down list.
-
Click Save block.
Result
Section titled “Result”Open your Drupal site and confirm the Live Chat widget now appears in the lower-right corner. Visitors can click it to start a real-time conversation with your agents.
Question about this page?
Ask the AI assistant. It starts from this page, then searches the rest of the docs.
Ask Cloud Voice AI
Answers are AI-generated from the docs and may contain mistakes. Verify with the linked pages.