
Satisfaction Survey Details Report
The Satisfaction Survey Details report breaks feedback down to the level of a single call: for each queue call an agent handled, it shows the rating the caller left and the score that rating earned. Use it when you need to see the raw survey responses behind an agent’s or queue’s average, rather than a rolled-up figure. This page explains how to open the report and what each column tells you.
Open the Satisfaction Survey Details report
Section titled “Open the Satisfaction Survey Details report”-
Sign in to the PBX (Private Branch Exchange, your hosted phone system) web portal and go to Reports and Recordings > Call Reports.
-
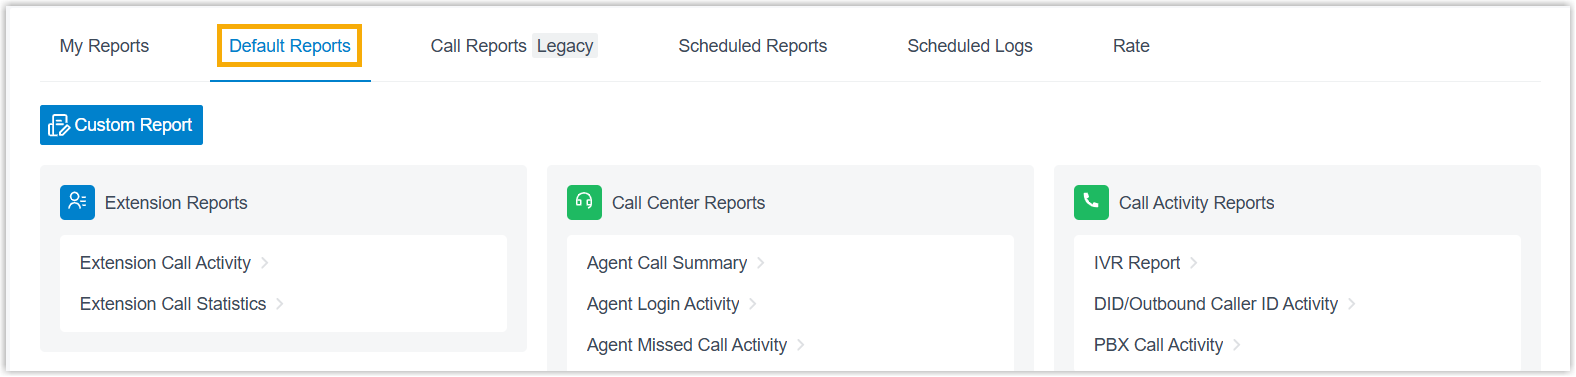
Open the Default Reports tab.
-
In the Call Center Reports pane, select Satisfaction Survey Details.
-
Set the report filters:

a. In the Time field, choose the date range the report should cover.
b. Narrow the results by queue or by agent.
The report matching your filters appears on the page.

Adjust the columns
Section titled “Adjust the columns”Optionally, tailor the column layout so the indicators you care about stay in view.
| Action | How |
|---|---|
| Choose which columns appear | Click the column-selection icon, then tick the columns you want to show. |
| Freeze a column | Click the drag handle next to a field and drop it onto Left (Freeze Column) or Right (Freeze Column) to pin it in place.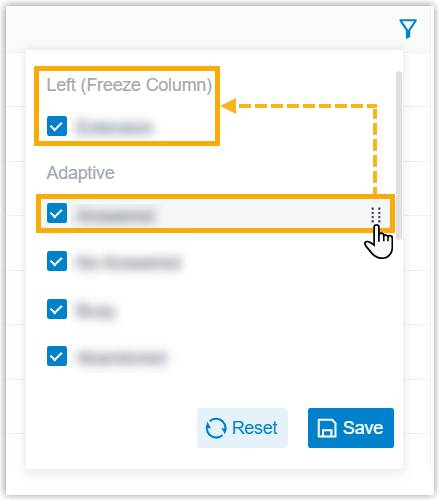 |
| Reorder columns | Click the drag handle next to a field and move it to the position you want.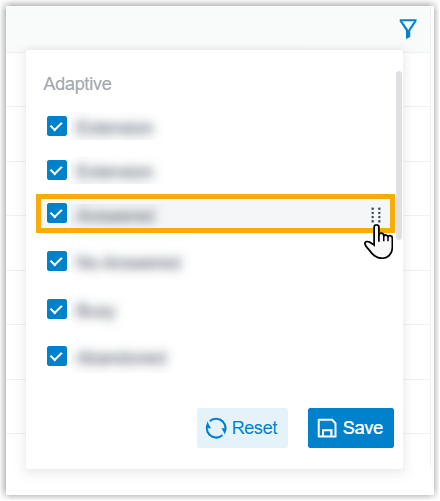 |
Save, schedule, or download the report
Section titled “Save, schedule, or download the report”Optionally, keep the report for later, have it emailed on a schedule, or export a copy.
| Action | How |
|---|---|
| Add to My Reports | Save the report to your My Reports list for quick access. At the bottom of the page, click Add to My Reports, enter a name that identifies it, fine-tune the filters or metrics, then click Save. |
| Add to Scheduled Reports | Have the report emailed automatically on a recurring basis. At the bottom of the page, click Add to Scheduled Reports, then fill in the scheduling options for the task. |
| Download the report | Export the report to your computer for offline review or further analysis. |
To control the export, click the settings icon before downloading, adjust the options below, and save your changes.
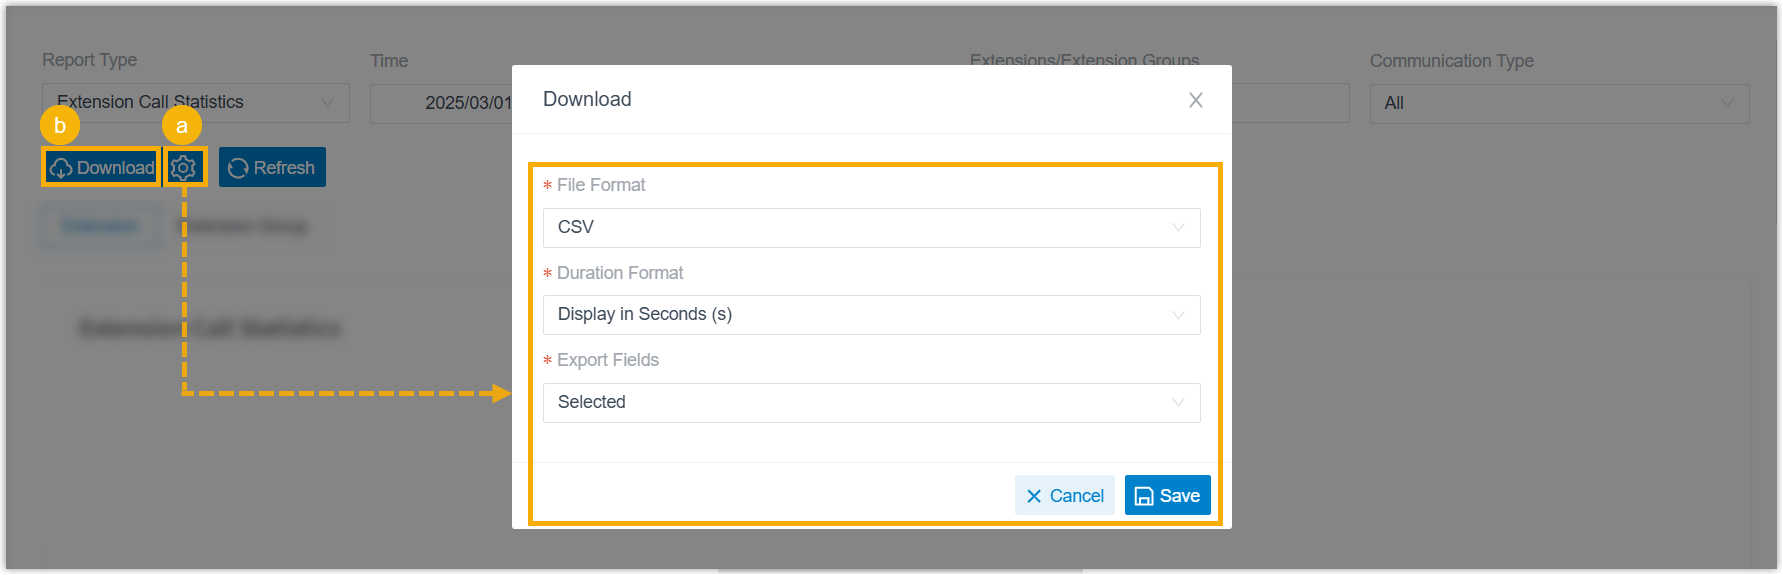
- File Format: the format of the exported file: CSV, XLS, PDF, or HTML.
- Duration Format: how every duration field is shown: Display in Second (s) or Display as HH:MM:SS.
- Export Fields: which fields to include: All or Selected.
When the settings are ready, click Download.
Report metrics
Section titled “Report metrics”| Metric | Description |
|---|---|
| Time | When the caller reached the queue. |
| Call From | The caller ID of the person who called in. |
| Key | The digit the caller pressed to rate the agent’s service. |
| Points | The score assigned to the key that was pressed. |
Question about this page?
Ask the AI assistant. It starts from this page, then searches the rest of the docs.
Ask Cloud Voice AI
Answers are AI-generated from the docs and may contain mistakes. Verify with the linked pages.