
Set up a Live Chat Channel
Before you can embed live chat on your website, you first build a live chat channel in Cloud Voice. The channel defines who receives incoming conversations, how the widget looks and behaves, and what automatic messages visitors see. This page walks you through creating one.
Before you begin
Section titled “Before you begin”If you want website visitors to be able to place calls to your agents directly from the widget, set up a WebRTC (Web Real-Time Communication, the technology that carries voice calls inside a web browser) trunk and a matching inbound route ahead of time. You select both when you enable calling on the channel, so having them ready keeps the rest of the setup uninterrupted.
Procedure
Section titled “Procedure”-
Sign in to the PBX (Private Branch Exchange, your phone system) web portal and go to Messaging > Message Channel.
-
Click Add and choose Live Chat.
-
On the General tab, define the core behavior of the channel.
-
Under Basic, fill in the identifying details.
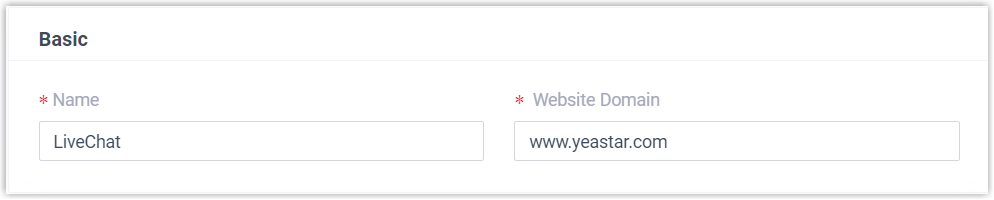
- Name: A label that helps you recognize this channel in the portal.
- Website Domain: The domain where the widget will run.
-
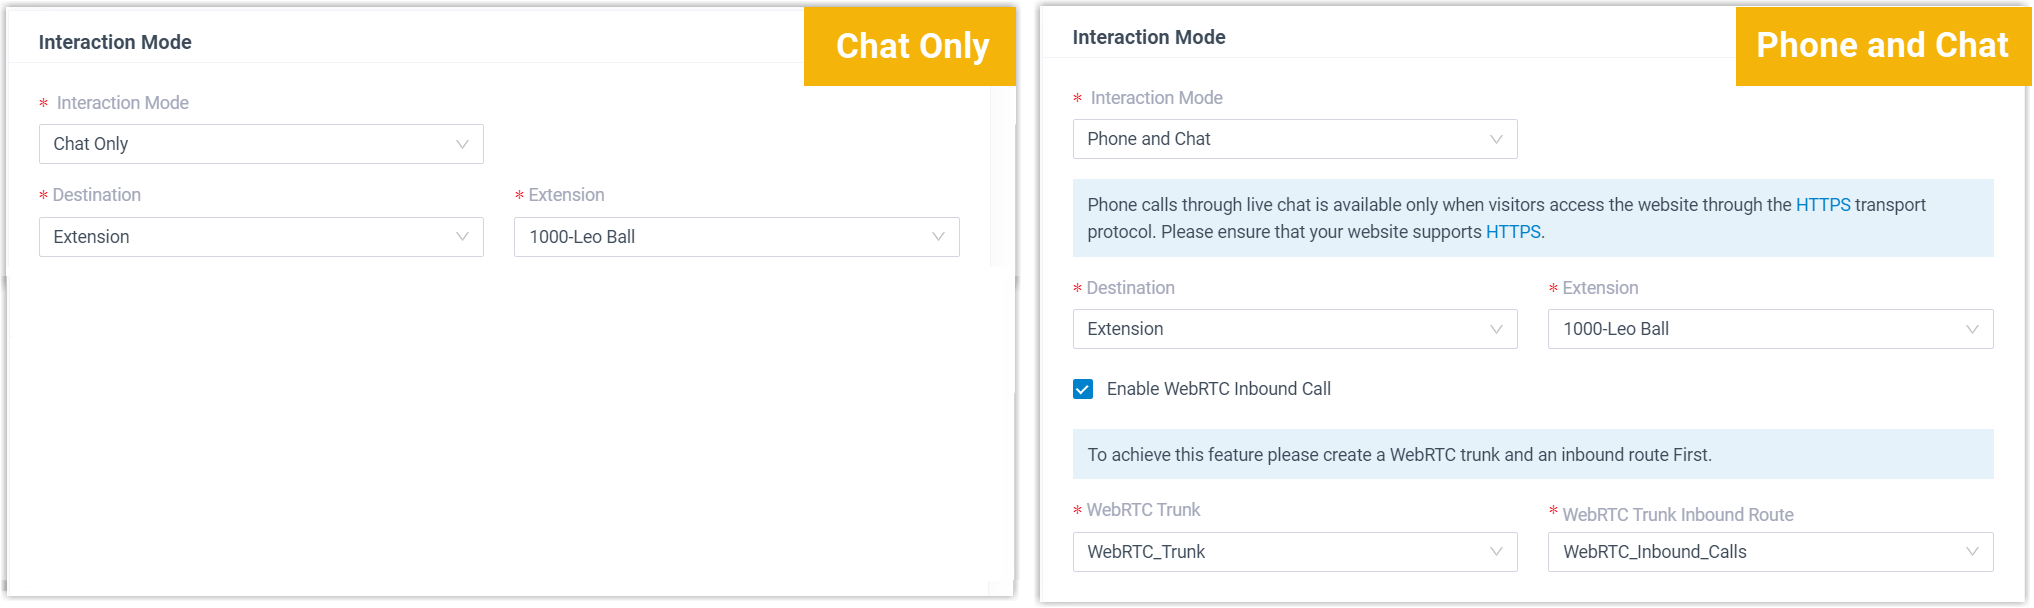
Under Interaction Mode, decide how visitors reach your agents and where their messages land.
-
Interaction Mode: Choose what the widget lets visitors do.
Option What it allows Chat Only Visitors reach your agents through chat messages. Phone and Chat Visitors reach your agents through chat messages or a phone call. -
Destination: Decide where incoming live chat messages are delivered.
Option What it does Extension Pick an extension from the Extension list. Only that extension user receives the incoming messages. Message Queue Pick a queue from the Message Queue list. Every agent in the queue sees new sessions, but once an agent picks up a session, only that agent receives and answers the rest of its messages. Third-Party Message Analytics Platform (Transmitted via API) Incoming messages are forwarded automatically to an external analytics platform over the API (Application Programming Interface, the connection that lets two systems exchange data) for further processing. -
Enable WebRTC Inbound Call: If you are letting visitors call from the widget, turn this on and select the WebRTC trunk and its inbound route.
-
-
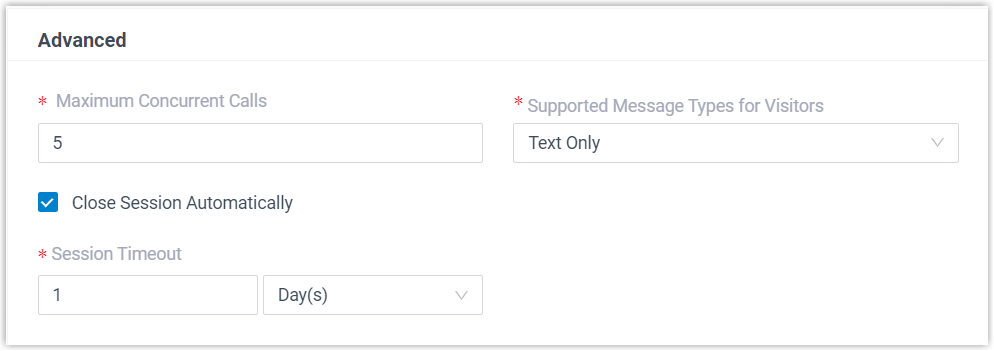
Under Advanced, adjust the remaining channel behavior.
-
Maximum Concurrent Calls: The ceiling on simultaneous calls through this channel. Once it is reached, no new calls can be placed from the widget.
-
Supported Message Types for Visitors: What visitors are allowed to send.
Option What visitors can send Text Only Text and emojis. Text and Image Text, emojis, and images. -
Close Session Automatically: To end sessions that sit idle, select this checkbox and enter how long a session may stay inactive in the Session Timeout field.
-
-
-
On the Display & Appearance tab, shape how the widget looks and what it shows visitors.
-
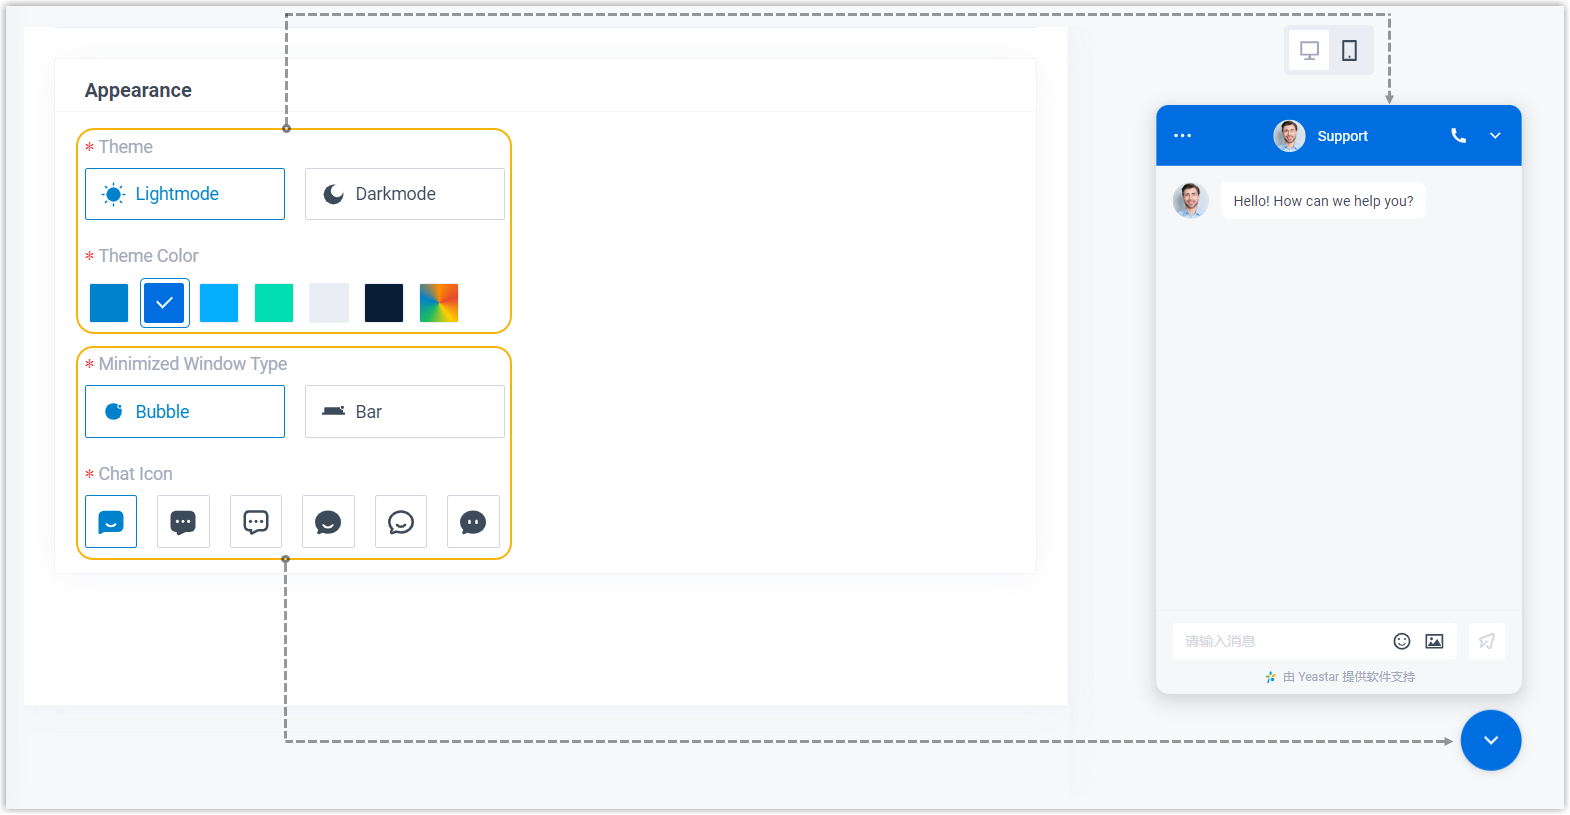
Under Appearance, style the widget.
-
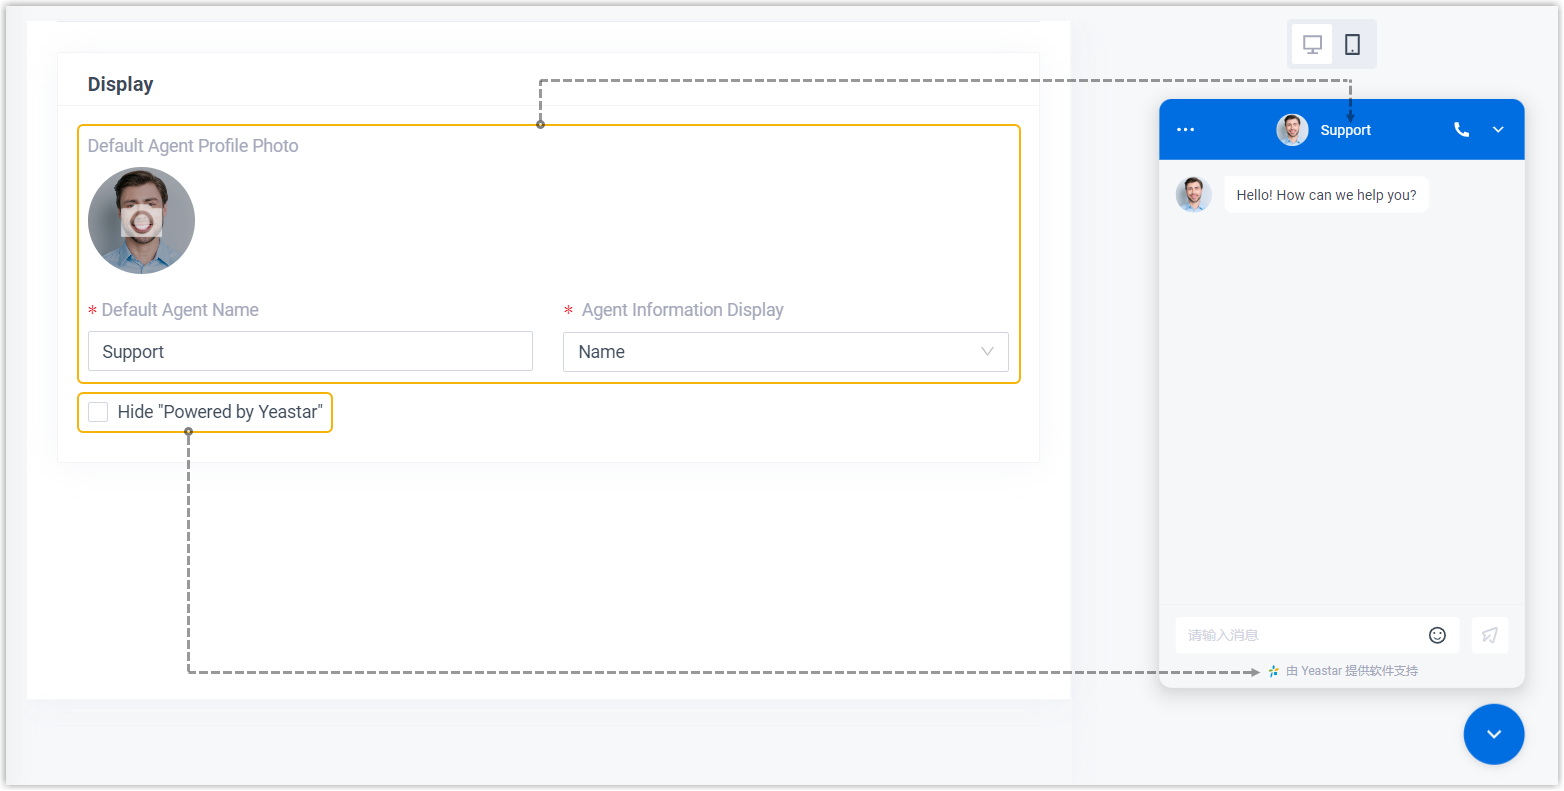
Under Display, choose what information appears when a visitor starts a chat or a call.
-
-
In the Message section, set the widget’s language and its automatic messages.
-
Under Language, pick an entry from the list. This sets the language the widget displays.
-
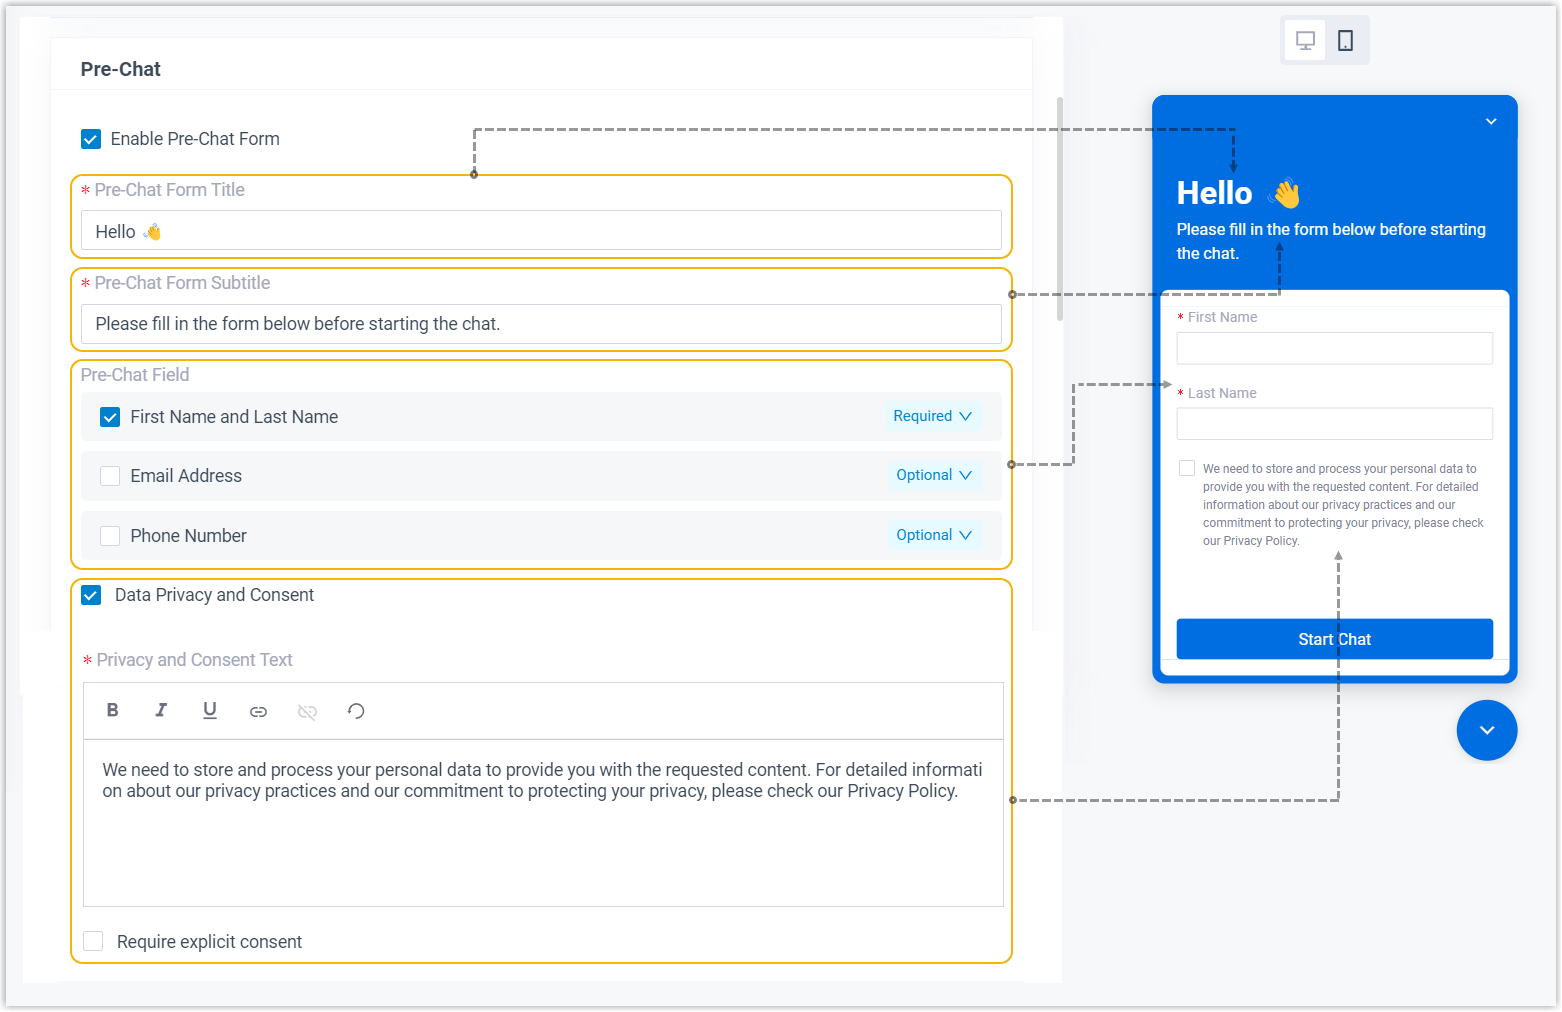
To collect visitor details before a chat begins, complete the fields under Pre-Chat.
-
Optional: Under Message, edit the automatic replies that go out to visitors in specific situations.
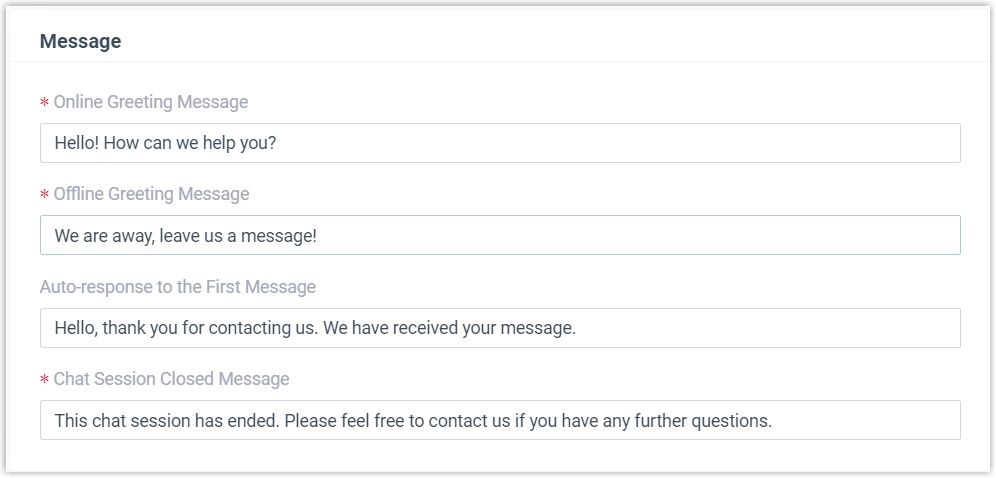
- Online Greeting Message: Sent when a visitor opens the chat and either the destination is a message queue during business hours, or the destination is an extension signed in to the Cloud Voice App with presence set to Available during business hours.
- Offline Greeting Message: Sent when a visitor opens the chat and either the PBX is outside business hours or on a holiday, or the destination extension is logged out of the Cloud Voice App or logged in with presence set to Away, Business Trip, Do Not Disturb, Lunch Break, or Off Work.
- Auto-response to the First Message: Sent when a visitor sends their first message in the chat.
- Chat Session Closed Message: Sent when a session ends, whether an agent or visitor closes it manually or it closes on timeout.
-
-
Click Save.
Result
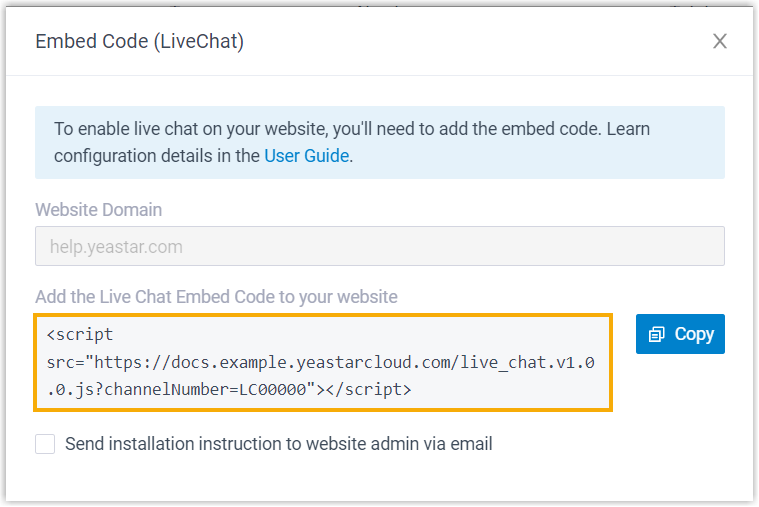
Section titled “Result”Cloud Voice generates a code snippet for the live chat channel and shows it in a pop-up window.
What to do next
Section titled “What to do next”-
Click Copy to grab the code snippet.
Question about this page?
Ask the AI assistant. It starts from this page, then searches the rest of the docs.
Ask Cloud Voice AI
Answers are AI-generated from the docs and may contain mistakes. Verify with the linked pages.