
LDAP Configuration on Yealink Phones
When Cloud Voice acts as an LDAP server (Lightweight Directory Access Protocol, the standard way phones and apps look up a shared contact list), your Yealink IP phones can query the contacts stored on the PBX and dial them straight from the handset. This page walks through the phone-side setup using a Yealink SIP-T53W (firmware 93.85.0.5) as the example; other Yealink models follow the same flow, though menu labels may differ slightly.
Connect the phone to the LDAP server
Section titled “Connect the phone to the LDAP server”The values shown below match the default configuration of the Cloud Voice LDAP server. Treat them as a starting point, then tune the filters and display attributes to fit your directory.
-
Sign in to the Yealink phone’s web interface and open Directory > LDAP.
-
Enable the LDAP Enable switch, then fill in the fields as described in the table.
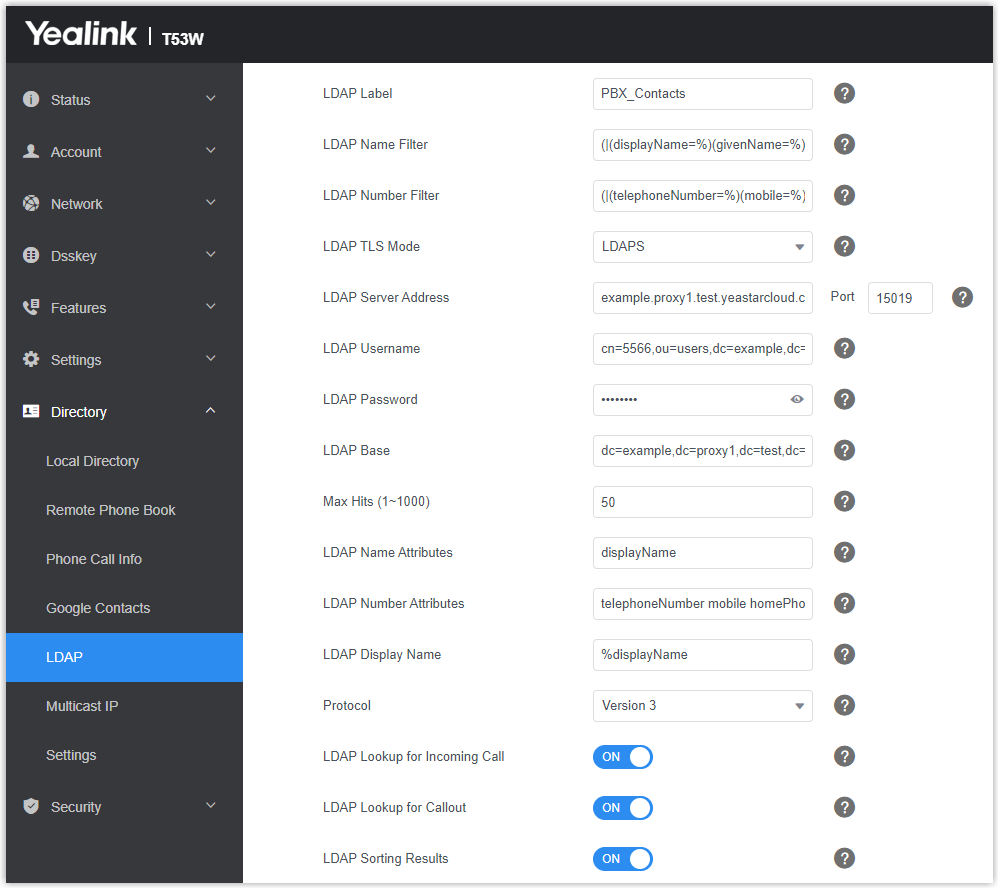
Setting What it does Example LDAP Label Name shown for the LDAP phonebook. PBX_ContactsLDAP Name Filter Attributes used to match a contact by name. (|(displayName=%)(givenName=%)(sn=%)(mail=%)(company=%))LDAP Number Filter Attributes used to match a contact by number. (|(telephoneNumber=%)(mobile=%)(homePhone=%)(facsimileTelephoneNumber=%))LDAP TLS Mode How the phone secures its connection to the LDAP server. LDAPSis LDAP carried over TLS, an encrypted connection.LDAPSLDAP Server Address The Cloud Voice LDAP server address from your PBX. example.proxy1.voice.example.comPort The LDAP server port. 15019LDAP Username The account used to sign in to the LDAP server. Find it on the PBX under Contacts > LDAP Server > LDAP Credentials > LDAP Account Username. cn=5566,ou=users,dc=example,dc=proxy1,dc=voice,dc=example,dc=comLDAP Password The sign-in password, which is the user extension’s registration password. Regpwd123LDAP Base The Base DN (Distinguished Name) from your PBX. It marks the point in the directory tree where each search begins. dc=example,dc=proxy1,dc=voice,dc=example,dc=comMax Hits (1~1000) Maximum number of results the server returns per search. 50LDAP Name Attributes Name attributes returned for each record. Separate multiple values with a space. displayNameLDAP Number Attributes Number attributes returned for each record. Multiple values are allowed. telephoneNumber mobile homePhoneLDAP Display Name How the contact’s name appears on the phone screen. Must begin with %.%displayNameProtocol LDAP protocol version. Cloud Voice uses Version 3. Version 3LDAP Lookup for Incoming Call Search the directory when a call comes in. EnabledLDAP Lookup for Callout Search the directory when you place a call. EnabledLDAP Sorting Results Sort search results alphabetically and numerically. Enabled -
Click Confirm to save.
Contacts stored on the PBX are now reachable from the phone.
Look up contacts from the Directory
Section titled “Look up contacts from the Directory”Add LDAP to the phone directory
Section titled “Add LDAP to the phone directory”-
In the phone’s web interface, open Directory > Settings.
-
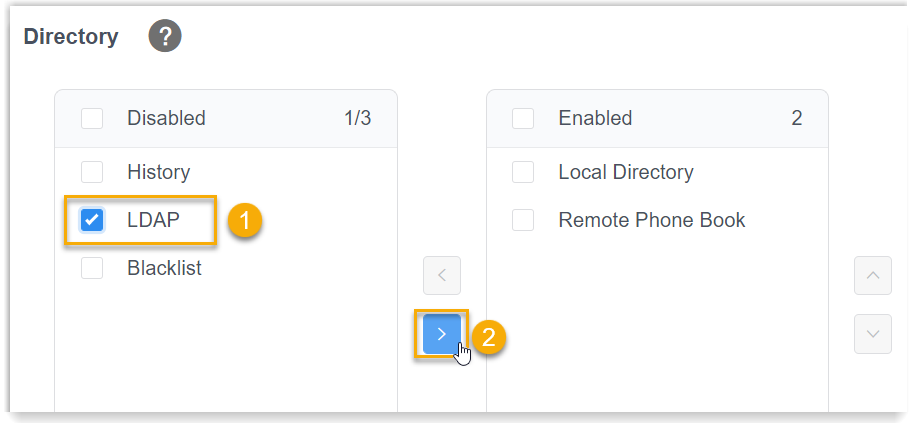
Under Directory, move LDAP from the Disabled box to the Enabled box.
-
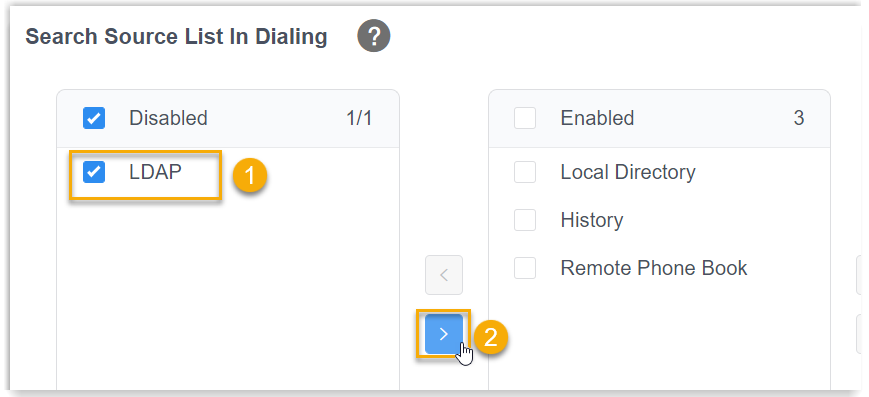
Optional: under Search Source List In Dialing, move LDAP from Disabled to Enabled so the directory is searched while you dial.
-
Click Confirm.
Search and call
Section titled “Search and call”-
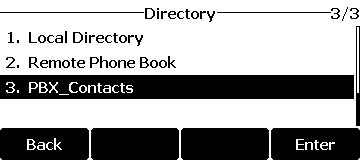
On the phone, press Directory and open the LDAP phonebook.
-
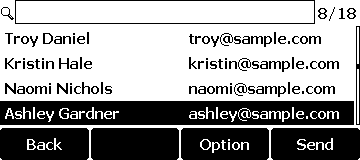
Type a name or number on the keypad. Contacts matching your input appear on screen.
-
Use the navigation keys to highlight the contact you want.
-
Press Send to place the call.
Look up contacts with an LDAP key
Section titled “Look up contacts with an LDAP key”Assign an LDAP line key
Section titled “Assign an LDAP line key”-
In the phone’s web interface, open DssKey > Line Key (DssKey is Yealink’s menu for the phone’s programmable keys) and choose a key to configure.
-
Set Type to LDAP.

-
Click Confirm.
Search and call
Section titled “Search and call”-
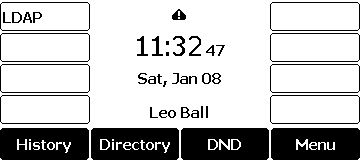
Press the LDAP key to open the LDAP phonebook.
-
Type a name or number on the keypad. Contacts matching your input appear on screen.
-
Use the navigation keys to highlight the contact you want.
-
Press Send to place the call.
Question about this page?
Ask the AI assistant. It starts from this page, then searches the rest of the docs.
Ask Cloud Voice AI
Answers are AI-generated from the docs and may contain mistakes. Verify with the linked pages.