
Extension Call Accounting Details Report
The Extension Call Accounting Details report breaks down billing at the individual call level, showing the cost of each outbound call an extension placed and the trunk it used (a trunk is the line that connects your phone system to the outside phone network, carrying calls to and from your carrier). Use it when you need line-by-line visibility into charges rather than a rolled-up summary. This page covers how to open the report and what each metric means.
Prerequisites
Section titled “Prerequisites”At least one call rate rule must be in place. Rate rules are what let the system calculate a cost for each outbound call, so without one the Amount column has no pricing to apply.
Open the report
Section titled “Open the report”-
Sign in to the management portal and go to Reports and Recordings > Call Reports.
-
Open the Extension Call Accounting Details report.
-
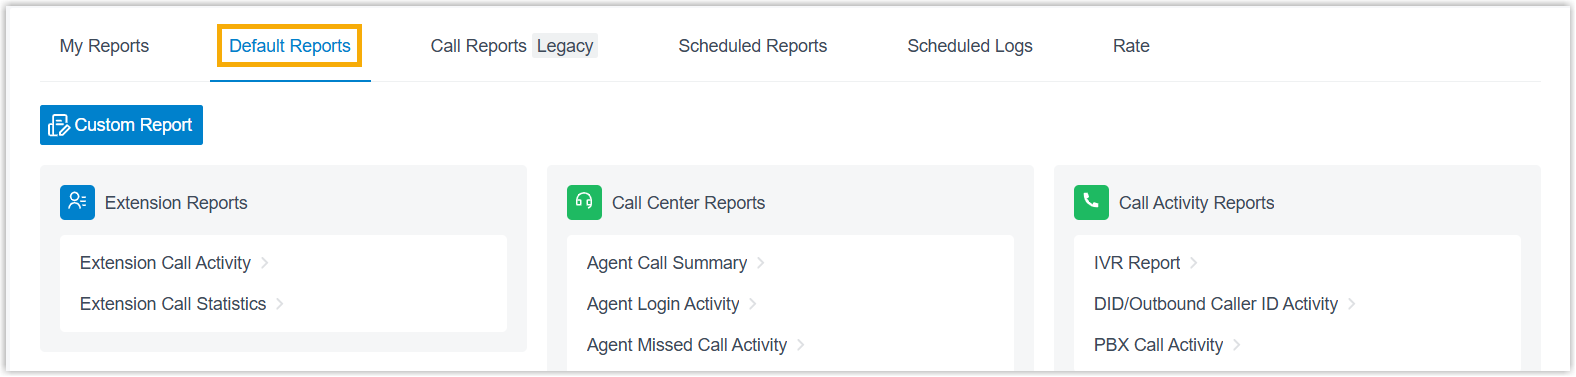
Select the Default Reports tab.
-
In the Accounting Reports section, click Extension Call Accounting Details.
-
-
Set the filters that define which calls appear.

-
Use the Time field to set the date range the report should cover.
-
Narrow the results by extension, extension group, organization, PIN code (Personal Identification Number, entered to place calls through a restricted route), or trunk.
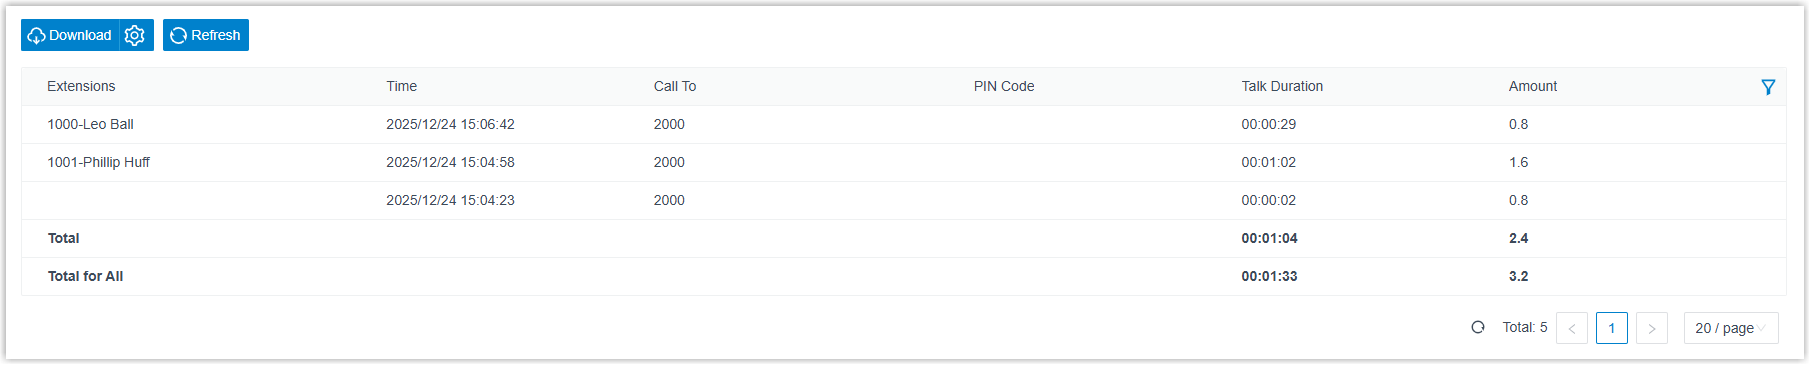
The matching records load on the page, as shown below.
-
-
(Optional) Rearrange the columns so the metrics you care about are front and center.
Action How to do it Choose which columns show Click  and pick the columns you want visible.
Freeze a column Click  next to a field and drag it onto Left (Freeze Column) or Right (Freeze Column).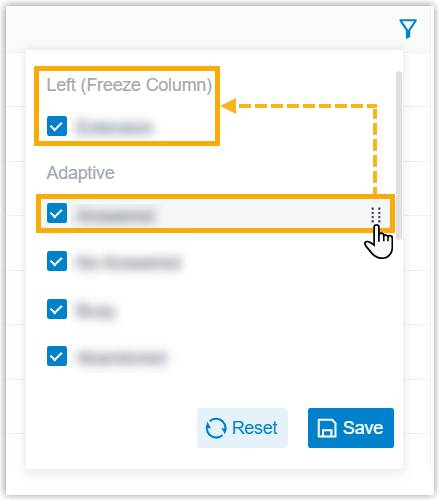
Reorder columns Click next to a field and drag it to the position you want.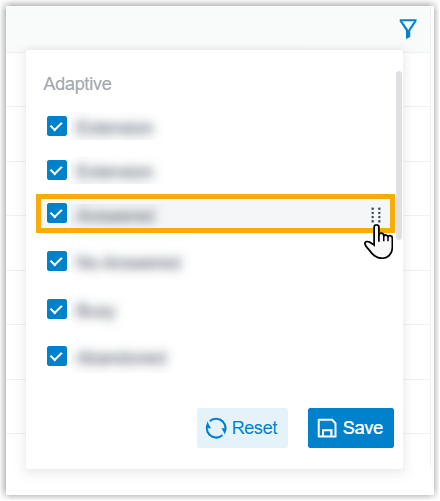
-
(Optional) Save the report so you can reopen it quickly, or schedule it to be emailed automatically.
Action How to do it Add to My Reports Keep the report handy in your My Reports list.
1. At the bottom of the page, click Add to My Reports.
2. Give it a name you’ll recognize, then adjust the filters or metrics if needed.
3. Click Save.Add to Scheduled Reports Have the report delivered by email on a schedule.
1. At the bottom of the page, click Add to Scheduled Reports.
2. Finish the setup by following Schedule call reports.Download the report Export a copy to your computer for offline review or deeper analysis. 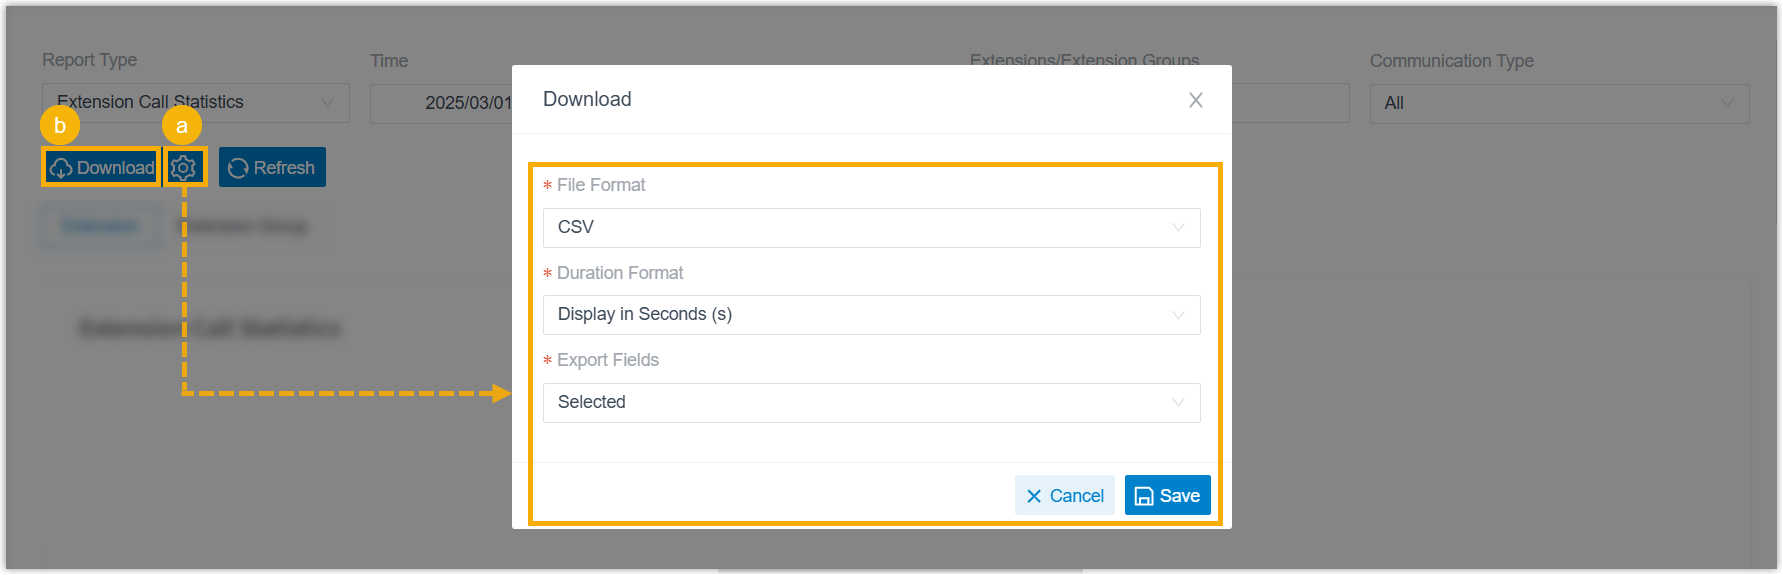
1. (Optional) Click to adjust the download options, then save them:
- File Format: choose CSV, XLS, HTML, or PDF.
- Duration Format: show duration fields in seconds (s) or as HH:MM:SS.
- Export Fields: export All fields or only the Selected ones.
2. Click Download.
Report details
Section titled “Report details”The table below explains each metric in the report.
| Metric | Description |
|---|---|
| Time | When the outbound call was placed. |
| Call To | The number that was dialed. |
| PIN Code | The PIN code entered to place the call through a restricted outbound route. |
| Talk Duration | Elapsed time from when the call was answered until it ended. |
| Amount | The cost of the call. |
Question about this page?
Ask the AI assistant. It starts from this page, then searches the rest of the docs.
Ask Cloud Voice AI
Answers are AI-generated from the docs and may contain mistakes. Verify with the linked pages.