
Enable Cloud Voice Live Chat on WordPress Website
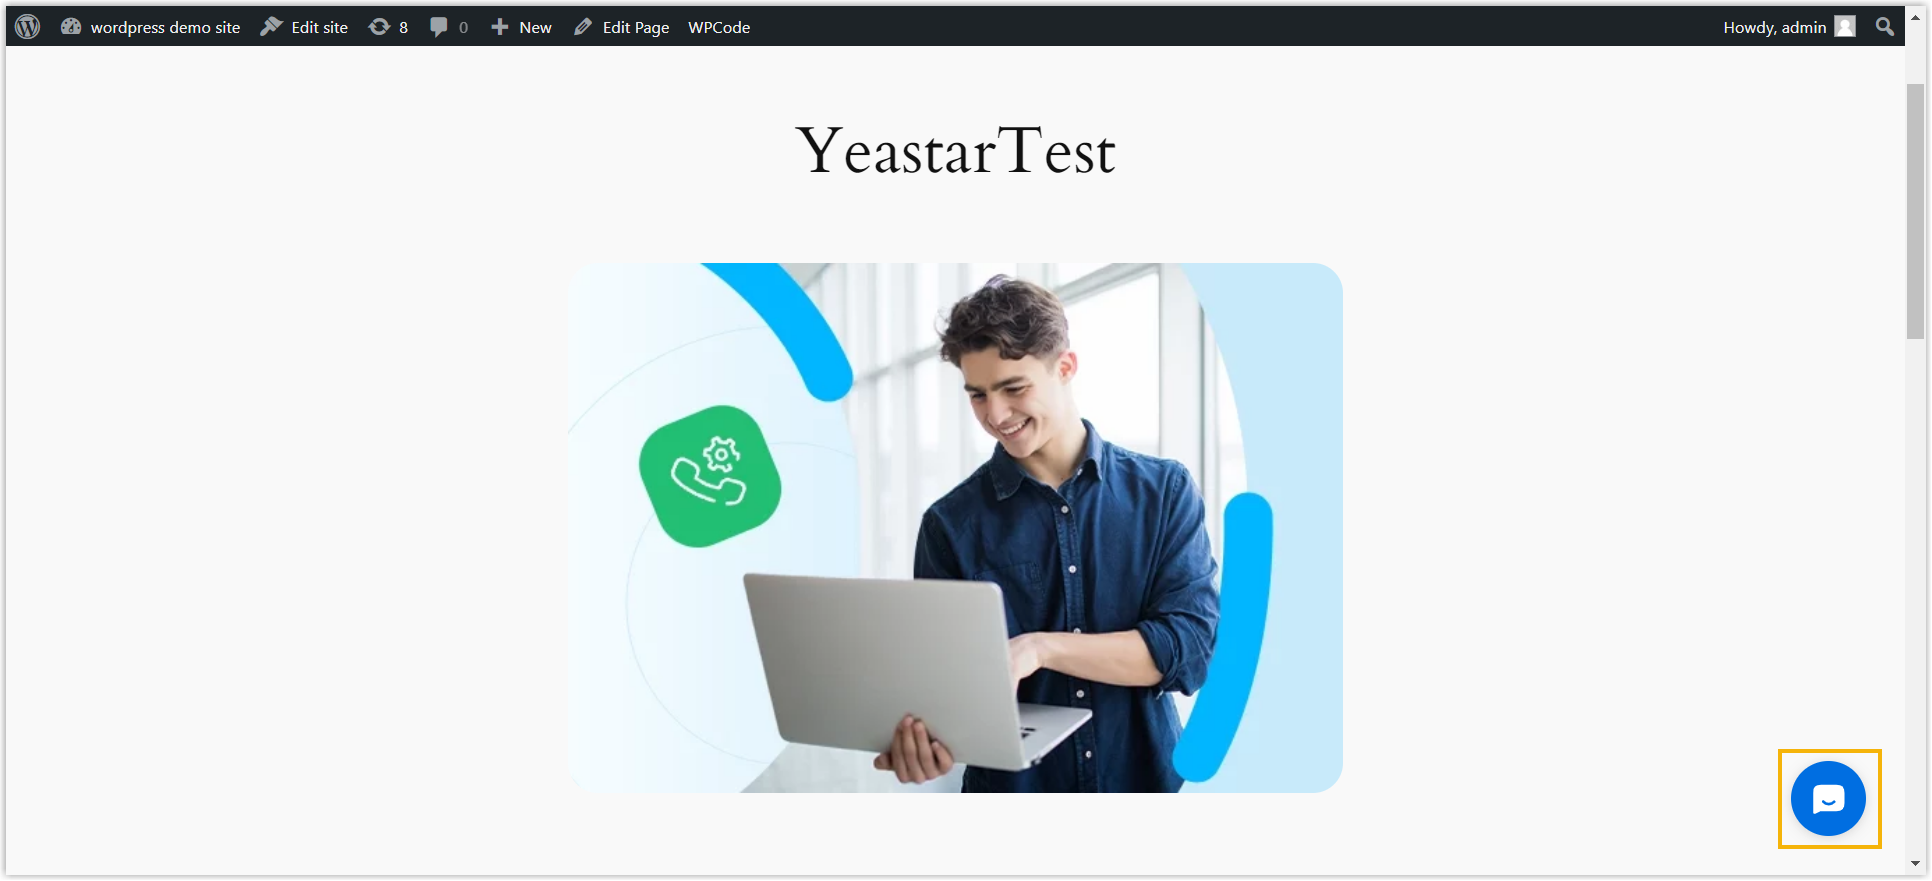
Once you have generated the Live Chat code snippet, you can drop it into your WordPress site’s footer. A chat widget then appears in the lower-right corner of every page, letting visitors start a live conversation with your agents. WordPress gives you two ways to add the snippet: through the built-in theme editor or with the WPCode plugin. Pick whichever suits your setup.
Prerequisites
Section titled “Prerequisites”You have already created a live chat channel and copied its Live Chat code snippet.
Option 1: Add the snippet with the theme editor
Section titled “Option 1: Add the snippet with the theme editor”Use this method when you want to add the snippet directly, without installing anything extra.
-
Sign in to your WordPress admin panel.
-
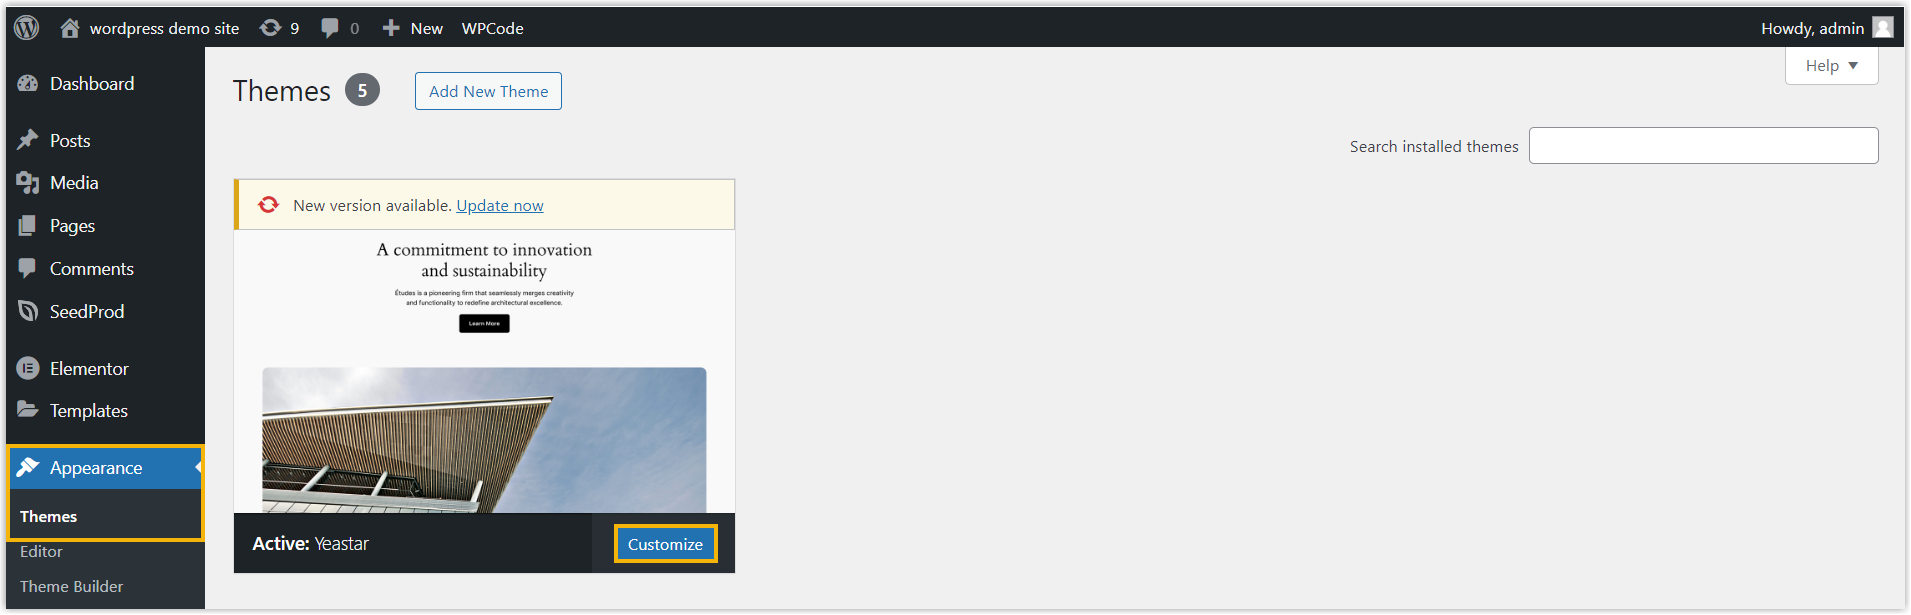
In the left sidebar, go to Appearance > Themes and click Customize on the theme you want to edit.
-
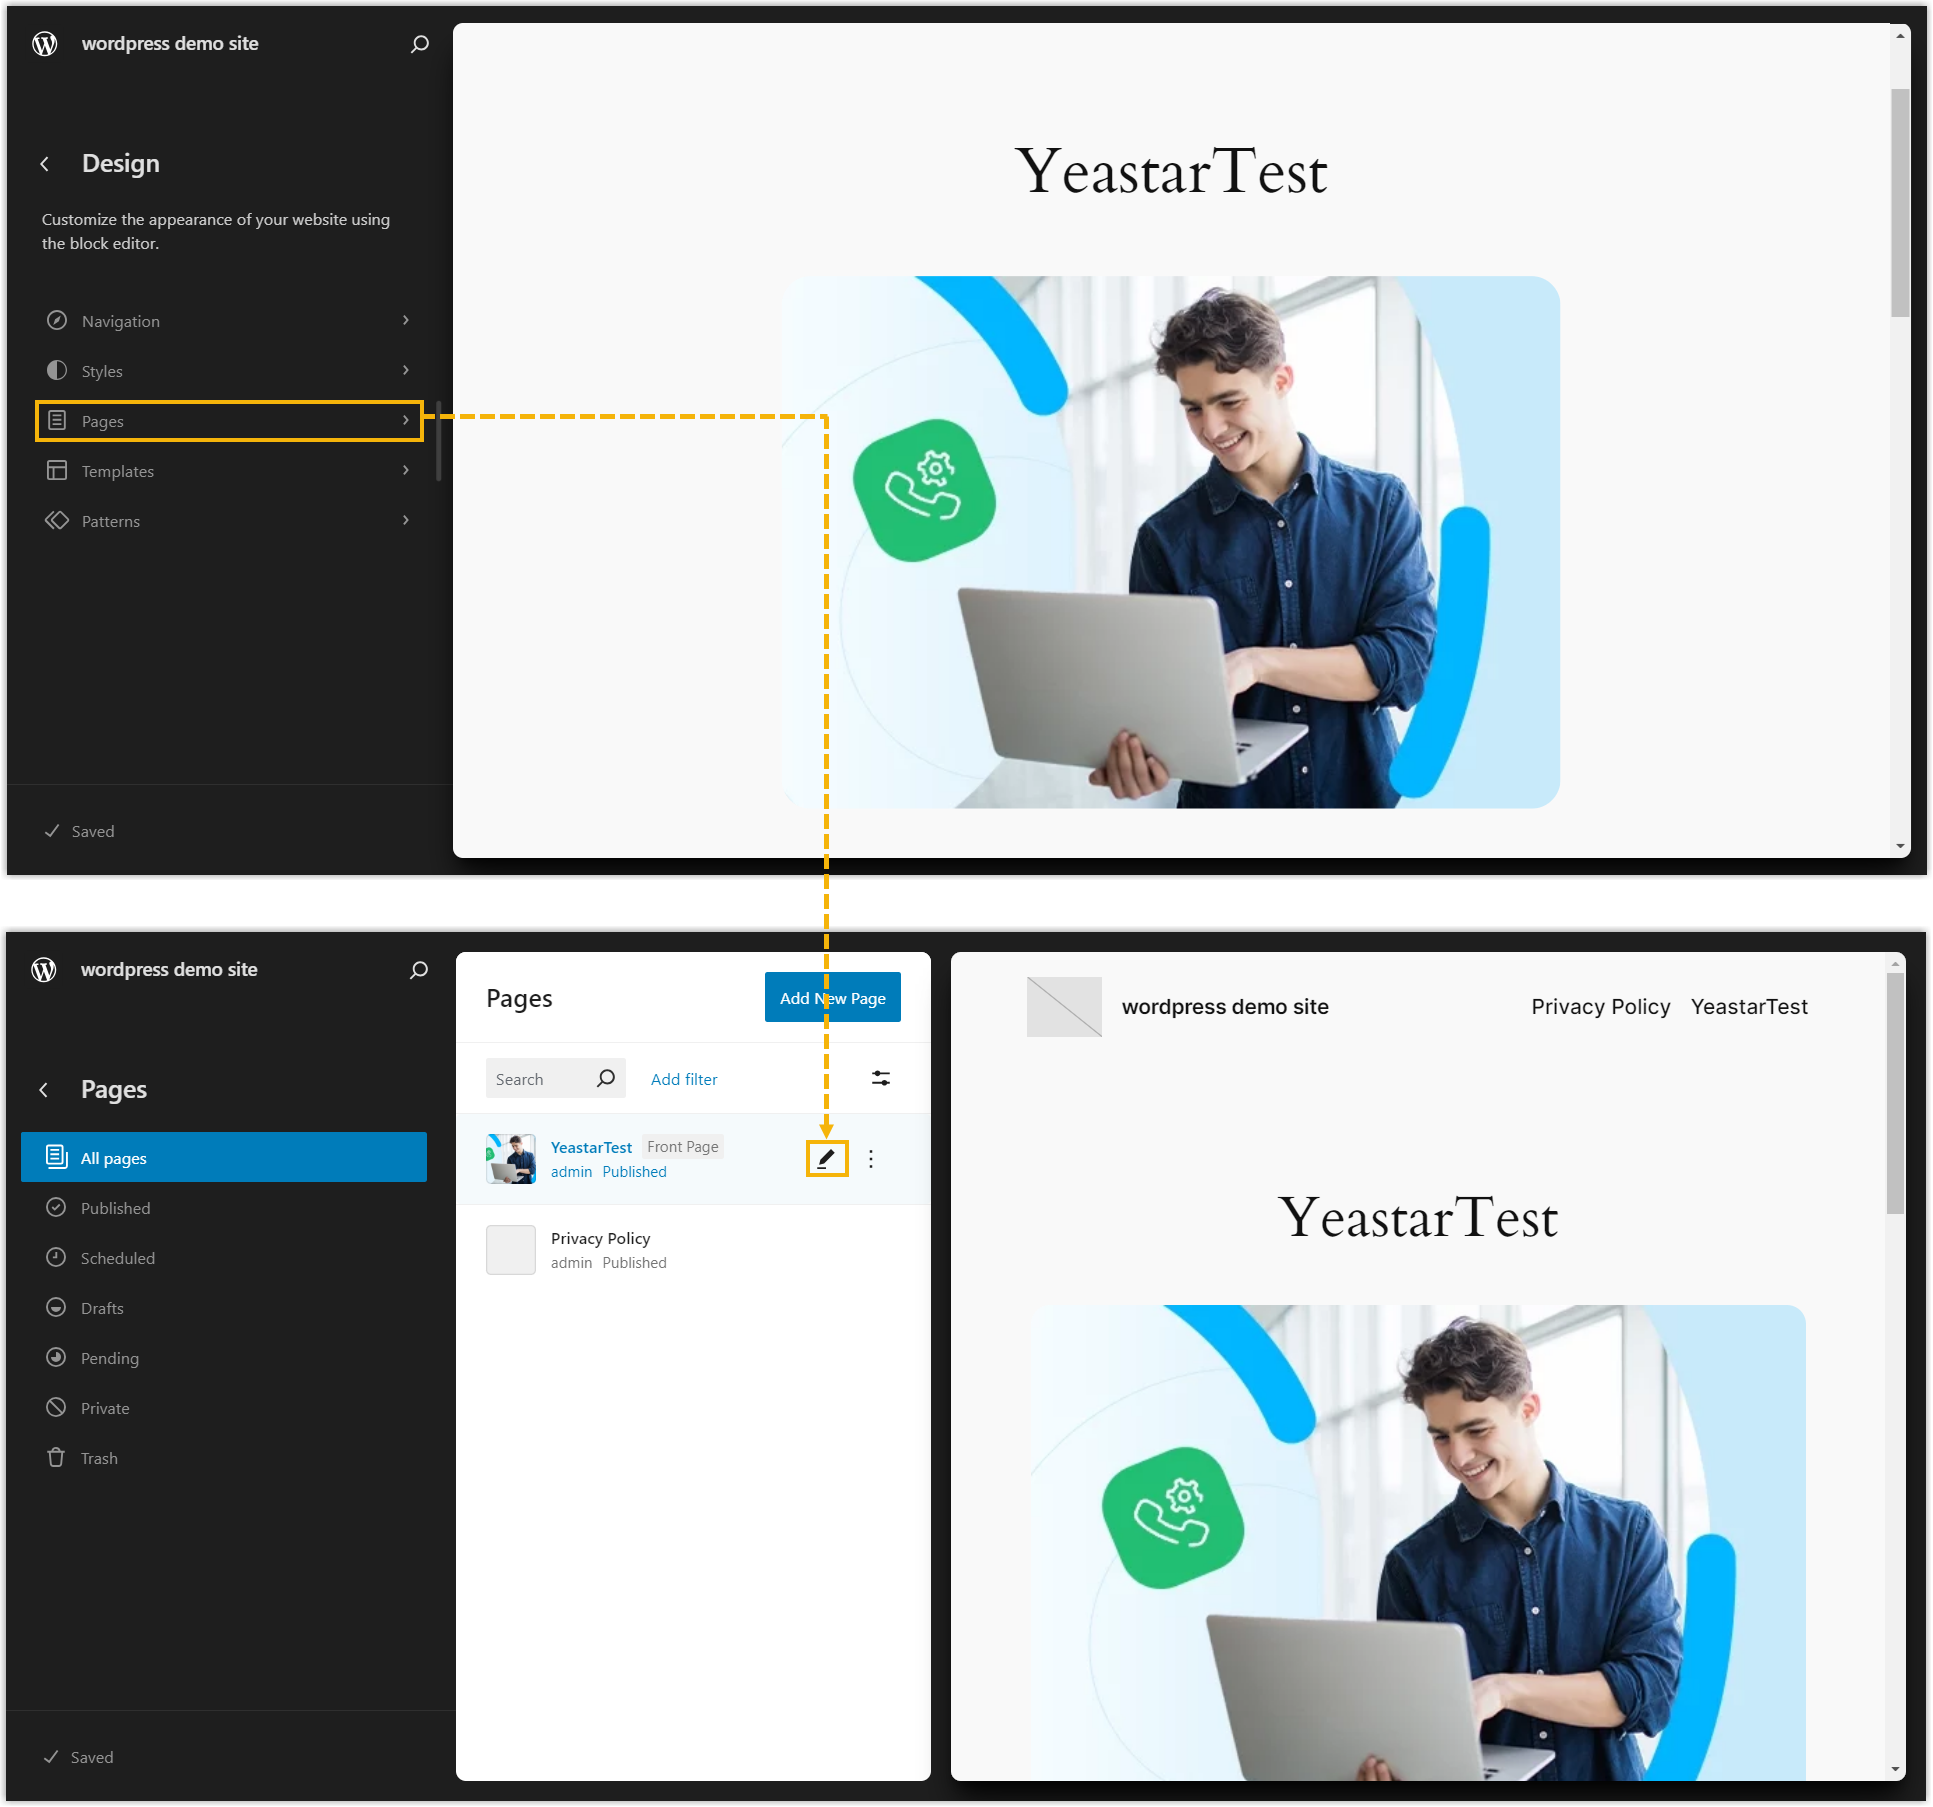
In the left sidebar, click Pages and open the page you want to edit.
-
In the top-right corner, click the more-options icon
 , then select Code editor.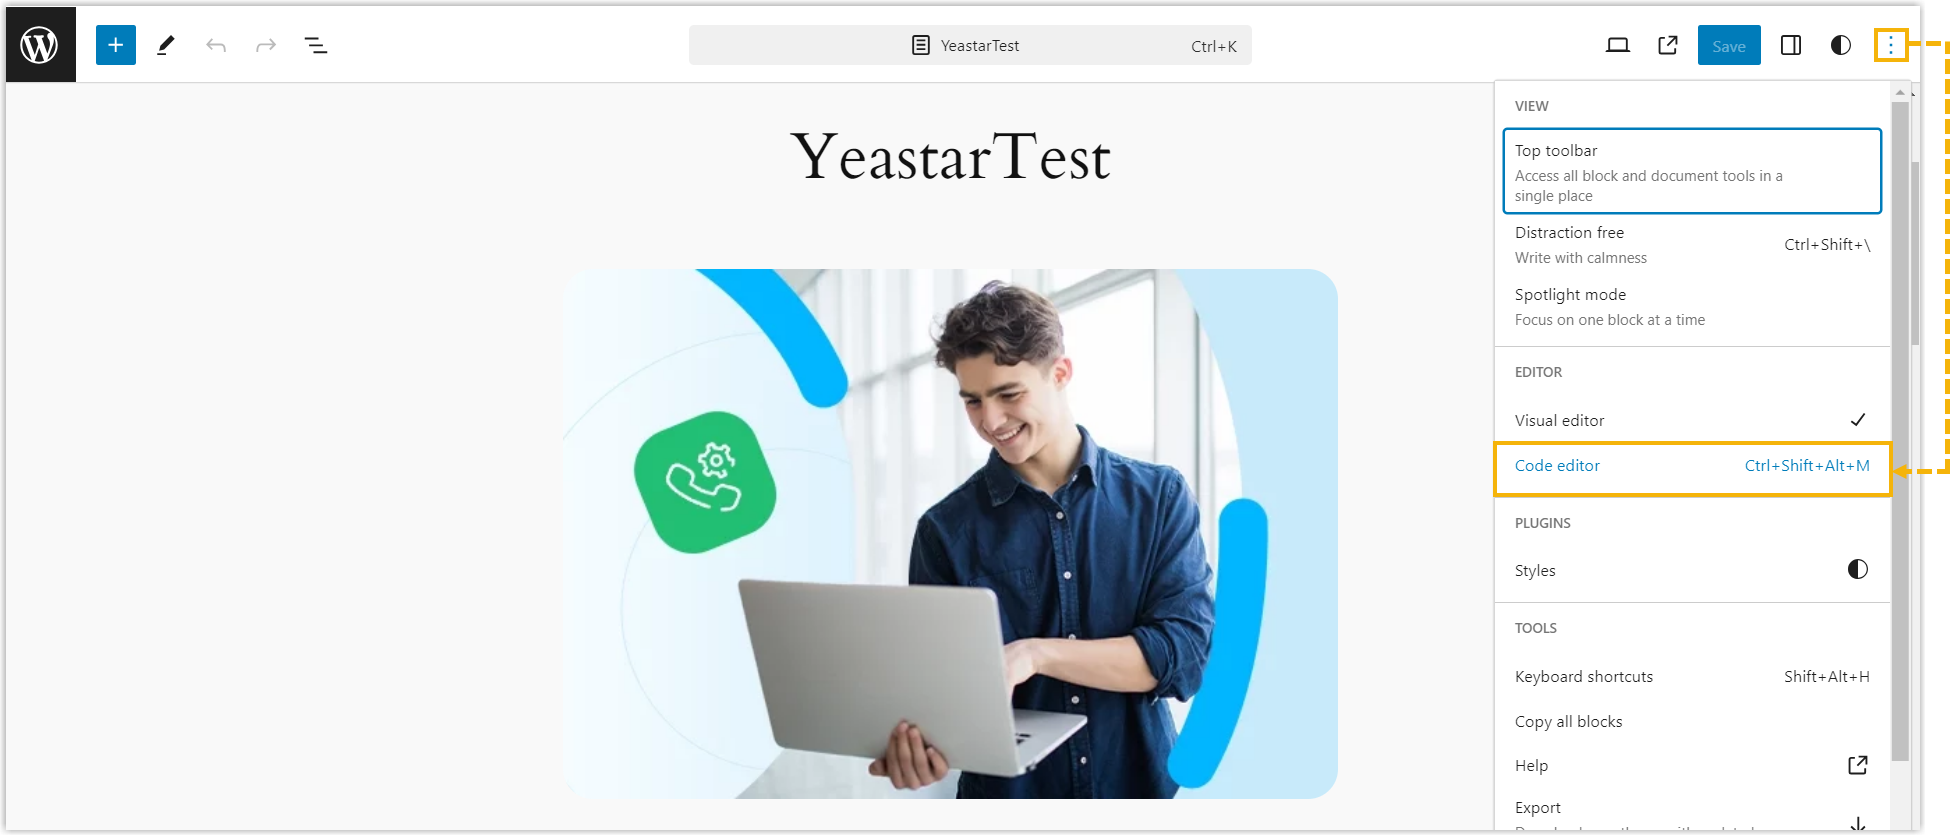
-
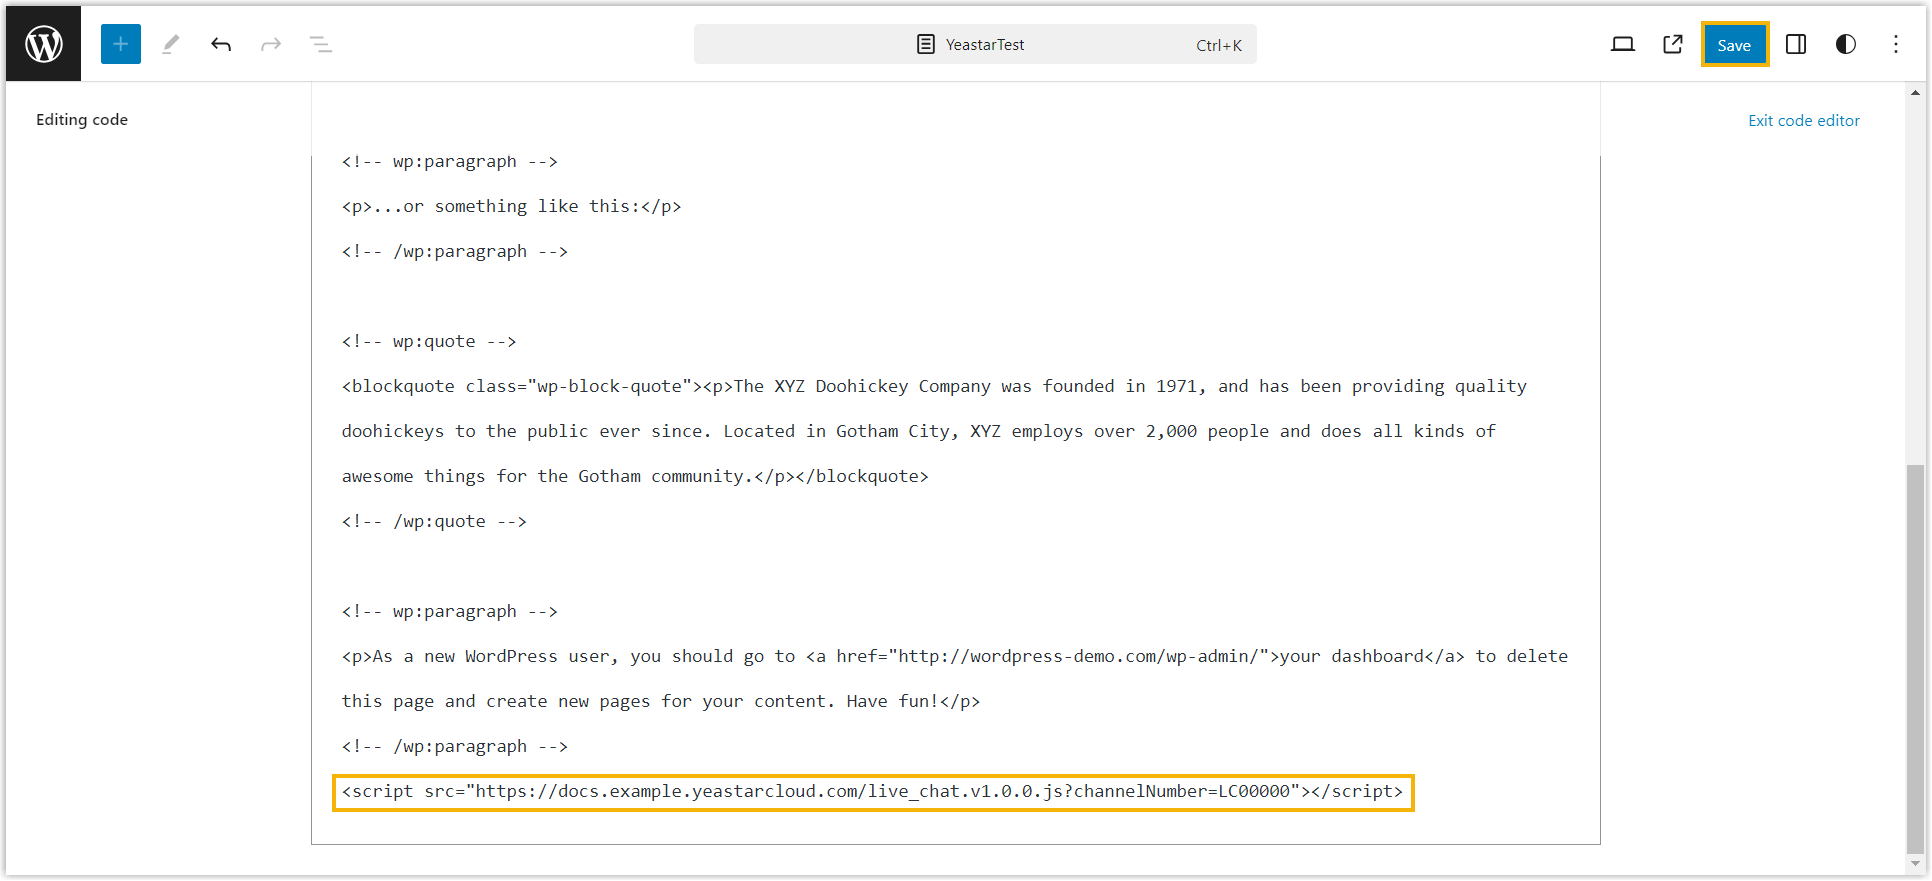
Scroll to the bottom of the editor, paste the Live Chat code snippet, then click Save.
Open the live page and confirm the Live Chat widget now shows in the bottom-right corner.
Option 2: Add the snippet with the WPCode plugin
Section titled “Option 2: Add the snippet with the WPCode plugin”WPCode is a free plugin that stores custom code separately from your theme, so the snippet is not lost when the theme updates. This is the recommended method for a live production site.
-
Sign in to your WordPress admin panel.
-
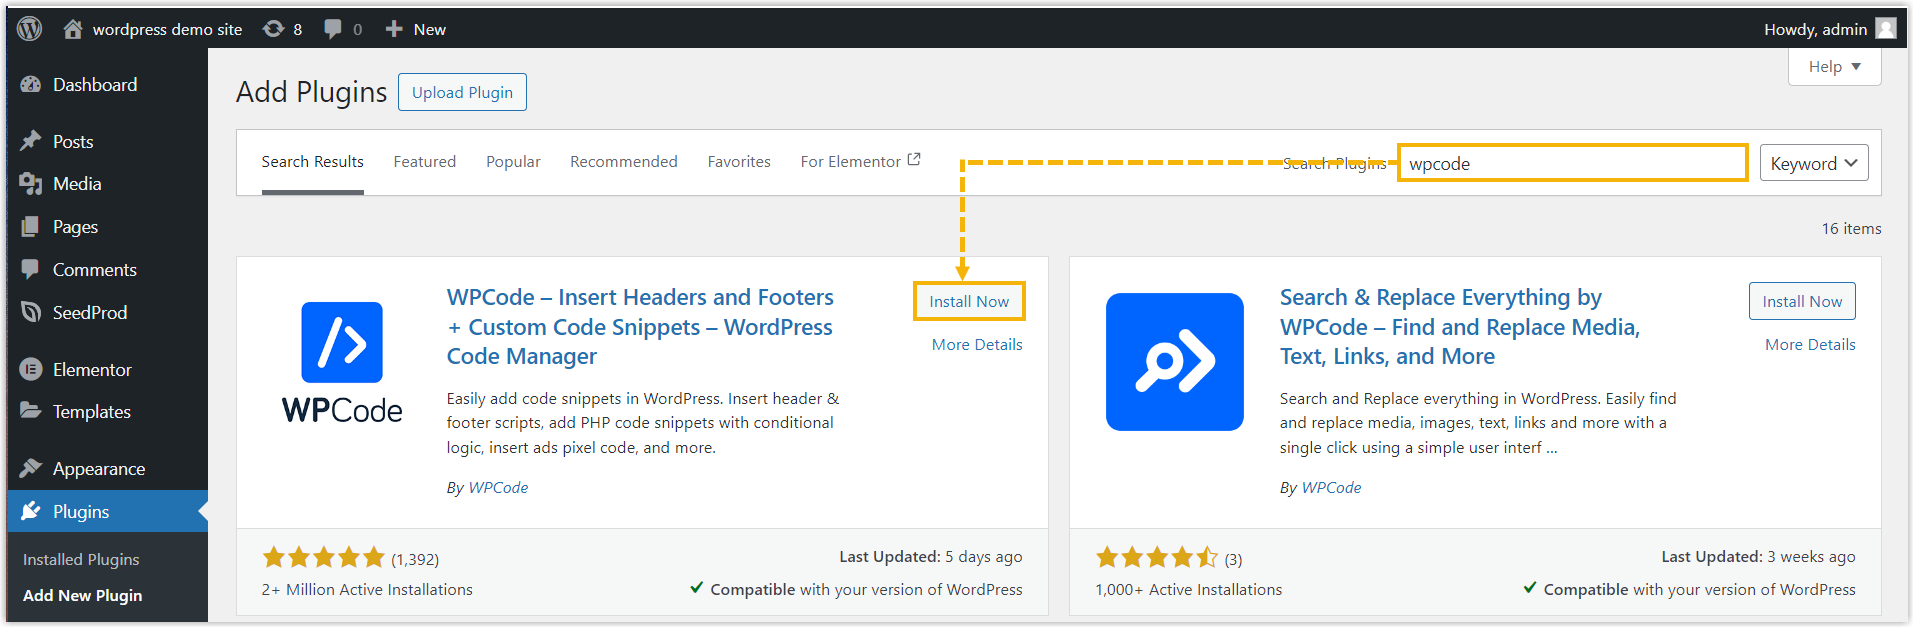
In the left sidebar, go to Plugins > Add New Plugin.
-
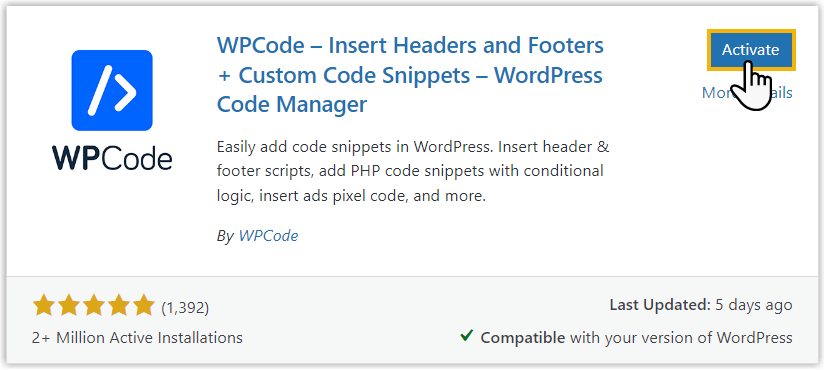
Install and activate the WPCode plugin:
-
In the top-right search box, look up WPCode, then click Install Now.
-
Click Activate to turn the plugin on.
-
-
Add the code snippet to the footer:
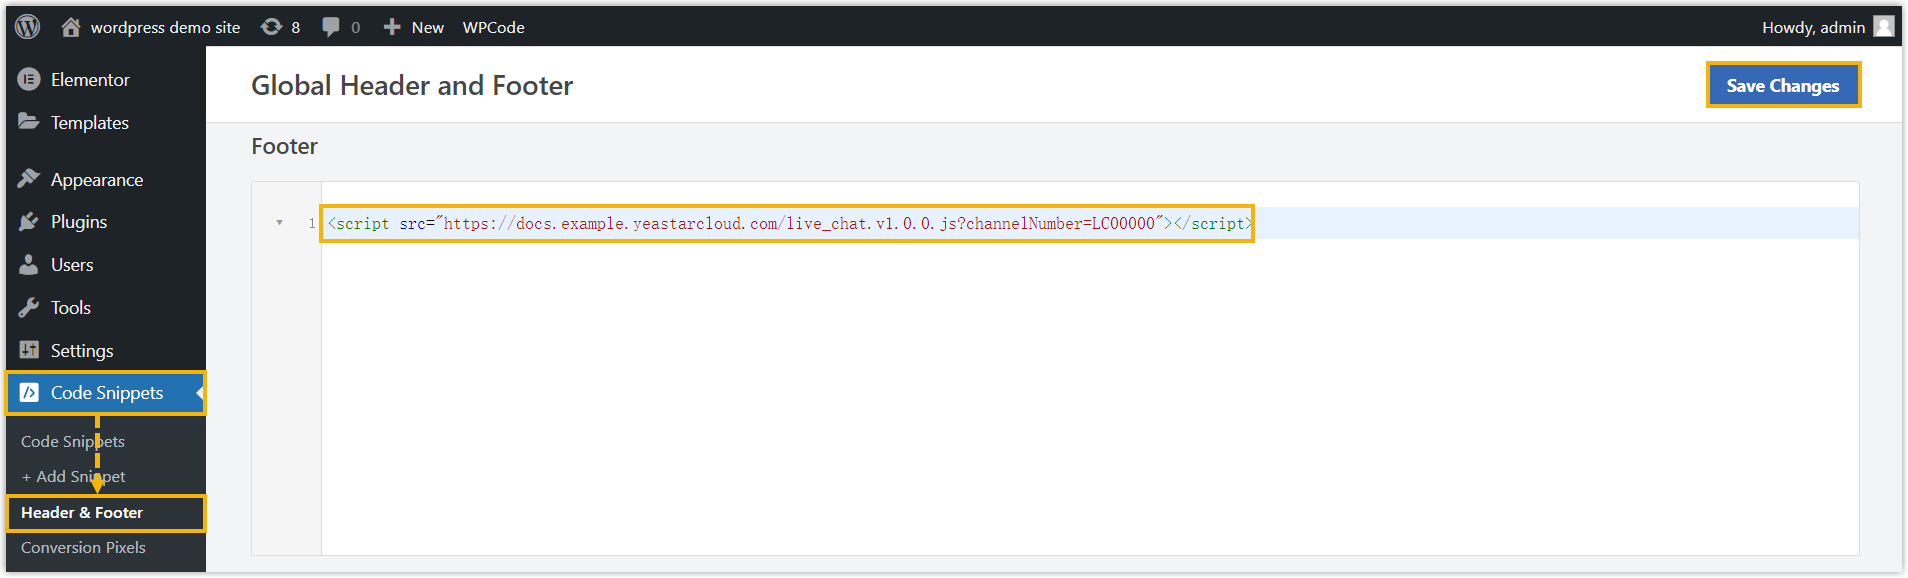
- In the left sidebar, go to Code Snippets > Header & Footer.
- In the Footer section, paste the Live Chat code snippet.
- In the top-right corner, click Save Changes.
Open the live page and confirm the Live Chat widget now shows in the bottom-right corner.
Question about this page?
Ask the AI assistant. It starts from this page, then searches the rest of the docs.
Ask Cloud Voice AI
Answers are AI-generated from the docs and may contain mistakes. Verify with the linked pages.