
Set up an SMS Channel for Apidaze
When you add an Apidaze SMS channel, the number you provision with Apidaze is tied to your Cloud Voice system, and your agents can hold text conversations with customers straight from the Cloud Voice App. This page covers the two halves of the setup: building the channel in Cloud Voice, then pointing Apidaze back at your system with a webhook.
Requirements
Section titled “Requirements”Confirm your system meets the following before you begin.
- Firmware: Version 84.23.0.24 or later.
- Domain name: The domain must not contain any underscore characters. An underscore causes the channel to fail authentication or stop receiving messages, because the third-party platform rejects it.
- Domain certificate: A valid domain certificate must be installed.
Supported message types and limits
Section titled “Supported message types and limits”The Apidaze channel handles both plain text messages and multimedia messages (MMS). Which MMS file types are accepted is decided by Apidaze.
| Limit | Value |
|---|---|
| Maximum file size | 100 MB |
| File retention period | 72 hours |
Before you begin
Section titled “Before you begin”Get the following from Apidaze:
- Your API key
- Your Secret
- The phone number you will use to send and receive messages
Step 1. Create and configure the SMS channel in Cloud Voice
Section titled “Step 1. Create and configure the SMS channel in Cloud Voice”-
Sign in to the PBX web portal and go to Messaging > Message Channel.
-
Click Add and choose SMS.
-
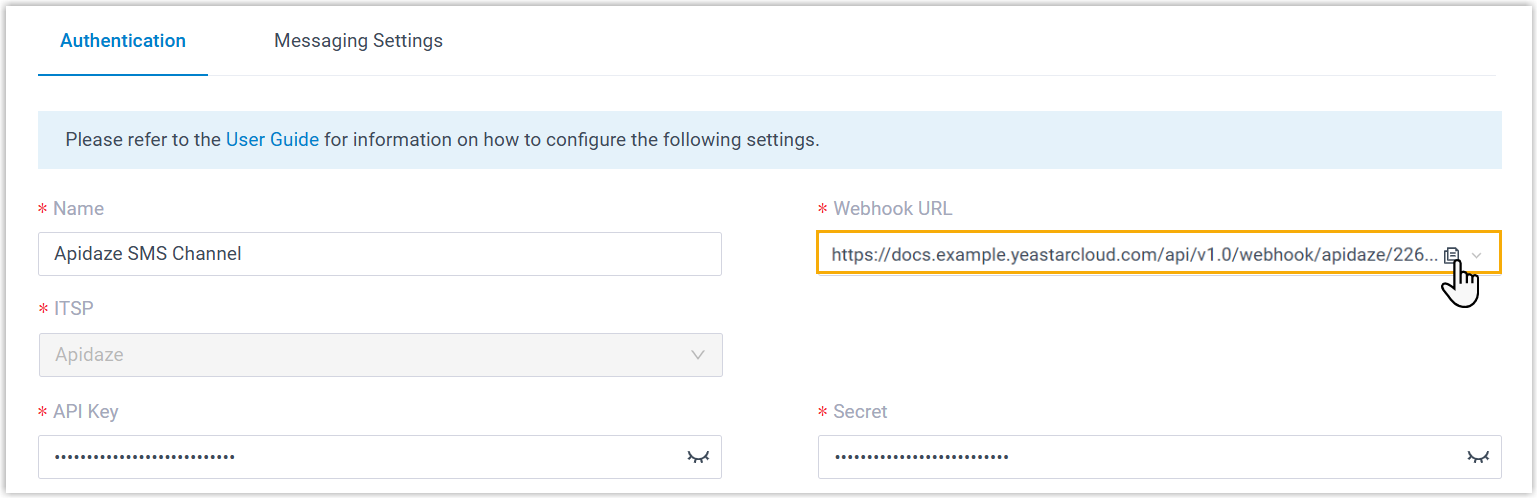
On the Authentication tab, enter your Apidaze credentials.
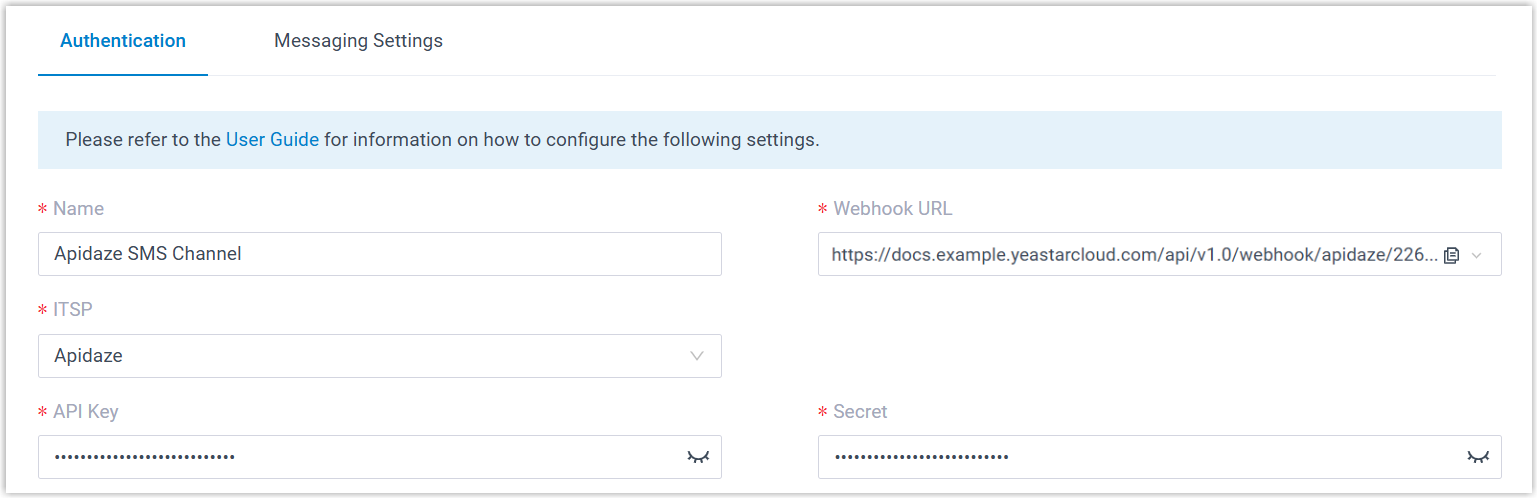
- Name: A label that makes the channel easy to recognize.
- ITSP (Internet Telephony Service Provider): Select Apidaze.
- API Key: The API key from Apidaze.
- Secret: The Secret from Apidaze.
-
On the Messaging Setting tab, configure how the channel behaves.
-
In Message Sending Rate, set the number of messages the system may send per second.
-
Set the session options as needed.
Setting What it does Close Session Automatically Select this to have the system end sessions that have gone quiet for a set time, then enter the number of days in Session Timeout (Days). Allow the Creation of Duplicate Active Sessions Select this to let a new session start even when an active one already exists between the same sender and receiver. When an agent tries to start such a session in the Cloud Voice App, a prompt appears; if the agent continues, the existing session (with its full chat history) leaves the previous handler’s list and moves to the new agent. 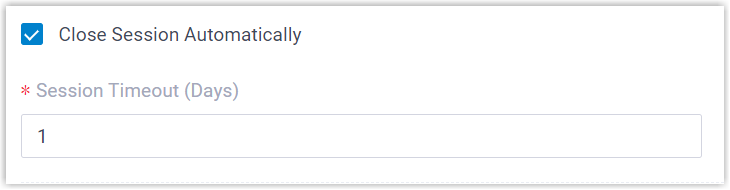
-
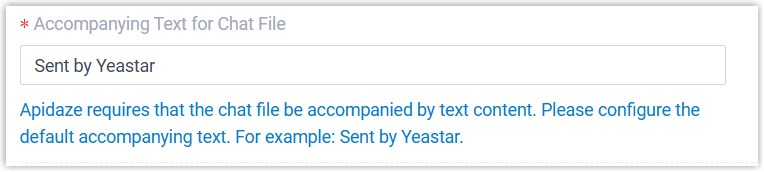
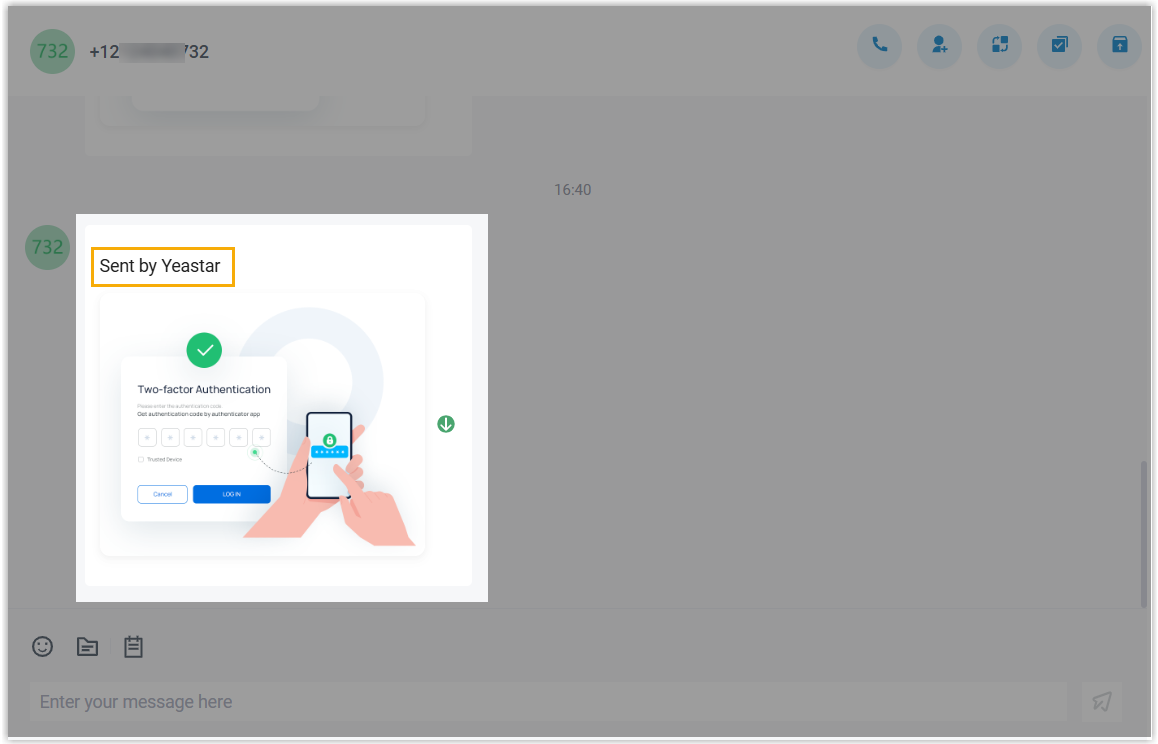
In Accompanying Text for Chat File, enter the default text to send alongside any chat file. The recipient sees this text next to the file.
-
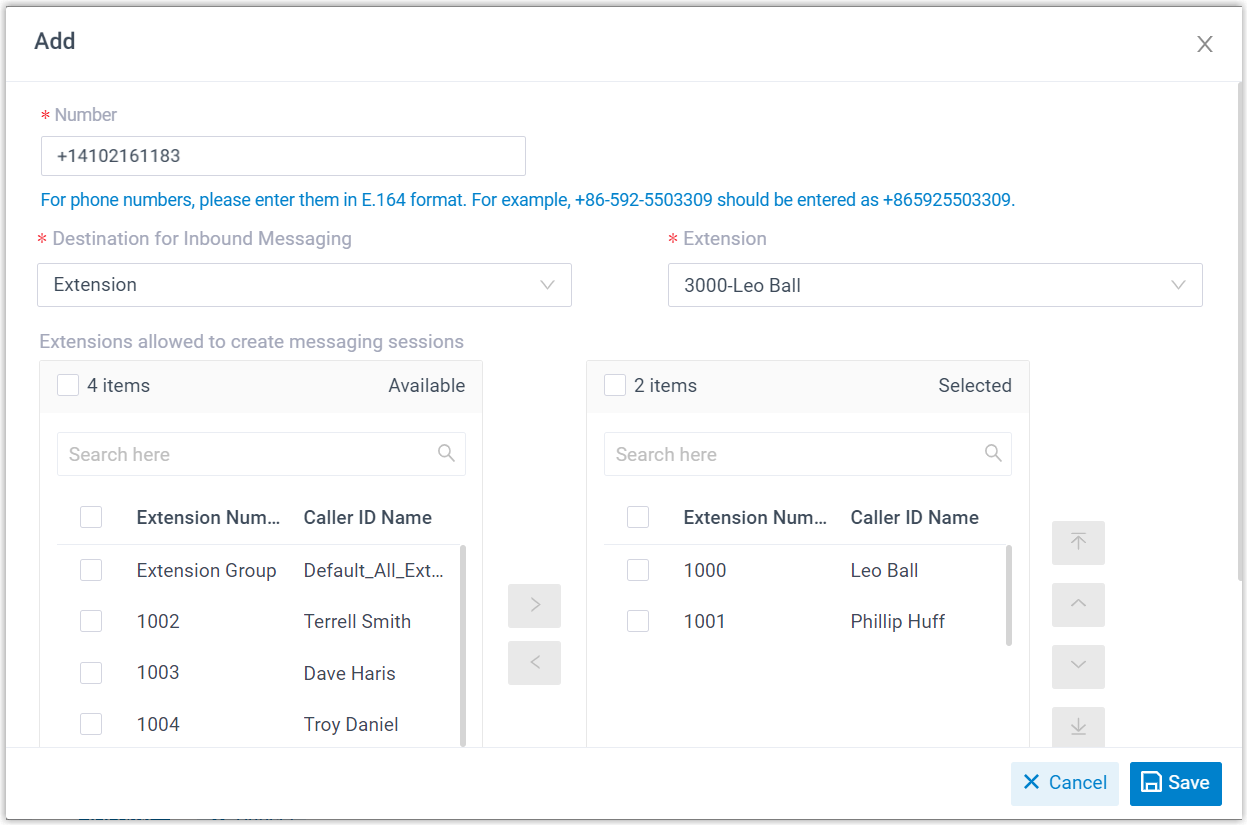
In the Number section, click Add to create a message routing rule.
-
Number: Enter your provisioned number or an alphanumeric sender ID.
-
Destination for Inbound Messaging: Choose where messages to this number are delivered.
Option What it does Extension Pick an extension from the Extension list. Only that extension user receives inbound messages from the number. Message Queue Pick a queue from the Message Queue list. Every agent in the queue sees new inbound sessions, but once an agent picks up a session, only that agent receives and answers its follow-up messages. Third-Party Message Analytics Platform (Transmitted via API) Inbound messages are forwarded automatically to an external analytics platform over the API for further processing. -
Extensions allowed to create messaging sessions: Select the extensions that may start a messaging conversation with customers.
-
-
Click Save.
-
-
Click Save.
Step 2. Configure the webhook in Apidaze
Section titled “Step 2. Configure the webhook in Apidaze”-
In the PBX web portal, go to Messaging > Message Channel.
-
Open the SMS channel you just created.
-
On the Authentication tab, copy the Webhook URL.
-
In Apidaze, set the messaging webhook for your phone number to the URL you copied. This lets Apidaze deliver inbound messages to your system.
Result
Section titled “Result”-
The channel appears in the message channel list with a green Status indicator
 , confirming it was created successfully.
-
The system tracks how many messages the channel sends and receives. The Total column shows all sent messages, both delivered and failed.

What to do next
Section titled “What to do next”Send a text message to your channel’s phone number and confirm that the assigned agent receives it in the Cloud Voice App.
Question about this page?
Ask the AI assistant. It starts from this page, then searches the rest of the docs.
Ask Cloud Voice AI
Answers are AI-generated from the docs and may contain mistakes. Verify with the linked pages.