
Manage Queue Call Logs (Agent)
As a queue agent, you can review every call your queues handled without leaving the Cloud Voice App. From the queue call log you can follow up on missed calls, return calls, read transcriptions, add notes, and more. This page walks through opening your queue call logs and the actions available on each entry, in both the web and desktop apps.
Before you begin
Section titled “Before you begin”Your system administrator must grant you permission to view queue call logs. If the Queue Call Logs tab described below does not appear, contact your administrator.
Open your queue call logs
Section titled “Open your queue call logs”-
Sign in to the Cloud Voice App (Web or Desktop) and go to Call Logs > Queue Call Logs.
-
Optional: Use the filters at the top of the list to narrow it down to the calls you want to review.

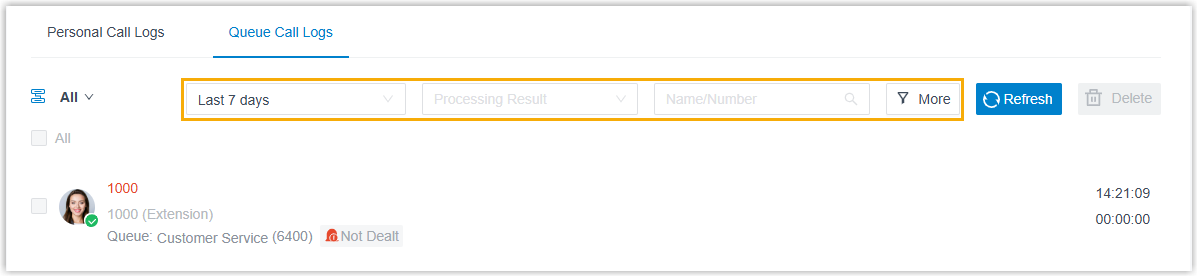
Once the list is open, use the actions below to work through your queue calls.
Refresh the list
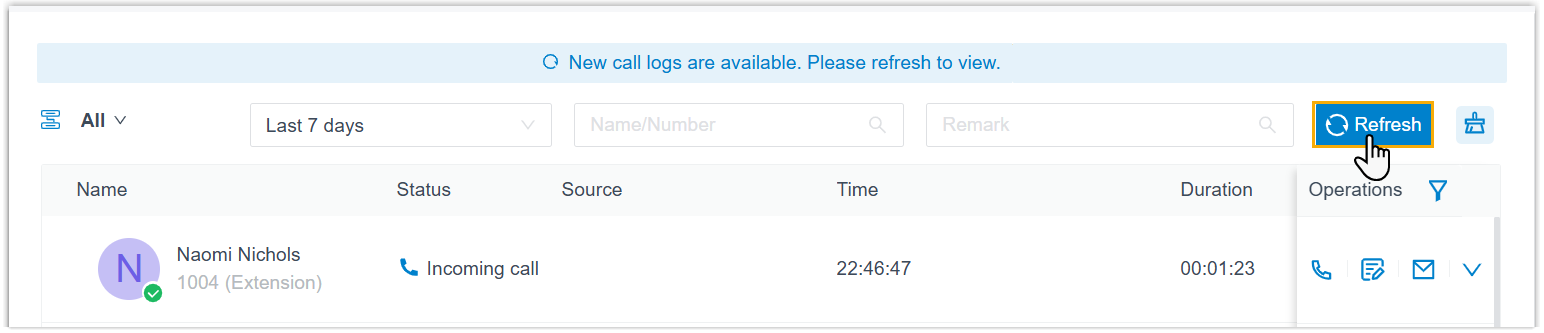
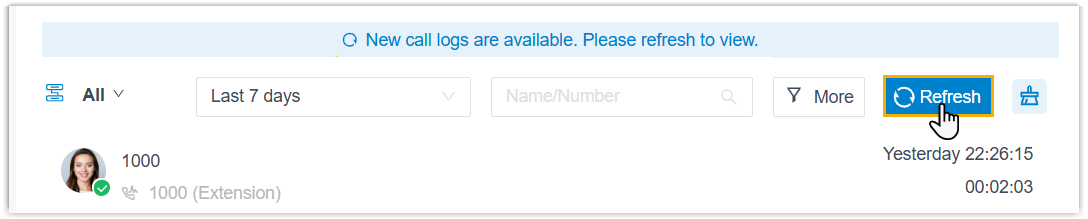
Section titled “Refresh the list”If new calls arrive while you have the Call Logs page open, a banner appears at the top of the list. Click Refresh on the banner to pull in the latest entries.
View call details
Section titled “View call details”Each entry shows where the call came from, the queue that received it, along with the processing status of any missed queue call, so you can see at a glance what still needs attention.


Update the status of a missed call
Section titled “Update the status of a missed call”When you plan to follow up on a missed queue call, or you have already dealt with it, update its processing status so the rest of the team knows where things stand.
- Click the current status shown next to the call log.
- Choose the new status from the drop-down list.

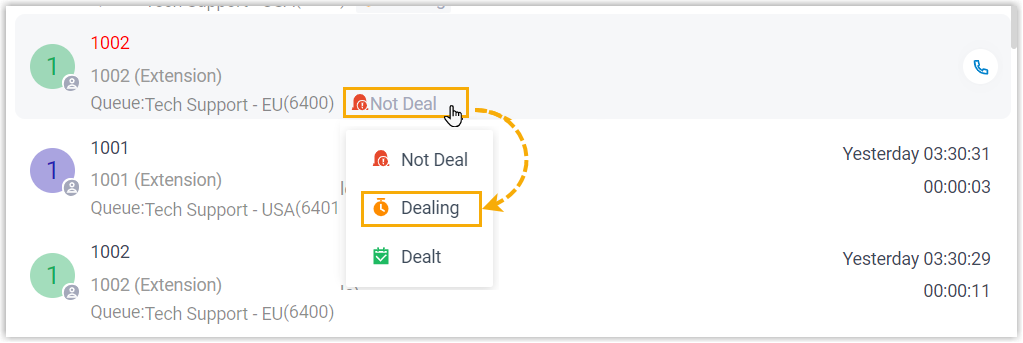
The new status applies immediately and is visible to every authorized agent. To see who changed it and when, hover over the processing status to view the operation record.


Call the person back
Section titled “Call the person back”You can dial a caller straight from their entry in either of these ways:
- Double-click the call log.
- Click the call icon
 next to the call log.
Read and edit call notes
Section titled “Read and edit call notes”You can review or update the notes attached to a call from its log entry.
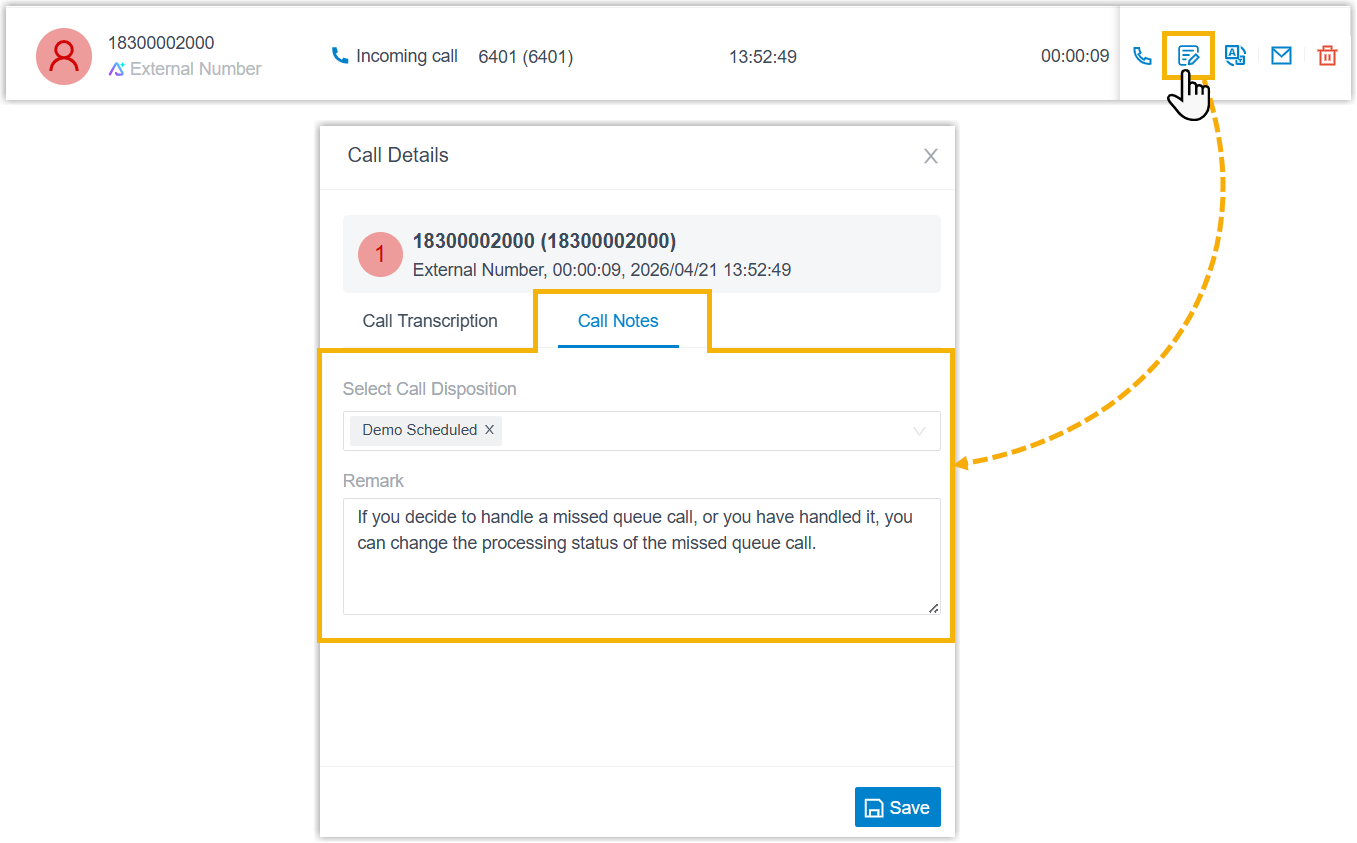
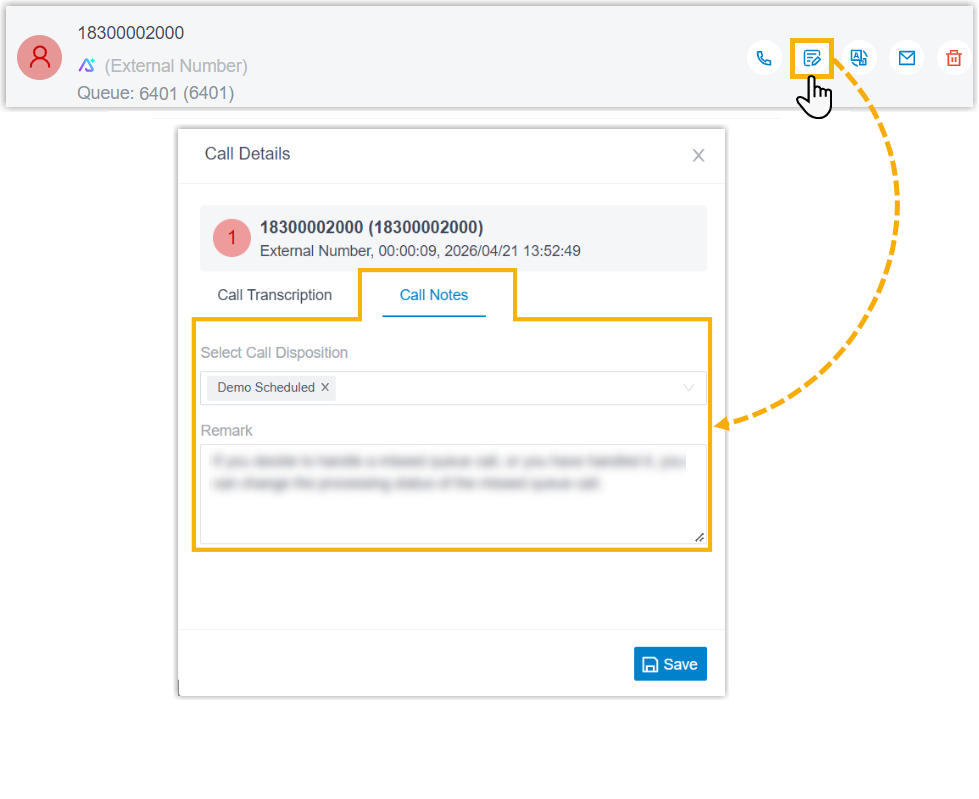
- Click the call note icon
 next to the call log.
 - In the call note panel, edit the details as needed, then click Save.
Read and edit the call transcription
Section titled “Read and edit the call transcription”For calls that were transcribed, you can review and refine both the summary and the full transcript.
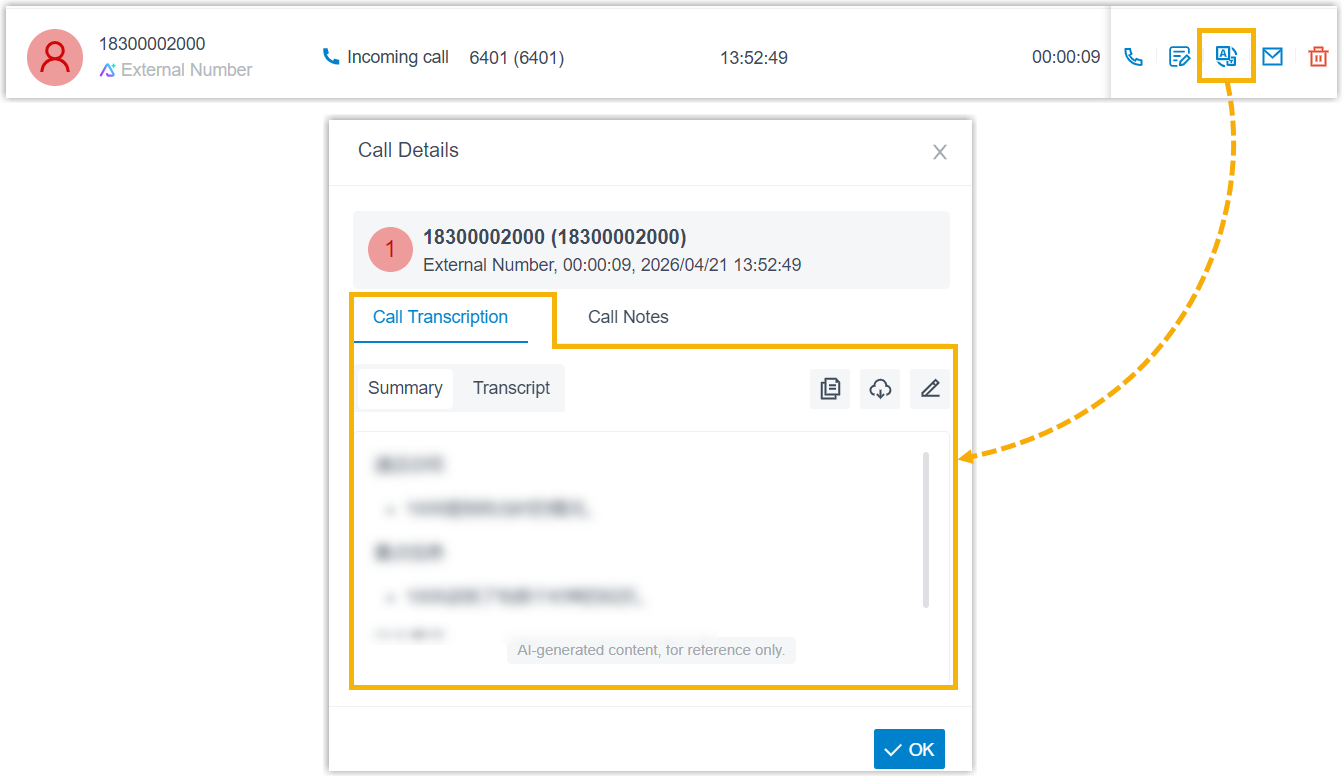
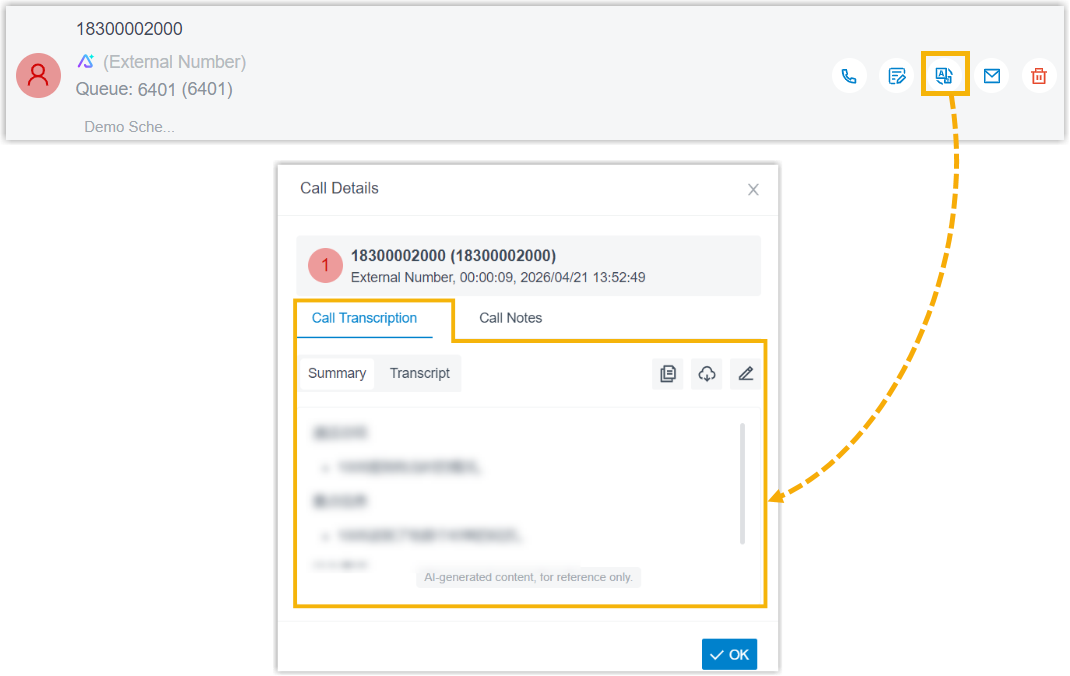
- Find a queue call log marked with the AI (artificial intelligence) icon
 , then click the transcription icon
  next to it. Only calls that carry this icon have a transcription available.
 - In the window that opens, review or edit the Summary and Transcript. You can also:
- Edit the summary: click the edit icon
 in the Summary section, then click Save in the top-right corner when you finish.
 - Copy the summary: click the copy icon
 in the Summary section.
 - Search the transcript: click the search icon
 in the Transcript section.
 - Download the summary or transcript: click the download icon
 and choose the file type you want.
- Edit the summary: click the edit icon
- Click OK to close the window.
Send a follow-up email
Section titled “Send a follow-up email”You can forward a call’s details to one or more email addresses for follow-up.

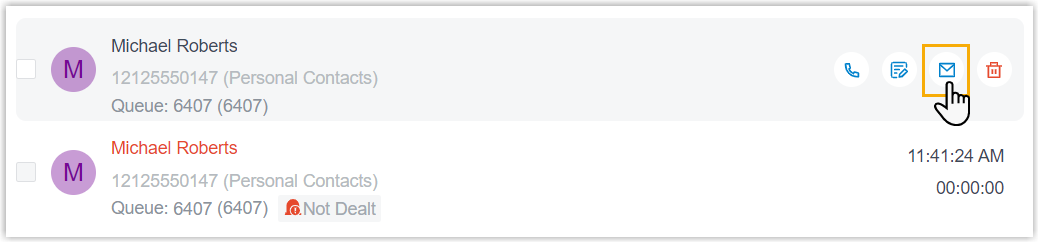
- Click the email icon
 next to the call log. The Cloud Voice App opens your default email client with a new message that already contains the call details.
 - Adjust the message as needed, then send it.
Delete incoming queue call logs
Section titled “Delete incoming queue call logs”You can remove incoming queue call logs in either of these ways:
- Delete one entry: click the delete icon
 next to the call log.
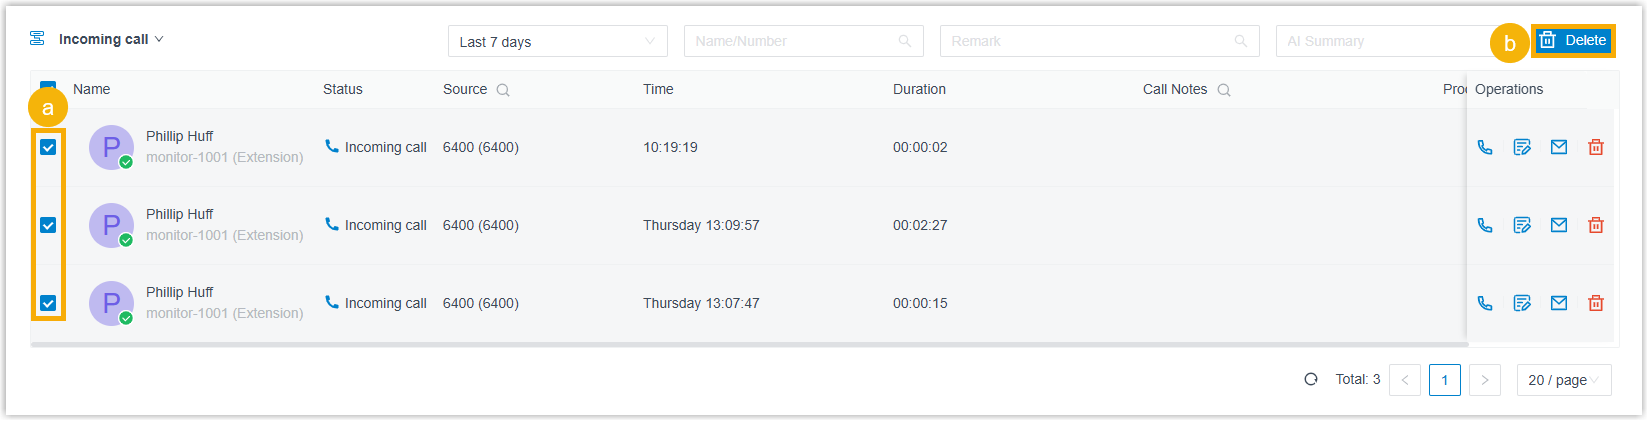
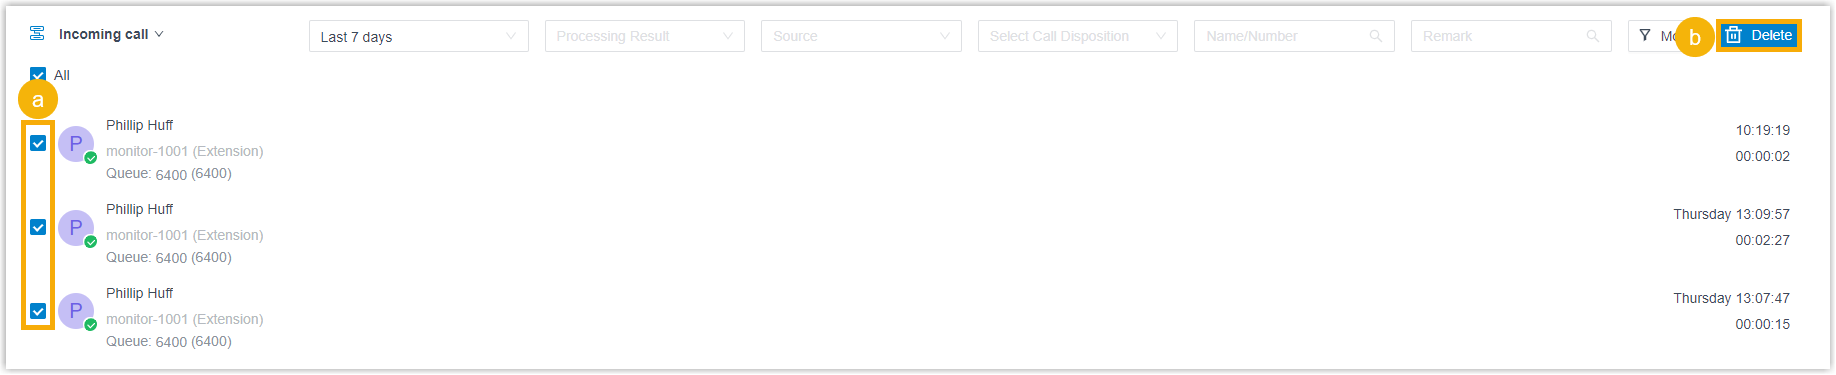
 - Delete several at once: select the checkboxes for the incoming call logs you want to remove, then click Delete.
Question about this page?
Ask the AI assistant. It starts from this page, then searches the rest of the docs.
Ask Cloud Voice AI
Answers are AI-generated from the docs and may contain mistakes. Verify with the linked pages.