
Submit App for Review
Once your Facebook channel is set up in Cloud Voice, the Meta app behind it still runs in development mode, so only your own test accounts can use it. Before real customers can reach you, you have to prove to Meta that the integration works and submit the app for App Review. This page walks you through validating message delivery, requesting the permissions the integration needs, and sending the app to Meta for approval.
Before you submit
Section titled “Before you submit”Confirm that messages flow correctly between your Facebook Page and Cloud Voice, and capture the evidence Meta will ask for.
-
(Optional) Add a user as a Tester.
Only your Meta Developer account can interact with the app by default, and Meta requires a Facebook account to test it. You can run the test with your own developer account, but adding a Tester with limited access keeps your developer account out of the process and is the safer approach.
-
Test message delivery and record two screencasts. You will upload both during App Review, so keep them handy:
- A screencast showing you send a message to your Facebook Page and that message being received and answered in Cloud Voice within the 24-hour window.
- A screencast showing the app apply a human agent tag to reply to a customer after the 24-hour window has closed.
Step 1. Complete app settings
Section titled “Step 1. Complete app settings”-
Open the Basic settings for your Meta app:
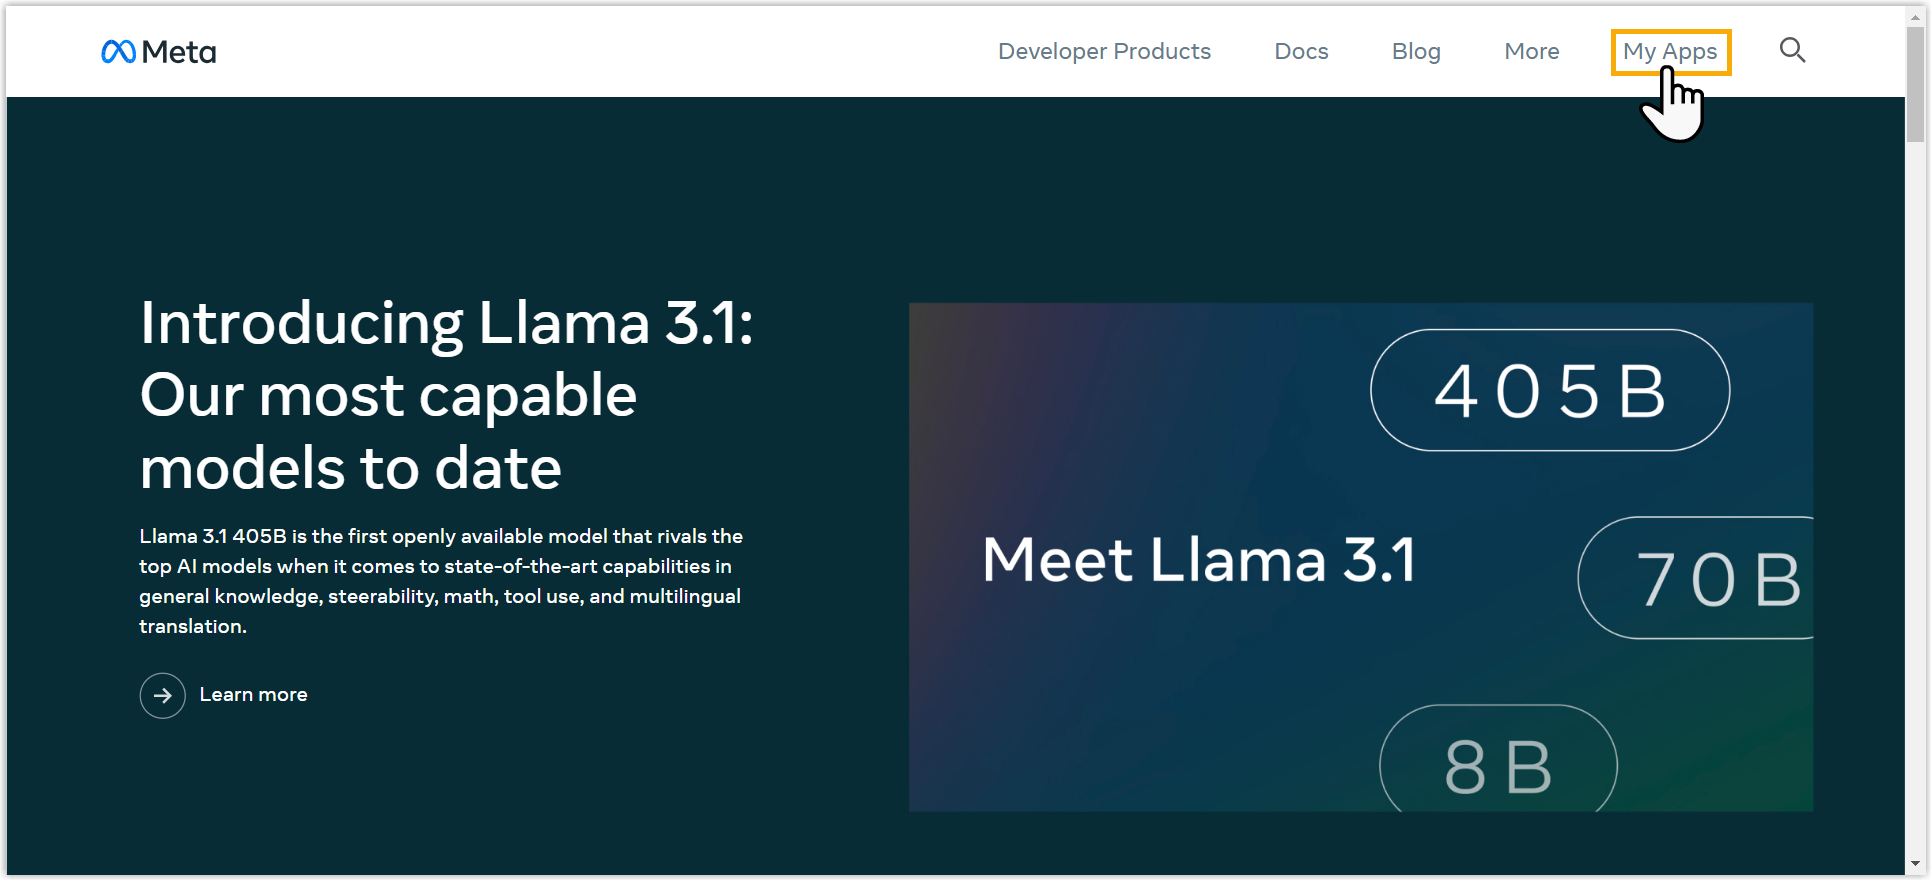
a. Sign in to the Meta for Developers portal and open My Apps from the top menu.
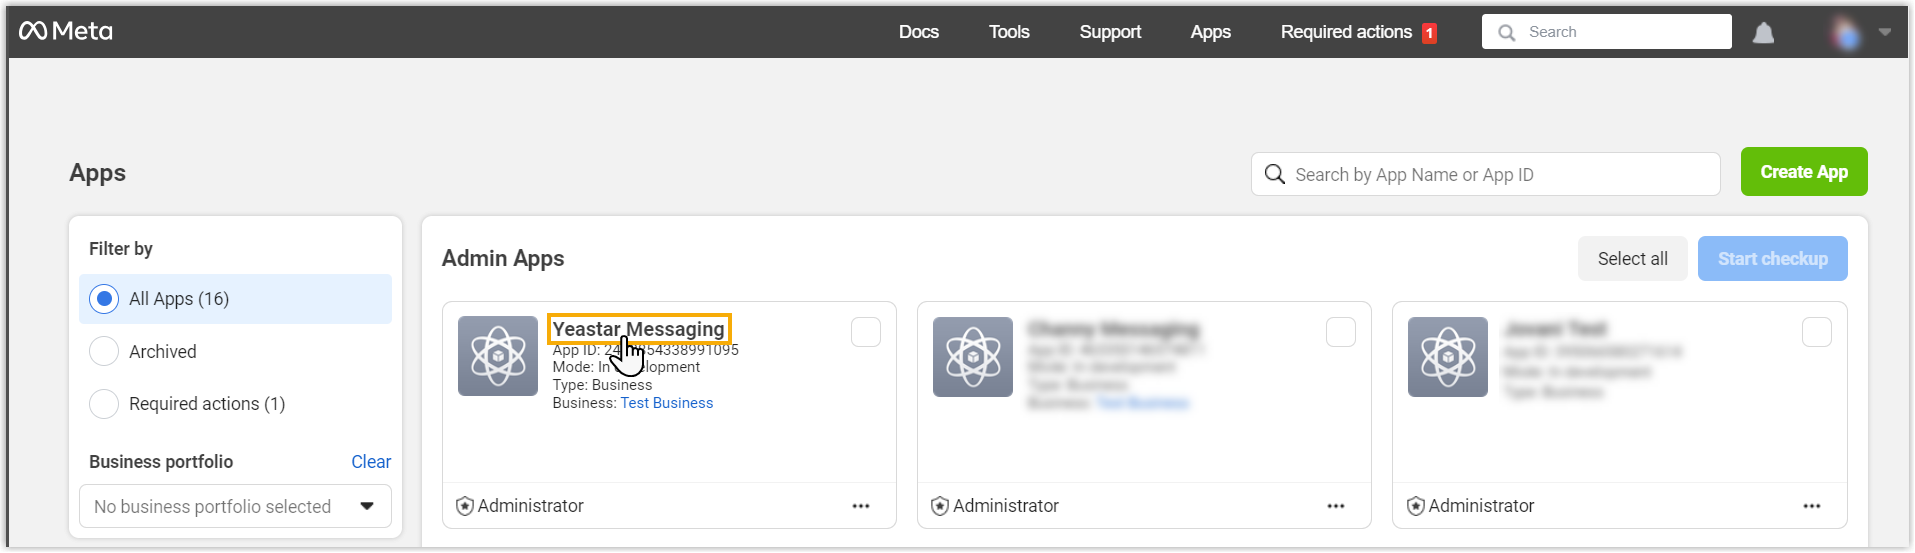
b. Select your Meta app from the list.
c. In the left navigation, go to App settings > Basic.
-
At the top of the page, fill in the following:
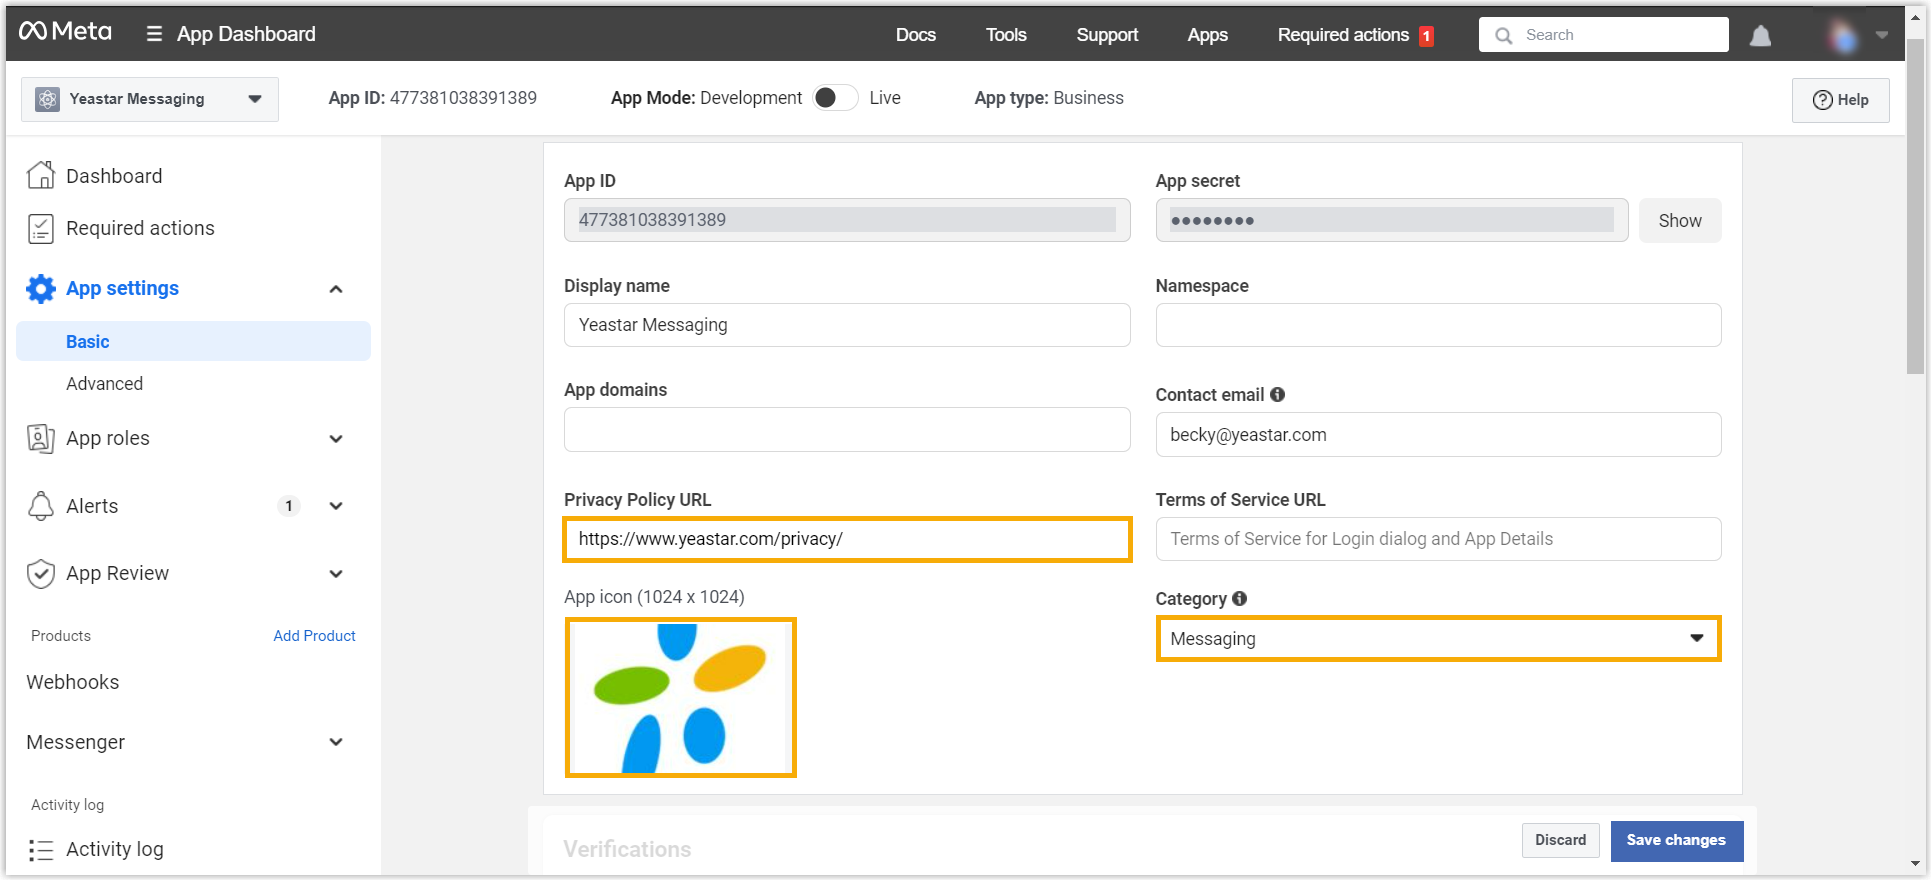
- Privacy Policy URL: Enter your organization’s privacy policy URL.
- App icon: Upload your organization’s icon.
- Category: Select Messaging.
-
Scroll to the bottom of the page and add a website platform so Meta has the URL of your PBX (Private Branch Exchange, your Cloud Voice phone system):
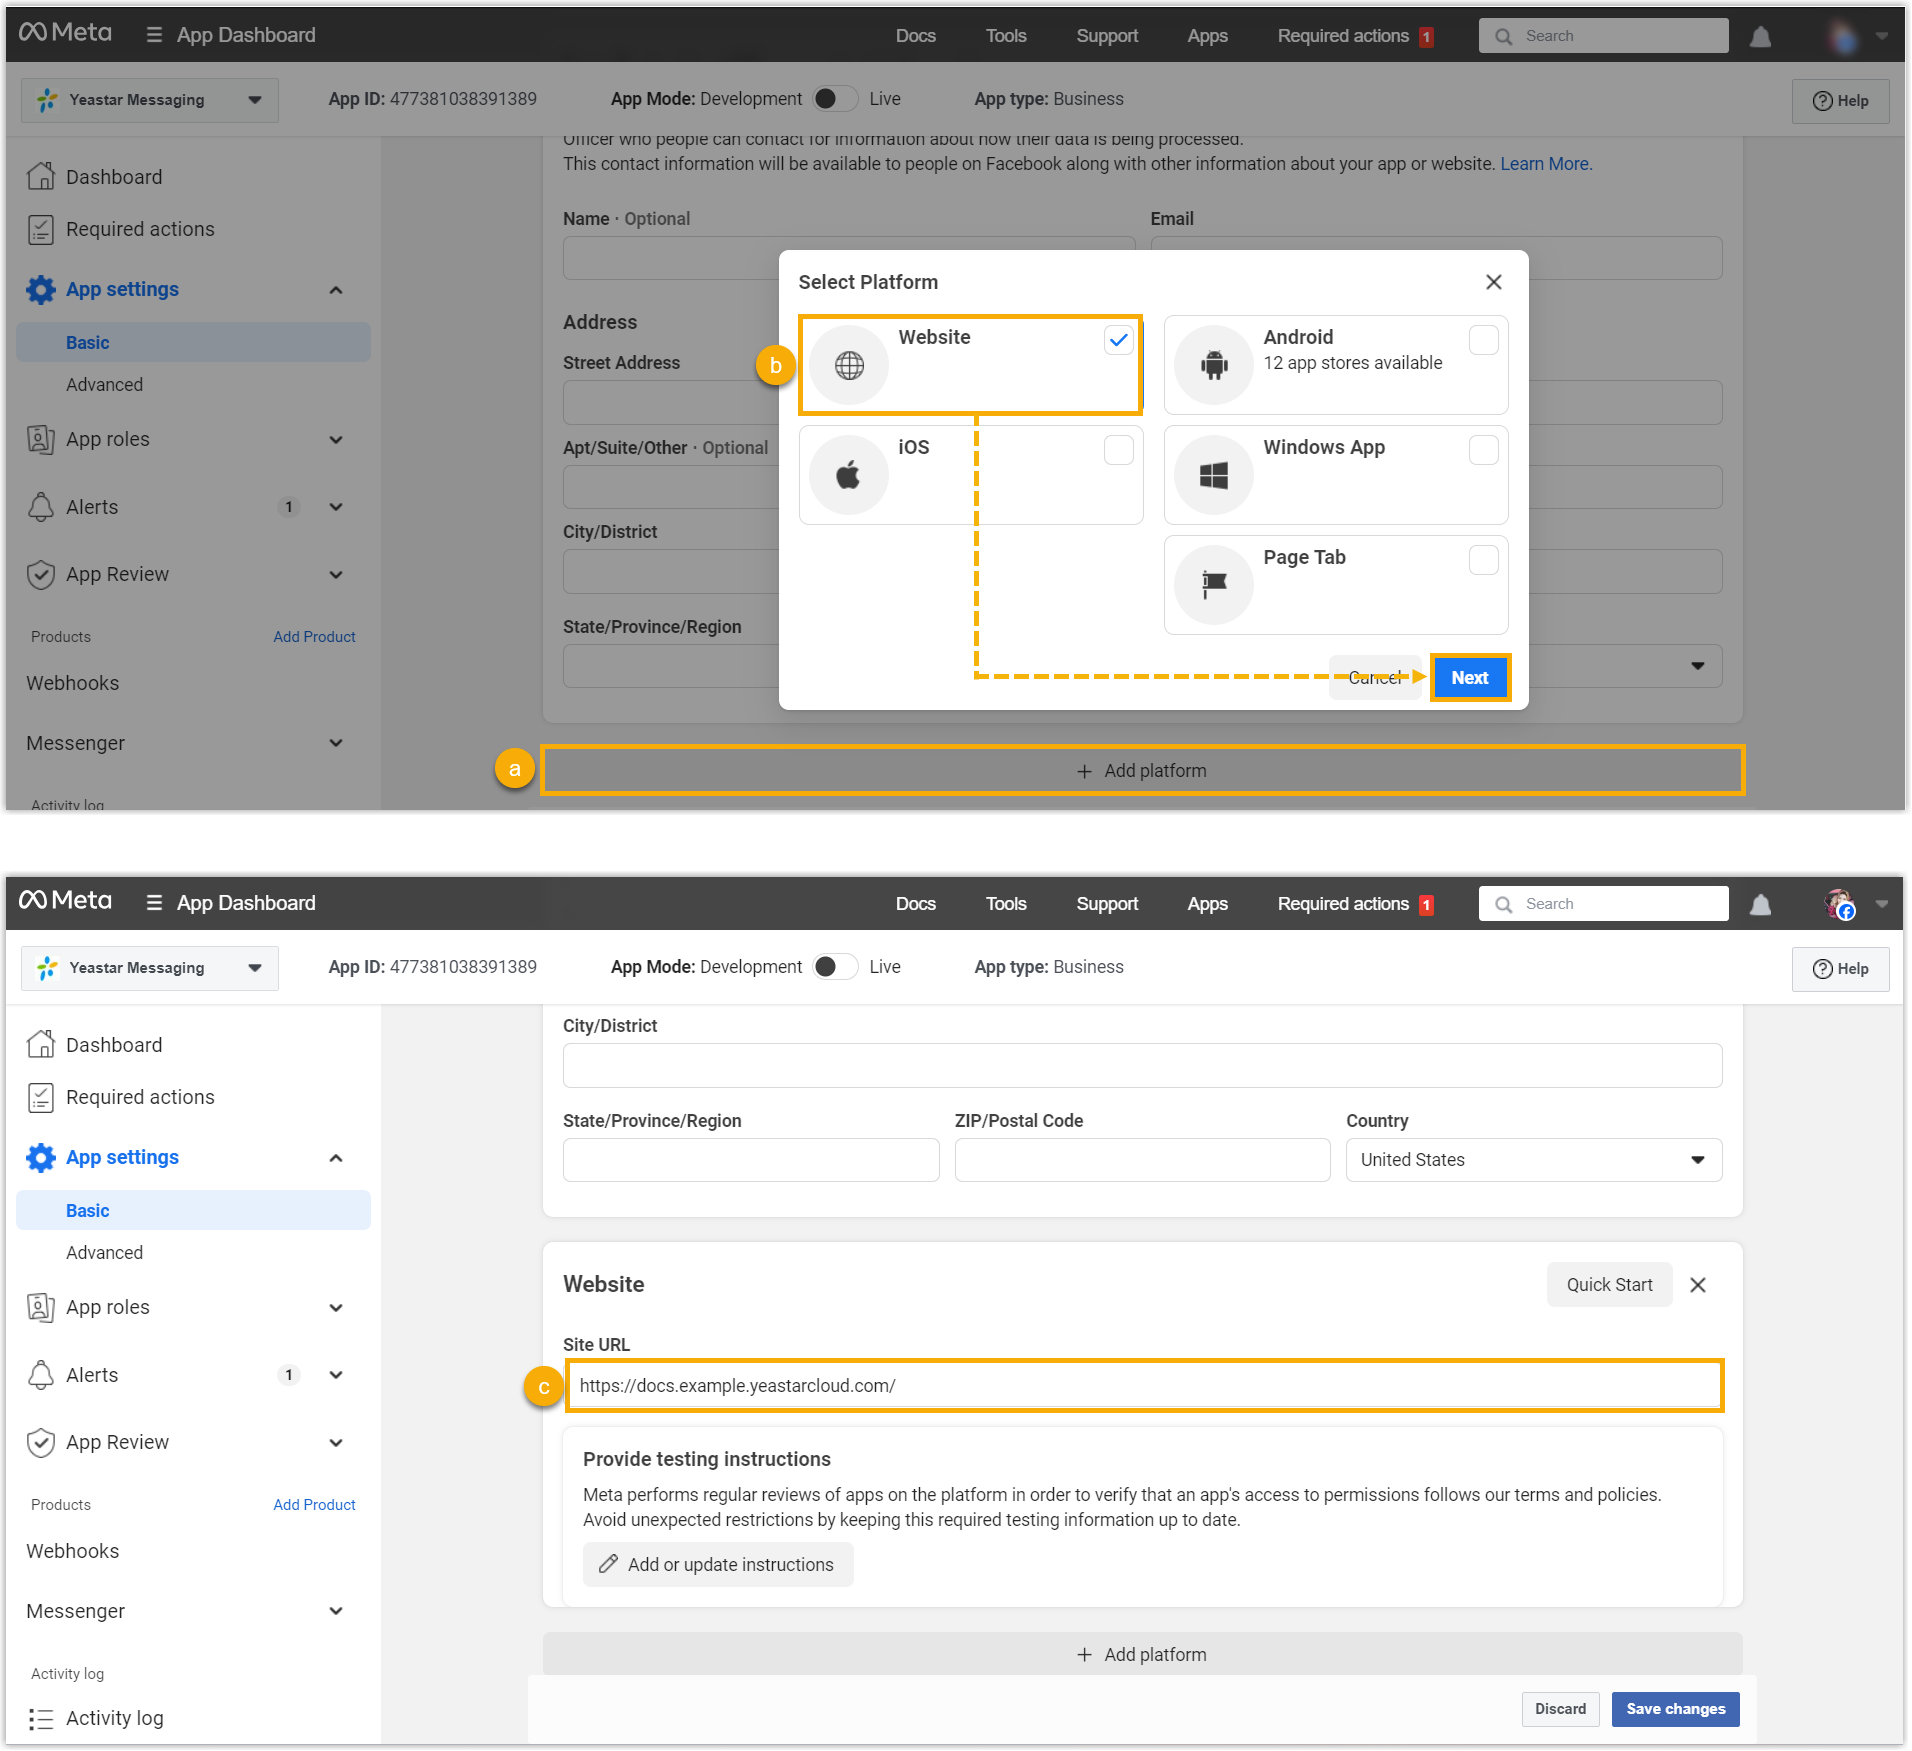
a. Click Add platform.
b. Select Website, then click Next.
c. In the Site URL field, enter the domain name of your PBX system.
-
Click Save changes.
Step 2. Select permissions and features
Section titled “Step 2. Select permissions and features”-
In the left navigation, go to App Review > Permissions and Features.
-
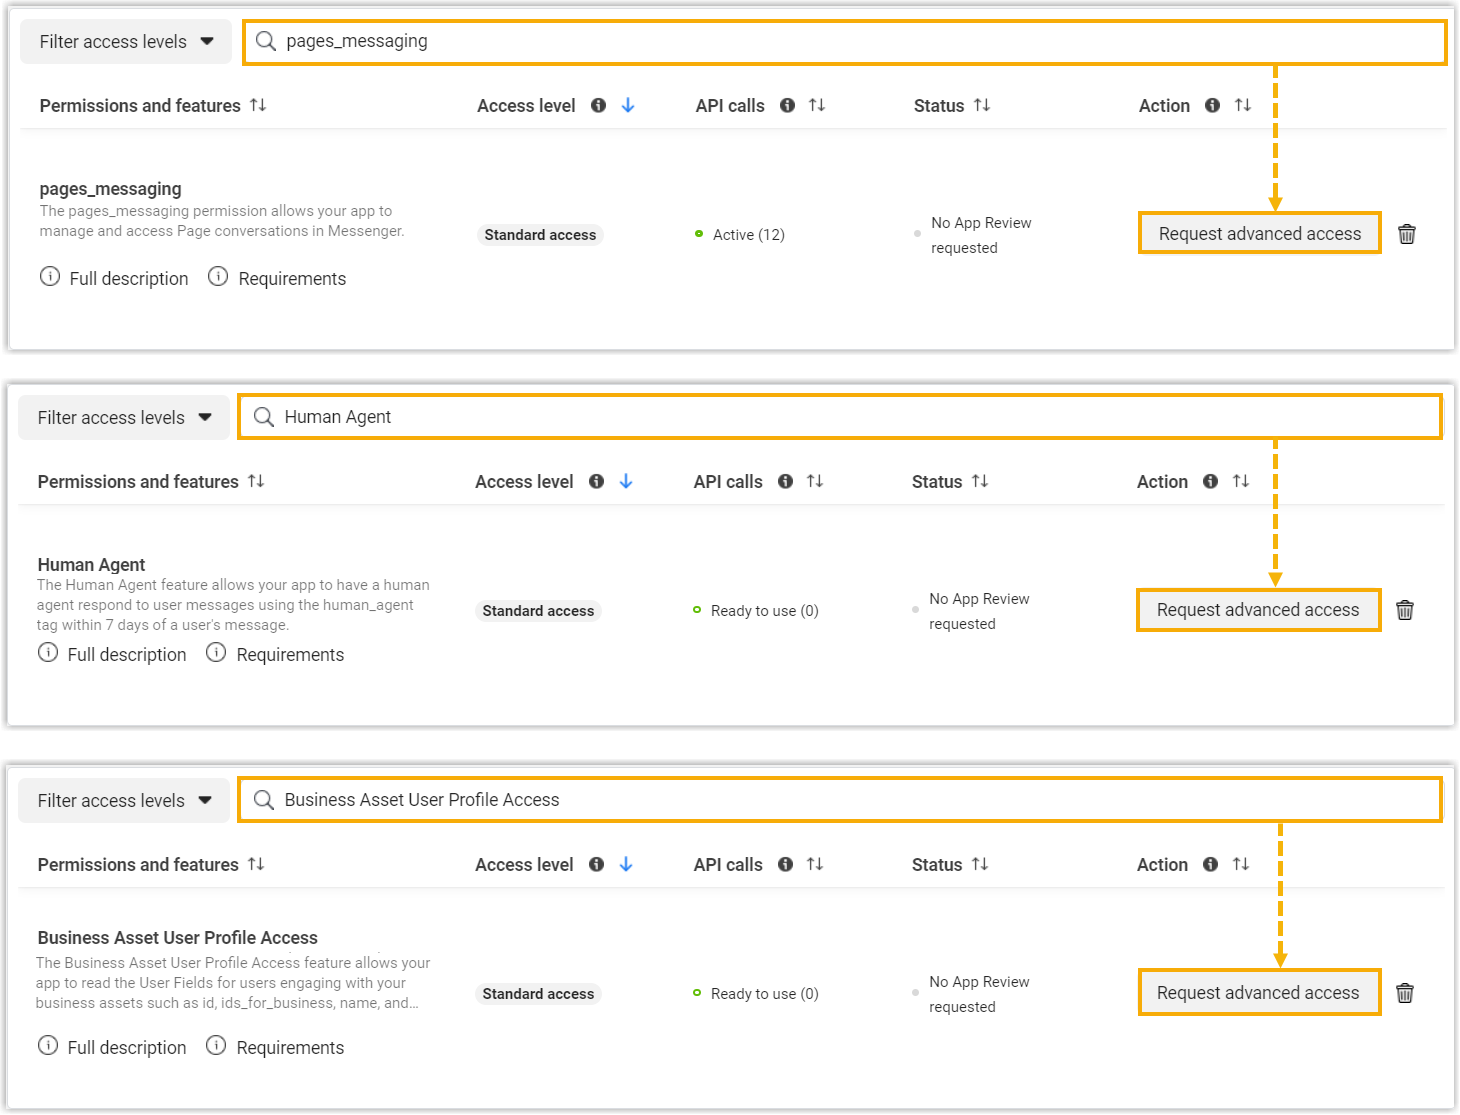
Search for each of the permissions the integration relies on, pages_messaging, Human Agent, and Business Asset User Profile Access: and click Request advanced access on each one to add it to your submission.
-
Click Continue request.
Step 3. Remove unnecessary permissions
Section titled “Step 3. Remove unnecessary permissions”-
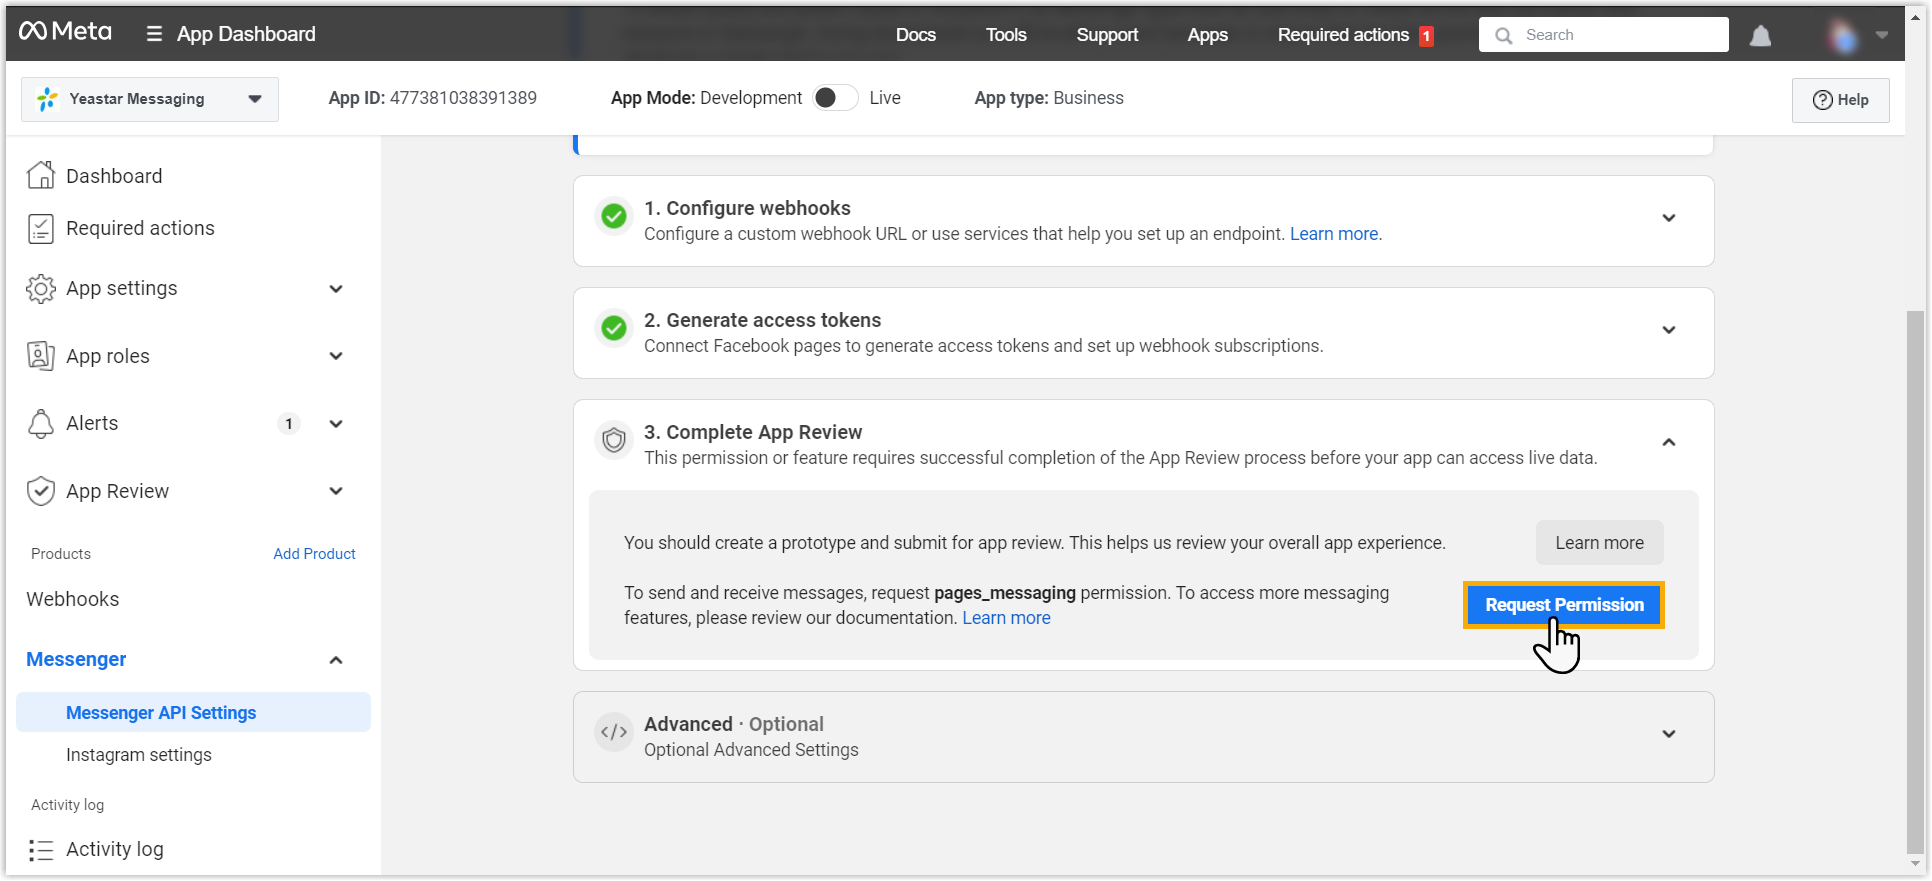
In the left navigation, go to Messenger > Messenger API Settings.
-
In the 3. Complete App Review section, click Request Permission.
-
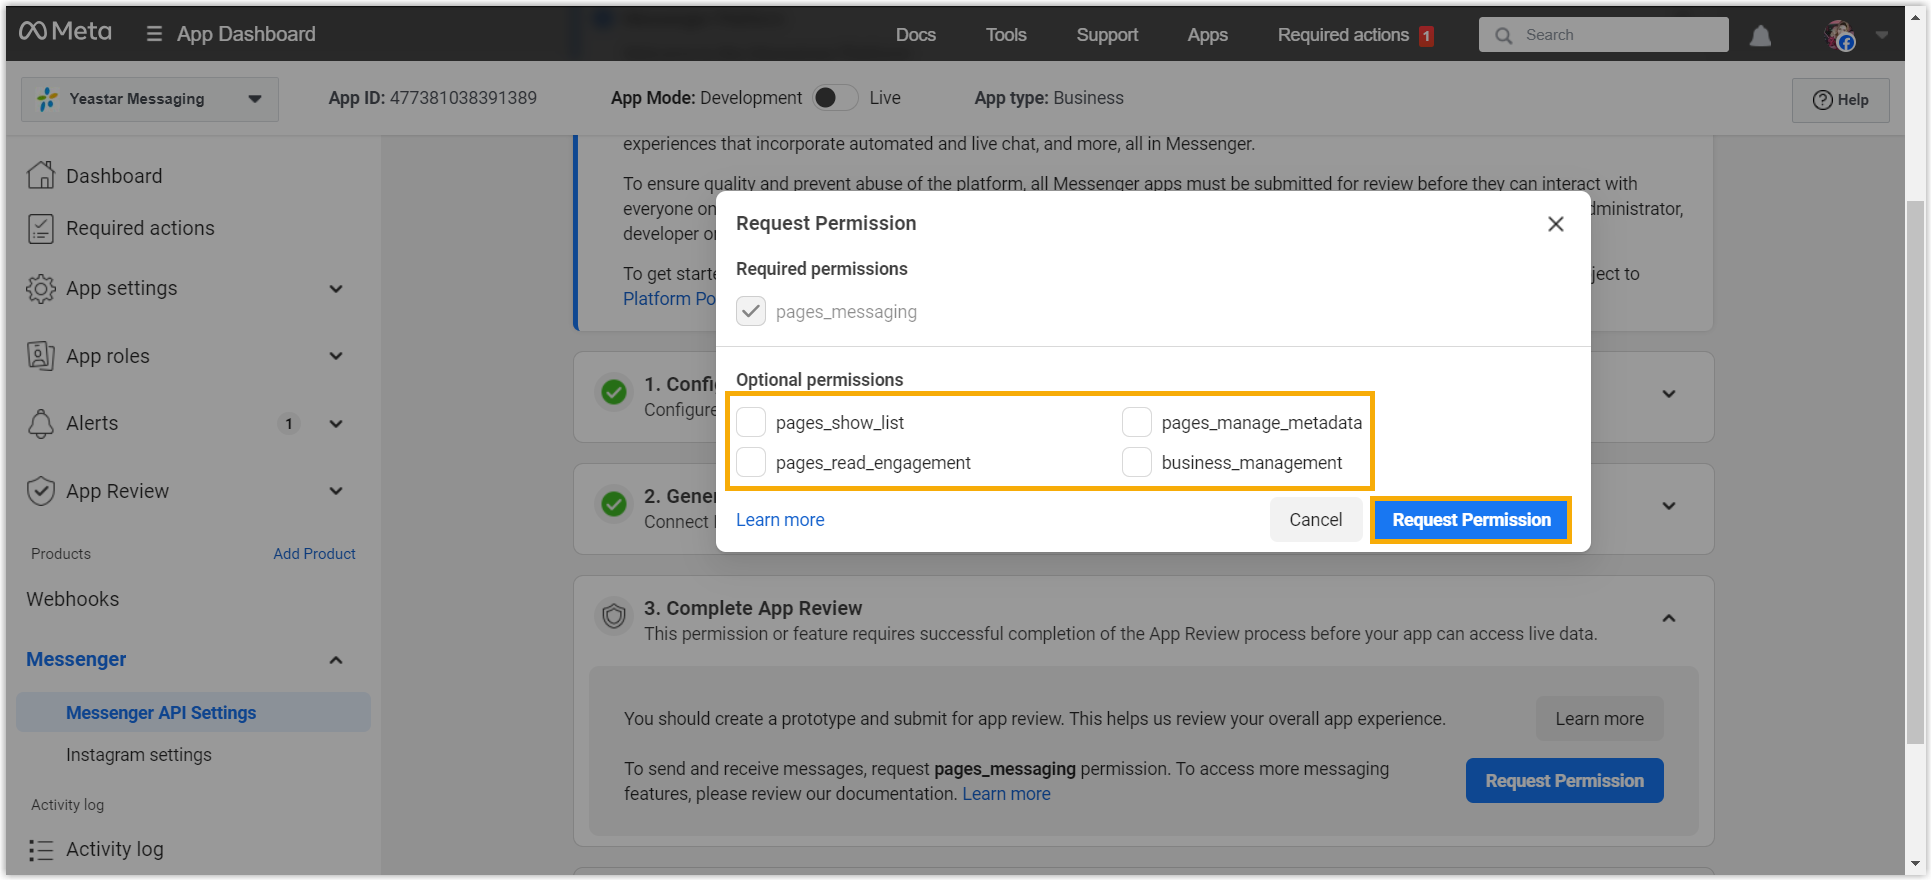
Clear the checkboxes for any permissions you do not need, then click Request Permission. Meta then takes you to App Review > Requests.
Step 4. Answer data handling questions
Section titled “Step 4. Answer data handling questions”-
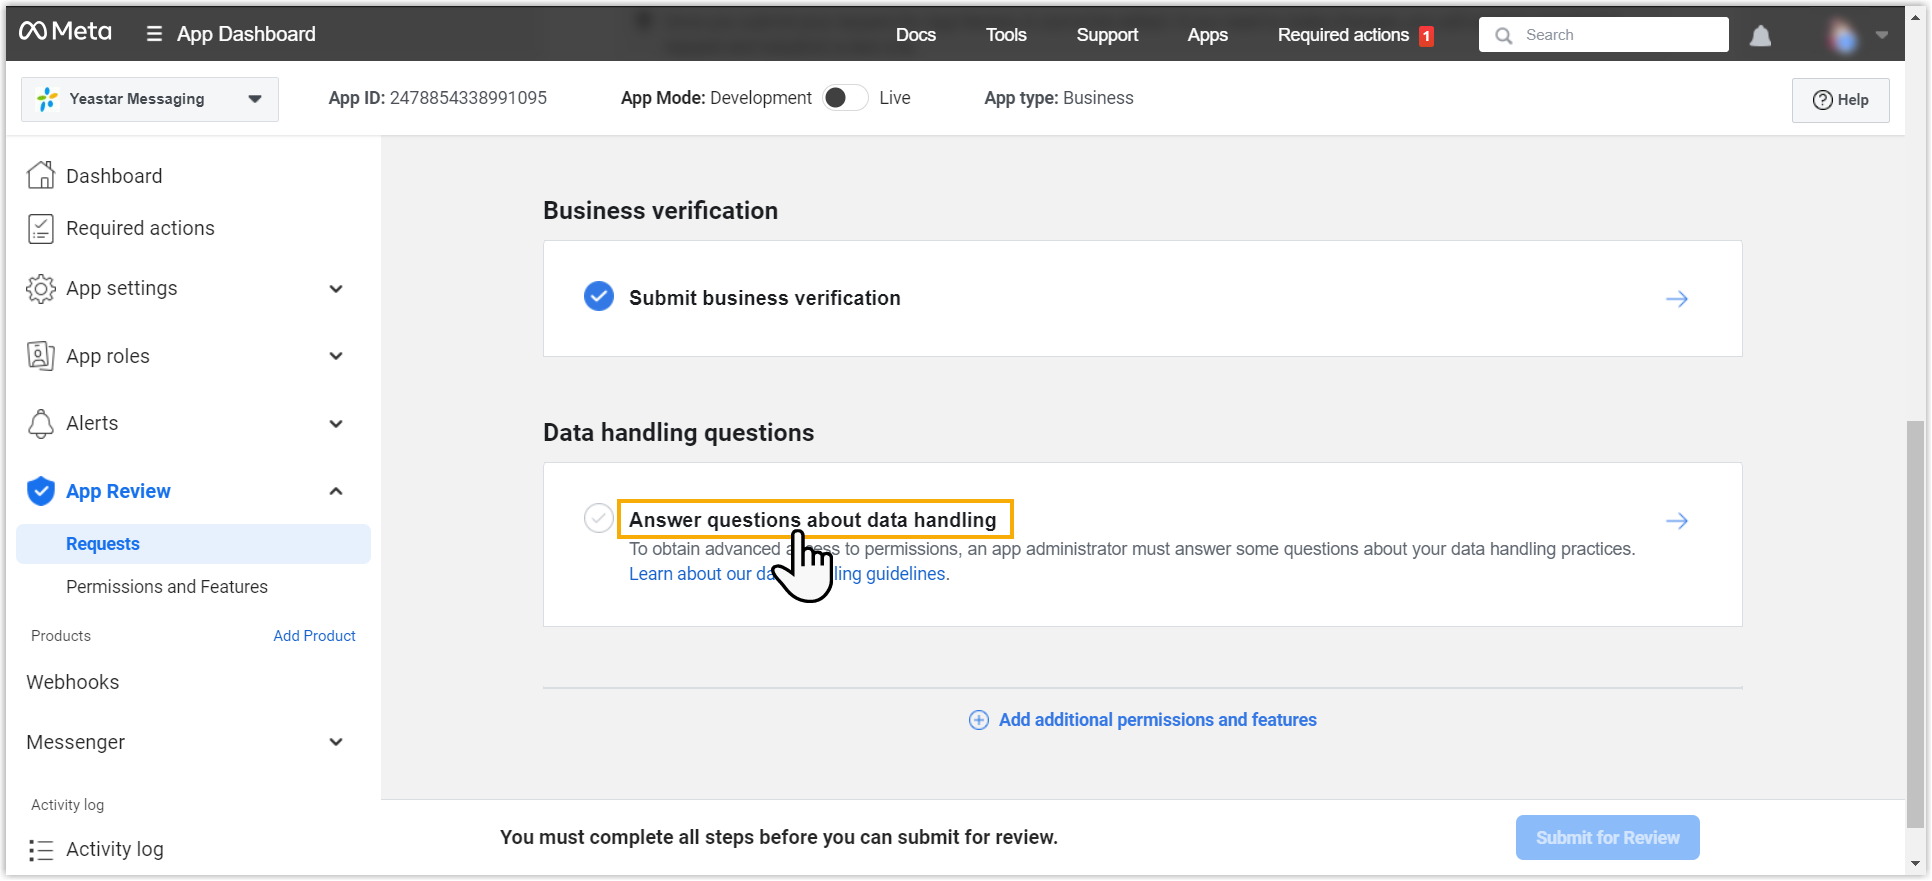
In the left navigation, go to App Review > Requests.
-
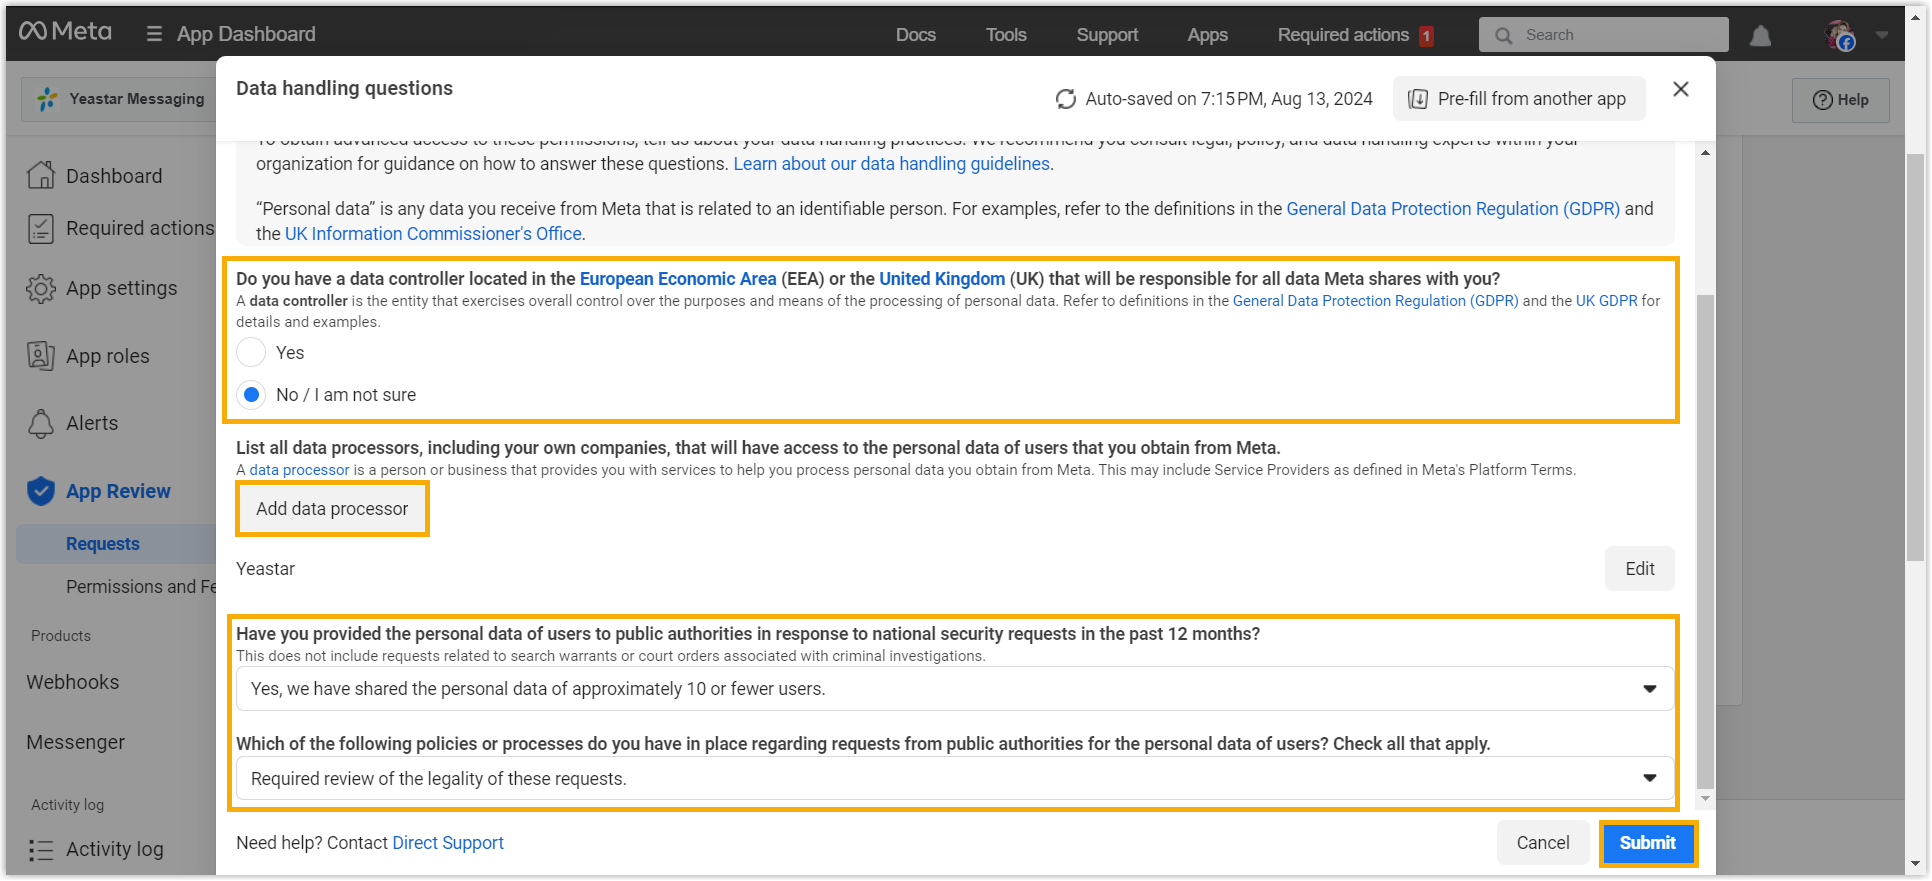
Scroll to the Data handling questions section and click Answer questions about data handling.
-
Answer the questions based on your situation, then click Submit.
-
Justify the pages_messaging permission and show how the app uses it:
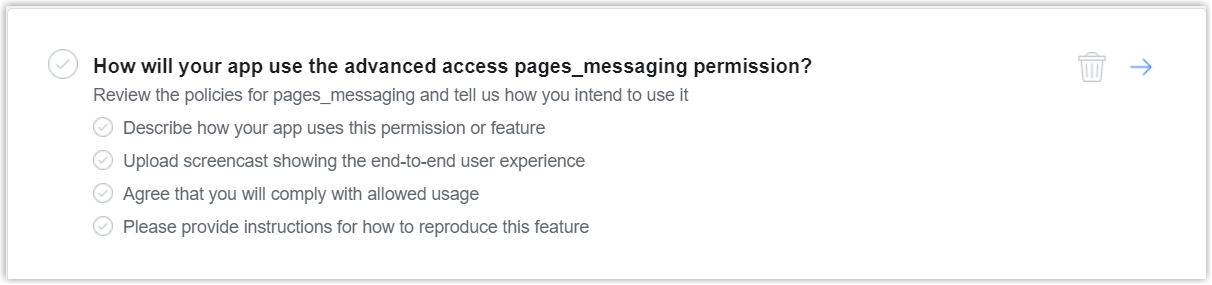
a. Click How will your app use the advanced access pages_messaging permission?.
b. Paste a description like the following into the detail box:
This app integrates Cloud Voice with Facebook Messenger. With the pages_messaging permission, agents can handle Facebook Page messages directly inside Cloud Voice.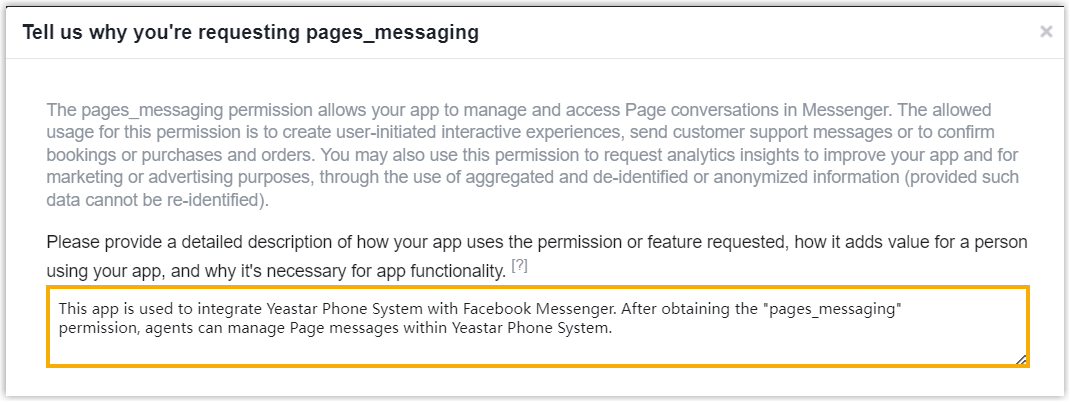
c. Under Test and reproduce the functionality of your integration, select your Facebook Page, then paste reproduction steps into the text field. Adjust the template for your own environment:
Step 1: Log in to Cloud Voice with the following credentials:Login address: {pbx_domain_name}Username: {email_address}Password: {password}Step 2: Log in to Facebook with the following credentials and send a message to the Facebook Page: {url_for_facebook_page}Email or phone: {email_address_or_phone_number}Password: {password}Step 3: Receive and reply to the message on Cloud Voice.For example:
Step 1: Log in to Cloud Voice with the following credentials:Login address: https://pbx.example.comUsername: agent@example.comPassword: rz9nDg3CrOStep 2: Log in to Facebook with the following credentials and send a message to the Facebook Page: https://www.facebook.com/profile.php?id=61563743597525Email or phone: tester@example.comPassword: YpeS345joiStep 3: Receive and reply to the message on Cloud Voice.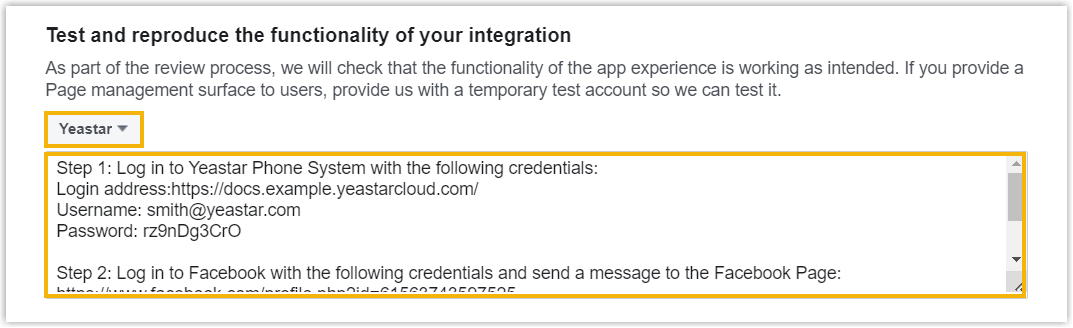
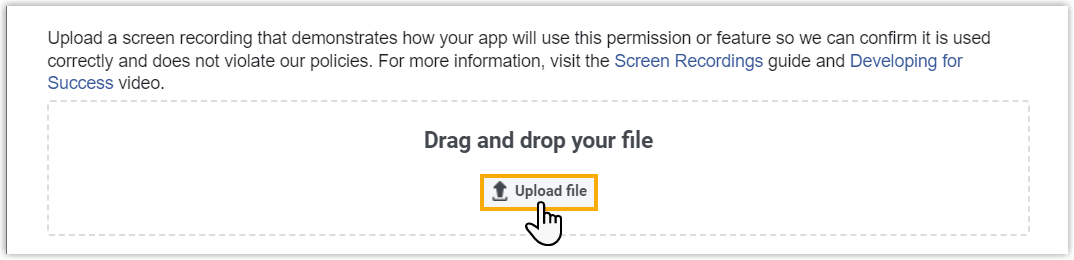
d. Click Upload file and upload the screencast that shows a message being sent to your Facebook Page and received and answered in Cloud Voice.
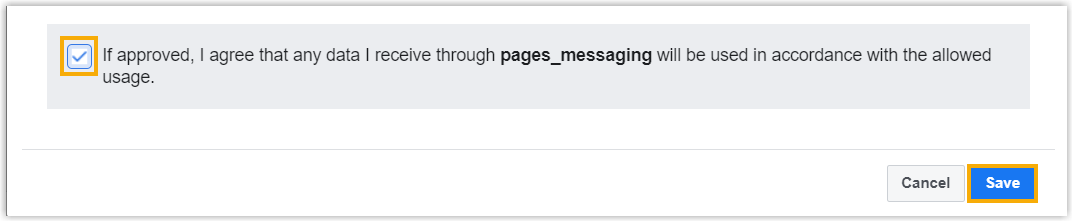
e. Select the checkbox to agree to comply with the allowed usage, then click Save.
-
Justify the Business Asset User Profile Access permission and show how the app uses it:
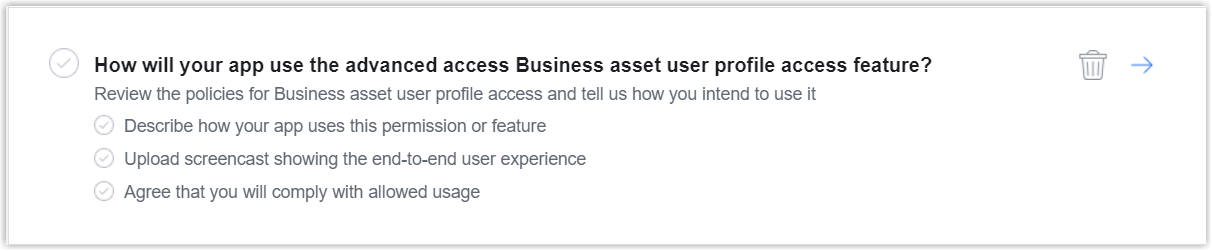
a. Click How will your app use the advanced access Business asset user profile access feature?.
b. Paste a description like the following into the detail box:
This app integrates Cloud Voice with Facebook Messenger. With the Business Asset User Profile Access permission, agents can see the names of the Facebook users who message the Page from within Cloud Voice, so they can tell customers apart and provide better service.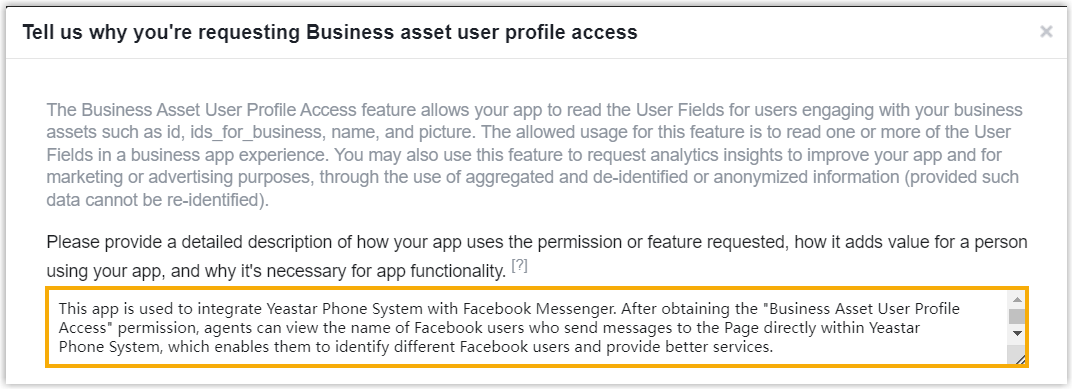
c. Click Upload file and upload the same screencast you attached for pages_messaging.
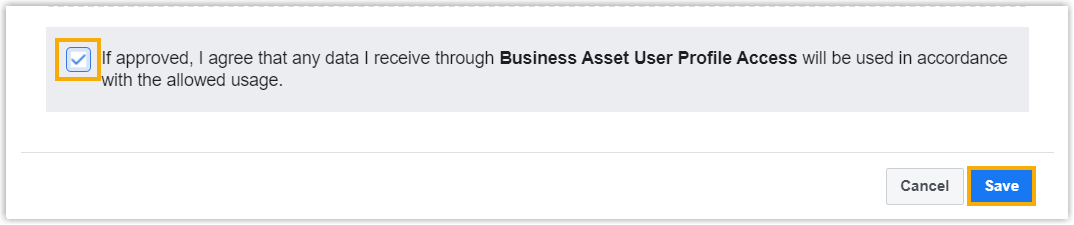
d. Select the checkbox to agree to comply with the allowed usage, then click Save.
-
Justify the Human Agent permission and show how the app uses it:
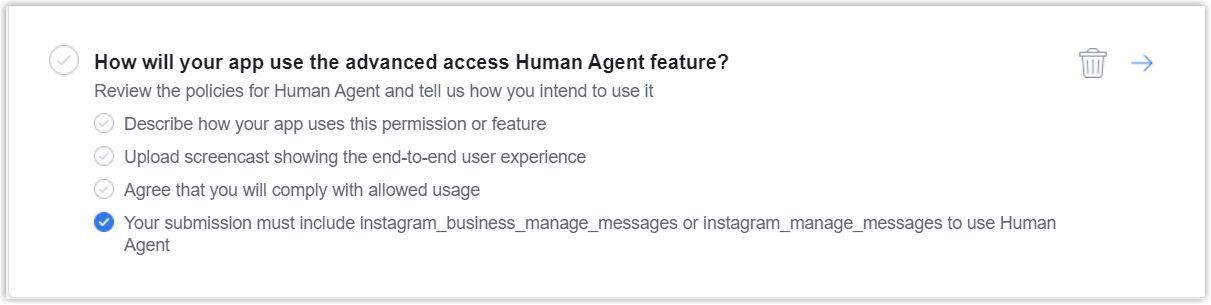
a. Click How will your app use the advanced access Human Agent feature?.
b. Paste a description like the following into the detail box:
This app integrates Cloud Voice with Facebook Messenger. Under Facebook's rules, a message tag is required to send messages outside the 24-hour standard messaging window. With the Human Agent permission, an agent can apply the human_agent tag to keep helping a customer when their inquiry cannot be resolved within that window.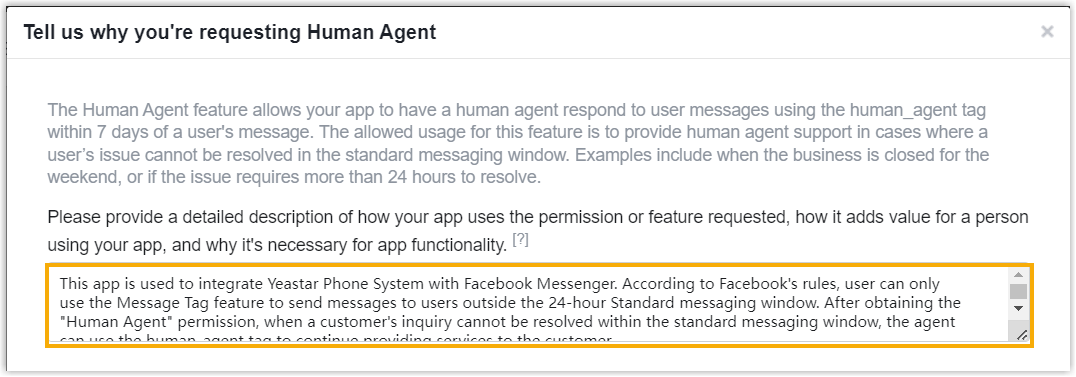
c. Click Upload file and upload the screencast that shows the app using a human agent tag to reply to customer messages.
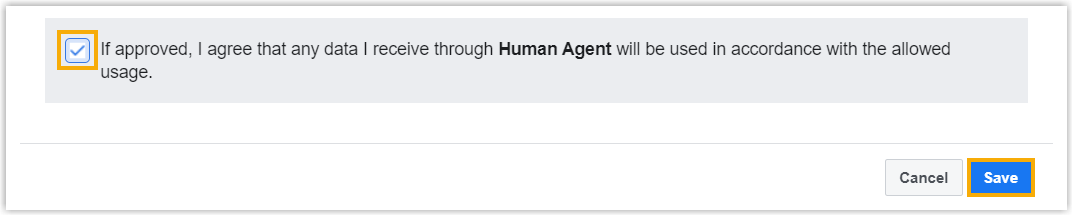
d. Select the checkbox to agree to comply with the allowed usage, then click Save.
-
At the bottom of the page, click Submit for Review and enter your password to confirm.
Result
Section titled “Result”Your submission joins Meta’s review queue. Expect the review result within a few days.
What to do next
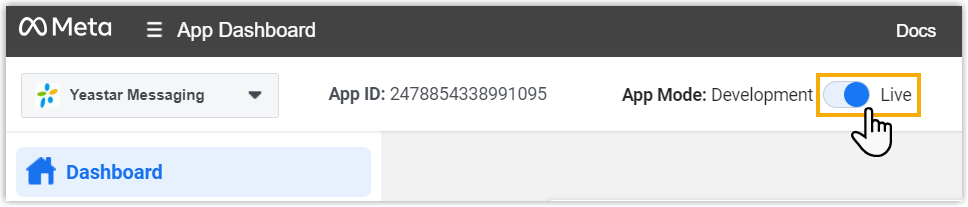
Section titled “What to do next”Once your app passes App Review, switch it to Live mode in the Meta for Developers portal so the Facebook channel works for all customers.
Question about this page?
Ask the AI assistant. It starts from this page, then searches the rest of the docs.
Ask Cloud Voice AI
Answers are AI-generated from the docs and may contain mistakes. Verify with the linked pages.