
Transfer a Call
As a queue manager, you can move a live call off the queue and onto another agent, or drop it into an extension’s voicemail when no one is available to take it. Both actions are performed from the Queue Panel in the Cloud Voice App.
Before you begin
Section titled “Before you begin”Transferring calls on behalf of queue members requires the Call distribution management (Redirect, Transfer, Drag and Drop operation) permission. Your system administrator assigns this permission; if the transfer controls are unavailable, ask them to grant it.
Send a call to an agent
Section titled “Send a call to an agent”-
Open the Cloud Voice App (Web or Desktop) and go to Call Center Console > Queue Panel.
-
In the Active Calls panel, move your pointer over the call you want to move.
-
Hand the call to an extension user using either method below.
Drag and drop
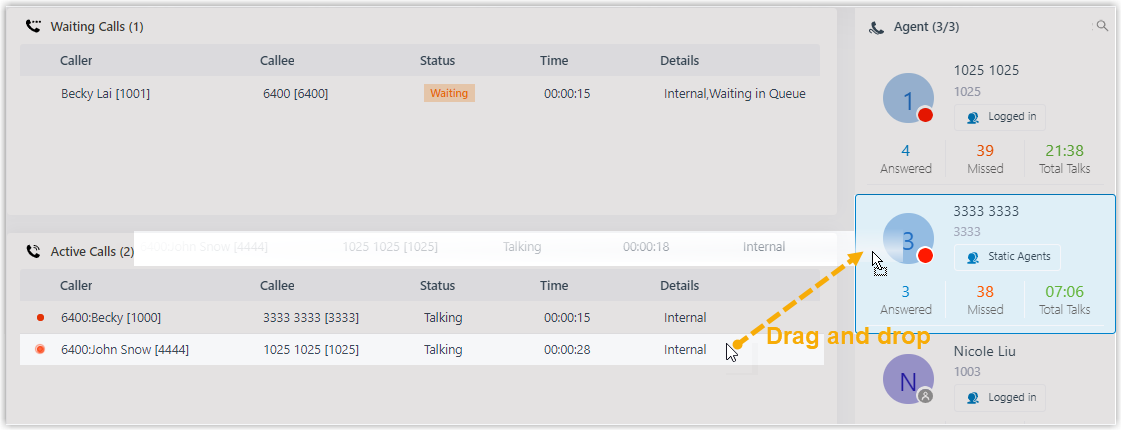
Drag the call from the Active Calls panel and release it on the target extension in the Agents panel. That agent’s phone begins ringing.
Right-click transfer
Right-click the call and choose Transfer. In the window that opens, type the destination extension number and click the transfer icon
 . The call is routed to that agent, whose phone starts ringing.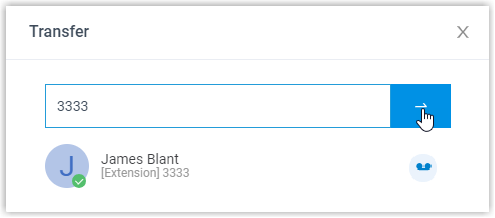
Send a call to an extension’s voicemail
Section titled “Send a call to an extension’s voicemail”When you want the caller to leave a message rather than wait for an agent, route the call straight to a mailbox.
-
Open the Cloud Voice App (Web or Desktop) and go to Call Center Console > Queue Panel.
-
In the Active Calls panel, move your pointer over the call.
-
Right-click the call and choose Transfer.
-
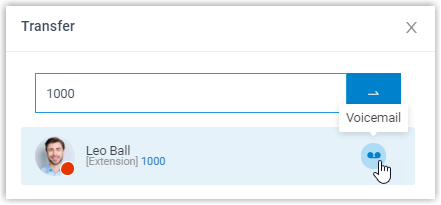
In the window that opens, type an extension number to find the user.
-
In the search results, click the voicemail icon
 next to that user.
The call is delivered to the extension’s voicemail, where the caller can record a message for that user.
Question about this page?
Ask the AI assistant. It starts from this page, then searches the rest of the docs.
Ask Cloud Voice AI
Answers are AI-generated from the docs and may contain mistakes. Verify with the linked pages.