
Check and Manage Call Logs
Your call history lives on the Call Logs page of the Cloud Voice App. From there you can review the calls you have placed, answered, or missed, narrow the list with filters, and act on individual entries. This page walks through both viewing and managing your personal call logs on the desktop client.
Open your call logs
Section titled “Open your call logs”On the Cloud Voice App desktop client, go to Call Logs. Every call tied to your extension appears in the list.
Filter the list
Section titled “Filter the list”Two independent filters help you find a specific call.
By communication type. Open the drop-down beside the  icon and pick a type to show only those calls.
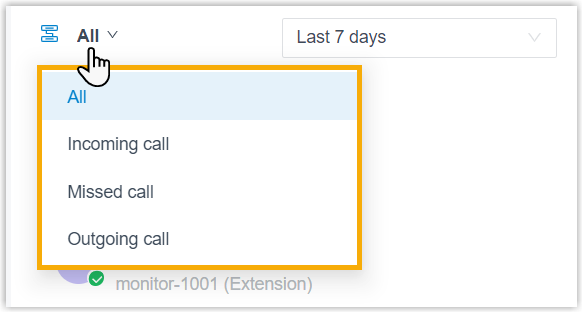
By detail. You can also filter by time range, disposition code, name, number, remark, or AI summary.
- A disposition code is a short label that records how a call was handled (for example, a follow-up needed or a sale closed).
- An AI summary is a recap of the conversation generated automatically from the call.

Manage individual call logs
Section titled “Manage individual call logs”Most actions appear when you hover over a call log entry. The sections below cover each one.
Refresh the list
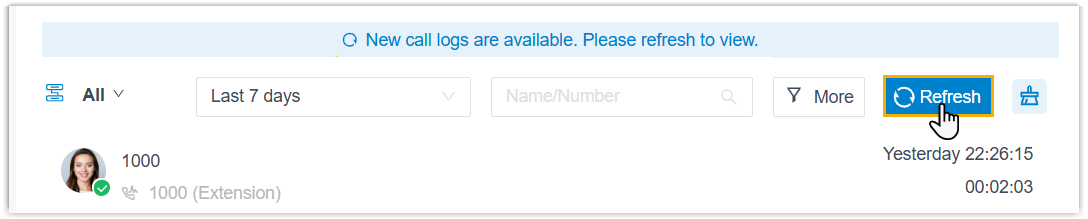
Section titled “Refresh the list”If new calls come in while you are on the Call Logs page, a banner appears at the top. Click Refresh to pull the new entries into the list.
View or edit a call note
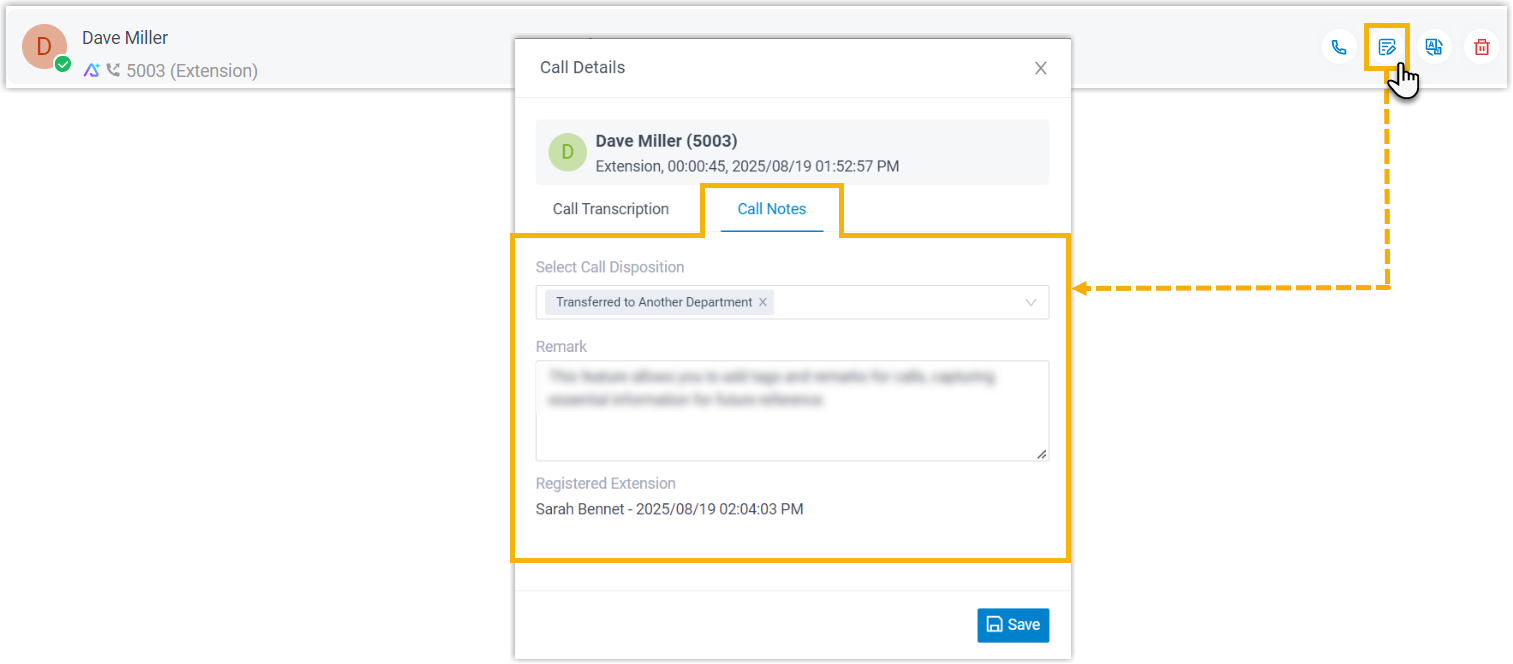
Section titled “View or edit a call note”A call note is your own text reminder attached to a specific call. To review or change a note you have added:
- Hover over the call log, then click the
 note icon.
 - Edit the text in the pop-up window, then click Save.
View or edit a call transcription
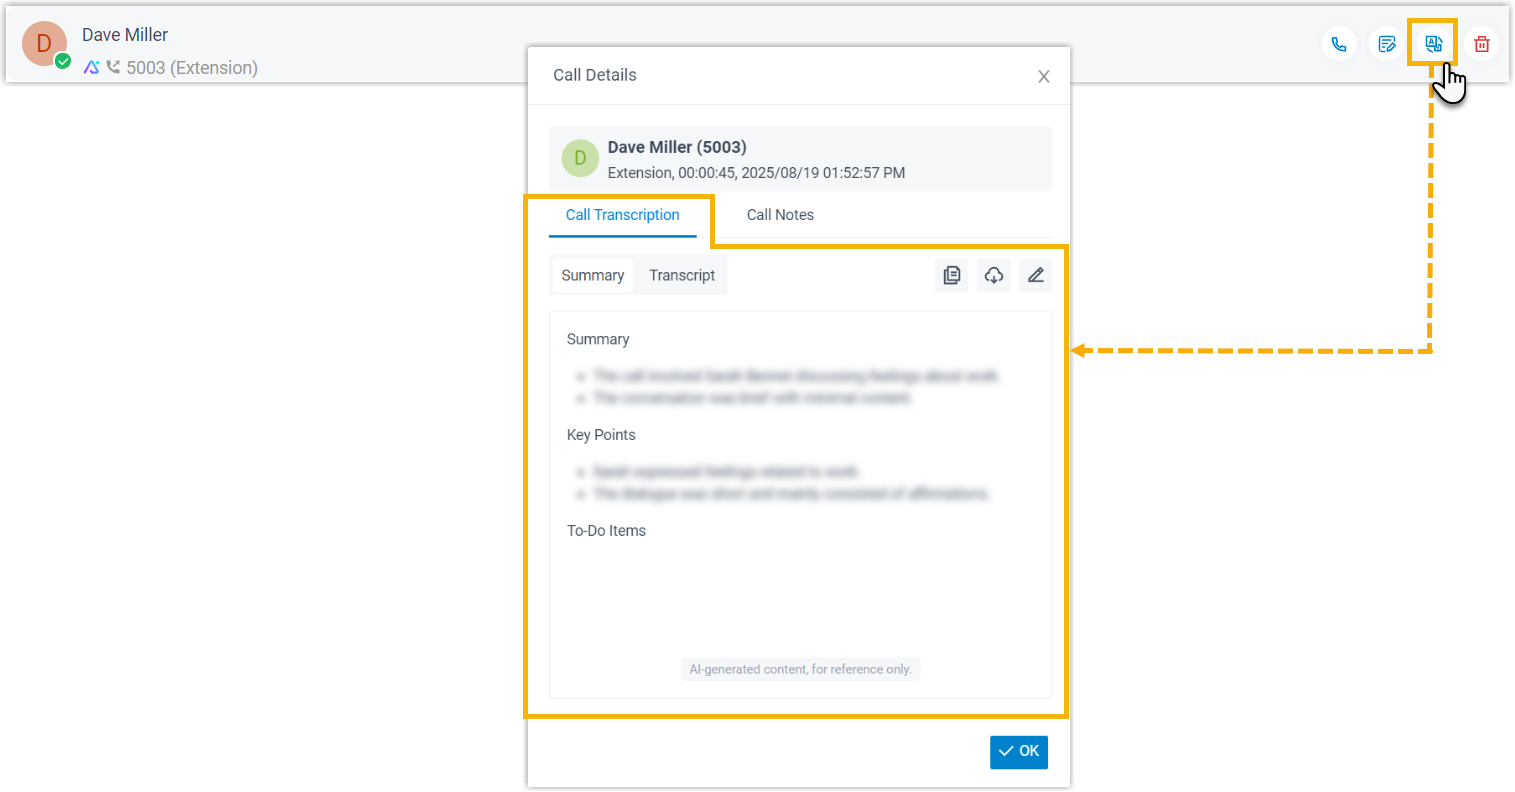
Section titled “View or edit a call transcription”A transcription is the written text of what was said on the call, and the summary is a short recap of it. To open both for a call:
- Hover over the call log, then click the
 transcription icon.
 - In the pop-up window, review or adjust the Transcript and Summary. From here you can also:
- Edit the summary by clicking the
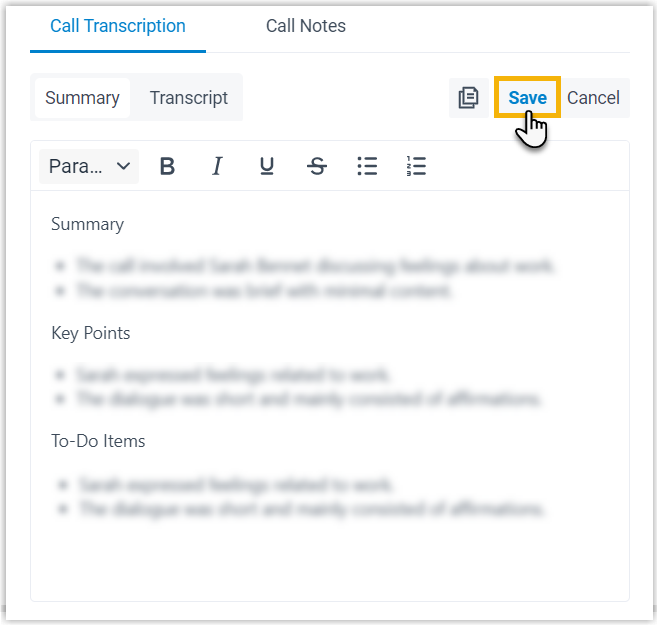
 edit icon in the Summary section, then clicking Save in the top-right corner.
 - Copy the summary with the
 copy icon in the Summary section.
 - Search within the transcript using the
 search icon in the Transcript section.
 - Download the summary or transcript with the
 download icon, then choosing a file type.
- Edit the summary by clicking the
- Click OK to close the pop-up window.
Editing the summary and saving your changes:
Follow up by email
Section titled “Follow up by email”To forward the details of a call to one or more email addresses, hover over the call log and click the  email icon. The Cloud Voice App opens your configured email client and starts a new message pre-filled with the call details, ready to send.

Place a call
Section titled “Place a call”You can dial straight from a call log entry in either of these ways:
- Double-click the entry.
- Hover over the entry, then click the
 call icon.

Delete one call log
Section titled “Delete one call log”To remove a single entry:
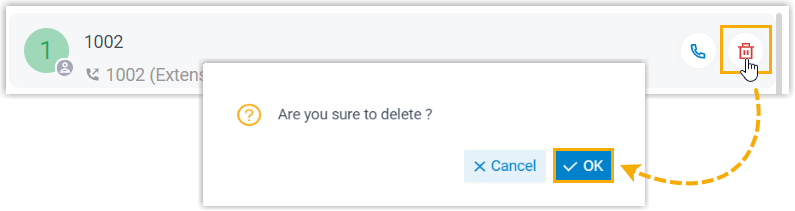
- Hover over the call log, then click the
 delete icon.
 - Click OK in the confirmation window.
Clear all call logs
Section titled “Clear all call logs”To wipe your entire personal call history:
- Click the
 clear-all icon in the top-right corner.
 - Click OK in the confirmation window.
Question about this page?
Ask the AI assistant. It starts from this page, then searches the rest of the docs.
Ask Cloud Voice AI
Answers are AI-generated from the docs and may contain mistakes. Verify with the linked pages.