
Set Up Outlook as an Email Server
Cloud Voice can route its email through your organization’s Microsoft 365 account instead of a generic mail relay. Rather than storing a mailbox password, the connection relies on modern (OAuth) authentication: you register an application in Microsoft Entra ID, hand its credentials to Cloud Voice, and grant consent once. After that, Cloud Voice sends notifications, voicemail-to-email, faxes, and other messages as your Microsoft account.
The setup has three parts: copy a redirect URI (the web address Microsoft returns to after sign-in) out of Cloud Voice, register an Entra ID application that trusts it, then paste the application’s credentials back into Cloud Voice and authorize the connection.
Requirements
Section titled “Requirements”| Platform | Requirement |
|---|---|
| Cloud Voice | Firmware 84.14.0.24 or later; Enterprise (EP) or Ultimate (UP) plan. |
| Microsoft 365 | A Microsoft account with the Global Administrator role and a Microsoft 365 Business Standard license, plus modern authentication enabled in the Microsoft 365 admin center. |
Step 1. Copy the redirect URI from Cloud Voice
Section titled “Step 1. Copy the redirect URI from Cloud Voice”Cloud Voice generates a redirect URI that Microsoft Entra ID needs to trust. Grab it first so you can paste it during registration.
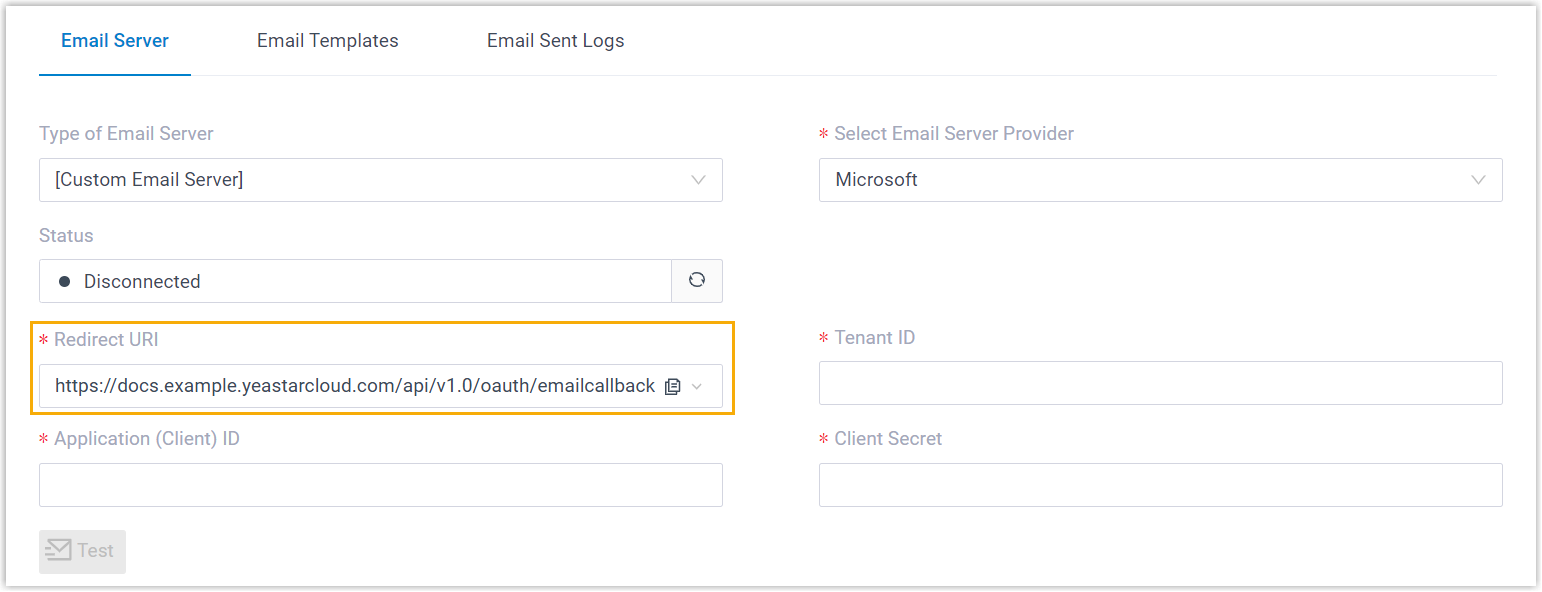
- Sign in to the Cloud Voice admin portal and go to System > Email > Email Server.
- Set Type of Email Server to Custom Email Server.
- Set Select Email Server Provider to Microsoft.
- In the Redirect URI field, select and copy the URI you want to use.
Step 2. Register an application in Microsoft Entra ID
Section titled “Step 2. Register an application in Microsoft Entra ID”Create an Entra ID application that trusts the redirect URI from Step 1, then collect the three credentials Cloud Voice will need: the tenant ID, the client ID, and a client secret.
-
Sign in to the Microsoft Azure portal with your Global Administrator account.
-
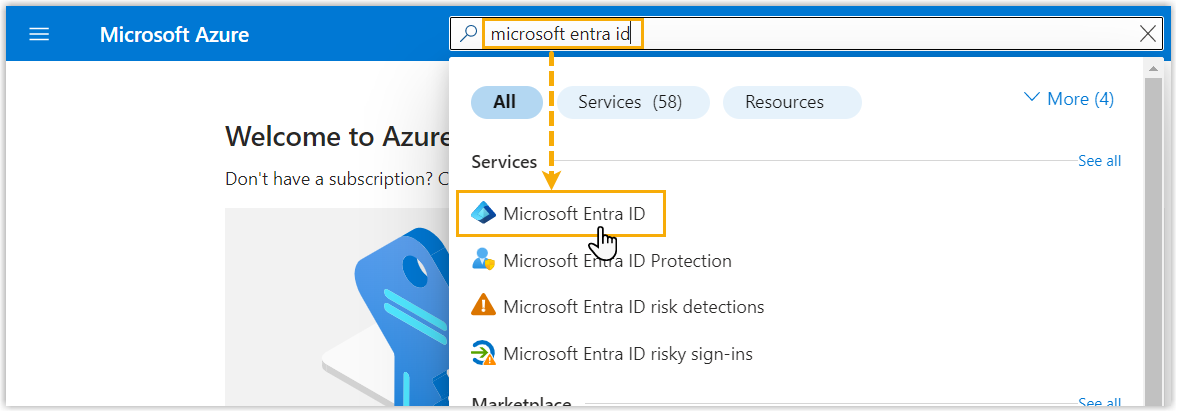
Search for and open the Microsoft Entra ID service to reach your organization’s directory.
-
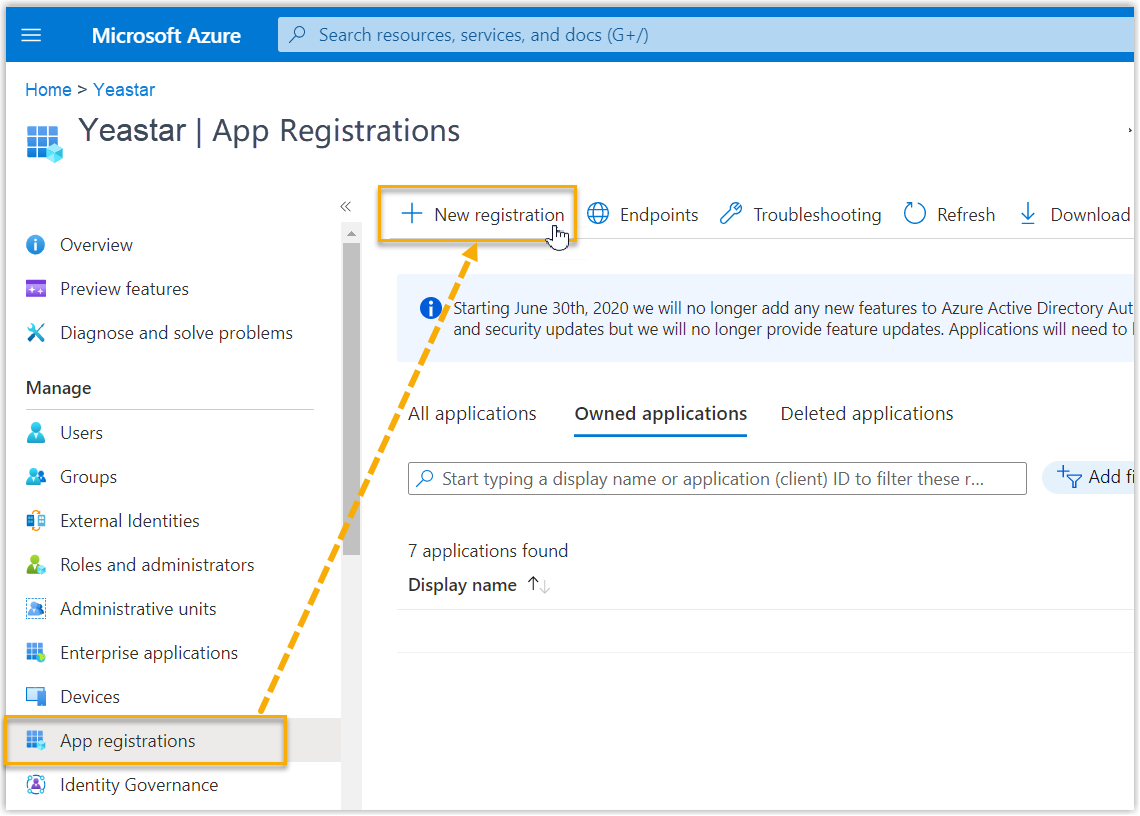
In the directory’s left navigation, open App registrations and click New registration.
-
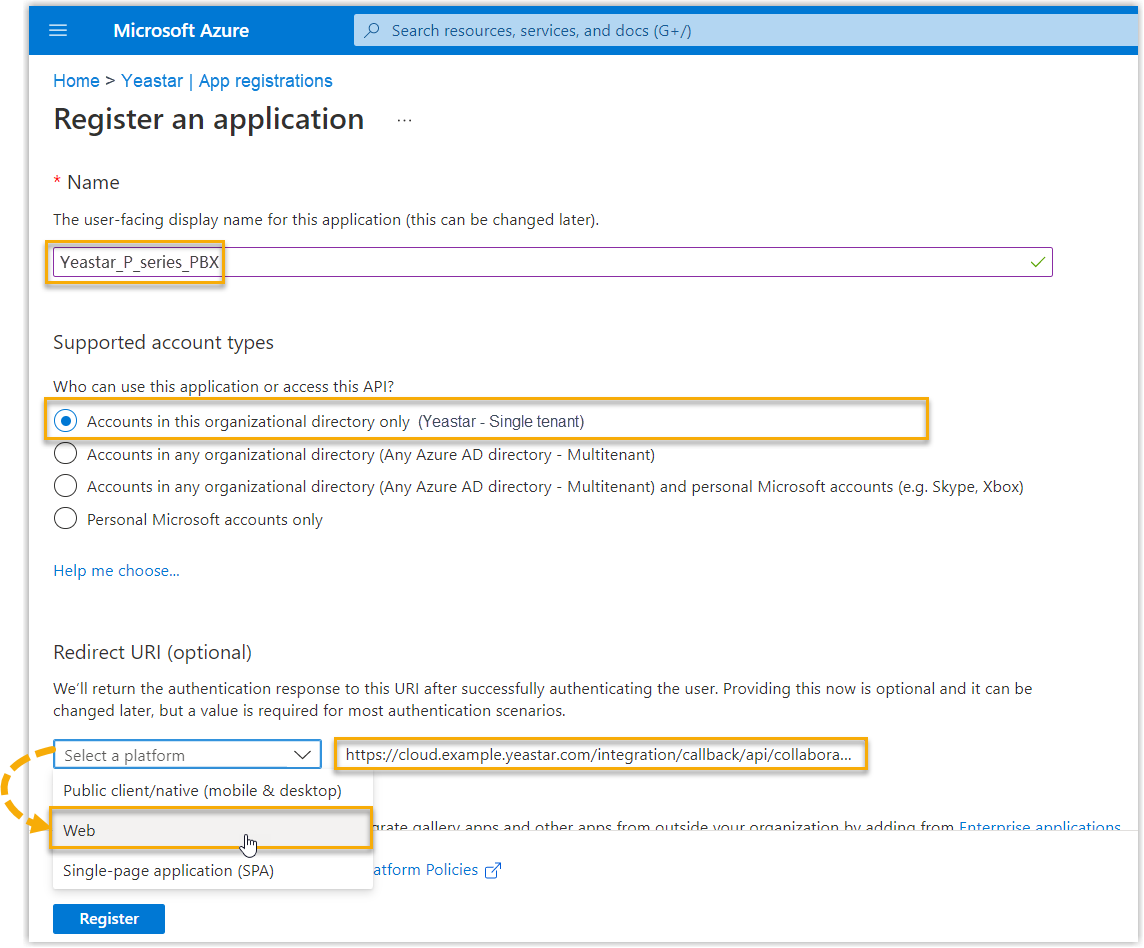
On the Register an application page, fill in the registration details and click Register:
- Name: a label that helps you recognize the application later.
- Supported account types: choose Accounts in this organizational directory only.
- Redirect URI: set the platform to Web, then paste the redirect URI you copied in Step 1.
When registration succeeds, you land on the application’s Overview page.
-
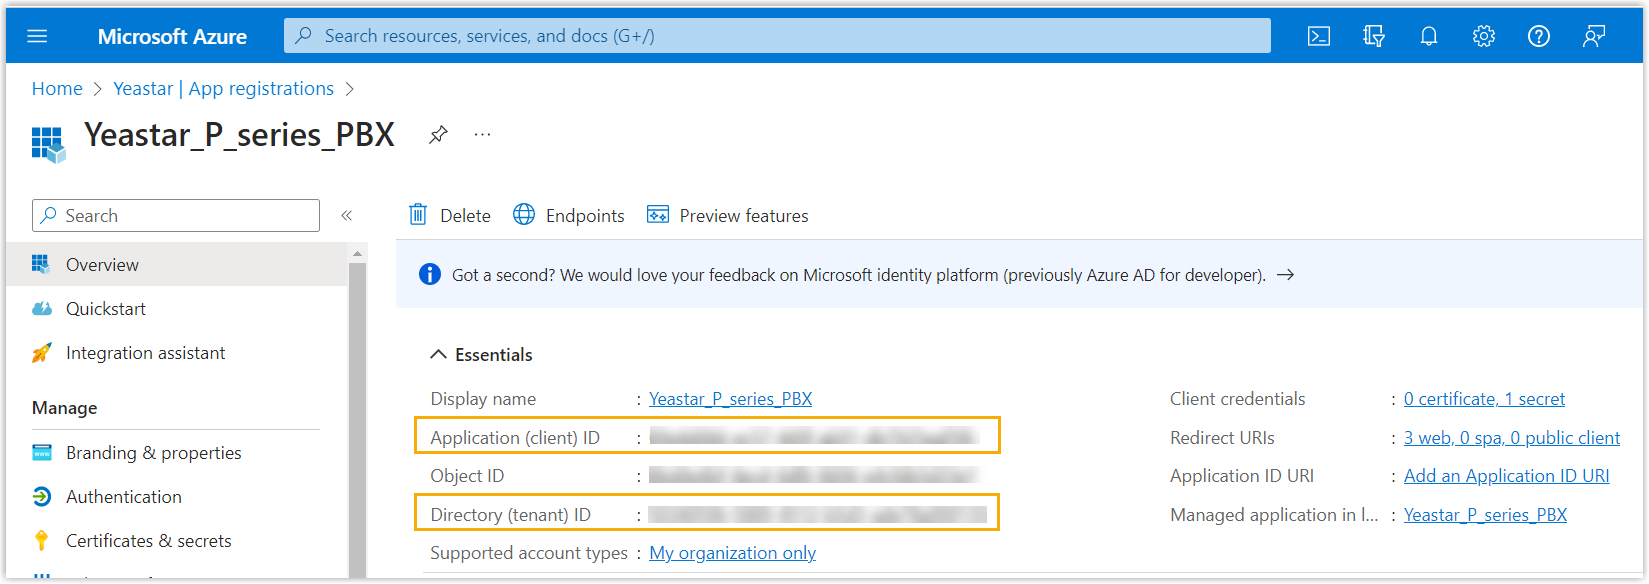
On the Overview page, note the Application (client) ID and Directory (tenant) ID: you’ll enter both into Cloud Voice.
-
Create a client secret for the application:
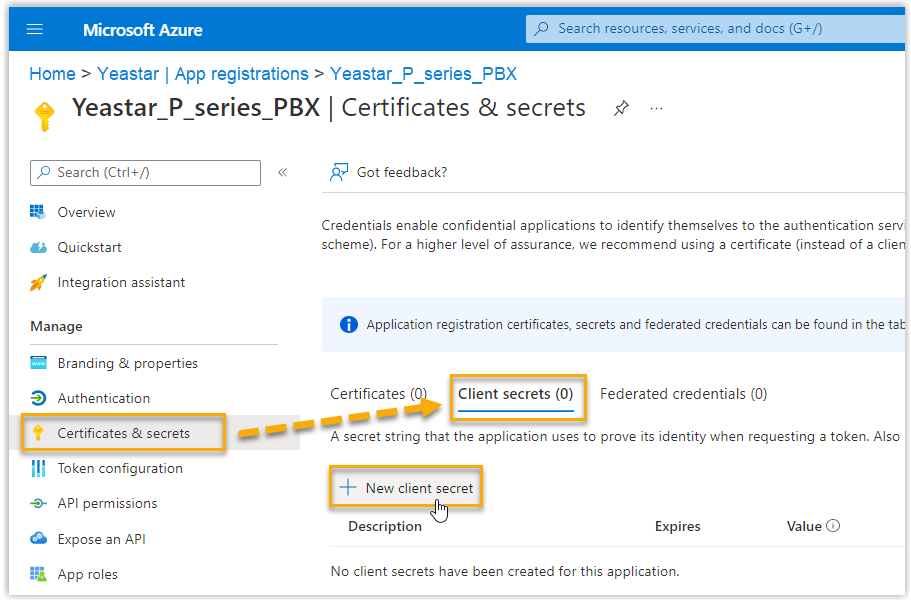
a. In the application’s left navigation, go to Certificates & secrets > Client secrets and click New client secret.
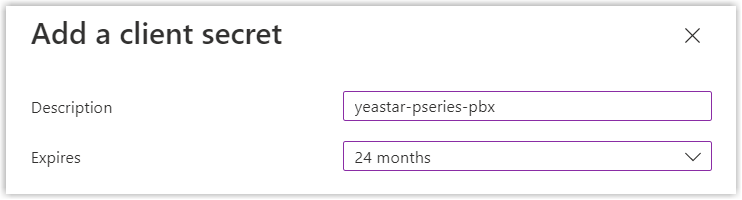
b. Add a description, set an expiration date, and click Add. The new secret appears in the Client secrets list.
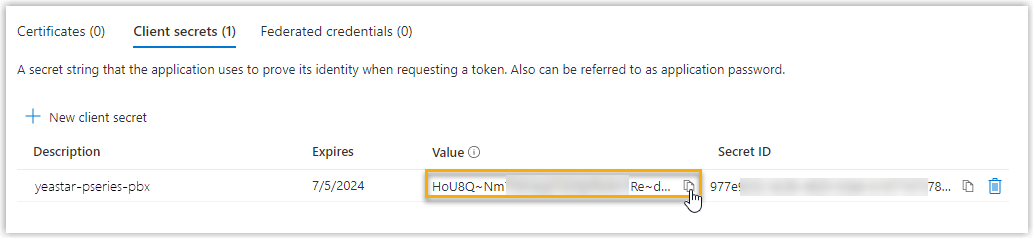
c. Copy the secret’s Value and store it somewhere safe.
Step 3. Configure SMTP on Cloud Voice
Section titled “Step 3. Configure SMTP on Cloud Voice”Enter the Entra ID credentials in Cloud Voice, then complete a one-time Microsoft sign-in to authorize the connection.
-
In the Cloud Voice admin portal, go to System > Email > Email Server.
-
Set Type of Email Server to Custom Email Server.
-
Set Select Email Server Provider to Microsoft.
-
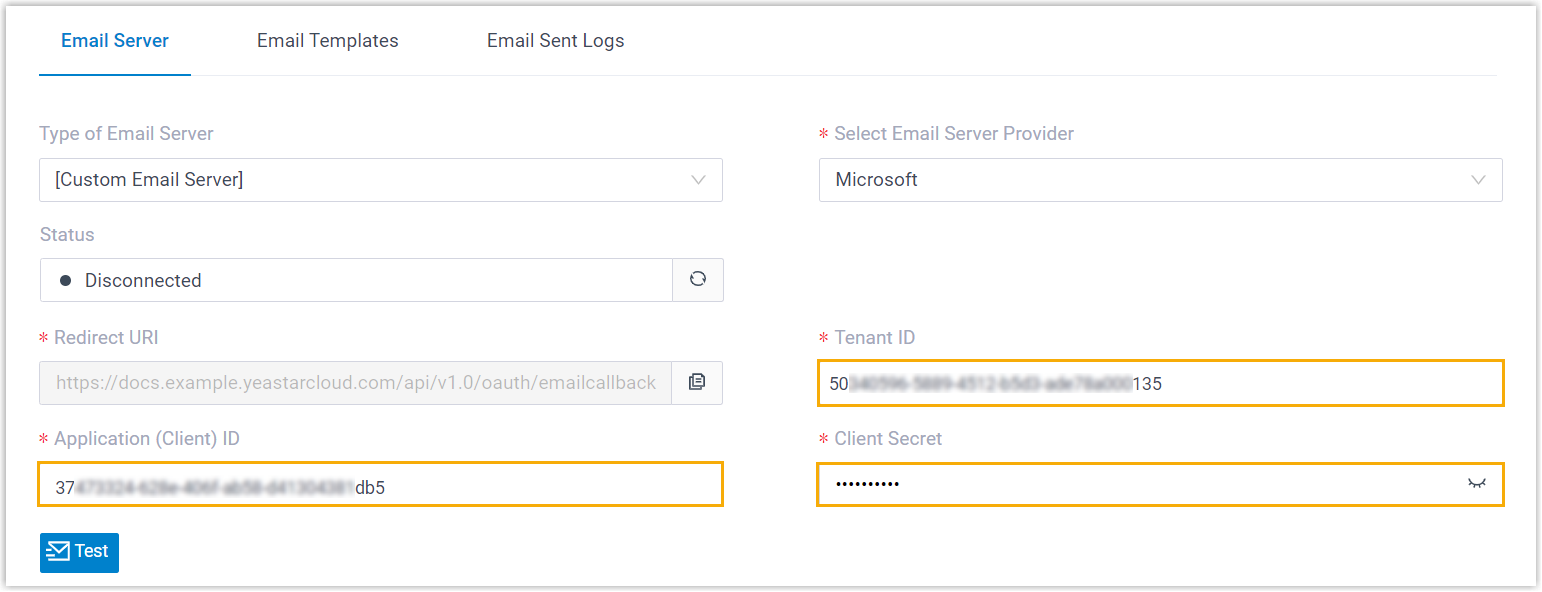
Enter the credentials you collected from the Entra ID application:
- Tenant ID: the application’s Directory (tenant) ID.
- Application (Client) ID: the application’s client ID.
- Client Secret: the secret value you copied.
-
Click Save. Cloud Voice redirects you to the Microsoft sign-in page.
-
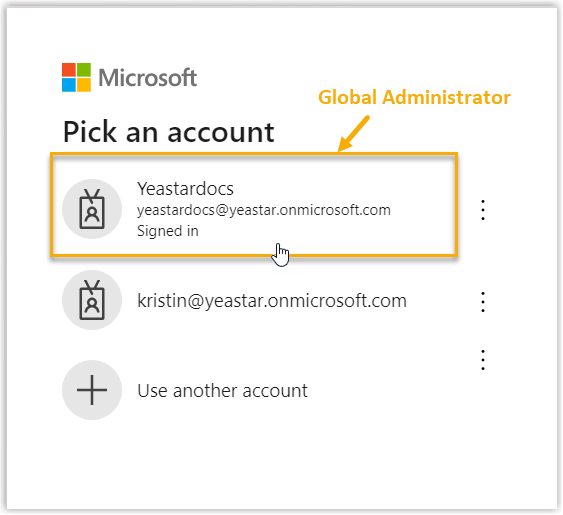
Sign in with the Microsoft account that holds the Global Administrator role.
-
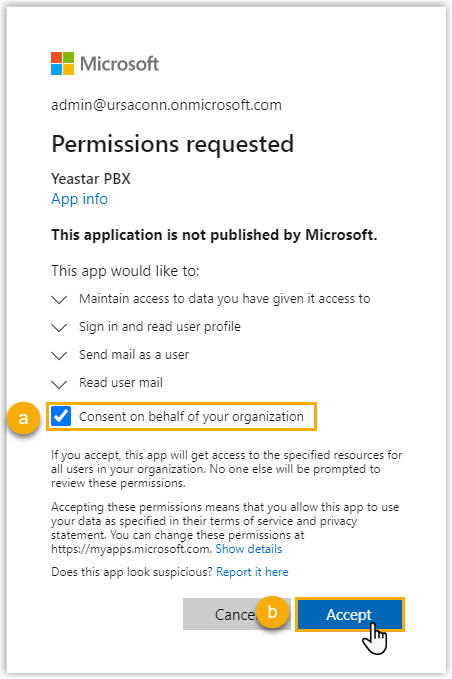
In the consent window, select Consent on behalf of your organization, then click Accept.
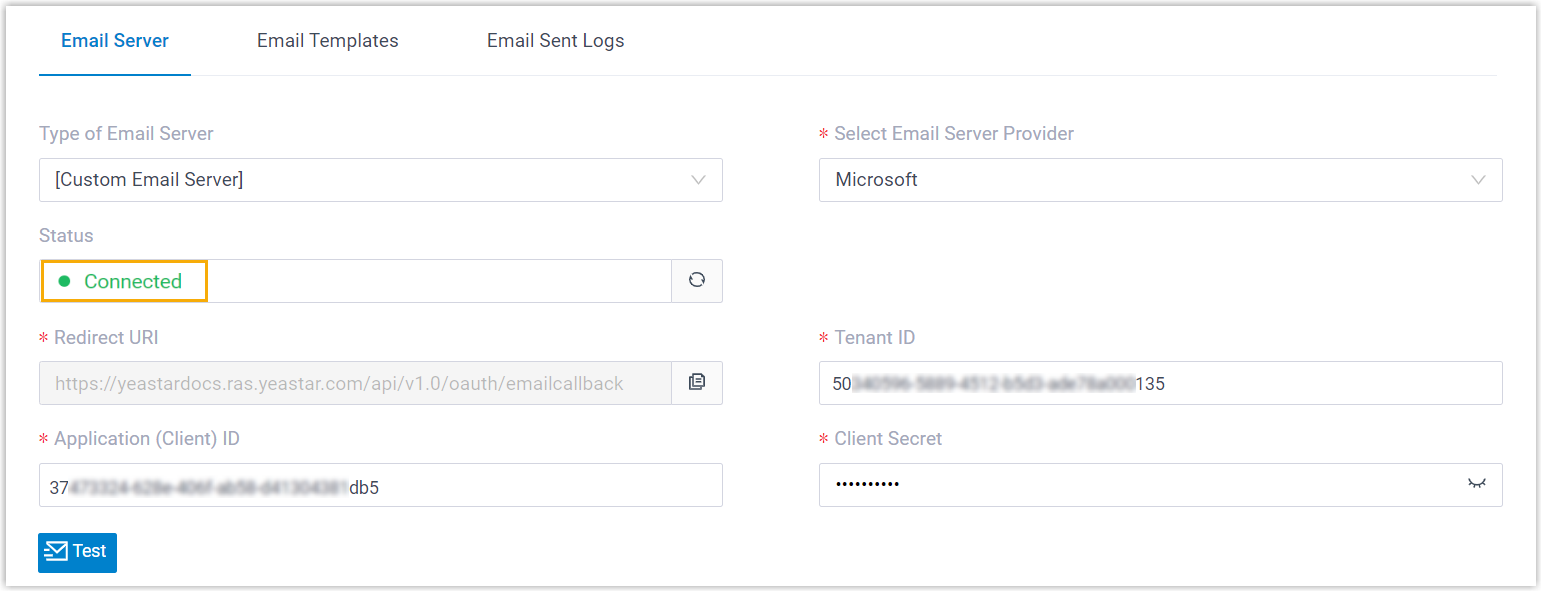
Back on the Cloud Voice page, the Status field changes to Connected, confirming that authentication succeeded and Outlook is now the email server.
-
Send a test message to confirm the server works:
a. Click Test.
b. In the pop-up, enter a recipient’s address in the Email Address field and click Test.
Result
Section titled “Result”When the test succeeds, the page shows Success and the recipient receives the message. The sender name and address match the Microsoft account’s display name and user principal name, for example, admin <admin@yourcompany.onmicrosoft.com>.
To change the sender name on outgoing mail, update the display name on the Microsoft account.

Question about this page?
Ask the AI assistant. It starts from this page, then searches the rest of the docs.
Ask Cloud Voice AI
Answers are AI-generated from the docs and may contain mistakes. Verify with the linked pages.