
Create a Custom Auto Provisioning Template
A custom Auto Provisioning template lets you shape how a group of devices, or a single device, is configured, starting from one of the system’s default templates. Use one when the default settings need adjusting, or when you need parameters the default template doesn’t include. Once saved, a custom template can be applied wherever the matching phones are provisioned.
Types of custom template
Section titled “Types of custom template”Cloud Voice offers three kinds of custom template, depending on how far you need to go:
-
Basic: Adjust the settings that a default template already exposes.
-
Advanced: Adjust the default template’s settings and append extra parameters for the phones you’re targeting.
-
Custom Phone Model: Upload configuration files for a model from a supported manufacturer that the system doesn’t yet recognize. See Upload a Template for a Custom Phone Model for that workflow.
The rest of this page covers the Basic and Advanced templates.
Create a basic template
Section titled “Create a basic template”Choose a basic template when everything you want to change is already available in a default provisioning template.
-
Sign in to the PBX (Private Branch Exchange, your phone system) web portal and go to Auto Provisioning > Resource Repository > Custom Templates.
-
Click Add.
-
In the Basic section, fill in the template’s identifying details:
- Template Name: A name you’ll recognize later.
- Source Default Template: The default provisioning template you want to base this one on.
- Template Type: Select Basic. The settings carried over from the source template appear in the Preference, Distinctive Ringtone, Codecs, and LDAP Directory sections below.
- Remark: Optional. A short note describing the template.
-
In the Preference section, change any of the preference settings inherited from the source template.
-
In the Distinctive Ringtone section, adjust the ringtone settings as needed.
-
In the Codecs section, pick the codec (coder-decoder, the format used to compress call audio) you want the devices to use.
-
In the LDAP Directory section, update the directory settings as needed. LDAP (Lightweight Directory Access Protocol) lets the phones look up a shared company phonebook.
-
In the VLAN section, set the VLAN (Virtual Local Area Network) options as needed.
-
Click Save.
Create an advanced template
Section titled “Create an advanced template”Choose an advanced template when the settings you need to push to your devices aren’t part of any default provisioning template.
-
Sign in to the PBX web portal and go to Auto Provisioning > Resource Repository > Custom Templates.
-
Click Add.
-
In the Basic section, fill in the template’s identifying details:
- Template Name: A name you’ll recognize later.
- Source Default Template: The default template you want to base this one on.
- Template Type: Select Advanced. The inherited settings appear in the Preference, Distinctive Ringtone, Codecs, and LDAP Directory sections, and a Customize Configuration Parameters In Text section appears containing every configuration parameter in editable text.
- Remark: Optional. A short note describing the template.
-
In the Preference section, change any of the preference settings inherited from the source template.
-
In the Distinctive Ringtone section, adjust the ringtone settings as needed.
-
In the Codecs section, pick the codec you want the devices to use.
-
In the LDAP Directory section, update the directory settings as needed.
-
In the VLAN section, set the VLAN options as needed.
-
Add the extra parameters that the source default template doesn’t provide.
-
In the first text box of the Customize Configuration Parameters In Text section, enter your configuration parameters.
-
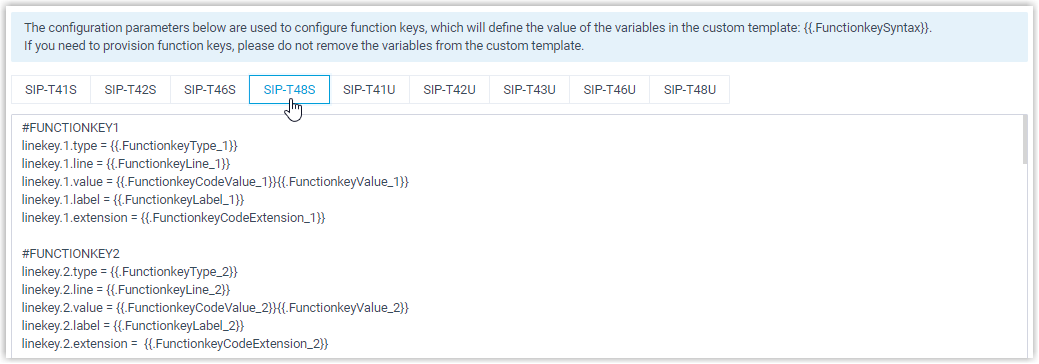
In the second text box, choose which function keys to apply for the phone model. You can also add your own function key parameters here.
-
-
Click Save.
Question about this page?
Ask the AI assistant. It starts from this page, then searches the rest of the docs.
Ask Cloud Voice AI
Answers are AI-generated from the docs and may contain mistakes. Verify with the linked pages.