
Convert Audio Files
Any recording you plan to upload as a music-on-hold track or a custom prompt has to be in a format that Cloud Voice accepts. When an existing file doesn’t match those specifications, run it through an audio editor to re-encode it first. This page walks through two ways to do that: a browser-based converter and the WavePad desktop application.
Convert audio files online
Section titled “Convert audio files online”If you’d rather not install anything, the G711 File Converter handles the job entirely in your browser.
-
Open g711.org.
-
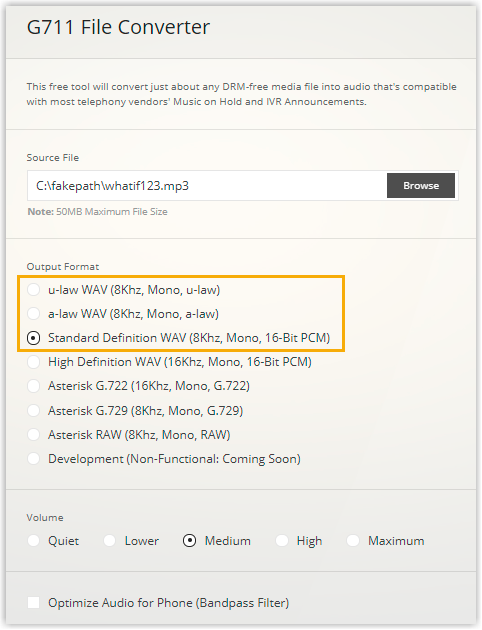
Click Browse and select the audio file you want to convert.
-
Choose an Output Format.
-
Click Submit to convert the file.
Convert audio files via WavePad
Section titled “Convert audio files via WavePad”WavePad is a desktop editor you install locally. Download it from the WavePad site, then follow these steps.
-
Start WavePad and open the file you want to convert.
-
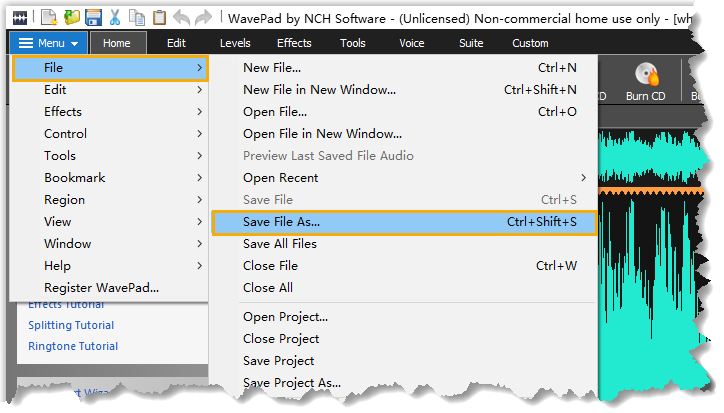
Go to File > Save File As.
-
In the Save as type list, choose
Wave(*.wav),MPEG Layer-3(*.mp3), orGSM(*.gsm), then click Save.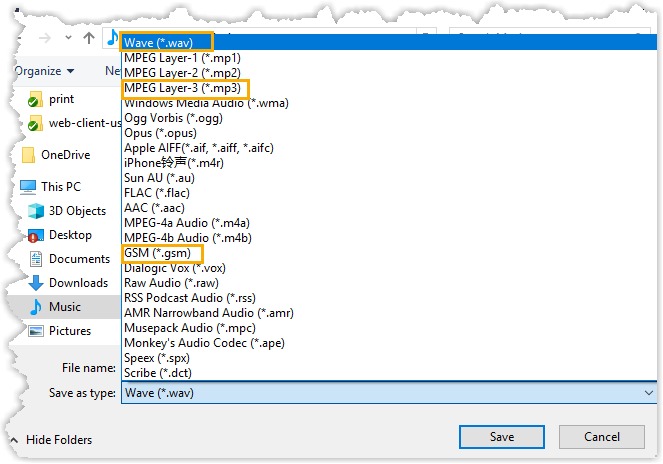
-
When you save as
Wave(*.wav)orMPEG Layer-3(*.mp3), set the encoder options and click OK.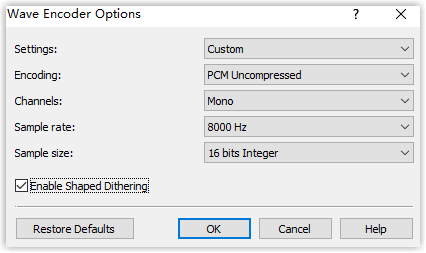
Question about this page?
Ask the AI assistant. It starts from this page, then searches the rest of the docs.
Ask Cloud Voice AI
Answers are AI-generated from the docs and may contain mistakes. Verify with the linked pages.