
Add Allowed Client Public IP Addresses
When your office network reaches the internet through more than one public IP address, you can tell the phone system which of those addresses are legitimate for staff connecting with the Cloud Voice App (web and desktop). Registering them keeps the system from being surprised when a client’s apparent source address changes mid-connection, which is a common cause of failed calls and one-way audio (where one person can hear the other but not the reverse).
Before you begin
Section titled “Before you begin”Your system must be running firmware version 84.22.0.17 or later.
Add the IP addresses
Section titled “Add the IP addresses”-
Sign in to the phone system web portal and open Security > Security Settings > Security Options.
-
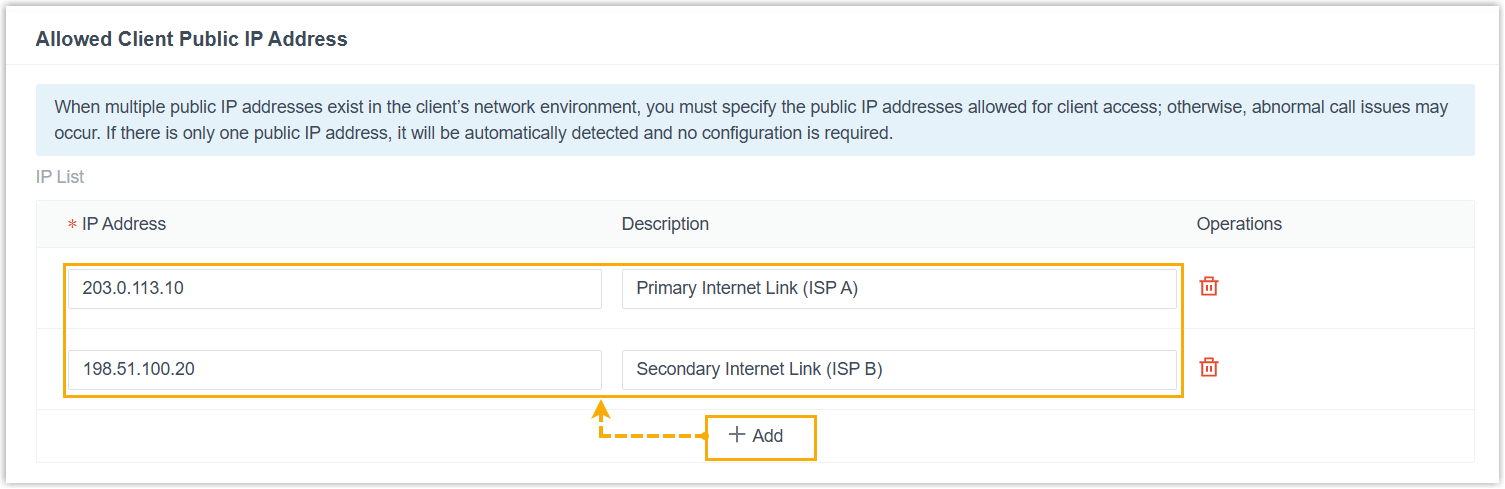
Scroll to the Allowed Client Public IP Address section.
-
Add each address you want to trust: a. Select Add. b. Type the public IP address, and optionally add a description so you can recognize it later. c. Repeat these two steps for every additional address.
-
Select Save.
What happens next
Section titled “What happens next”Once saved, Cloud Voice App web and desktop clients on your network include every address you listed when they set up a call (in the connection signaling). The phone system then accepts the call’s audio (the media stream) arriving from any of those addresses.
Question about this page?
Ask the AI assistant. It starts from this page, then searches the rest of the docs.
Ask Cloud Voice AI
Answers are AI-generated from the docs and may contain mistakes. Verify with the linked pages.