
Manage Call Recording Files
Cloud Voice keeps every call recording in one place so you can review calls whenever you need to. From the web portal of your PBX (Private Branch Exchange, the phone system that routes your calls) you can find specific recordings, play them back, save copies, and clear out files you no longer need. Every task below starts from the same place: Reports and Recordings > Recording Files.
Find recordings
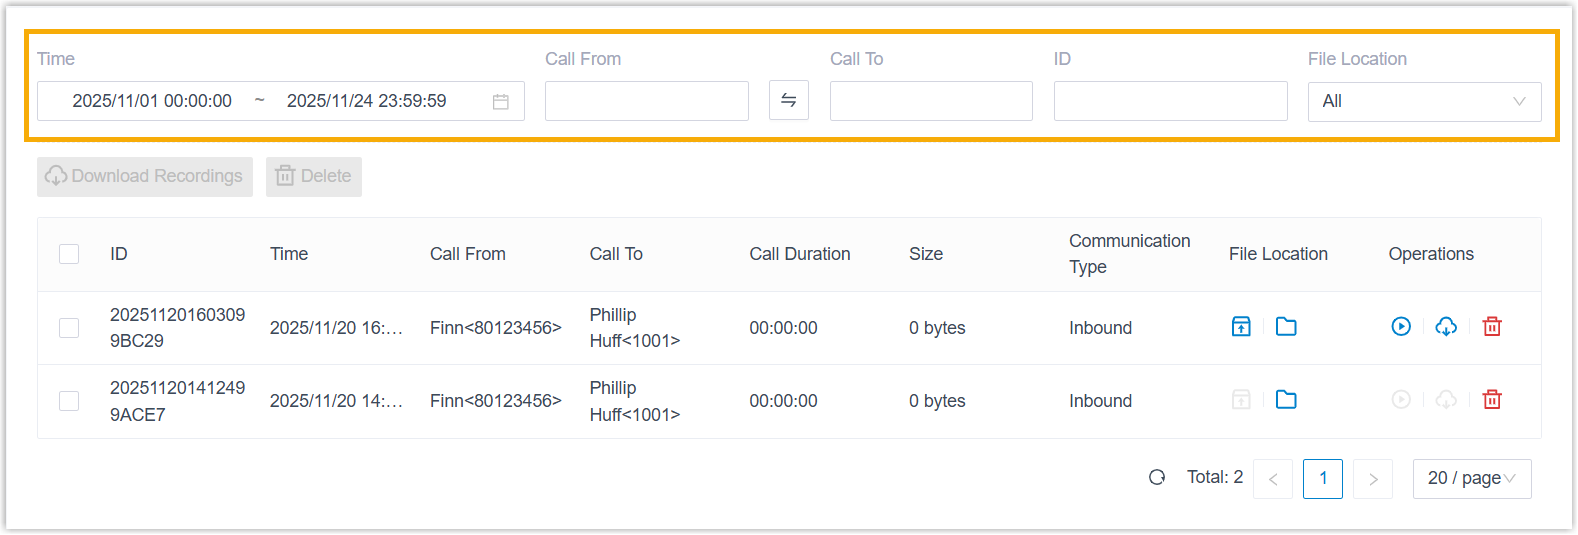
Section titled “Find recordings”Use search when you need to pull up a specific call, for example to review a support conversation or settle a billing dispute. You can narrow the recording list by call time, the numbers on either end of the call, the recording’s ID, or where the file is stored.
-
Sign in to the PBX web portal and go to Reports and Recordings > Recording Files.
-
Fill in any of the following search fields:
Field What to enter Time A start date and an end date. To pin the search to a precise window, click Select Time and set a start time and an end time. Call From The caller’s number or name. Call To The callee’s number or name. To swap the caller and callee, click the switch button  .
.ID The unique identifier of the recording file. File Location The storage location where the recording is kept. The list updates to show the recordings that match.
Play recordings
Section titled “Play recordings”-
Go to Reports and Recordings > Recording Files.
-
Optionally, set the search fields to filter down to the recordings you want.
-
Click the play button
 next to the recording you want to hear, then choose how to listen:
- Play on Web: Click
.png) to stream the recording directly in your browser.
to stream the recording directly in your browser. - Play to Extension: Play the recording through a desk phone. a. Pick an extension and click Play. The system rings that extension. b. Answer the call to hear the recording on the phone.
- Play on Web: Click
Download recordings
Section titled “Download recordings”You can save recordings to your own computer or push copies to an external server such as an FTP (File Transfer Protocol) server, an SFTP (SSH File Transfer Protocol, the secure version) server, S3-compatible object storage, Google Cloud Storage, or Microsoft SharePoint. Sending recordings to an external server is configured separately; see Cloud Voice Remote Archiving Overview. The steps below cover downloading to your own computer.
-
Go to Reports and Recordings > Recording Files.
-
Optionally, set the search fields to filter down to the recordings you want.
-
Download one recording or several at once:
-
One recording: Click the download button
 next to the file.
-
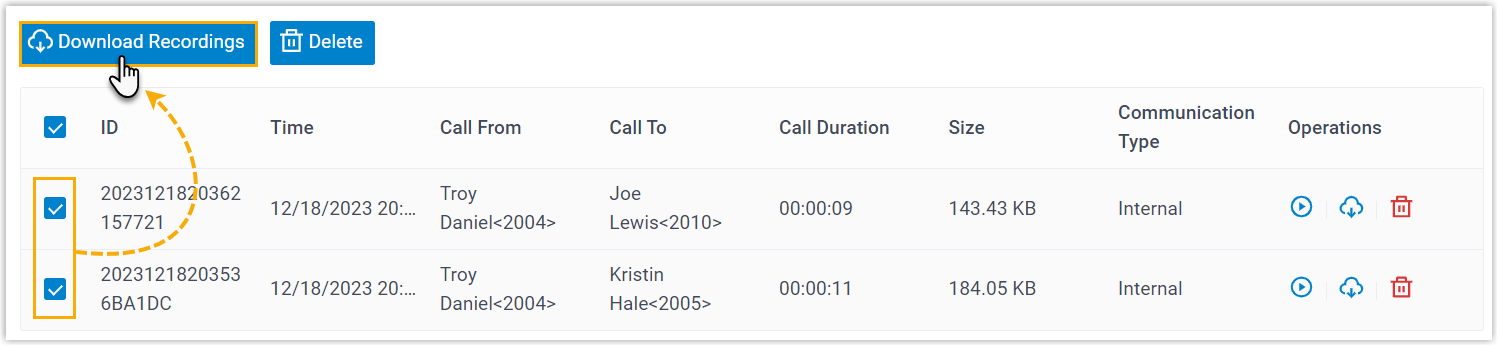
Multiple recordings: Select the checkbox beside each recording you want, then click Download Recordings.
-
Delete recordings
Section titled “Delete recordings”-
Go to Reports and Recordings > Recording Files.
-
Optionally, set the search fields to filter down to the recordings you want.
-
Remove one recording or clear several at once:
- One recording: Select the recording, click the delete button
 , then confirm with OK.
 - Multiple recordings: Select the checkbox beside each recording you want to remove, click Delete, then confirm with OK.
- One recording: Select the recording, click the delete button
Question about this page?
Ask the AI assistant. It starts from this page, then searches the rest of the docs.
Ask Cloud Voice AI
Answers are AI-generated from the docs and may contain mistakes. Verify with the linked pages.