
Check out
When a guest is ready to leave, the front desk can check them out directly from the Room Panel. Cloud Voice supports checking out one room at a time or clearing an entire tour group in a single operation. Both flows let you add any final charges and produce an invoice you can hand to the guest.
Check out an individual guest
Section titled “Check out an individual guest”-
Sign in to the Cloud Voice App (Desktop or Web) and open Hotel Management > Room Panel.
-
Find the checked-in room and click the check-out icon
 in its bottom-right corner.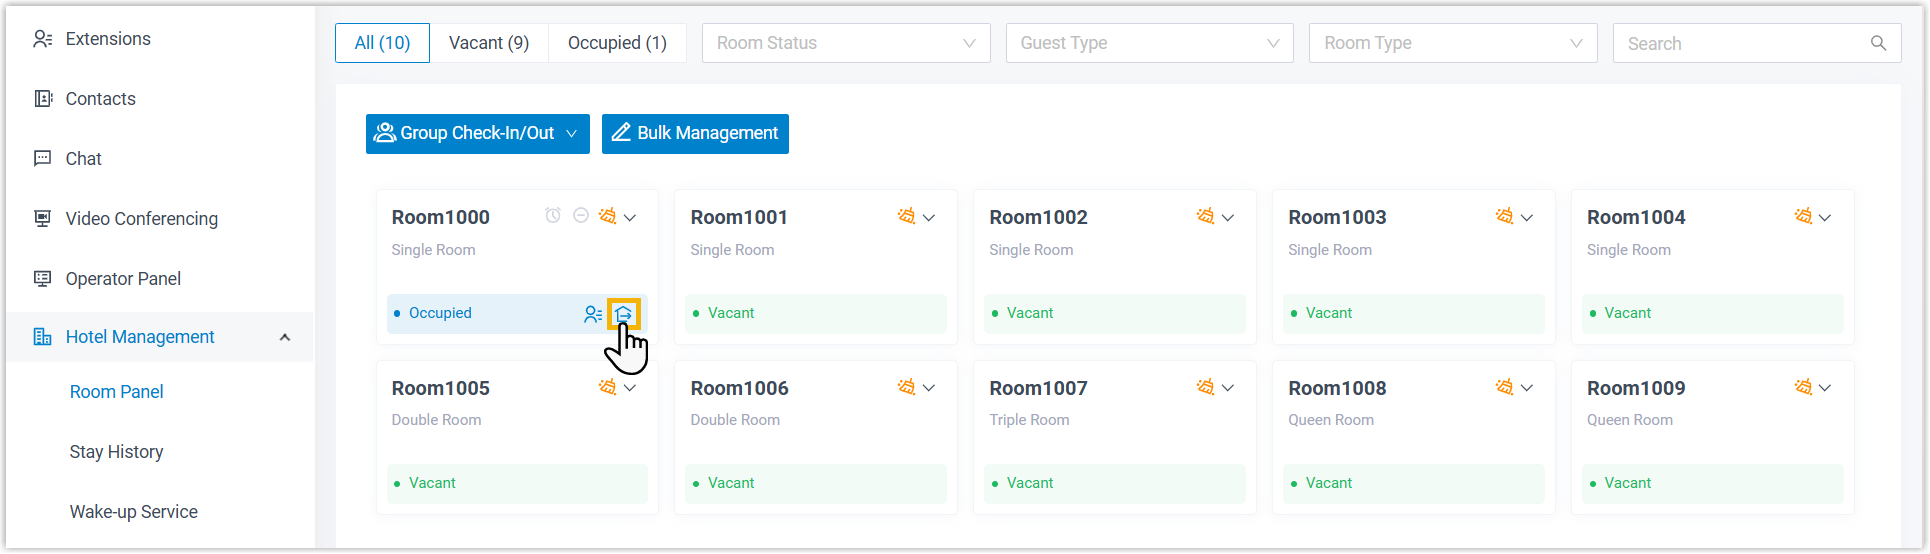
-
Fill in the check-out details:
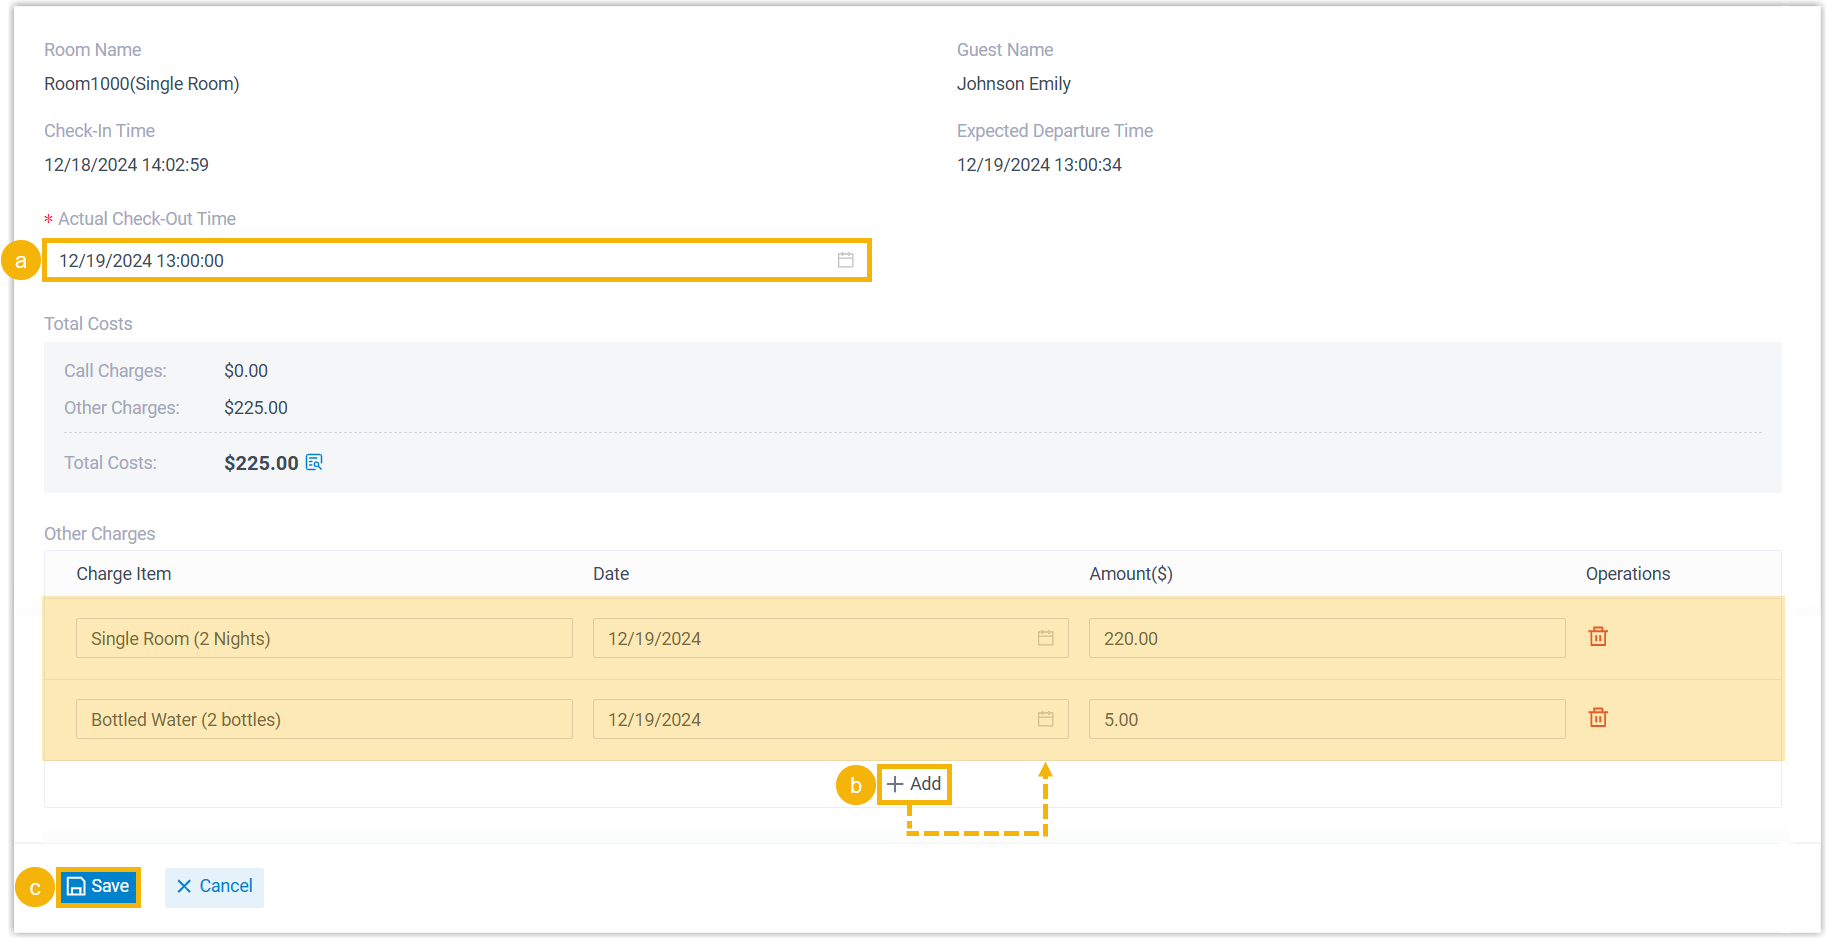
a. In the Actual Check-Out Time drop-down, accept the current time or set a different one.
b. Under Other Charges, click Add to record any extra fees for the room.
c. Click Save.
What happens next
Section titled “What happens next”-
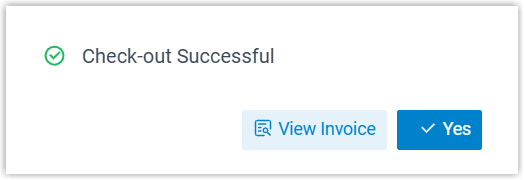
A confirmation window appears once check-out succeeds. Click View Invoice to open the invoice and share it with the guest.
-
The room is marked Vacant and its status returns to the default configuration.
-
The room extension is restored to its default settings, and the following guest data is removed:
- Cleared data: First Name, Mobile Number, Email Address, Voicemail Messages, Call Recordings, Call Logs, Internal Chat histories, Personal Contacts, Video Conferences, and Wake-up Calls.
- Call permission reset: Outbound and international calling are again blocked on the extension.
- Presence reset: Extension presence returns to Available.
- Extension setting reset: The Last Name field is set back to the extension number.
Check out a tour group
Section titled “Check out a tour group”-
Sign in to the Cloud Voice App (Desktop or Web) and open Hotel Management > Room Panel.
-
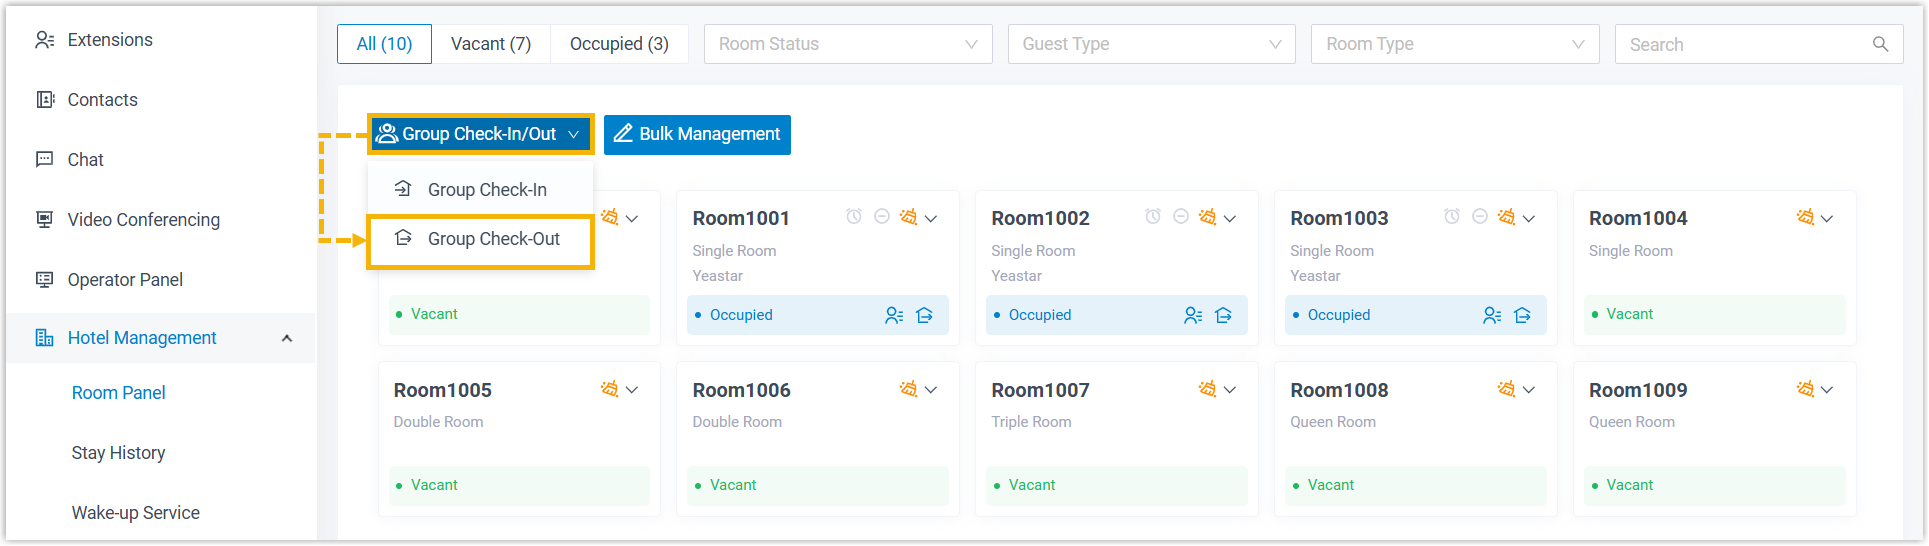
In the top-left corner, click Group Check-In/Out and choose Group Check-Out.
-
Fill in the group check-out details:
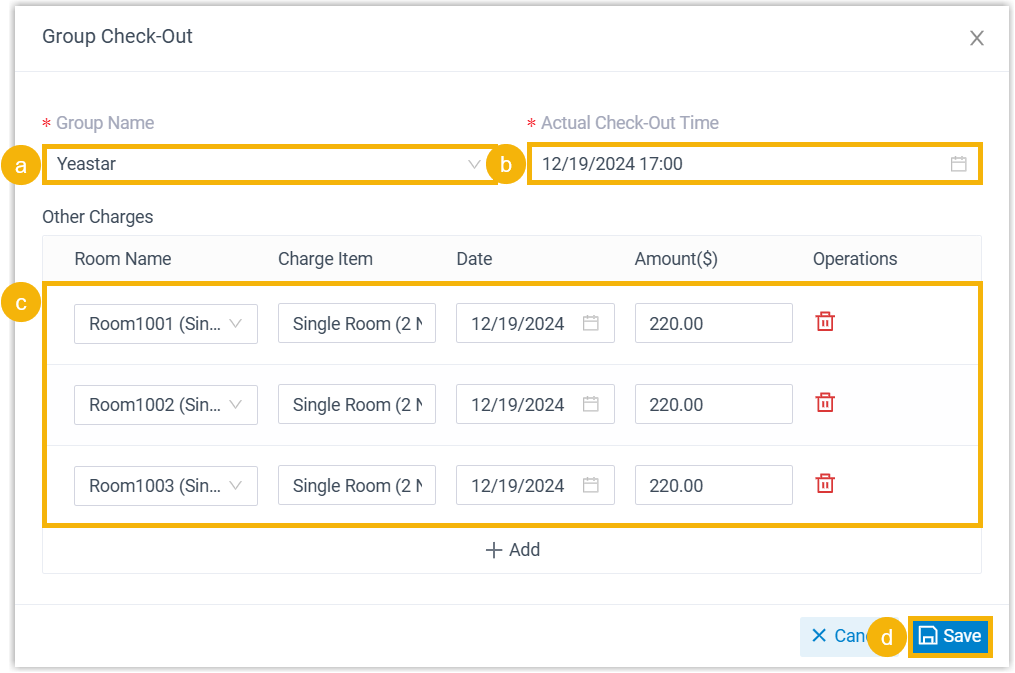
a. In the Group Name drop-down, select the tour group.
b. In the Actual Check-Out Time drop-down, accept the current time or set a different one.
c. Under Other Charges, click Add to record any extra fees for the group.
d. Click Save.
What happens next
Section titled “What happens next”-
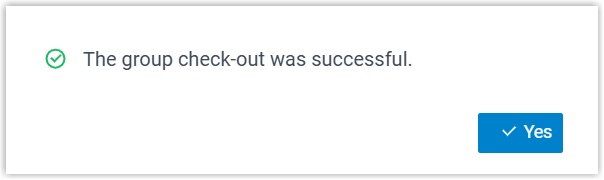
A confirmation window appears once check-out succeeds.
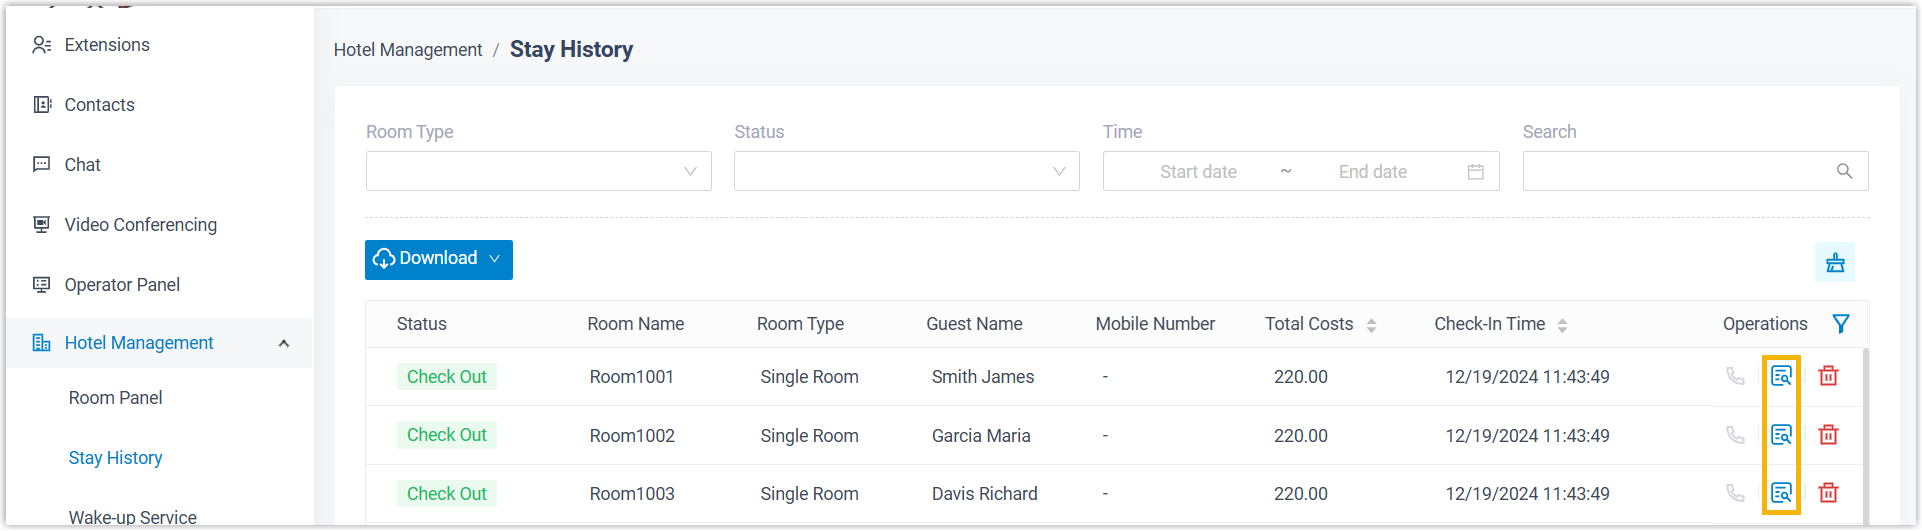
You can review each room’s invoice under Hotel Management > Stay History and send them to the guests.
-
The temporary extension group created for the tour group is deleted from the PBX (Private Branch Exchange, the phone system that manages your extensions and calls).
-
Every room in the group is marked Vacant and its status returns to the default configuration.
-
Each room extension is restored to its default settings, and the following guest data is removed:
- Cleared data: First Name, Mobile Number, Email Address, Voicemail Messages, Call Recordings, Call Logs, Internal Chat histories, Personal Contacts, Video Conferences, and Wake-up Calls.
- Call permission reset: Outbound and international calling are again blocked on the extension.
- Presence reset: Extension presence returns to Available.
- Extension setting reset: The Last Name field is set back to the extension number.
Question about this page?
Ask the AI assistant. It starts from this page, then searches the rest of the docs.
Ask Cloud Voice AI
Answers are AI-generated from the docs and may contain mistakes. Verify with the linked pages.