
Configure Two-factor Authentication using Email
Two-factor authentication adds a second checkpoint to the administrator sign-in: after the password is accepted, a one-time code delivered by email must also be entered. This page walks through turning that on with email as the delivery method.
Before you begin
Section titled “Before you begin”Make sure the system email server is configured. Codes are delivered through it, so without a working mail server the feature cannot send them.
Turn on email verification
Section titled “Turn on email verification”-
Log in to the Cloud Voice Dashboard at https://portal.voice.izt.cloud and click Login to open your phone system’s management portal with full administrator access. Select your account name in the top-right corner, then open Change Password & Security > Security Settings.
-
Tick the Two-Factor Authentication checkbox.
-
When the Password window appears, type your account password and select Confirm to authorize the change.
-
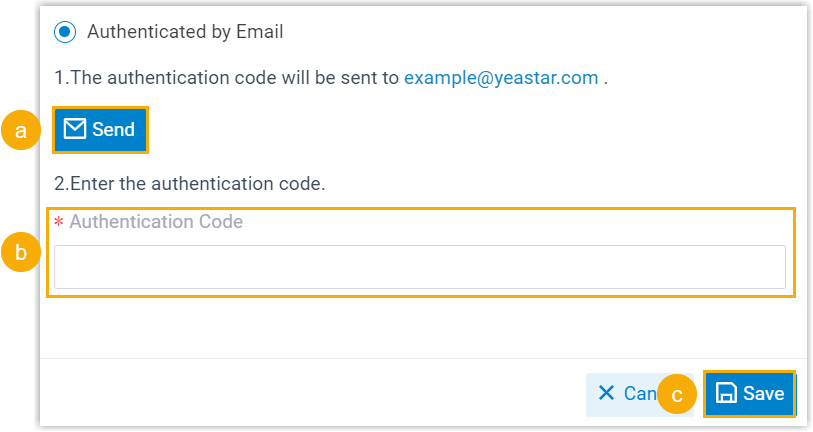
Choose Authenticated by Email, then work through the fields below.
-
Select Send. A message with a six-digit code goes to the email address tied to the administrator account.
-
Enter that code in the Authentication Code field.
-
Select Save.
-
What happens next
Section titled “What happens next”-
An “Edited successfully.” confirmation appears, which means two-factor authentication is now active.
-
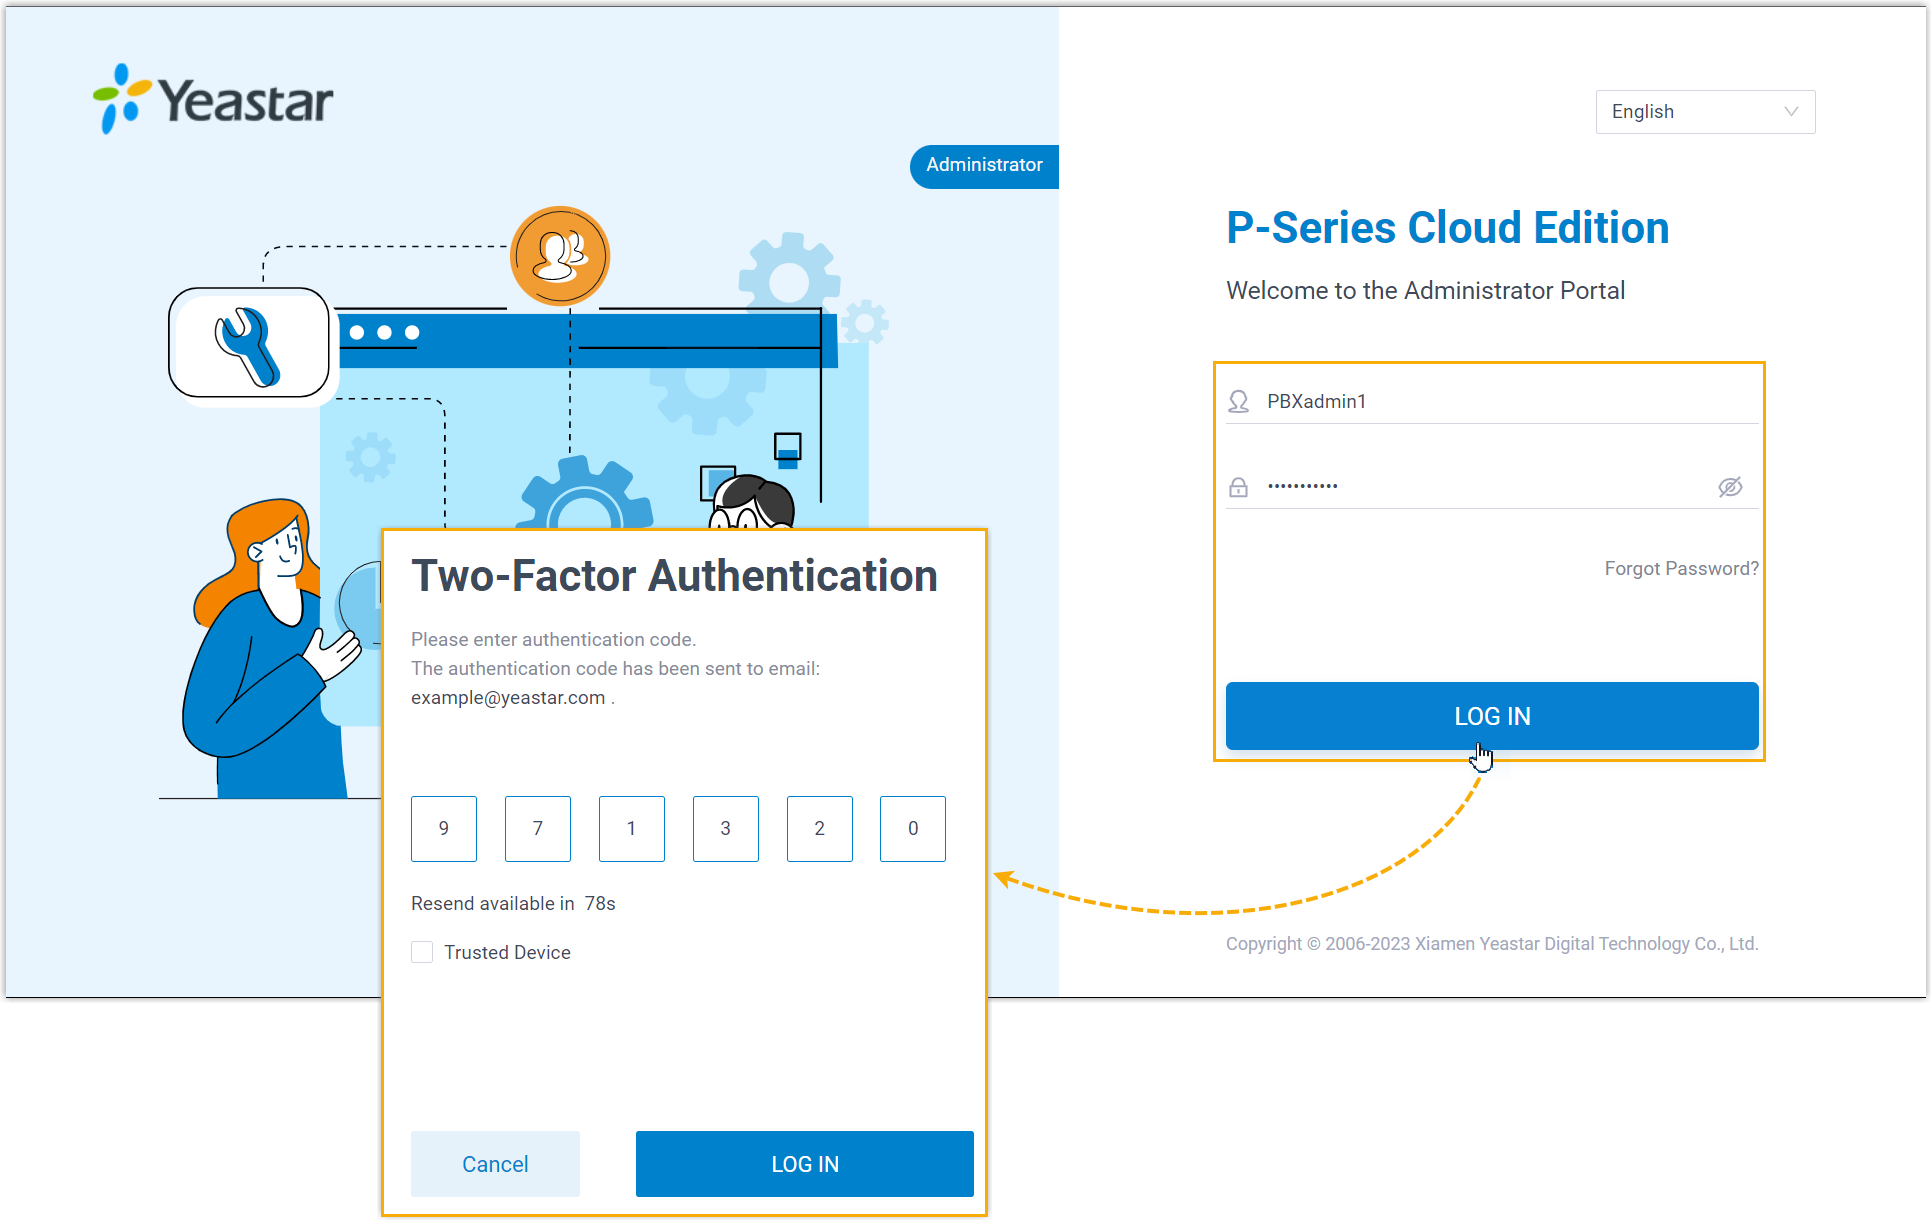
From your next sign-in onward, the portal asks for a verification code in addition to your password.
Question about this page?
Ask the AI assistant. It starts from this page, then searches the rest of the docs.
Ask Cloud Voice AI
Answers are AI-generated from the docs and may contain mistakes. Verify with the linked pages.