
Connect Cloud Voice to an SQL Database Using Data Connector
The Data Connector lets Cloud Voice write a copy of your phone system data to a SQL (Structured Query Language) database you control. Once a link is established, the system performs a one-way sync of records such as call detail records (CDRs), recording logs, and system metrics on the interval you choose, so you can retain, report on, or feed that data into other tools.
Before you start
Section titled “Before you start”Data Connector requires Cloud Voice firmware 84.23.0.83 or later.
You also need a destination database ready to receive the synced data:
- A running database server on one of the supported platforms: PostgreSQL, MySQL, or Microsoft SQL.
- An empty database created on that server to hold the Cloud Voice data.
Enable and configure the connector
Section titled “Enable and configure the connector”-
Sign in to the PBX web portal and go to Integrations > Data Connectors.
-
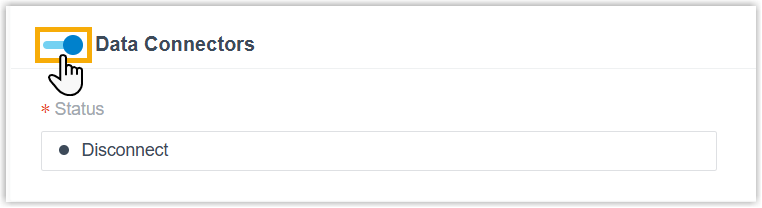
Switch Data Connectors on.
-
In the Database section, define how Cloud Voice reaches your database.
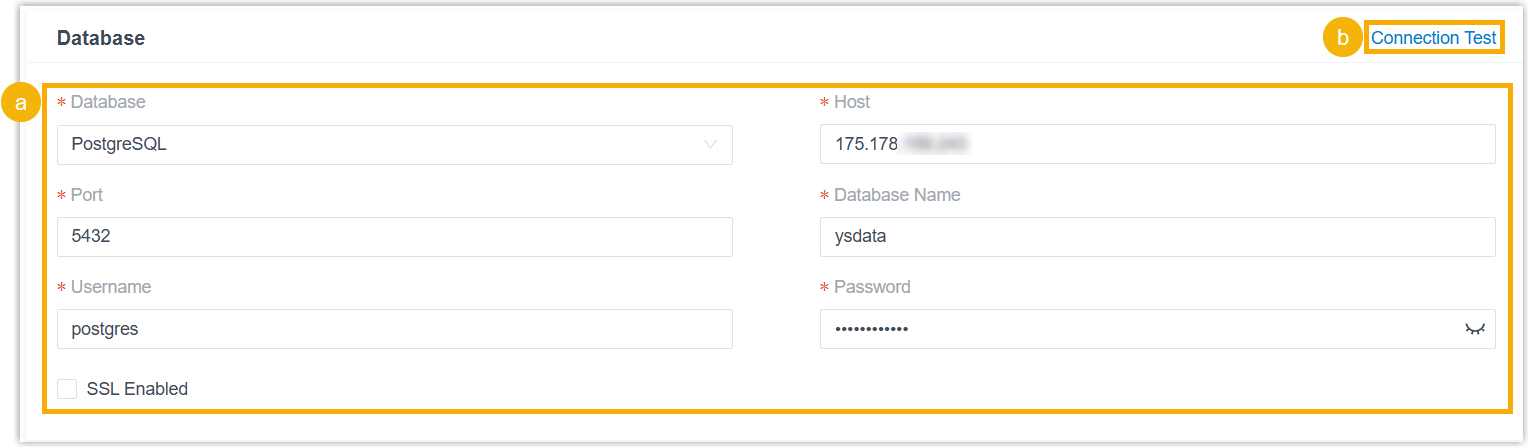
a. Fill in the connection details:
Item Description Database Choose the database type: PostgreSQL, MySQL, or Microsoft SQL. Host The IP address or domain name of the server where the database runs. Port The port the database listens on. Database Name The name of the database that will store the data. Username The account used to connect to the database. Password The password for that account. SSL Enabled Turn SSL (Secure Sockets Layer) certificate verification on or off. When enabled, click Browse to upload your SSL certificate. b. Optional: click Connection Test to confirm Cloud Voice can reach the database. A “Connection test successful” message means the connection is working.
-
In the Data Range section, choose which data sets to sync:
Data What is synced CDR The CDR list, call legs, and timeline data. Recording Logs Recording log entries. The recording audio files themselves are not synced. System Metric Dashboard metrics: Active Calls, CPU Utilization, Memory Usage, Local Storage Usage, Registered Extensions, SIP Trunks Available, and Cloud Voice App Client Logins. Each sync captures the values as they stand at that moment. Call Notes Call disposition and remark content. Report Data Call report data. AI Summary & AI Transcription AI-generated summaries and transcriptions. -
In the Sync Configuration section, set how often the sync runs and whether source data is cleared afterward.
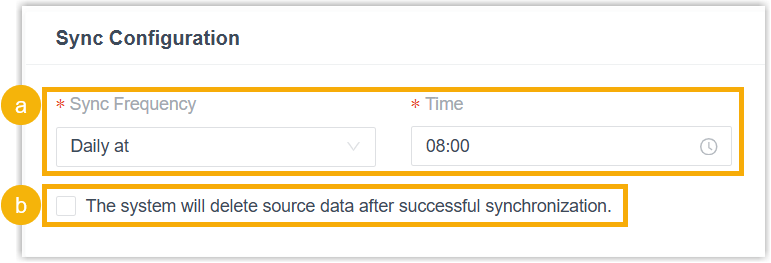
a. Pick an interval from the Sync Frequency drop-down list.
b. Optional: select The system will delete source data after successful synchronization to remove the copied records from the PBX once each sync finishes.
-
Run the first sync:
a. Click Sync Now. b. Click OK in the confirmation dialog, then click Confirm, and wait for the sync to finish.
Result
Section titled “Result”When the link is live, the integration status reads Connected. This confirms the database connection is established and that one-way synchronization into your database is running.
Question about this page?
Ask the AI assistant. It starts from this page, then searches the rest of the docs.
Ask Cloud Voice AI
Answers are AI-generated from the docs and may contain mistakes. Verify with the linked pages.