
Route Calls from a Branch PBX to Cloud Voice
Once a branch office PBX (Private Branch Exchange, the on-site phone system) is interconnected with your headquarters Cloud Voice system, you still need to tell each side how to move calls across the link. This page walks through the route settings that let anyone on the branch PBX dial a headquarters extension on Cloud Voice.
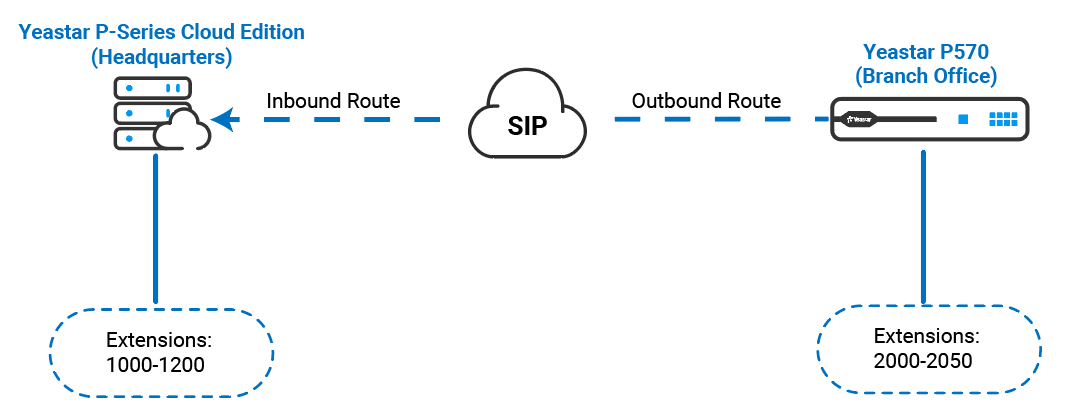
How the call flows
Section titled “How the call flows”Two pieces of configuration work together for a branch-to-headquarters call:
| Where | What to do |
|---|---|
| Branch PBX | Add an outbound route that sends the call out over the trunk to Cloud Voice. |
| Cloud Voice (headquarters) | Add an inbound route that accepts the call and delivers it to the matching headquarters extension. |
Both routes must be in place. The branch side alone will send the call out, but without the inbound route on Cloud Voice there is nothing to answer it.
The diagram below shows the path a call takes from a branch extension to a headquarters extension.
Step 1. Add an outbound route on the branch PBX
Section titled “Step 1. Add an outbound route on the branch PBX”An outbound route decides which calls leave the branch PBX and over which trunk. This one hands calls from branch extensions to the trunk that reaches Cloud Voice.
- Sign in to the branch PBX web portal and go to Call Control > Outbound Route.
- Click Add.
- Fill in the route:
-
Under General, give the route a name you will recognize later.
-
Under Dial Pattern, set the dial rules that decide which dialed numbers use this route. For this example, leave the defaults as they are.
-
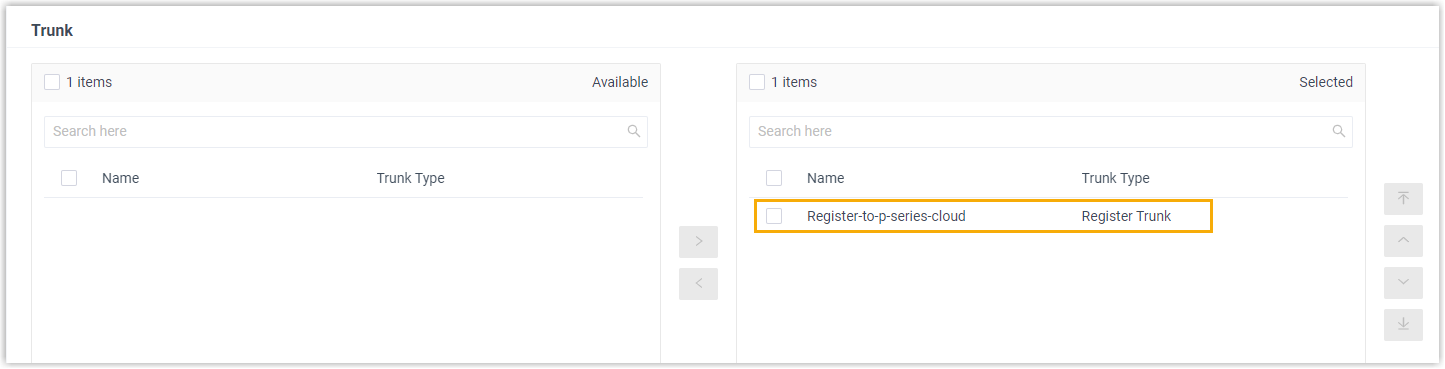
Under Trunk, move the trunk you created for Cloud Voice from the Available box to the Selected box.
-
Under Extension/Extension Group, move every extension from Available to Selected so that all branch users are allowed to call Cloud Voice.
-
- Click Save, then Apply.
Step 2. Add an inbound route on Cloud Voice
Section titled “Step 2. Add an inbound route on Cloud Voice”An inbound route decides what happens to calls arriving over a trunk. This one receives the branch call and points it at the right headquarters extension.
- Sign in to your Cloud Voice web portal and go to Call Control > Inbound Route.
- Click Add.
- Fill in the route:
-
Under General, give the route a name you will recognize later.
-
Under DID Pattern, define how the dialed number is matched. DID stands for Direct Inward Dialing: it is the number the branch caller dials, which Cloud Voice uses to pick the destination extension.

- DID Matching Mode: Select Match DID Range to Extension Range.
- DID Range: Enter the headquarters extension range. In this example, enter
1000-1200.
When a dialed number falls inside the DID range, the call is sent to the extension it maps to.
-
Under Caller ID Pattern, set any caller ID matching you need. For this example, leave the defaults as they are.
-
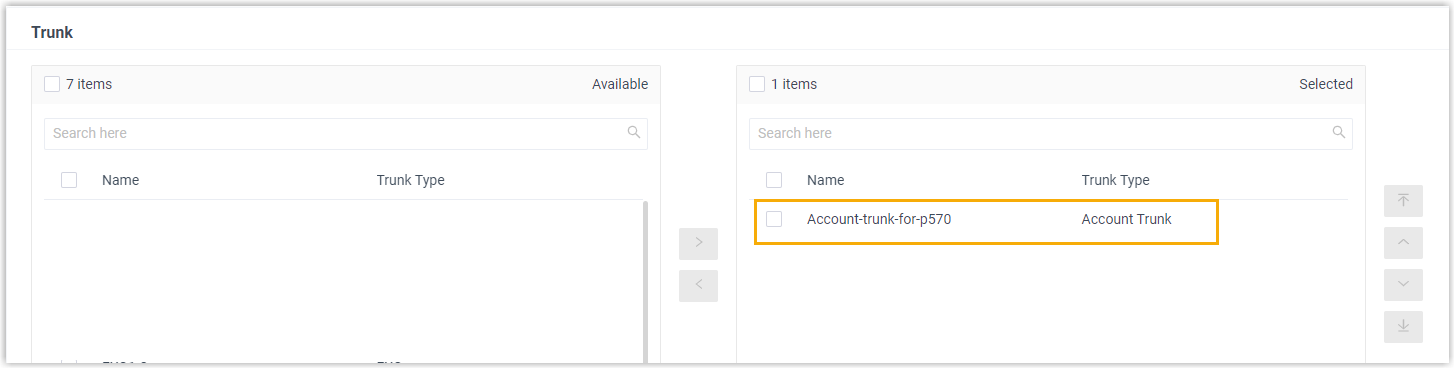
Under Trunk, move the trunk you created for the branch PBX from the Available box to the Selected box.
-
Under Default Destination, choose where matched calls land:

- In the Default Destination drop-down list, select Match Extension Range.
- In the extension range field, enter the headquarters extension range. In this example, enter
1000-1200.
-
- Click Save, then Apply.
Test the connection
Section titled “Test the connection”Place a call to confirm the routes work. For example, when extension 2000 at the branch office dials 1000, extension 1000 at headquarters should ring.
Question about this page?
Ask the AI assistant. It starts from this page, then searches the rest of the docs.
Ask Cloud Voice AI
Answers are AI-generated from the docs and may contain mistakes. Verify with the linked pages.