
Make Outbound Calls through the Extended E1/T1/PRI Trunk
With Cloud Voice connected to a TE100 gateway, the gateway’s E1/T1/PRI trunk (a digital line that carries multiple voice channels) becomes an additional path for placing external calls. Routing does not happen automatically, though: you add an outbound route on the Cloud Voice side to hand calls off to the gateway, and a second route on the gateway to forward those calls onto the digital trunk. This page walks through both, along with mapping caller IDs to extensions and confirming the setup with a test call.
This guide assumes the SIP (Session Initiation Protocol, the signaling used to set up calls) account trunk between Cloud Voice and the gateway is already in place.
Scenario
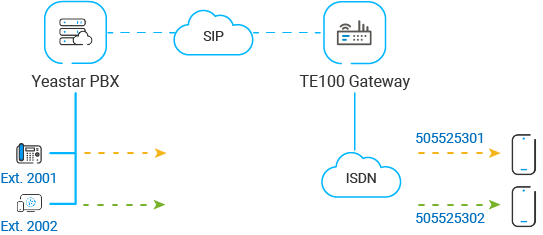
Section titled “Scenario”The steps below follow this example layout, where Cloud Voice extensions reach the outside world through the gateway’s E1/T1/PRI trunk.
Step 1: Add an outbound route on Cloud Voice
Section titled “Step 1: Add an outbound route on Cloud Voice”Create a route that sends calls from your extensions toward the gateway.
- Sign in to the Cloud Voice portal and go to Call Control > Outbound Route, then click Add.
- Configure these fields and leave the rest at their defaults:
-
Name: A label that identifies the route.
-
Dial Pattern: Define how dialed digits are matched. In this example, set Pattern to
X.so users dial destination numbers exactly as they normally would. -
Trunk: Choose the SIP account trunk that connects to the gateway. This example uses the trunk named
Connect-to-TE100-Gateway.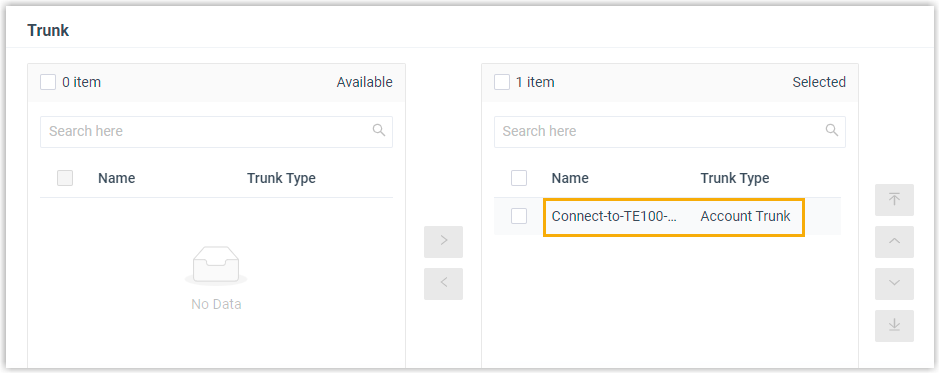
-
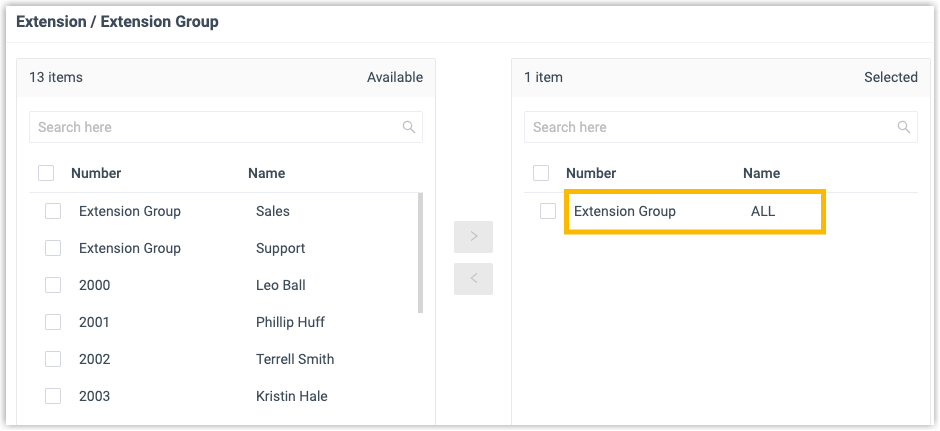
Extension / Extension Group: Add the extensions allowed to dial out through this route. This example adds every extension.
-
- Click Save, then Apply.
Step 2: Bind DOD numbers to extensions on Cloud Voice
Section titled “Step 2: Bind DOD numbers to extensions on Cloud Voice”Direct Outward Dialing (DOD) numbers let you tie a specific outbound caller ID to each extension, so the called party sees who is actually calling. Configure them on the trunk that reaches the gateway.
-
Go to Extension and Trunk > Trunk and edit the SIP account trunk connected to the gateway.
-
Open the Outbound Caller ID tab.
-
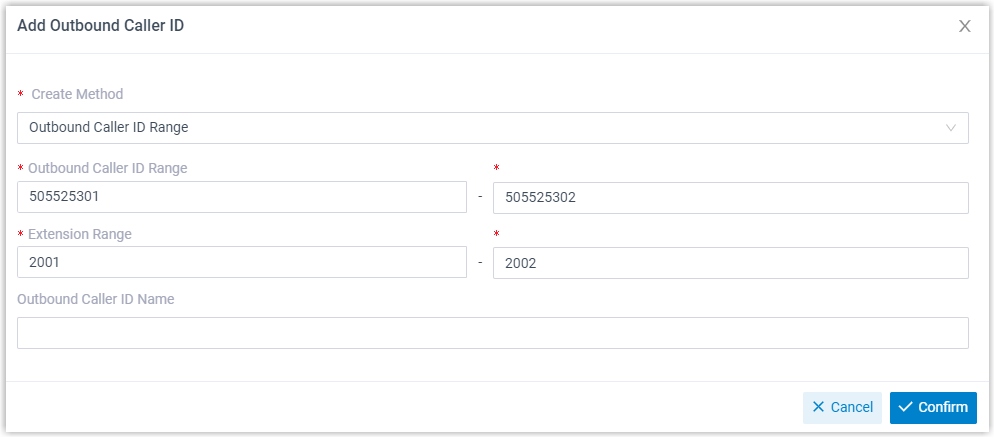
In the Outbound Caller ID List section, click Add, fill in the fields below, then click Confirm:
- Create Method: Select Outbound Caller ID Range.
- Outbound Caller ID Range: Set
505525301-505525302. - Extension Range: Set
2001-2002.
-
Click Save, then Apply.
Step 3: Add an outbound route on the TE100 gateway
Section titled “Step 3: Add an outbound route on the TE100 gateway”The gateway needs its own route to accept calls arriving from Cloud Voice and pass them onto the E1/T1/PRI trunk.
-
Sign in to the gateway’s web interface and go to Gateway > Route Settings > Route List, then click Add New Route.
-
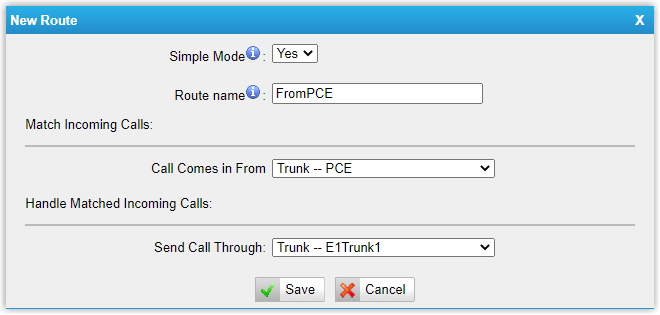
In the dialog, configure the route:
- Simple Mode: Select Yes.
- Route Name: A label that identifies the route.
- Call Comes in From: Choose the SIP trunk that connects to Cloud Voice. This example uses
Trunk--CloudVoice. - Send Call Through: Choose the E1/T1/PRI trunk that carries the call out. This example uses
Trunk--E1Trunk1.
-
Click Save, then Apply Changes.
Step 4: Place a test call
Section titled “Step 4: Place a test call”Dial an external number from a Cloud Voice extension to confirm the path works. For example, extension 2001 calls 1588035242: the destination rings, and it shows the bound caller ID 505525301.
Question about this page?
Ask the AI assistant. It starts from this page, then searches the rest of the docs.
Ask Cloud Voice AI
Answers are AI-generated from the docs and may contain mistakes. Verify with the linked pages.