
Integrate a Helpdesk Using a Template
When the helpdesk your team uses isn’t among the built-in integrations, you can still connect it to Cloud Voice through a custom Helpdesk integration template. This page walks you through completing that connection.
Before you begin
Section titled “Before you begin”Make sure the following are in place:
- You have added a Helpdesk integration template.
- You have gathered the authorization information your helpdesk requires. What you need to collect depends on the helpdesk’s authentication method:
| Authentication method | What to obtain |
|---|---|
| None | Any integration details the helpdesk expects, such as an API (Application Programming Interface) key or a webhook URL (Uniform Resource Locator: the web address the helpdesk sends data to). |
| Basic | The credentials used to sign in, for example a username and password, or an API key. |
| OAuth2 (Open Authorization, version 2) | Register an application in your helpdesk (see below), then note the client ID and client secret it returns. |
| Bearer Token | The client ID and client secret used for authentication. |
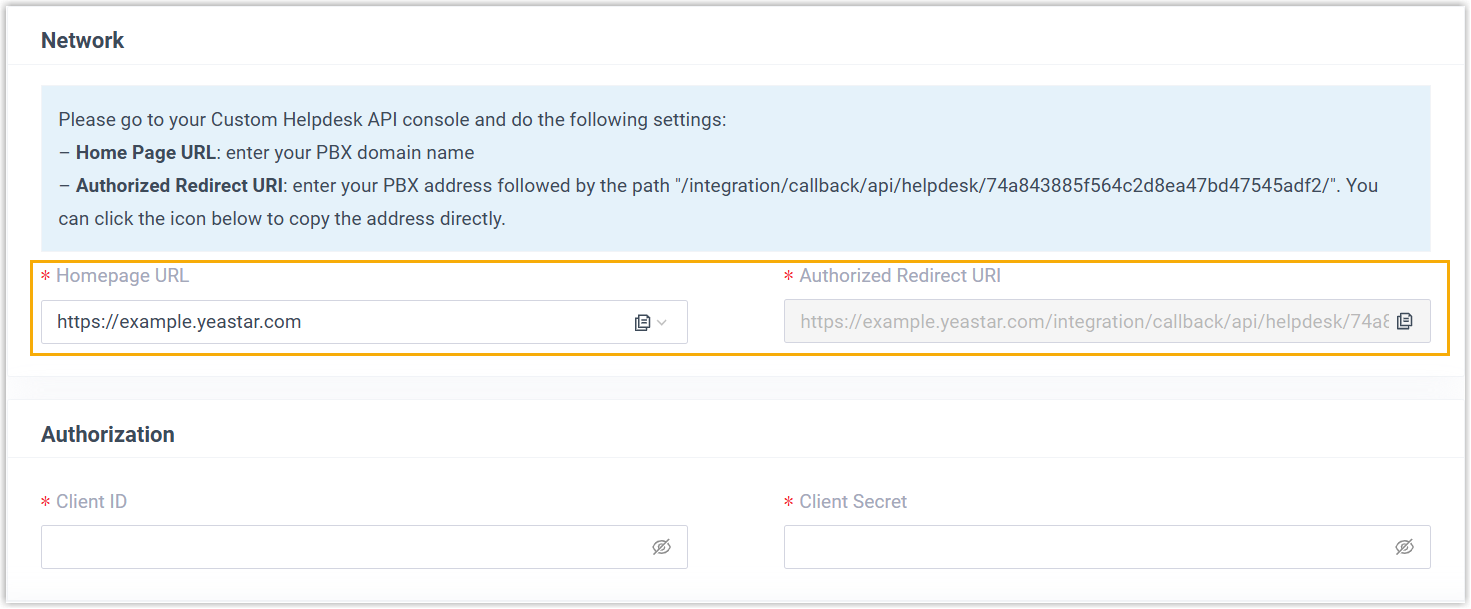
For OAuth2, open the phone system’s authentication details first, at Integrations > Helpdesk > Custom Helpdesk. Use those details to create an application in your helpdesk, which then gives you the client ID and client secret.
Set up the integration
Section titled “Set up the integration”-
Sign in to the Cloud Voice portal and go to Integrations > Helpdesk.
-
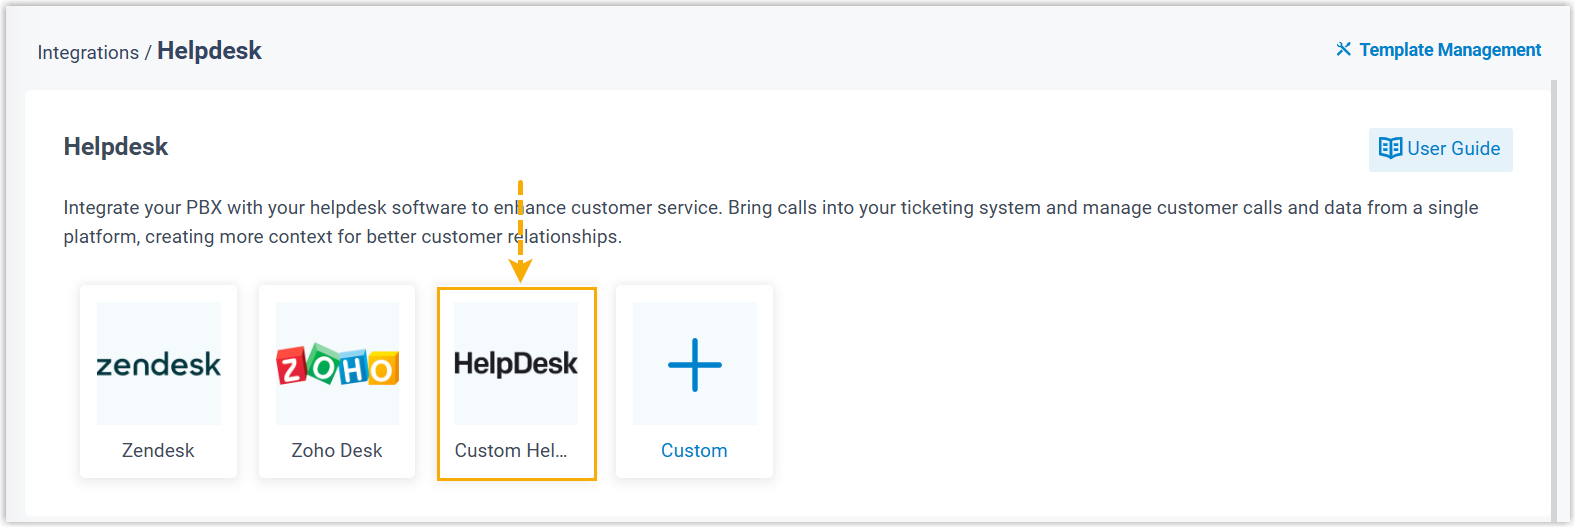
In the helpdesk list, select the helpdesk you added from a template.
-
Authenticate the connection using the method your helpdesk requires.
None authentication

a. In the Settings section, enter the details needed for the integration.
b. Click Save.
Basic authentication

a. In the Settings section, enter the required credentials.
b. Click Save.
OAuth2 authentication
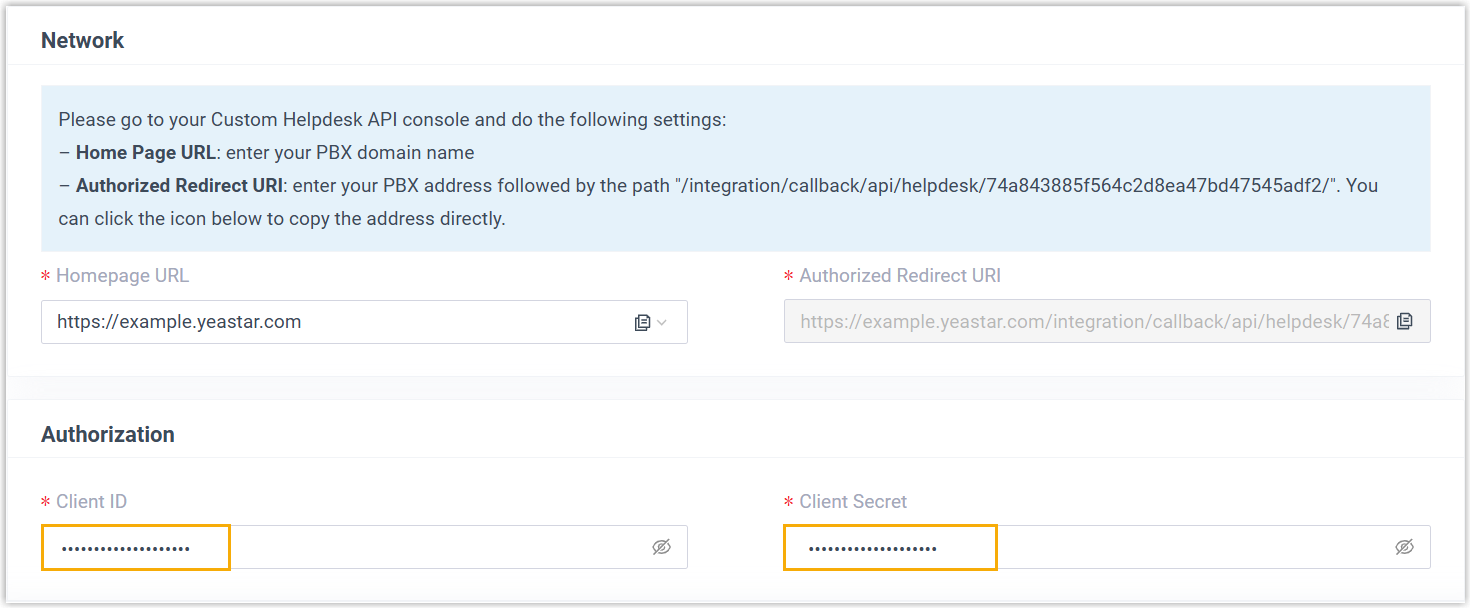
a. In the Authorization section, enter the authorization details from the application you created in the helpdesk.
b. Click Save. A new browser tab opens and asks for permission to access your helpdesk data.
c. Approve the request so Cloud Voice can reach the data in your helpdesk account. Back on the configuration page, a pop-up reports the result.
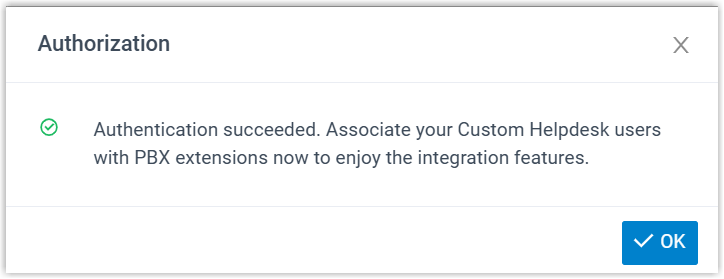
d. Click OK. When the Status field reads Connected, the helpdesk integration is in place.
Bearer Token authentication

a. In the Settings section, enter the required credentials.
b. Click Save.
-
Associate helpdesk users with extensions.
If your helpdesk requires its users to be linked to extensions before the integration features work, complete these steps:
a. On the helpdesk integration page, click
 to pull in the current list of helpdesk users.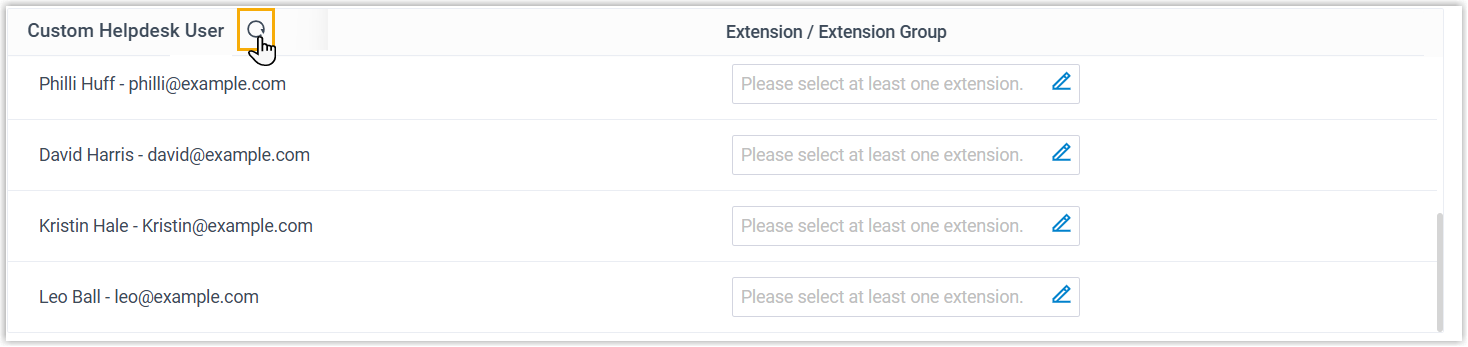
b. Link the helpdesk users to extensions using one of the following methods.
Associate automatically
When users sign in to both their helpdesk account and their extension with the same email address, you can match them all in one step:
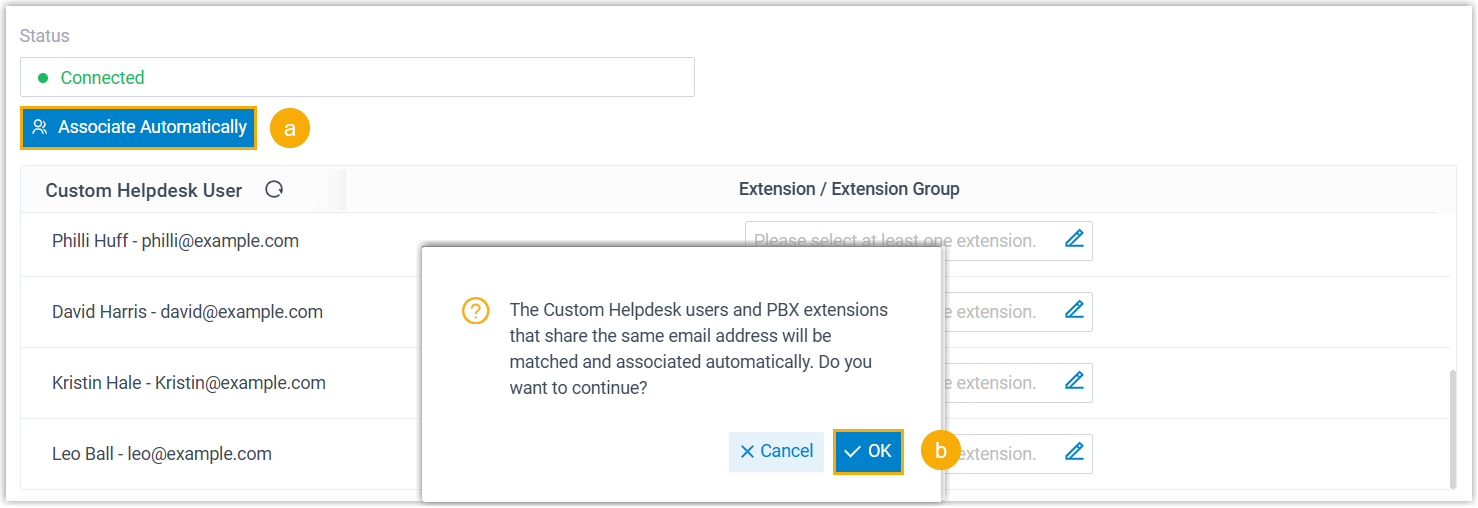
i. Click Associate Automatically.
ii. In the pop-up window, click OK.
Associate manually
When a user’s helpdesk email differs from the email on their extension, link the two by hand:
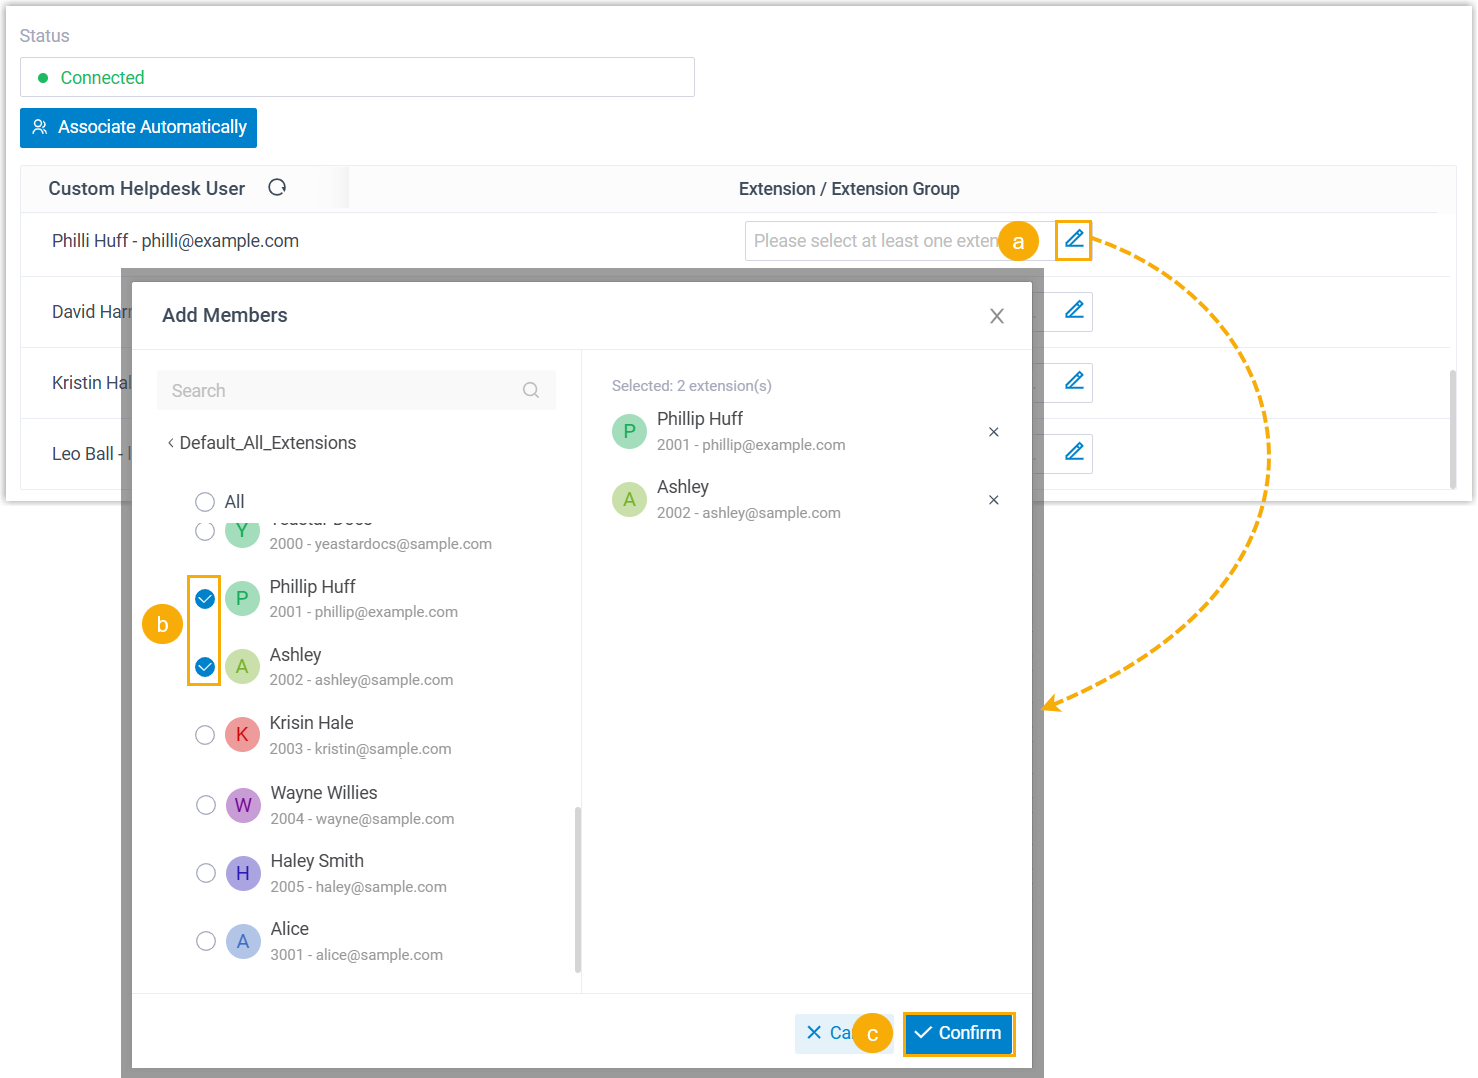
i. In the Extension field beside the helpdesk user, click
 .
.ii. In the pop-up window, select the extension(s) for that user.
iii. Click Confirm.
c. Click Save.
Question about this page?
Ask the AI assistant. It starts from this page, then searches the rest of the docs.
Ask Cloud Voice AI
Answers are AI-generated from the docs and may contain mistakes. Verify with the linked pages.