
Set up Hotel Service on Cloud Voice
Before your front desk can check guests in or manage room phones, a hotel manager needs to switch on the hotel module and work through its four configuration tabs. This page walks through the initial setup end to end: enabling the service, setting your hotel-wide preferences, adding guest rooms, and defining how wake-up calls behave.
Step 1. Turn on the hotel module
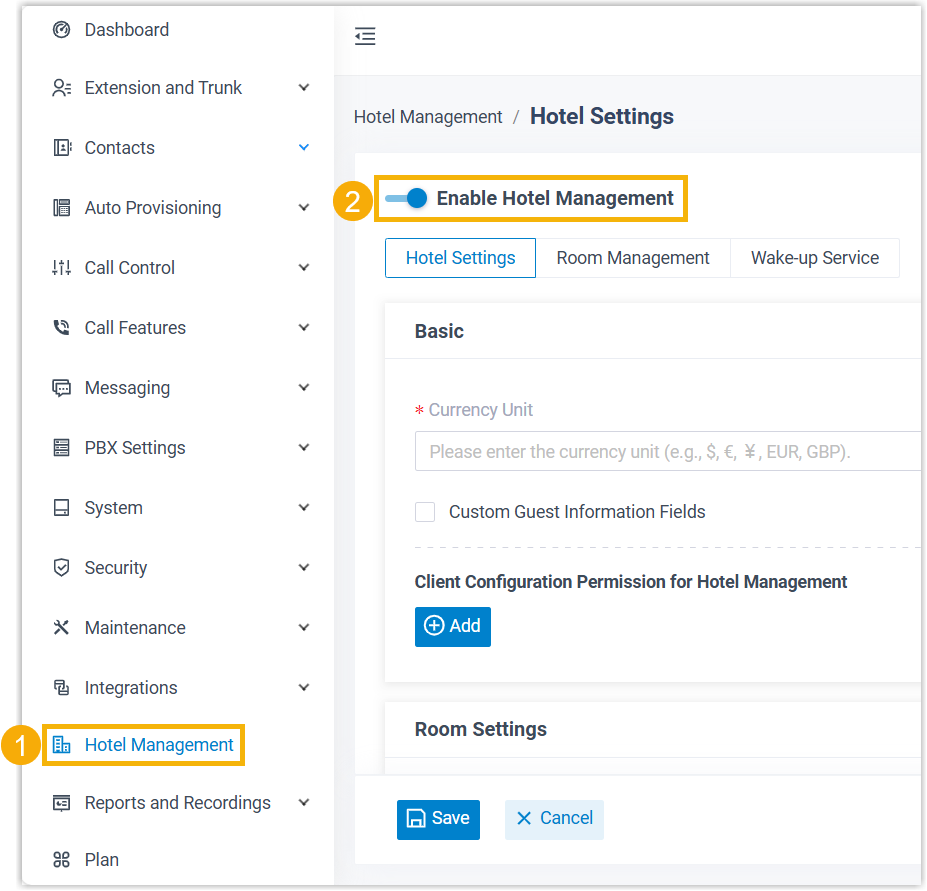
Section titled “Step 1. Turn on the hotel module”- Sign in to the Cloud Voice management portal and open Hotel Management.
- Switch on Enable Hotel Management.
Step 2. Set your hotel preferences
Section titled “Step 2. Set your hotel preferences”Open the Hotel Settings tab. This is where you define the property-wide defaults: currency, the information you collect from guests, what your staff can do, your guest room policy, and your billing details.
Currency
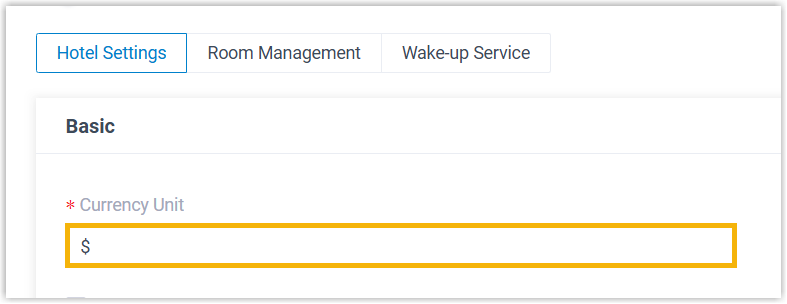
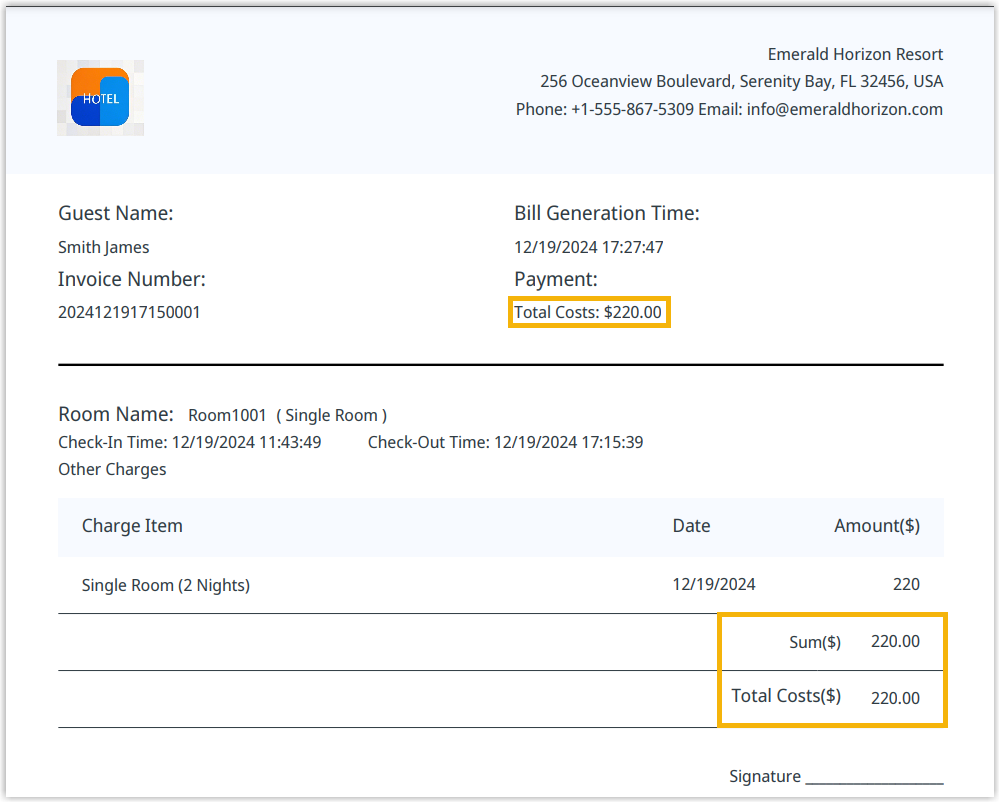
Section titled “Currency”The Currency Unit is required. Type the currency you want in the Currency Unit field; the value you enter carries through to every bill and invoice the system produces.
Guest information fields
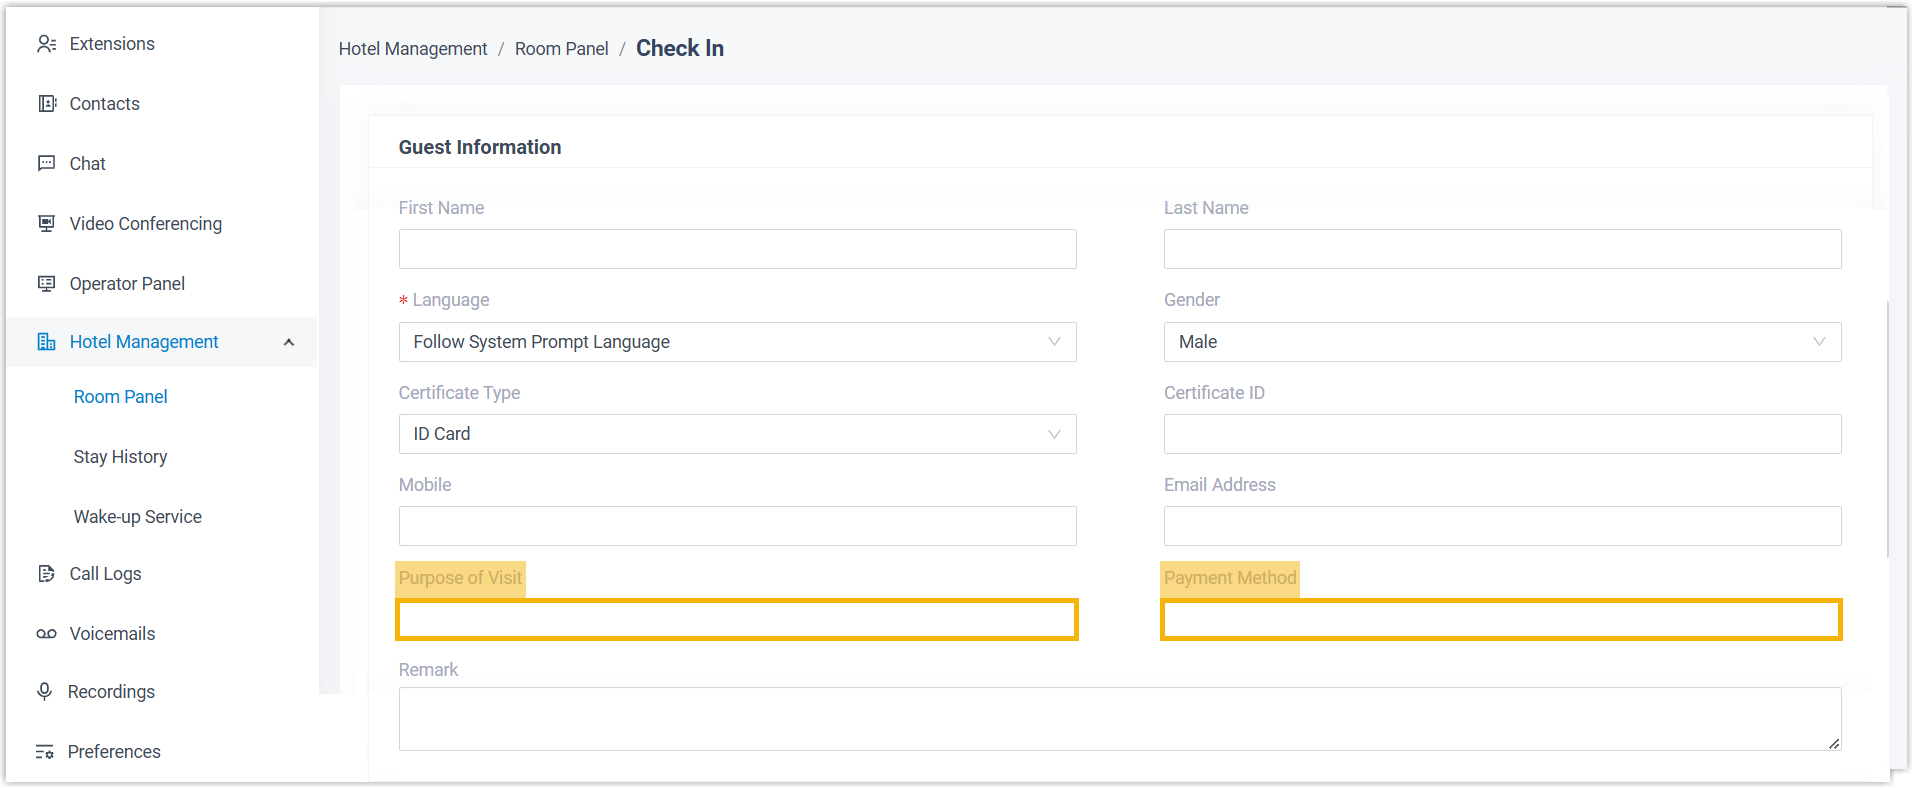
Section titled “Guest information fields”These fields determine what the front desk records about each guest at check-in. Out of the box, the check-in form collects the following.
| Category | Fields |
|---|---|
| Guest Information | First Name, Last Name, Certificate ID, Mobile Number, Email Address |
| Guest Address | Zip Code, Street, City, State, Country |
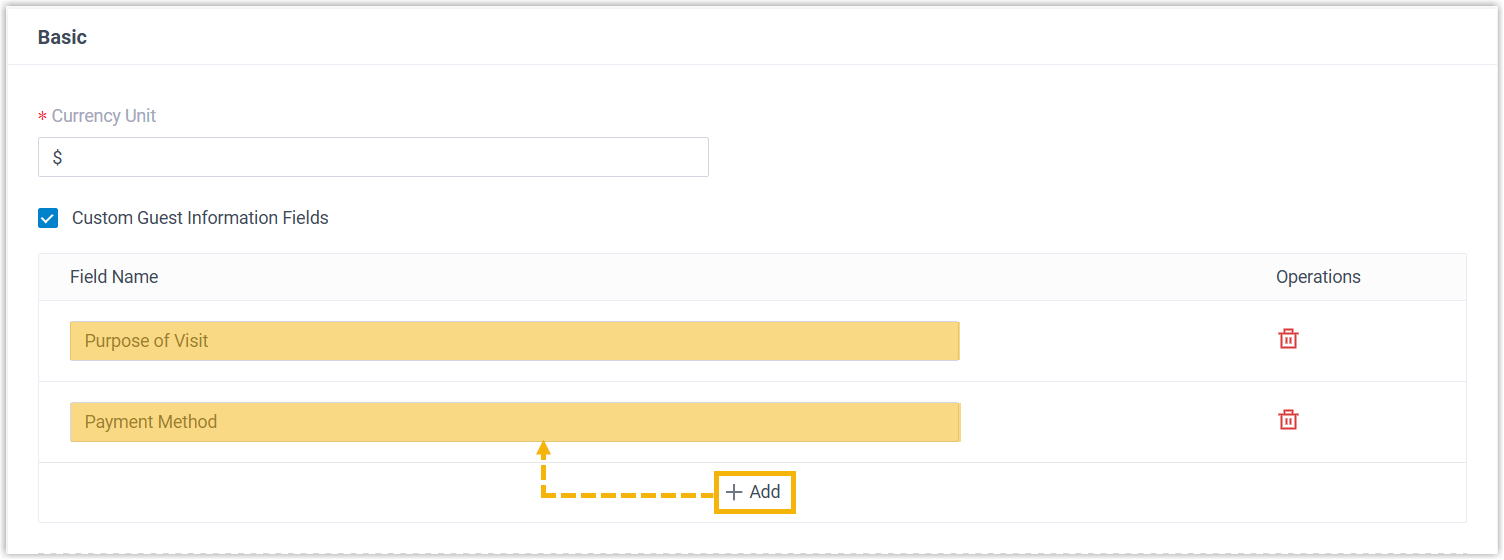
To capture anything beyond these, turn on Custom Guest Information Fields and click Add to define each extra field.
Whatever you configure here is what staff see on the check-in form.
Staff privileges for room operations
Section titled “Staff privileges for room operations”Under Client Configuration Permission for Hotel Management, you can hand specific room tasks to individual staff members, such as your front desk. Anyone you authorize performs these tasks from the service panels in the Cloud Voice App (Desktop or Web).
Click Add to create a permission rule.
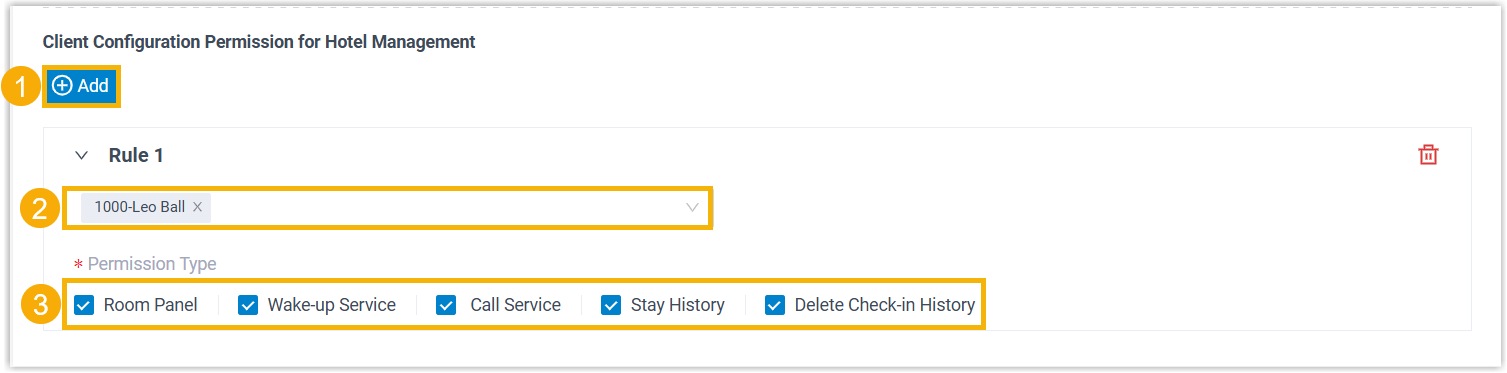
The privileges you can grant, and where staff use them in the Cloud Voice App, are:
-
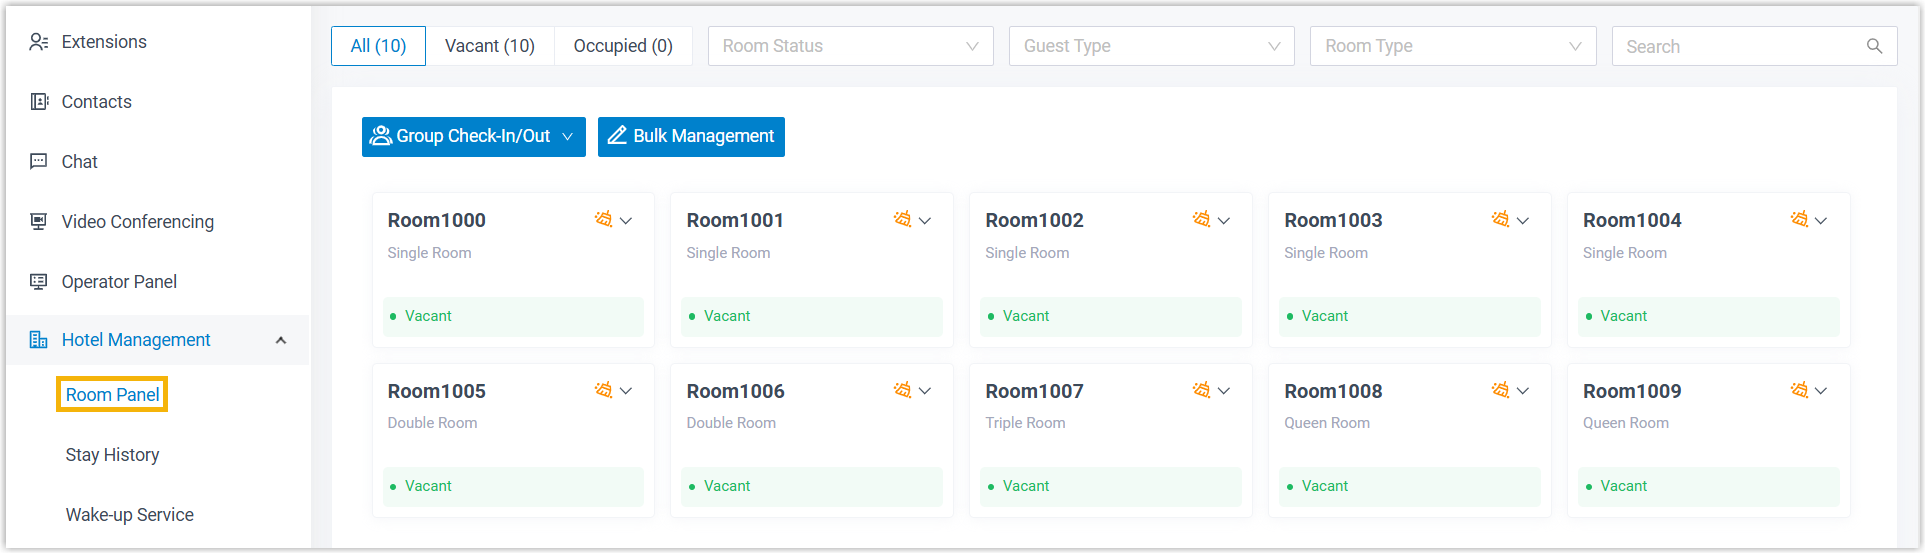
Room Panel: Work from Hotel Management > Room Panel to check guests in and out, move rooms, set Do Not Disturb, change room status, add wake-up calls, and more.
-
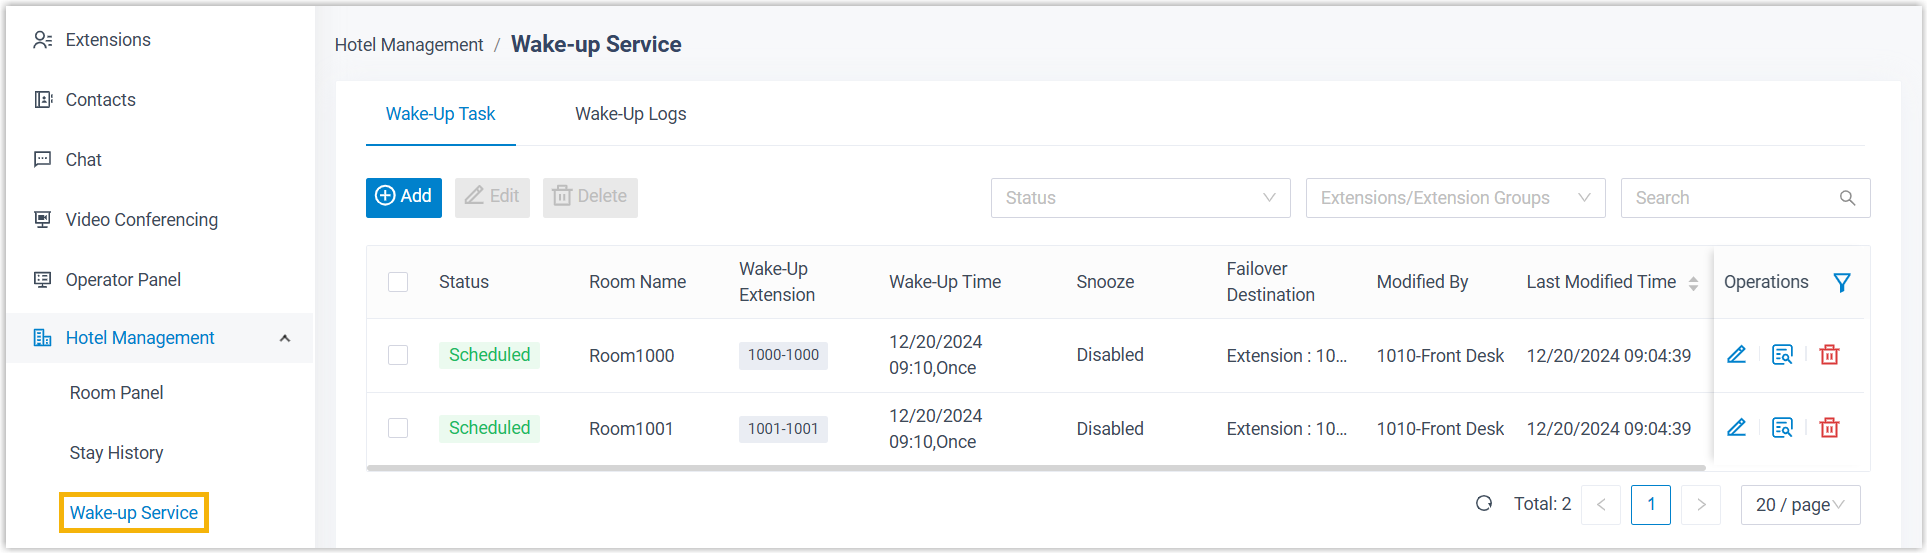
Wake-up Service: Open Hotel Management > Wake-up Service to schedule wake-up tasks and review the wake-up log.
-
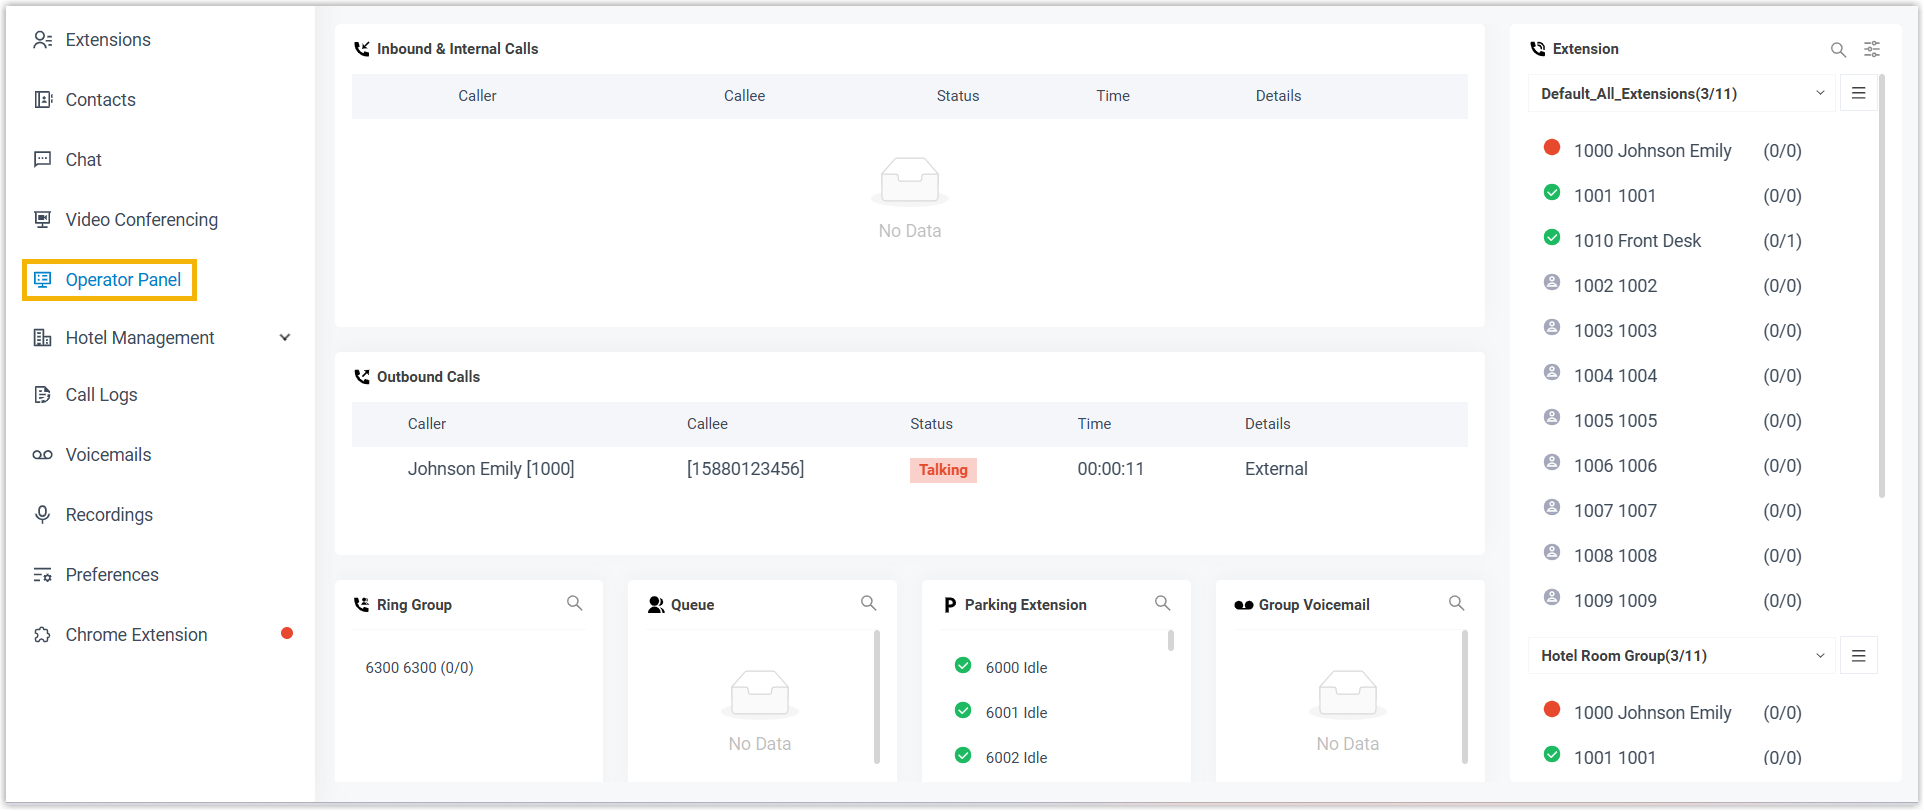
Call Service: Handle guest calls from the Operator Panel. See Call Management Permission for the details.
-
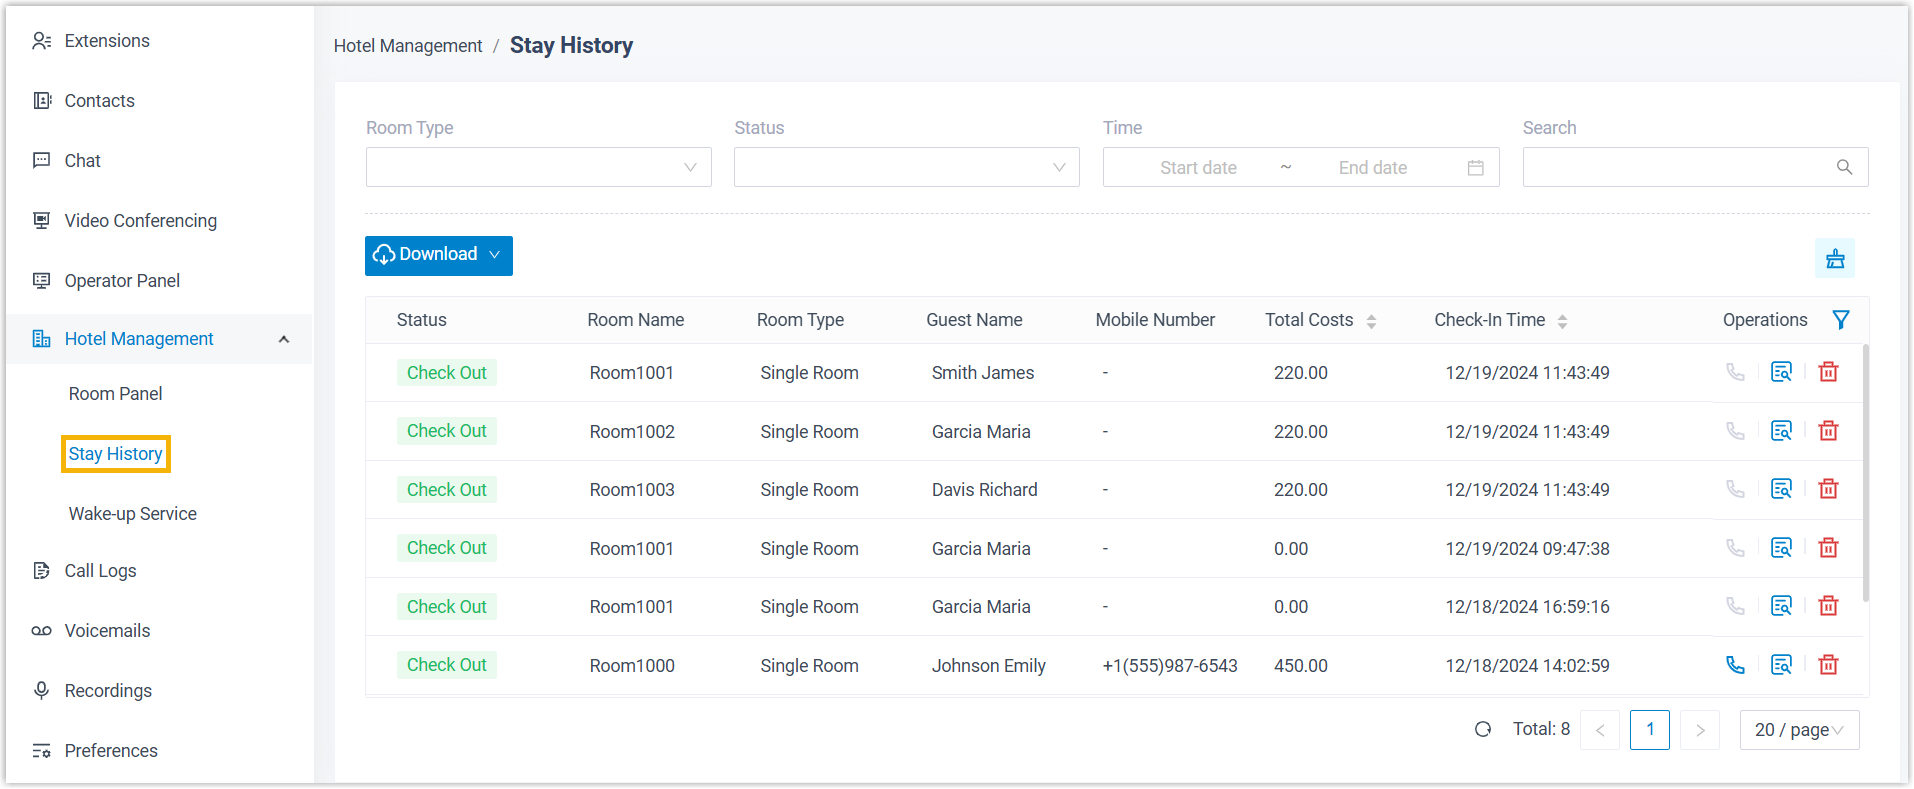
Stay History: Open Hotel Management > Stay History to review past guest stays.
-
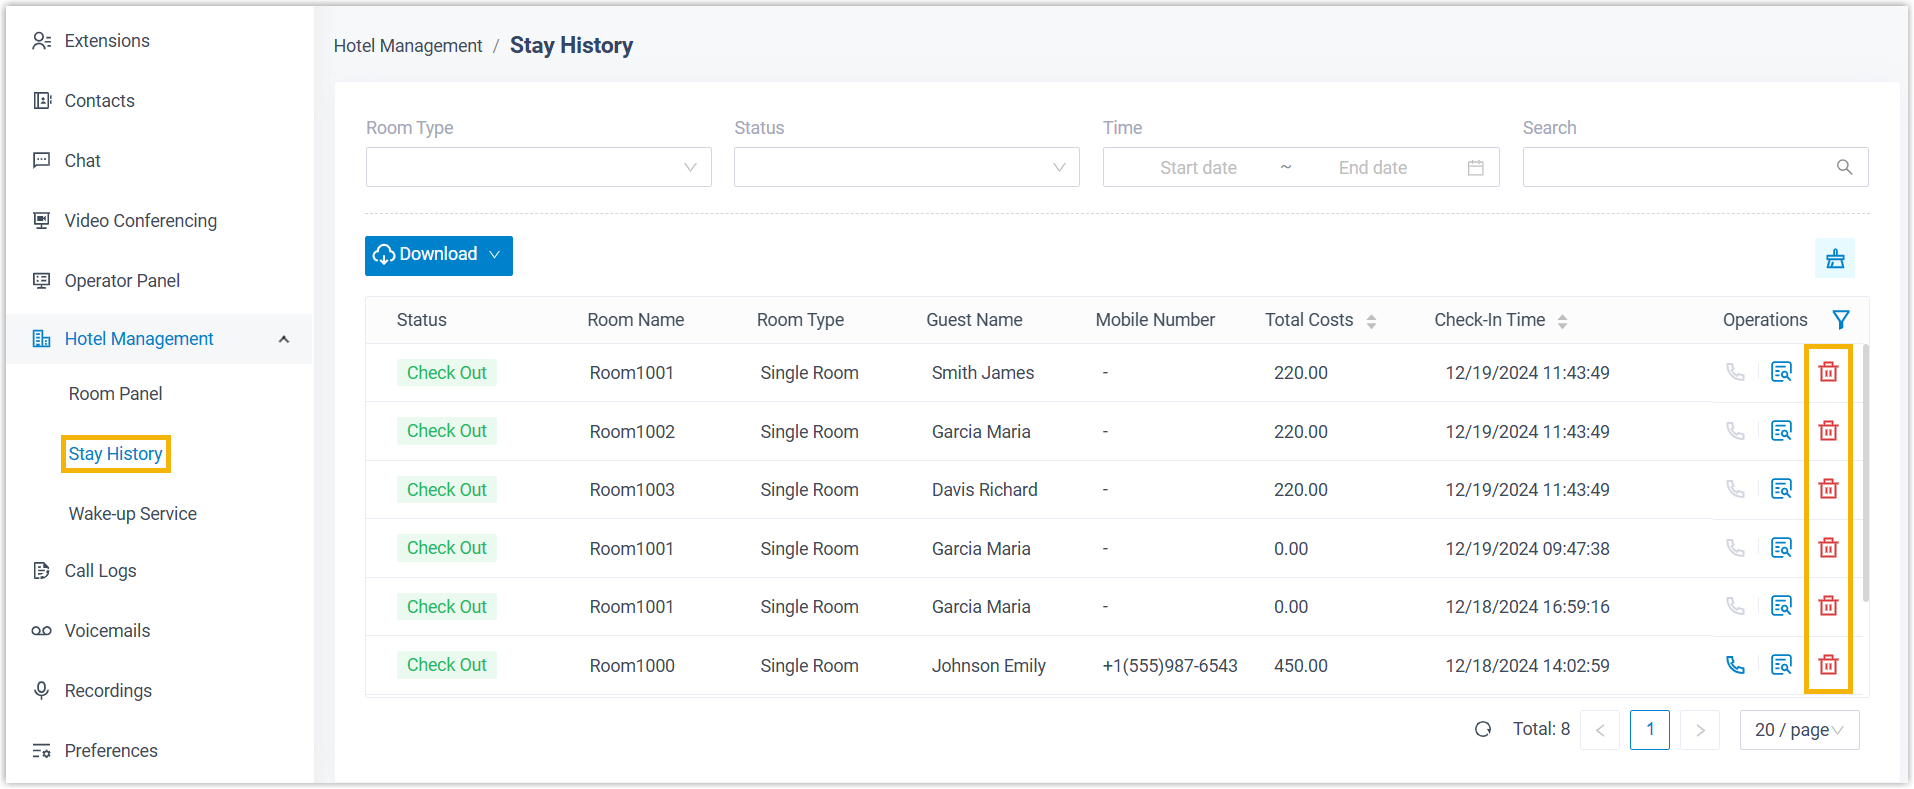
Delete Check-in History: Also under Hotel Management > Stay History, this allows the staff member to delete guest stay records.
Guest room policy
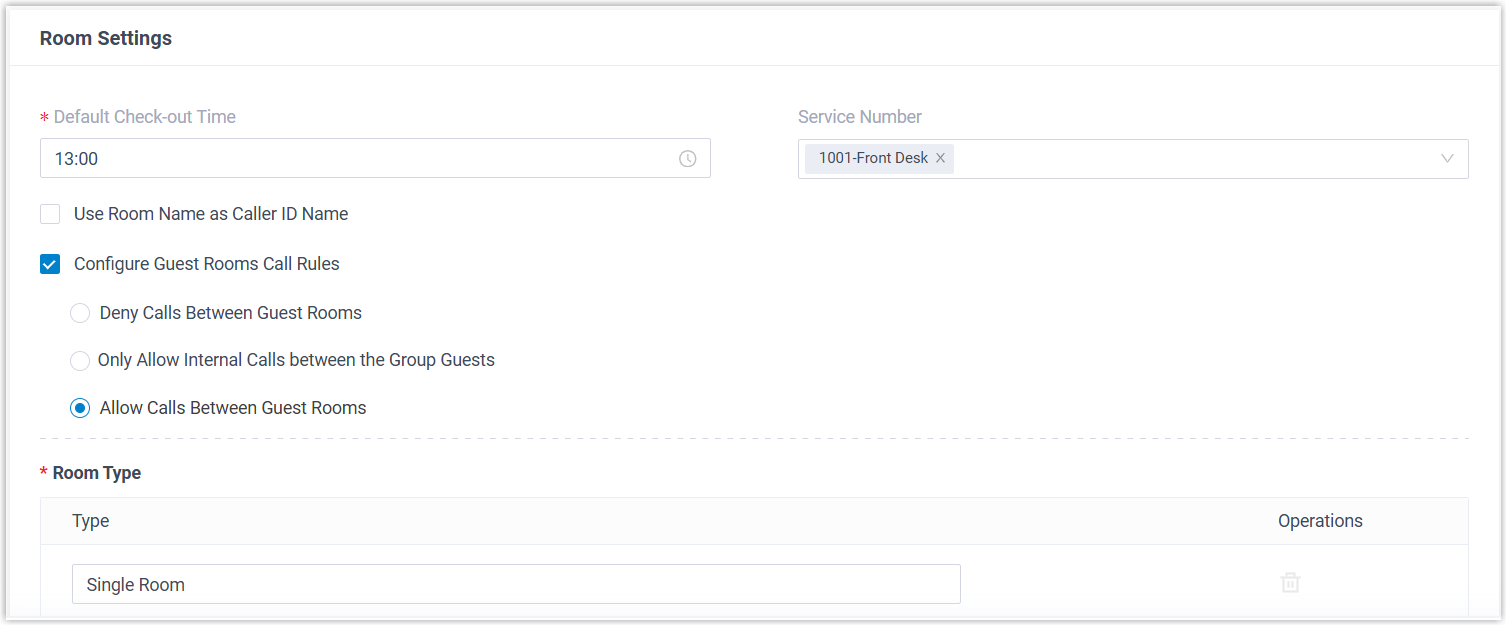
Section titled “Guest room policy”The guest room policy is required. It sets the shared rules that apply to every room.
-
Default Check-out Time: Set the check-out time to apply by default.
-
Service Number: A service number is the extension or AI receptionist number tied to a hotel service such as the 24-hour front desk, laundry, or restaurant. Every guest can dial it from a room phone whether or not they are checked in. Select one or more service numbers from the drop-down list.
-
Use Room Name as Caller ID Name: By default, an internal call from a room phone shows the guest name captured at check-in, formatted according to PBX Settings > Preferences > Basic > Name Display Format.

To show the room name instead (the name set in Hotel Management > Room Management > Room Name), turn on Use Room Name as Caller ID Name.

-
Configure Guest Rooms Call Rules: Room-to-room calling is off by default. Enable this option and pick the rule that fits your property:
- Deny Calls Between Guest Rooms
- Only Allow Internal Calls between the Group Guests
- Allow Calls Between Guest Rooms
-
Room Type: Define your room types.
Hotel information
Section titled “Hotel information”Fill in your property’s details in the Billing Information section. These details appear on every bill and invoice.
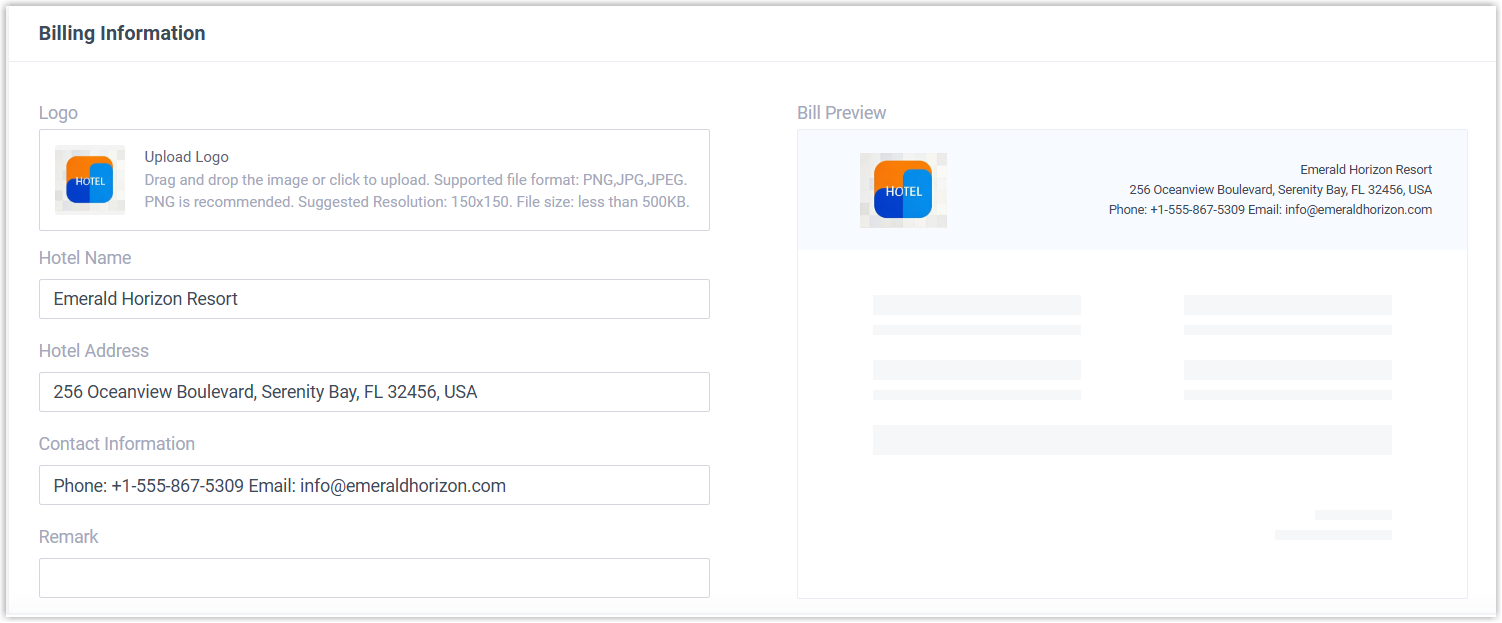
Step 3. Add guest rooms
Section titled “Step 3. Add guest rooms”Open the Room Management tab to create your rooms and configure room statuses.
Add rooms
Section titled “Add rooms”Add rooms all at once or individually.
Add rooms in bulk
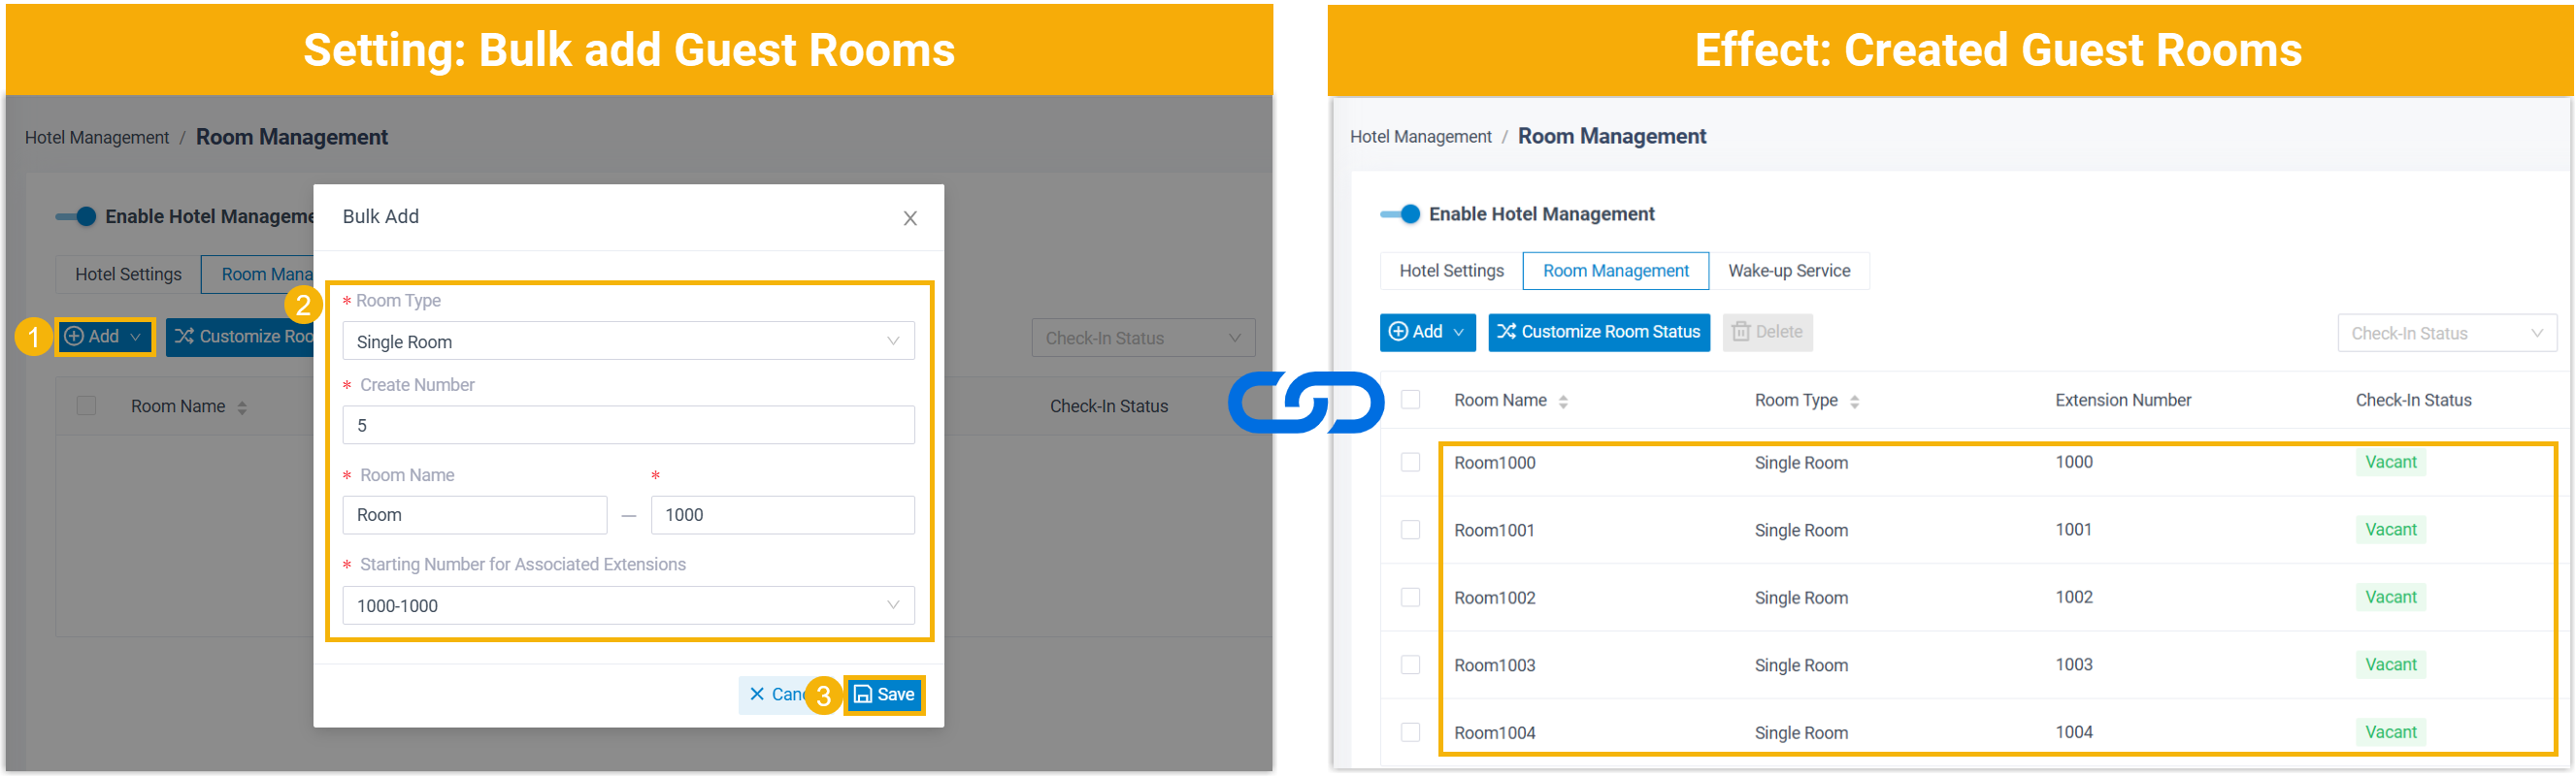
- Click Add > Bulk Add.
- In the dialog, set:
- Room Type: Choose a room type.
- Create Number: The number of rooms to create. Enter a value from 1 to 99.
- Room Name: A prefix and a suffix that combine into each room name. The prefix can be any letter or number; the suffix is a number from 0 to 9999. For example, a prefix of
Roomand a suffix of1000producesRoom1000. - Starting Number for Associated Extensions: Pick an extension from the drop-down. The system assigns available extension numbers to the new rooms in sequence, starting from the one you choose.
- Click Save.
Add a room individually
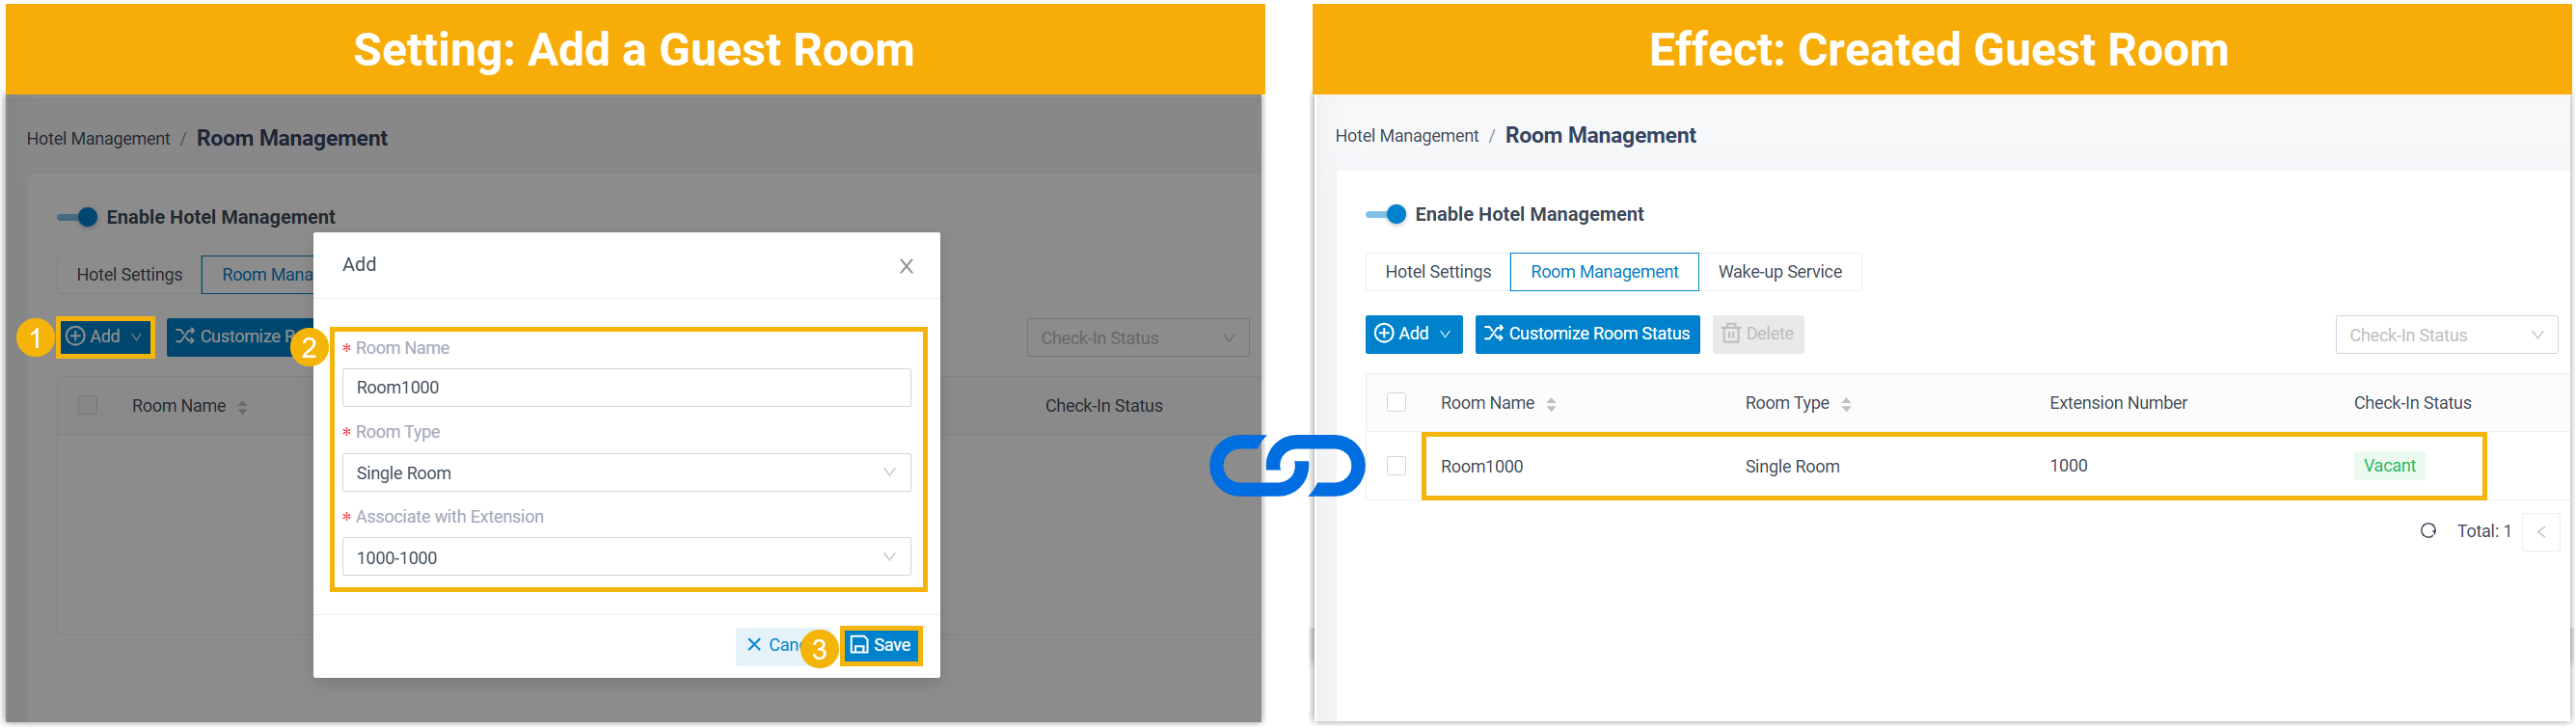
- Click Add > Add.
- In the dialog, set:
- Room Name: Name the room.
- Room Type: Choose a room type.
- Associate with Extension: Pick the extension to tie to the room.
- Click Save.
Set up room statuses
Section titled “Set up room statuses”Cloud Voice includes six built-in statuses, Dirty, Clean, Inspected, Repairing, Available, and Unavailable: each paired with a feature code so housekeeping can update a room from its phone. You can add your own statuses on top of these.
-
Click Customize Room Status. The three default status rules appear in the list.
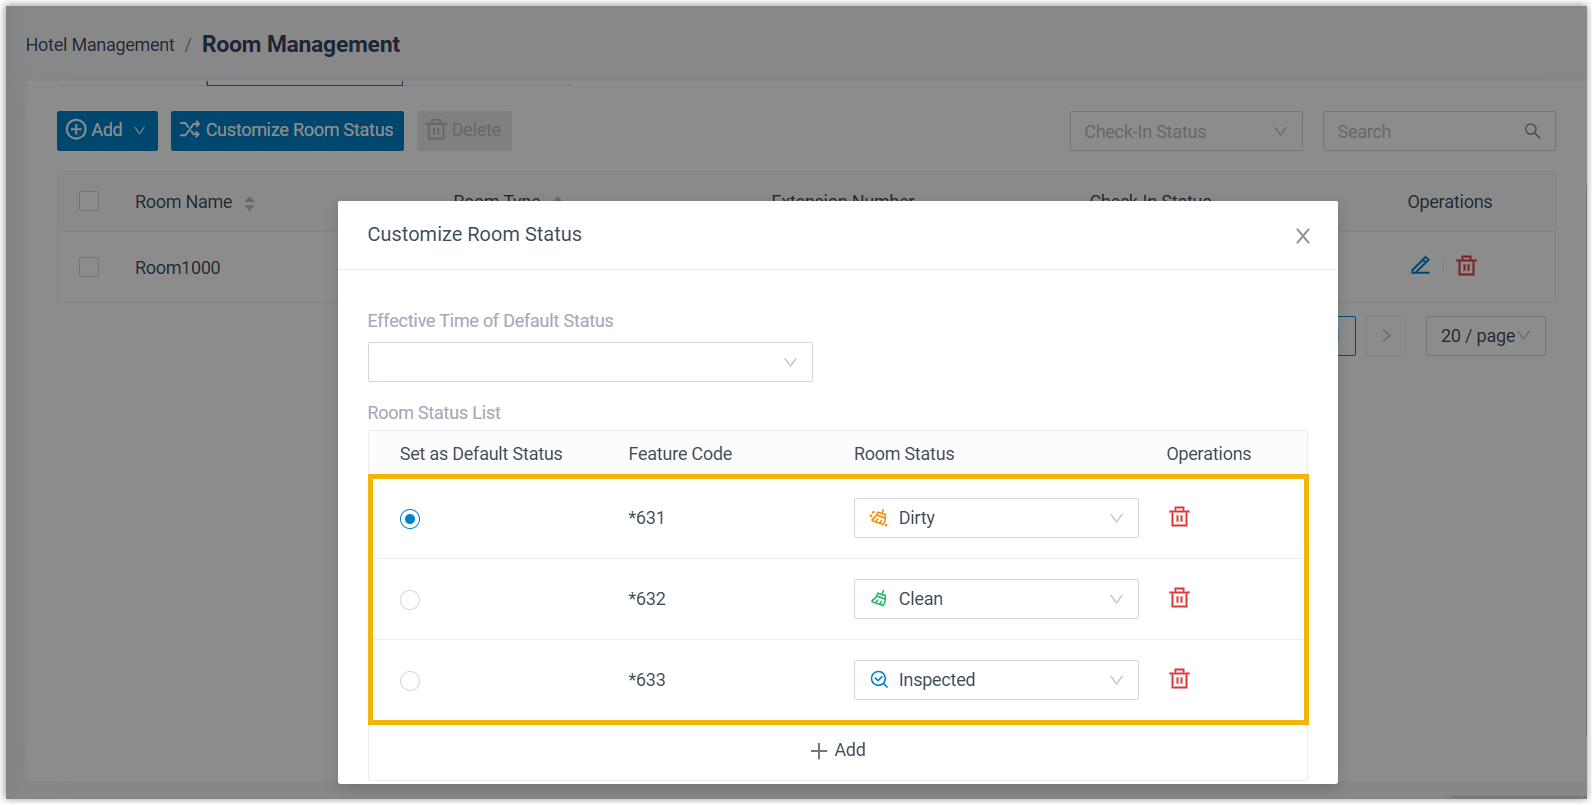
-
Add a status.
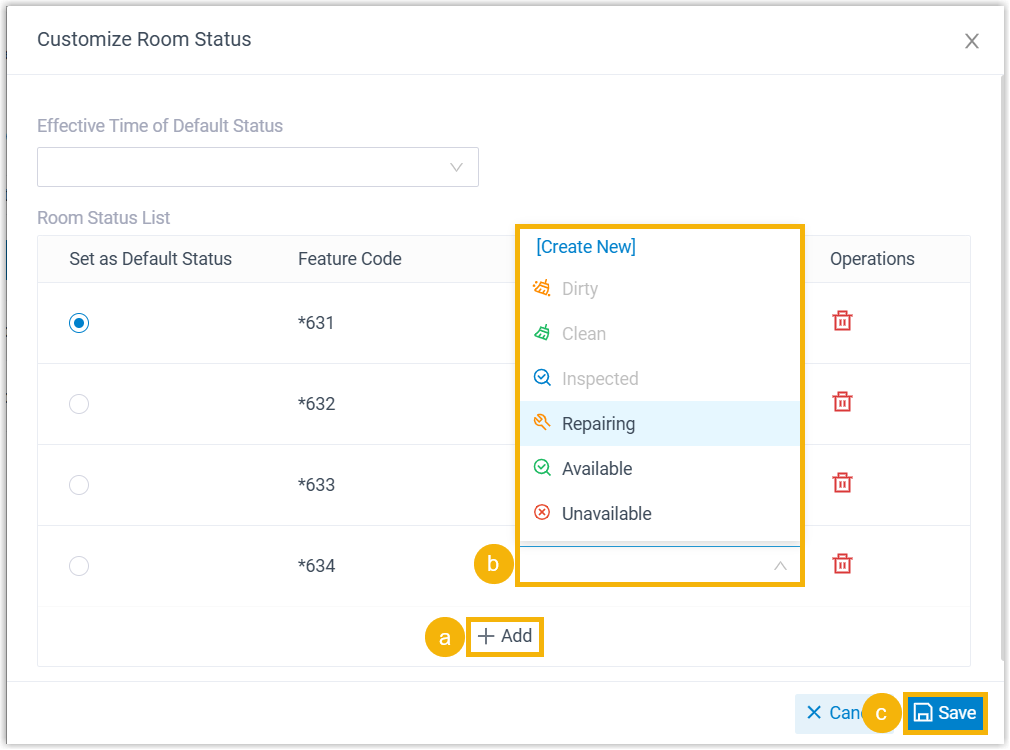
a. Click Add. The system generates a feature code for the status so housekeepers can dial it from a room phone to update the room.
b. In the Room Status drop-down, pick an existing status or click Create New to define one.
-
Set the default status and, if you want, when it should reset.
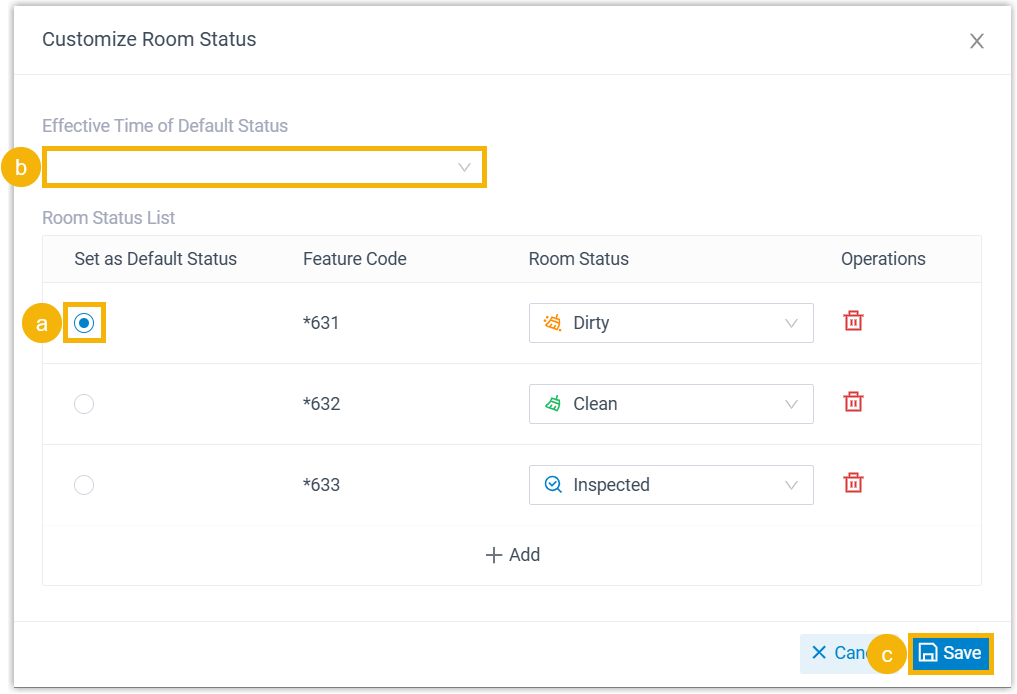
a. In the Set as Default Status column, choose the default.
b. Optional: In the Effective Time of Default Status drop-down, choose when the status resets to the default:
- At Check-In: Reset each time a guest checks in.
- Automatically Reset Every X Days: Reset on a schedule. Select the interval, in days, from the drop-down.
c. Click Save.
Step 4. Set up wake-up service
Section titled “Step 4. Set up wake-up service”Open the Wake-up Service tab to set the wake-up number and the rules that govern wake-up calls.
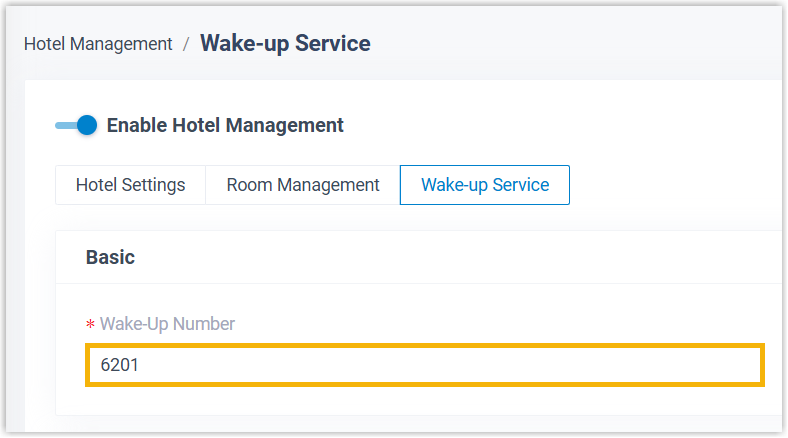
Wake-up number
Section titled “Wake-up number”The wake-up number is the internal number a guest dials to set their own wake-up calls. Keep the default number or type your own in the Wake-Up Number field.
Wake-up rule
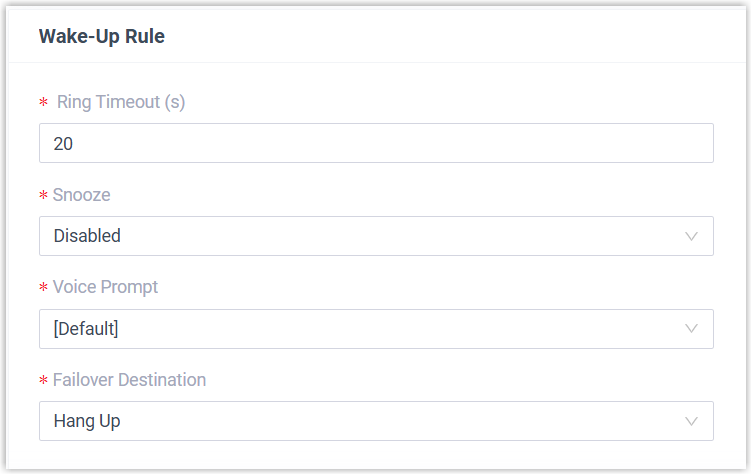
Section titled “Wake-up rule”Set how wake-up calls play out.
| Setting | Description |
|---|---|
| Ring Timeout (s) | How long, in seconds, a wake-up call rings before timing out. Valid range: 5 to 300. |
| Snooze | How many times to repeat the call when a guest doesn’t answer, and the interval between repeats. |
| Voice Prompt | The prompt played when the guest answers. The list is drawn from PBX Settings > Voice Prompt > Custom Prompt. |
| Failover Destination | Where the call goes if the guest never answers: Hang Up, Extension, or Ring Group. |
Result
Section titled “Result”- Hotel service is now set up on Cloud Voice.
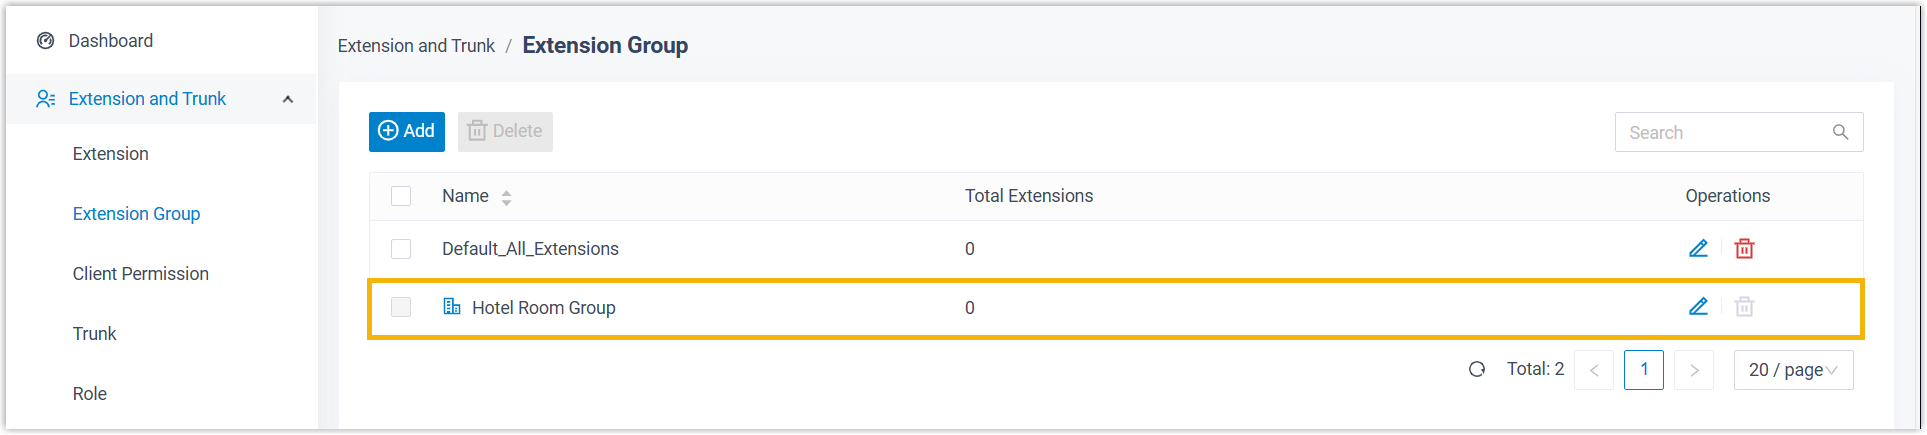
- An extension group named Hotel Room Group is created, and every extension you assign to a guest room is added to it automatically, giving you one place to manage room calls.
Question about this page?
Ask the AI assistant. It starts from this page, then searches the rest of the docs.
Ask Cloud Voice AI
Answers are AI-generated from the docs and may contain mistakes. Verify with the linked pages.