
Set up a Multi-language IVR
An IVR (Interactive Voice Response) is the automated menu that answers a call and asks the caller to press a key. A multi-language IVR greets callers, lets them pick a language, and then continues the interaction in that language. Once a caller makes a selection, every following system prompt plays in the chosen language and the call is sent to a destination you assign to that option. The result is a smoother experience for a mixed-language audience and calls that land with the right team.
Requirements
Section titled “Requirements”Your Cloud Voice system must be running version 84.14.0.24 or later.
Step 1. Plan the language menu
Section titled “Step 1. Plan the language menu”Before you touch any settings, decide how the menu should behave. Map out three things for every language you want to offer:
- The languages the IVR will announce.
- The keypad digit a caller presses to choose each language.
- Where the call goes after each selection.
As an example, the table below sketches a two-option menu offering English and Mandarin.
| Language | Key | Destination |
|---|---|---|
| English | Key 1 | IVR: English (6202) |
| Mandarin | Key 2 | Queue: Mandarin-agents (6400) |
Step 2. Upload the greeting prompt
Section titled “Step 2. Upload the greeting prompt”The IVR needs an audio file that reads out the language choices and the key for each one.
-
Record a prompt that lists the options, for example: “Welcome. For English, press 1. For Mandarin, press 2.”
-
Add the audio file to the system:
-
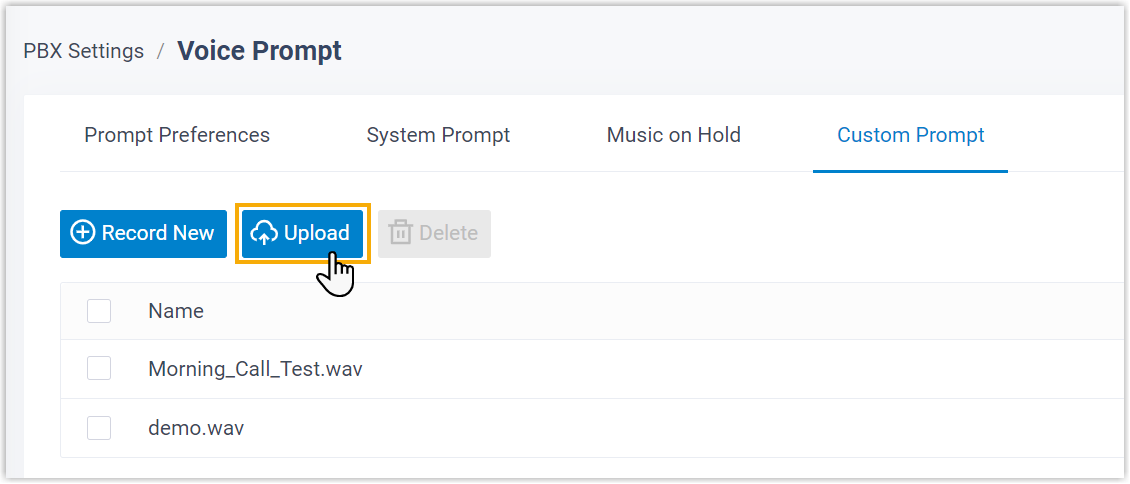
Sign in to the web portal and open PBX Settings > Voice Prompt > Custom Prompts.
-
Click Upload and choose your audio file.
-
Click Save, then Apply.
-
Step 3. Build the IVR
Section titled “Step 3. Build the IVR”-
Go to Call Features > IVR and click Add.
-
On the Basic tab, set up the general options for the IVR.
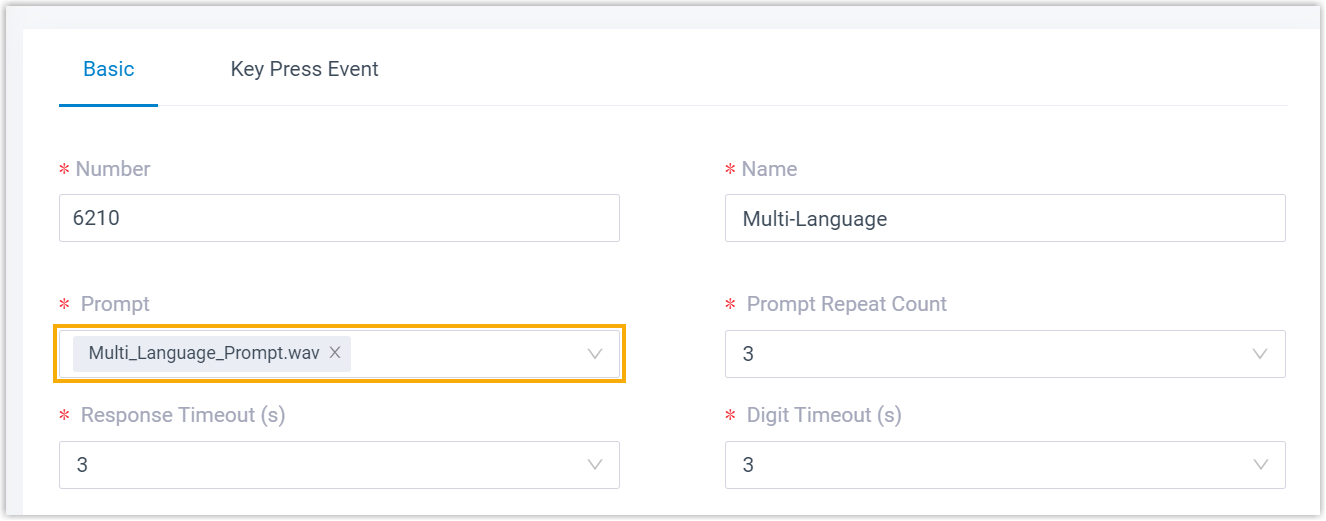
- Open the Prompt drop-down and pick the greeting you uploaded in Step 2.
- Fill in the rest of the basic settings to suit your needs.
-
Open the Key Press Event tab and turn on the language feature.
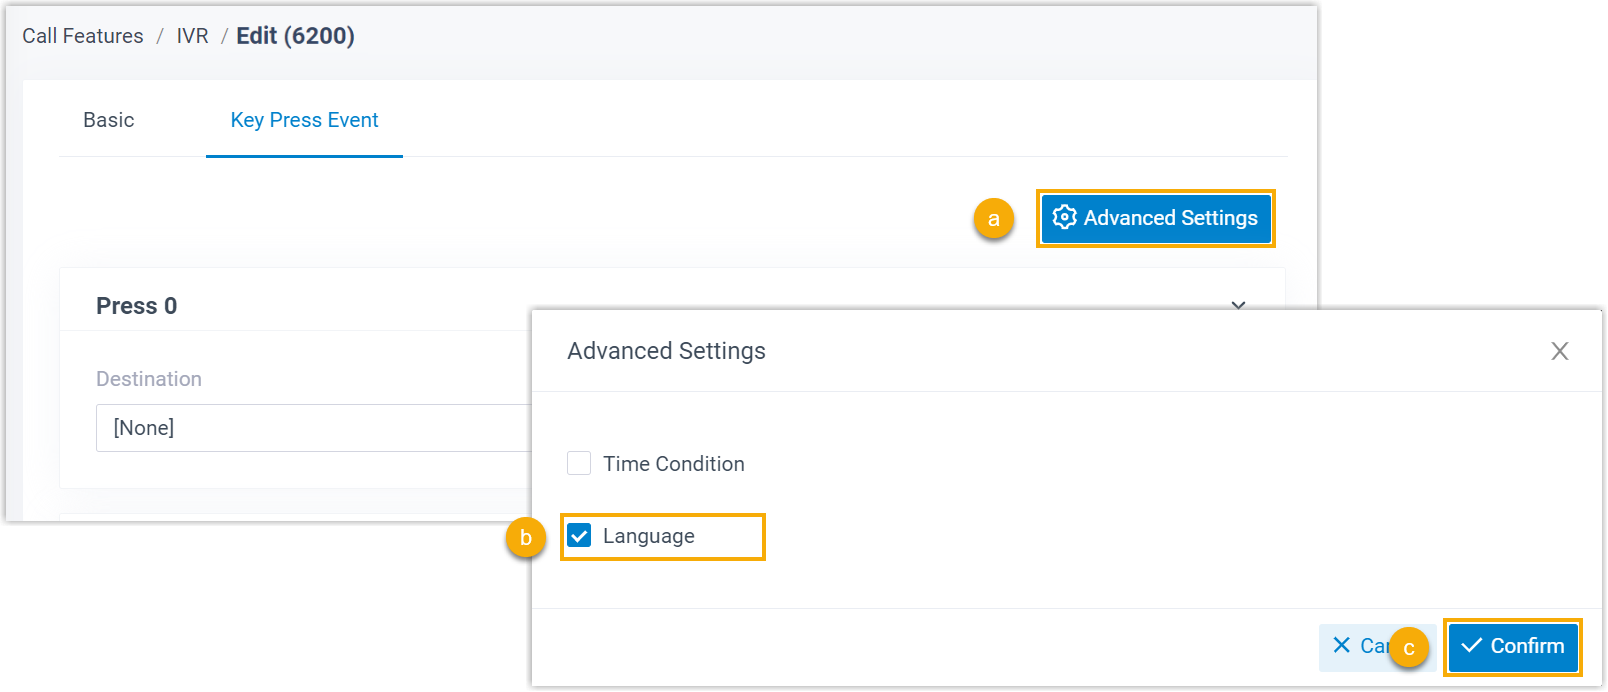
- In the top-right corner, click Advanced Settings.
- In the dialog that opens, select the Language checkbox.
- Click Confirm.
-
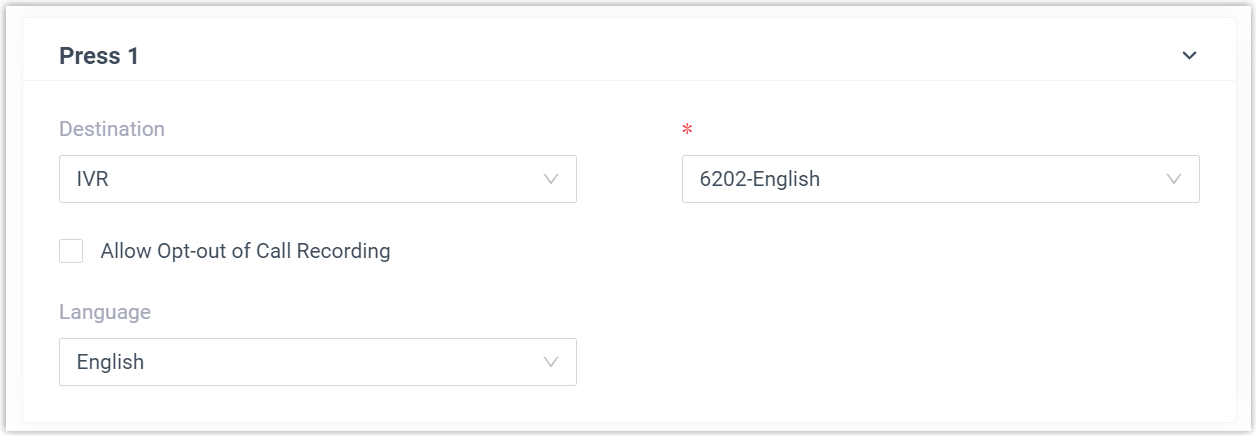
Define a key event for each language you planned in Step 1.
-
Destination: Choose where the call goes when a caller presses this key.
-
Allow Opt-out of Call Recording (optional): Select this to keep calls routed through this key from being recorded, even when Call Recording is on.
-
Language: Pick the language for system prompts. From this point on, the caller hears system prompts in the language tied to the key they pressed.
-
-
Click Save, then Apply.
What callers experience
Section titled “What callers experience”A caller reaching the IVR first hears your greeting asking them to choose a language. After they press a key, every system prompt that follows plays in the language assigned to that key, your own custom recordings are unaffected, and the call is handed off to the destination you set for that option.
Question about this page?
Ask the AI assistant. It starts from this page, then searches the rest of the docs.
Ask Cloud Voice AI
Answers are AI-generated from the docs and may contain mistakes. Verify with the linked pages.