
Set up Gmail as an Email Server
Cloud Voice can route its outbound email through your own Gmail account. This page walks you through generating a Google app password and then pointing Cloud Voice at Gmail’s SMTP service (SMTP, short for Simple Mail Transfer Protocol, is the standard used to send email) so the system can send notifications, voicemail alerts, and similar messages from your address.
Before you begin
Section titled “Before you begin”Confirm that your Cloud Voice system is able to reach Google’s servers over the network. If the system cannot reach Google, the connection test in Step 2 will fail no matter how the settings are entered.
Step 1. Generate an app password in your Google Account
Section titled “Step 1. Generate an app password in your Google Account”Google blocks direct password sign-in for third-party services, so Cloud Voice authenticates with a dedicated app password instead of your normal Gmail password. Enabling 2-Step Verification is a prerequisite for creating one.
- Sign in to your Google Account with the Gmail credentials you want Cloud Voice to use.
- In the left-hand menu, select Security.
- Enable 2-Step Verification:
-
Under Signing in to Google, click 2-Step Verification and re-enter your Gmail password when prompted.
-
On the 2-Step Verification page, click GET STARTED and confirm your password again.
-
Choose a verification method and follow the on-screen prompts to verify your account.
-
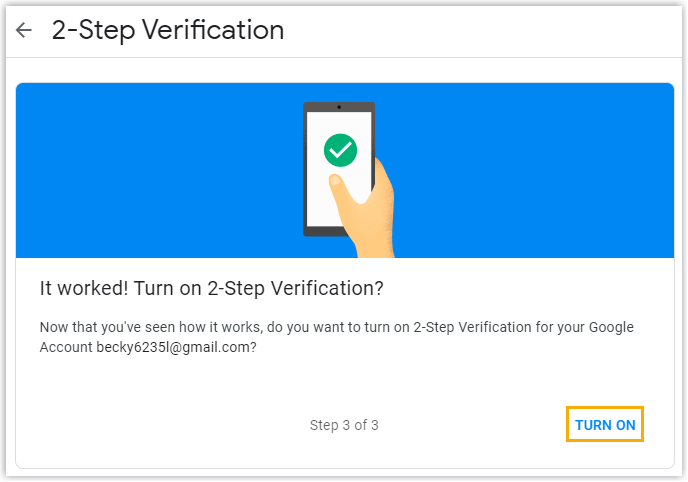
Click TURN ON to finish enabling 2-Step Verification.
-
- Use the back arrow
 at the top of the page to return to the Security page.
 - Create the app password:
-
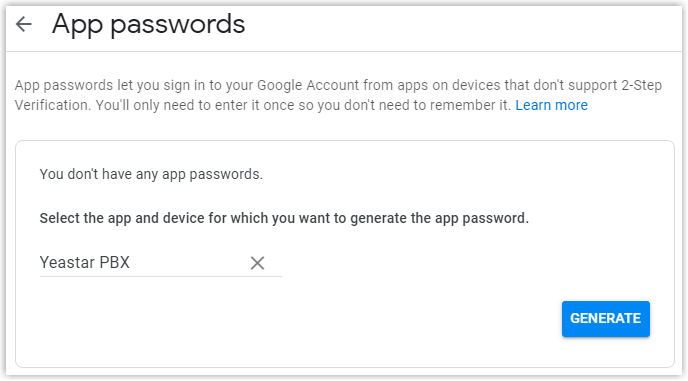
Under Signing in to Google, click App passwords and verify your Gmail password once more.
-
Open the Select app drop-down and choose Other (Custom name).
-
Type a label that will help you recognize the entry later, for example
Cloud Voice PBX. (PBX stands for Private Branch Exchange, the term for your business phone system.) -
Click GENERATE.
-
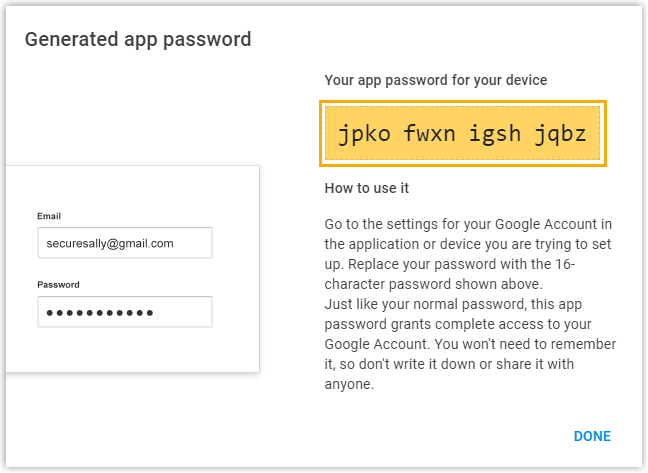
Google displays the new 16-digit app password. Copy it and keep it somewhere safe, because you will paste it into Cloud Voice in the next step.
Step 2. Point Cloud Voice at the Gmail server
Section titled “Step 2. Point Cloud Voice at the Gmail server”With the app password in hand, configure Cloud Voice to send through Gmail.
-
Sign in to the Cloud Voice web portal and go to System > Email > Email Server.
-
Set Type of Email Server to Custom Email Server.
-
Set Select Email Server Provider to General.
-
Fill in the server details:
- Sender Email Address: Your Gmail address. This is the From address recipients see on messages sent by Cloud Voice.
- Email Address or Username: Your Gmail address.
- Password: The 16-digit app password you generated in Step 1, not your normal Gmail password.
- Outgoing Mail Server (SMTP): Leave the default value
smtp.gmail.com. - Port: Leave the default value
587. - Enable TLS Encryption: Leave this option cleared. (TLS, short for Transport Layer Security, encrypts the connection to the mail server.)
-
Send a test message to confirm the connection:
- Click Test.
- In the dialog that opens, type a destination address in the Email Address field.
- Click Test.
-
Click Save.
What to expect
Section titled “What to expect”- On success, the page shows “Success” and the address you tested receives the message.
- On failure, the page shows “Failed to send” along with an error message. For more detail on why delivery failed, review the Email Sent Logs.
Question about this page?
Ask the AI assistant. It starts from this page, then searches the rest of the docs.
Ask Cloud Voice AI
Answers are AI-generated from the docs and may contain mistakes. Verify with the linked pages.