
Set up WebRTC Click-to-Call
WebRTC click-to-call lets visitors ring your company straight from their browser, with no dialer or app to install. WebRTC (Web Real-Time Communication) is the technology built into modern browsers that carries voice and video without any plugin. You set it up in two moves: create a WebRTC trunk (the connection that carries these browser calls into your phone system) to obtain a call link, then place that link behind a button or embed it in a page. This guide walks through building the trunk, routing its inbound calls to the right destination, testing the flow, and adding the link to your site.
Before you begin
Section titled “Before you begin”- Video calling is available only on the Ultimate Plan. Voice-only click-to-call works on any plan.
- Cloud Voice must be running version 84.11.0.22 or later.
- You need permission to add trunks. Building a WebRTC trunk starts with the Add button under Extension and Trunk > Trunk.
Step 1: Create the WebRTC trunk
Section titled “Step 1: Create the WebRTC trunk”The trunk is what generates the call link your visitors will use.
-
Sign in to the PBX (Private Branch Exchange, the phone system that connects your extensions and outside lines) web portal and go to Extension and Trunk > Trunk, then click Add.
-
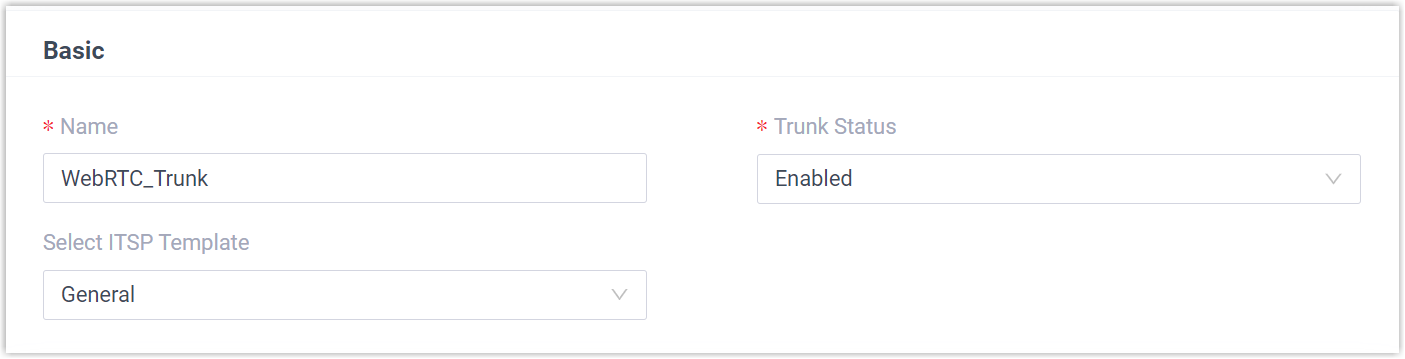
Under Basic, fill in these fields:
- Name: A label that makes the trunk easy to recognize later.
- Trunk Status: Set to Enabled.
- Select ITSP Template: Choose General. ITSP stands for Internet Telephony Service Provider; the template pre-loads common trunk settings, and General is the correct choice for a WebRTC trunk.
-
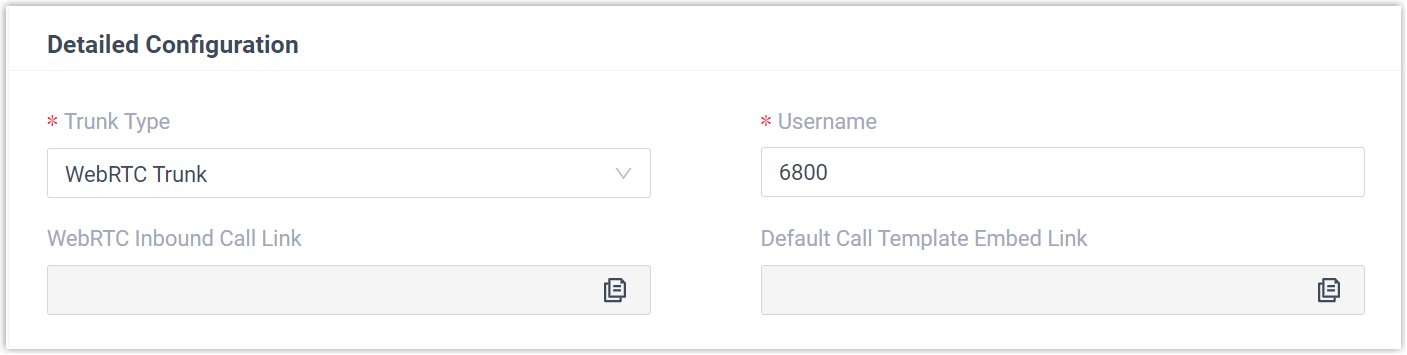
Under Detailed Configuration, set:
- Trunk Type: Select WebRTC Trunk.
- Username: Enter a username for the trunk.
-
(Optional) Open the Advanced tab to fine-tune the trunk:
- Under Codec Settings, pick the codecs you want to use.
- Under Call Restriction, cap the number of simultaneous calls the trunk will carry.
-
Click Save, then Apply.
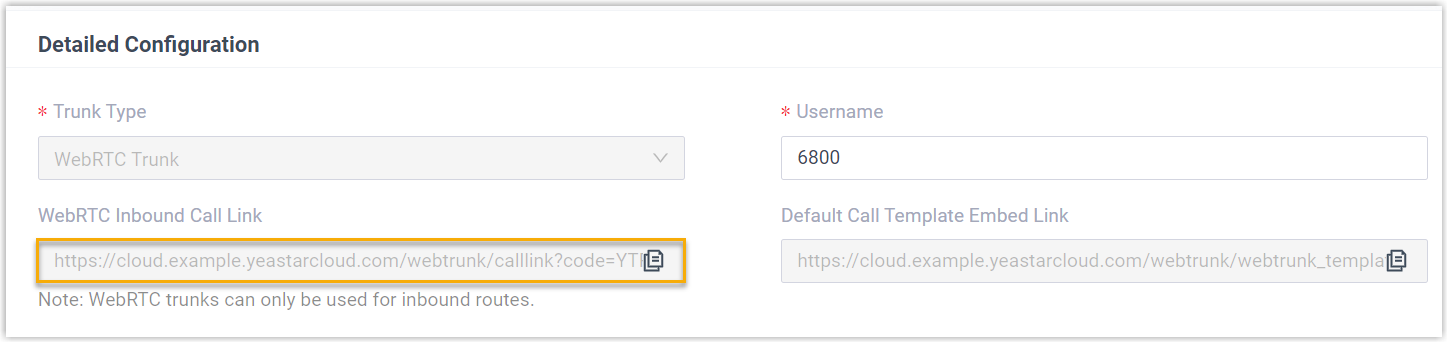
Once saved, the trunk appears in the list with a green status indicator, and its WebRTC Inbound Call Link is generated in the trunk’s detail view.
Step 2: Route the WebRTC inbound calls
Section titled “Step 2: Route the WebRTC inbound calls”Add an inbound route so calls that arrive through the WebRTC trunk land where you want them.
-
Go to Call Control > Inbound Route and click Add.
-
Under General, give the route a name.

-
Under Trunk, move the WebRTC trunk from the Available box to the Selected box.
-
Under Default Destination, decide where the calls go:
-
Same destination every time: Pick it from the Default Destination drop-down list.

-
Different destinations by time of day:
- Select the Time Condition checkbox.
- Choose a mode from the Time-based Routing Mode drop-down list.
- Set a destination for each time period.
For examples of time-based routing, see Route inbound calls based on Business Hours, Route inbound calls based on Department Hours, and Route inbound calls based on Employee Hours.
-
-
Click Save, then Apply.
Step 3: Test the click-to-call flow
Section titled “Step 3: Test the click-to-call flow”Confirm that a call through the link reaches the destination you configured.
-
Go to Extension and Trunk > Trunk and click the edit icon next to the WebRTC trunk.
-
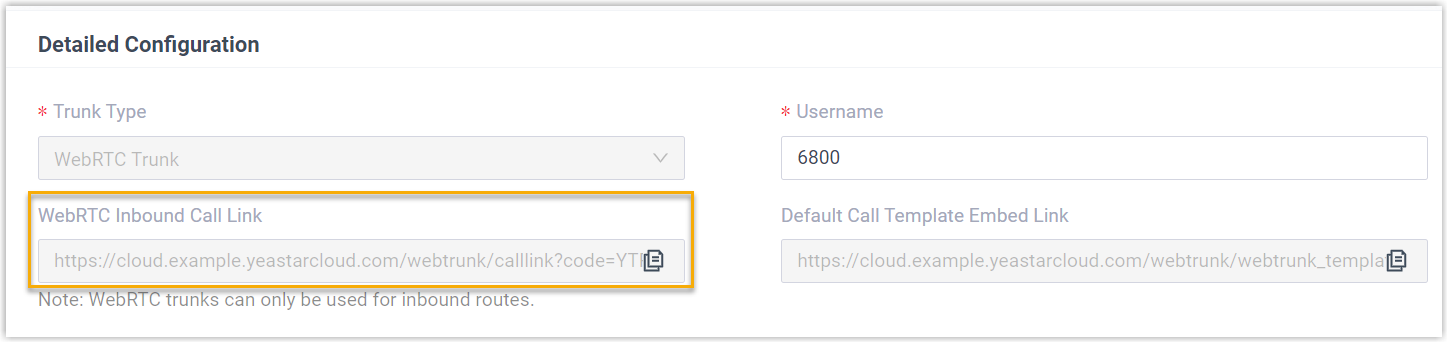
Under Detailed Configuration, copy the WebRTC Inbound Call Link.
-
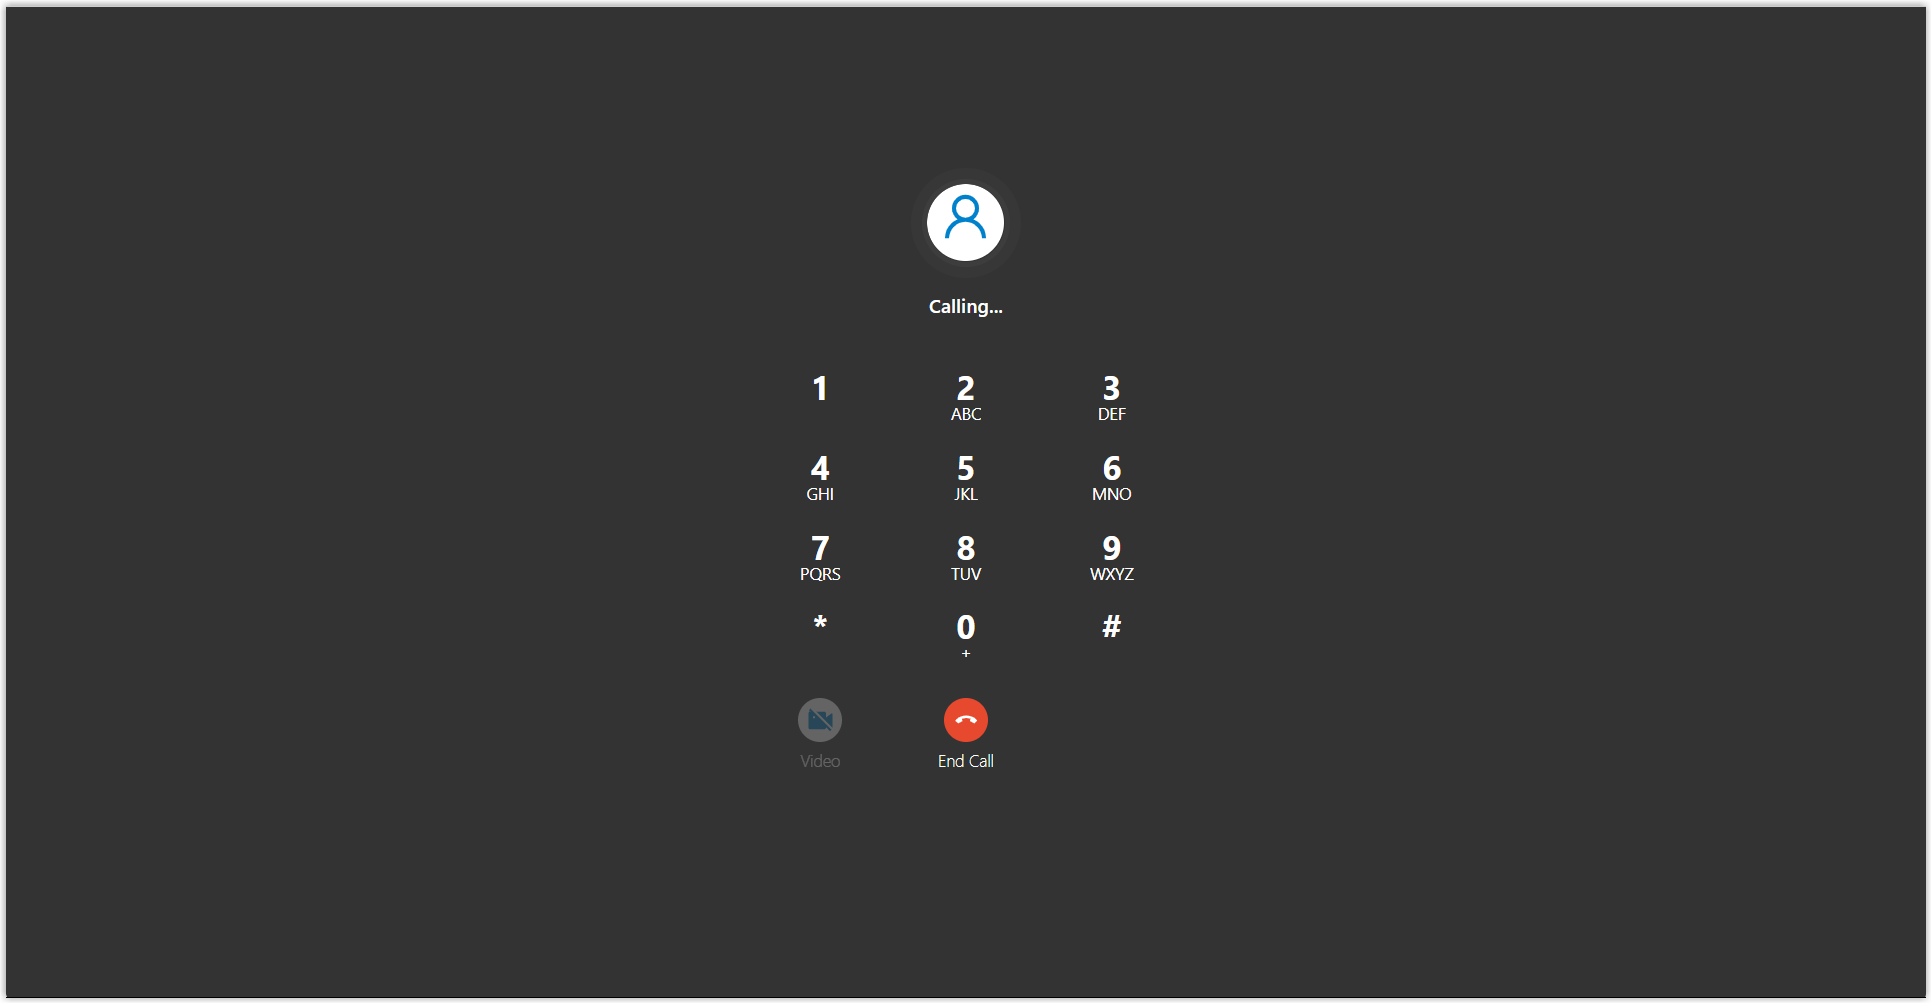
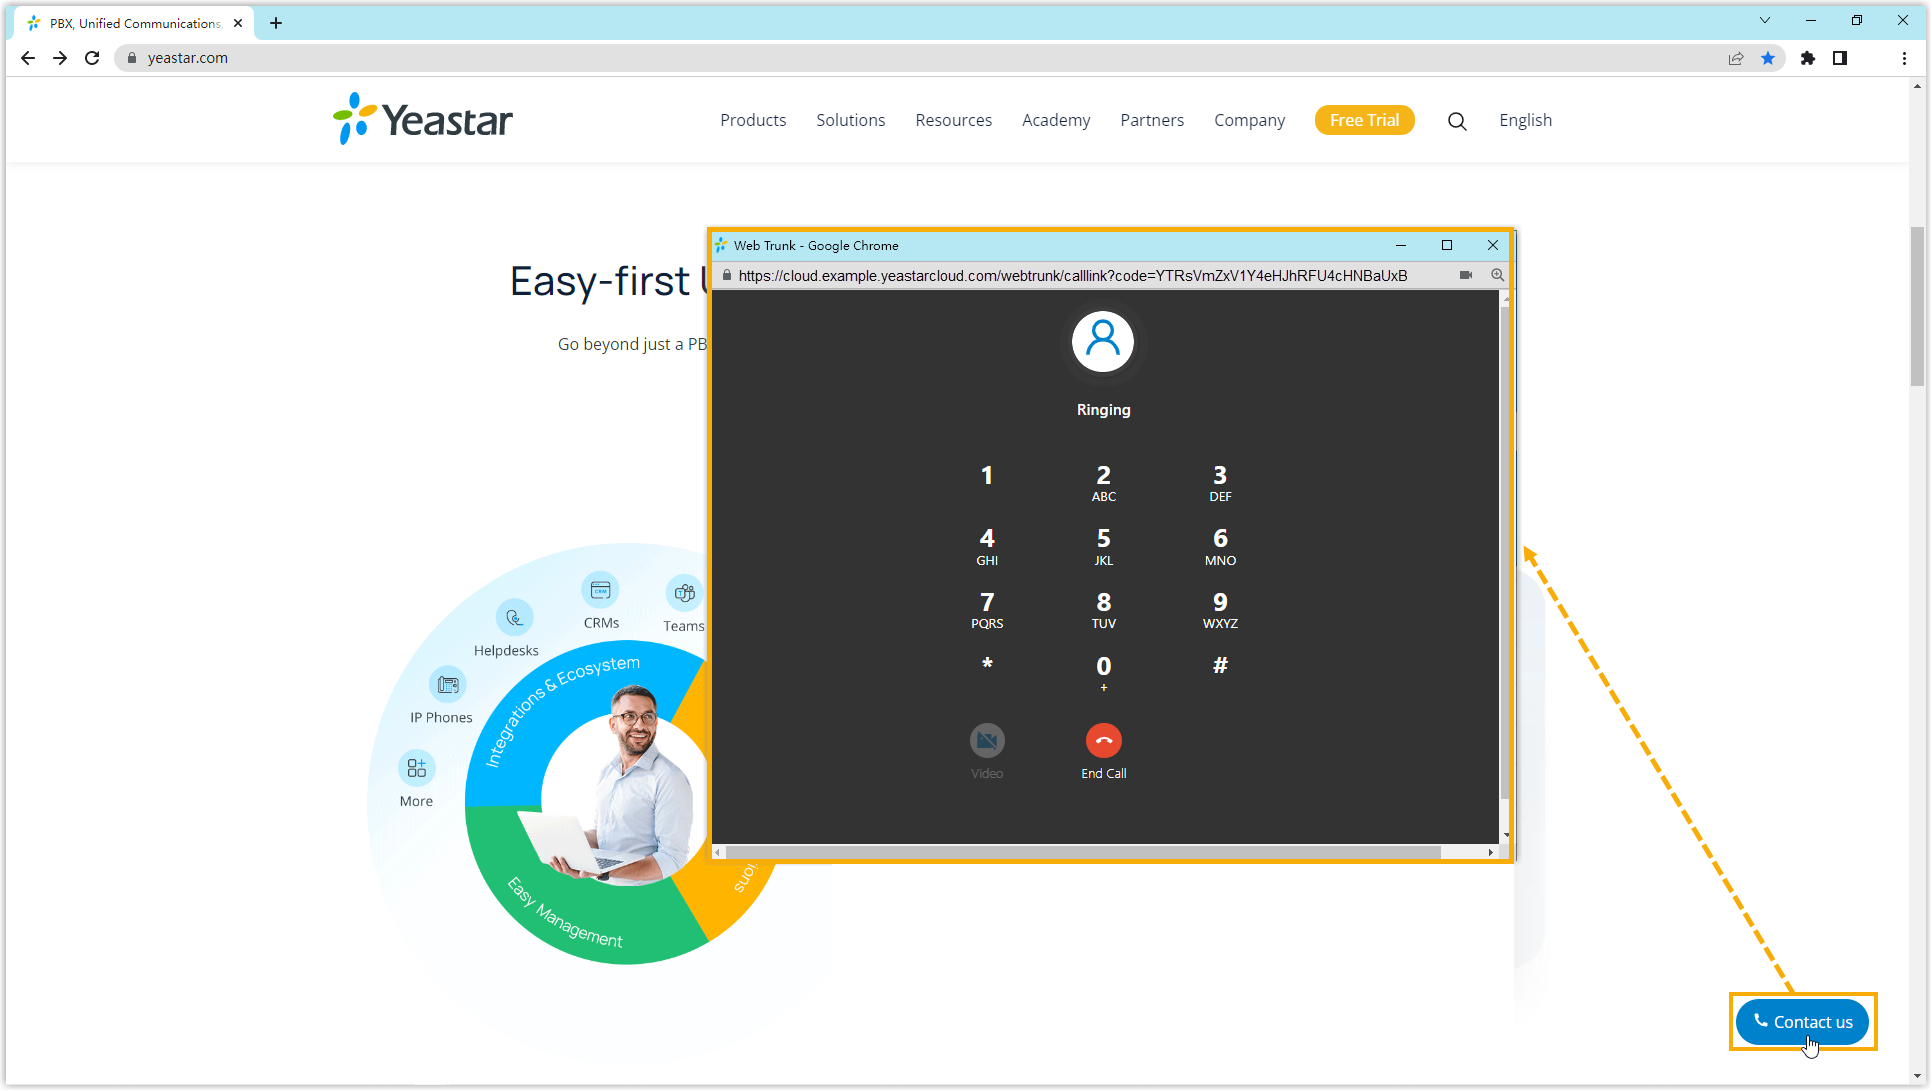
Paste the link into a new browser tab’s address bar and press Enter.
A dialpad opens in the browser and a call is placed to the destination you set.
Add the link to your website
Section titled “Add the link to your website”With the call link working, embed it in your site one of two ways.
Option 1, Link a button you build. Create your own call button and point its link to the WebRTC inbound call link.
Option 2, Use the built-in button template. The WebRTC trunk also provides a ready-made call button. Reference its embed link with a script tag:
<script src="{Default Call Template Embed Link}"></script>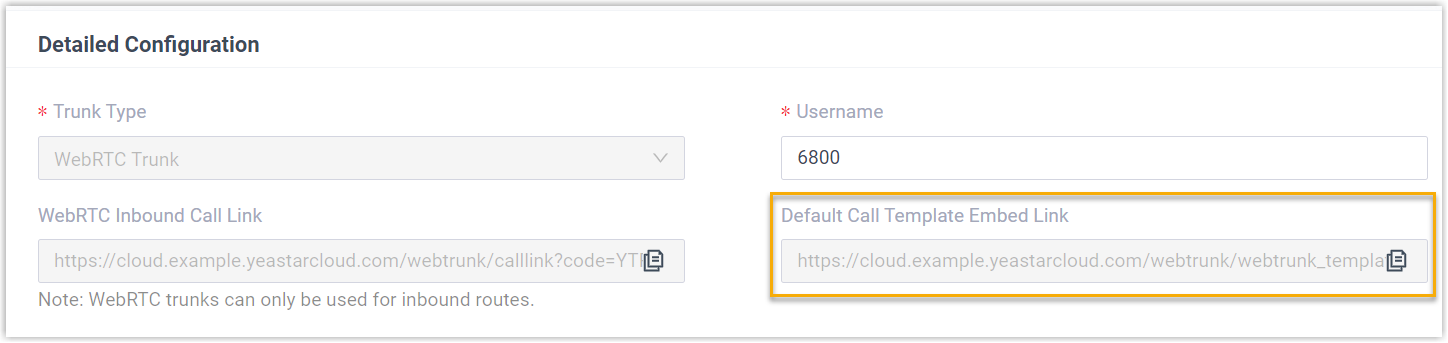
The result is a call button that opens the dialer when a visitor clicks it:
Question about this page?
Ask the AI assistant. It starts from this page, then searches the rest of the docs.
Ask Cloud Voice AI
Answers are AI-generated from the docs and may contain mistakes. Verify with the linked pages.