
Set up Recording Prompts
Cloud Voice can announce to everyone on a call that recording is taking place. You do this by assigning a recording prompt to each type of communication, so the system plays your chosen message when recording begins (or, for one-click recording, when it stops). Each call type has its own prompt, so you can tailor the wording to internal, inbound, outbound, and manually triggered recordings.
Every prompt is a custom audio file that you create once and then select from a drop-down list. The workflow is the same in each case: build the prompt under Voice Prompt, then assign it under Recording.
Prompt for internal calls
Section titled “Prompt for internal calls”When recording of internal calls is turned on, you can attach a prompt that plays as soon as the call connects. Both parties hear it before recording starts.
- Create the prompt.
-
Sign in to the management portal and go to PBX Settings > Voice Prompt > Custom Prompt.
-
Upload an audio file or record a new prompt for internal calls.

-
- Assign the prompt.
-
Go to Call Features > Recording.
-
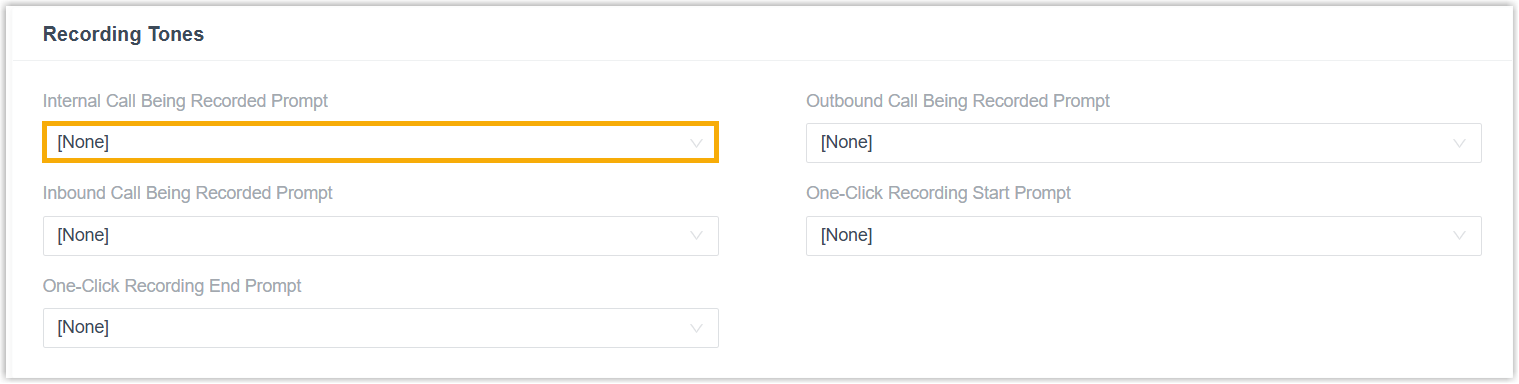
In the Recording Tones section, choose your prompt from the Internal Call Being Recorded Prompt drop-down list.
-
Click Save, then Apply.
-
Prompt for inbound calls
Section titled “Prompt for inbound calls”When recording is enabled for specific objects such as an extension or a trunk (a trunk is the line that connects your phone system to an outside carrier), you can play a prompt on inbound calls to those objects. The prompt plays once the call is answered, and recording begins.
- Create the prompt.
-
Sign in to the management portal and go to PBX Settings > Voice Prompt > Custom Prompt.
-
Upload an audio file or record a new prompt for inbound calls.
-
- Assign the prompt.
-
Go to Call Features > Recording.
-
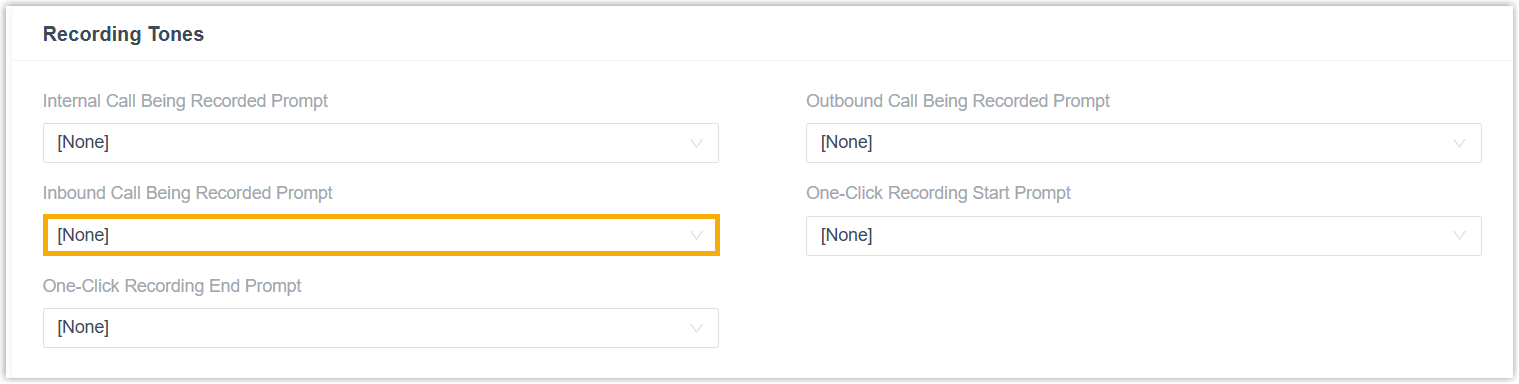
In the Recording Tones section, choose your prompt from the Inbound Call Being Recorded Prompt drop-down list.
-
Click Save, then Apply.
-
Prompt for outbound calls
Section titled “Prompt for outbound calls”When recording is enabled for specific objects such as an extension or a trunk, you can play a prompt on outbound calls from those objects. The prompt plays as the call connects, and recording begins.
- Create the prompt.
-
Sign in to the management portal and go to PBX Settings > Voice Prompt > Custom Prompt.
-
Upload an audio file or record a new prompt for outbound calls.
-
- Assign the prompt.
-
Go to Call Features > Recording.
-
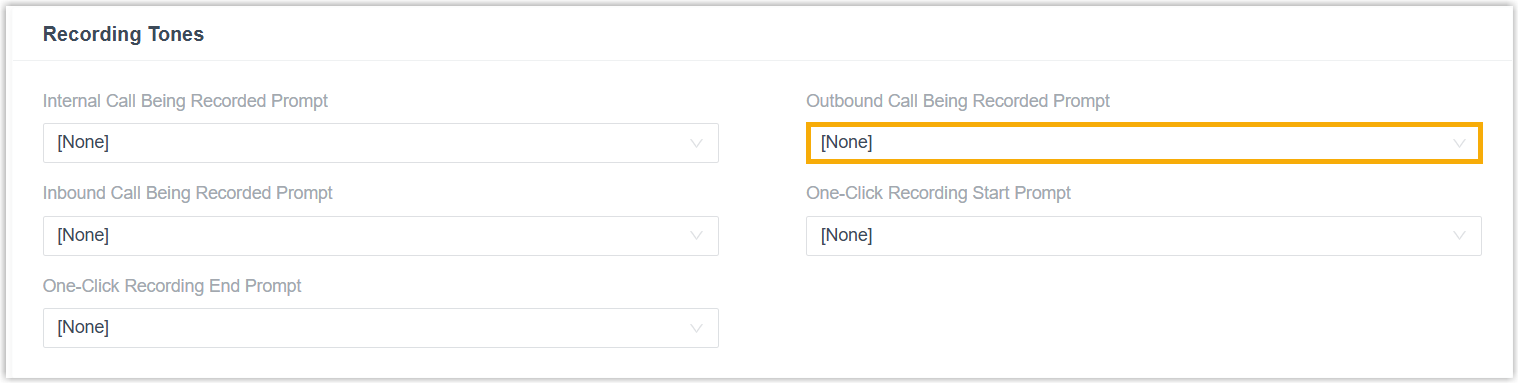
In the Recording Tones section, choose your prompt from the Outbound Call Being Recorded Prompt drop-down list.
-
Click Save, then Apply.
-
Prompts for one-click recording
Section titled “Prompts for one-click recording”Authorized users can turn recording on or off in the middle of a call, either with the recording button in the Cloud Voice App or by dialing the feature code (a short code, usually starting with *, that you enter on the phone keypad to trigger a system action; *1 by default). Because recording can start and stop on demand, one-click recording uses two separate prompts: one when recording begins and one when it ends. The matching prompt plays each time the recording status changes.
- Create the prompts.
-
Sign in to the management portal and go to PBX Settings > Voice Prompt > Custom Prompt.
-
Upload audio files or record new prompts for one-click recording.
-
- Assign the prompts.
-
Go to Call Features > Recording.
-
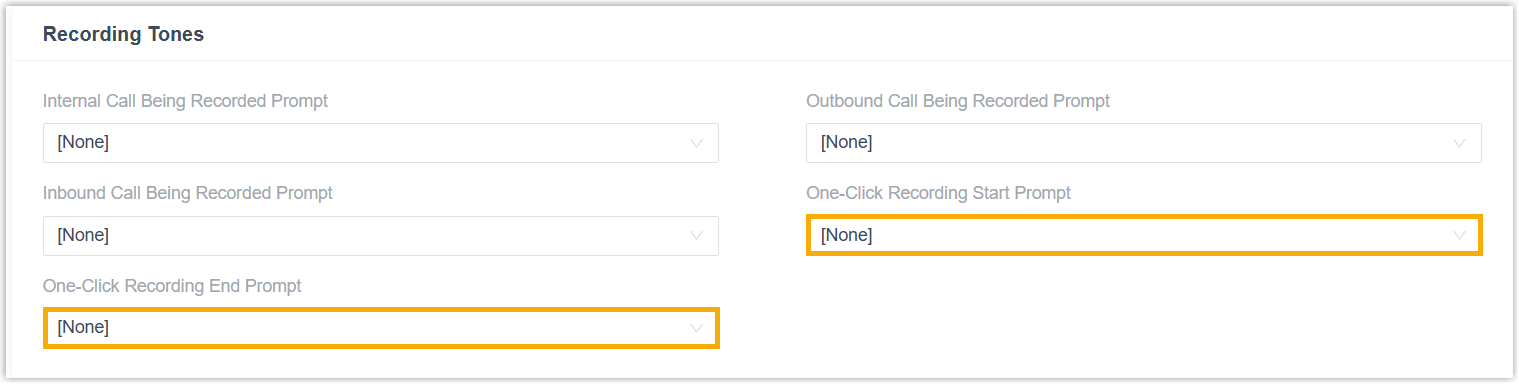
In the Recording Tones section, choose a prompt from both the One-Click Recording Start Prompt and One-Click Recording End Prompt drop-down lists.
-
Click Save, then Apply.
-
Question about this page?
Ask the AI assistant. It starts from this page, then searches the rest of the docs.
Ask Cloud Voice AI
Answers are AI-generated from the docs and may contain mistakes. Verify with the linked pages.