
Restrict Outbound Calls by PIN Codes
Attaching a PIN (Personal Identification Number) to an outbound route stops outbound calls from being placed until the caller supplies a valid code. This gives you a simple way to keep external calling reserved for the people who should have it, and to see afterward who placed each call. You can guard a route with one shared code or with a list of codes handed out to individual users.
Guard a route with a single PIN code
Section titled “Guard a route with a single PIN code”When you want to limit an outbound route to a particular team or set of employees, assign it one PIN code. Anyone who knows the code can dial out through the route; everyone else is blocked.
-
In the PBX web portal, open Call Control > Outbound Route.
-
Click the edit icon
 next to the route you want to protect.
 -
Scroll to the Trunk section and configure the password:

a. From the Outbound Route Password drop-down, choose Single PIN.
b. In the Single PIN field, type the code you want to use.
-
Click Save, then Apply.
Once the route is saved, callers are prompted for the code whenever they dial an external number through it.
The code used on each call also appears in the call detail records (CDRs, the log of every call the system handles), so you can confirm the route was used with authorization. Find them under Reports and Recordings > CDR.
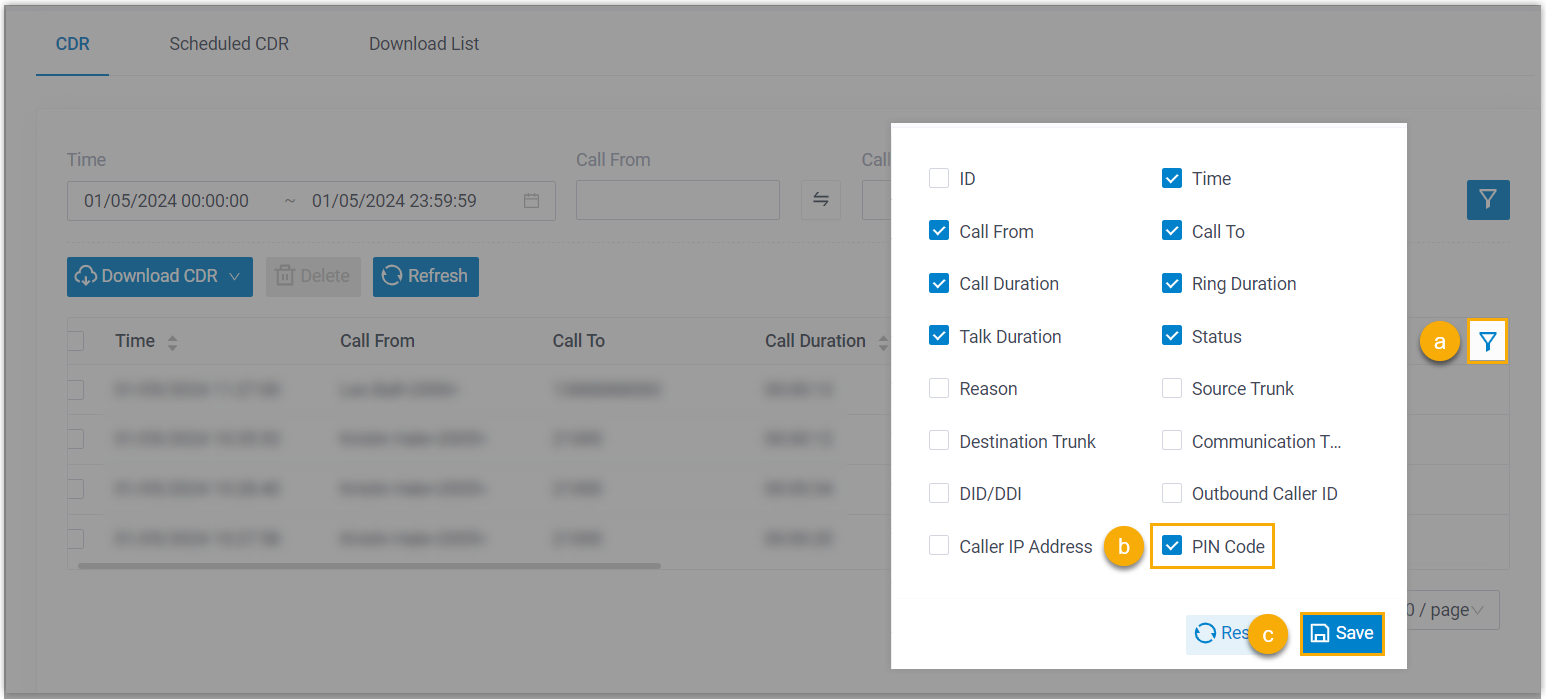

For a walk-through of what a caller experiences, see Usage example.
Guard a route with a PIN list
Section titled “Guard a route with a PIN list”Sometimes several people share one extension number across different devices to place outbound calls. A single shared code can’t tell them apart in your records. Instead, build a list of PIN codes, give each person their own, and attach the list to the route. Everyone can dial out, and each call is stamped with the individual code that placed it.
Step 1: Create a PIN list
Section titled “Step 1: Create a PIN list”-
In the PBX web portal, open Call Features > PIN List and click Add.
-
Fill in the dialog that opens:
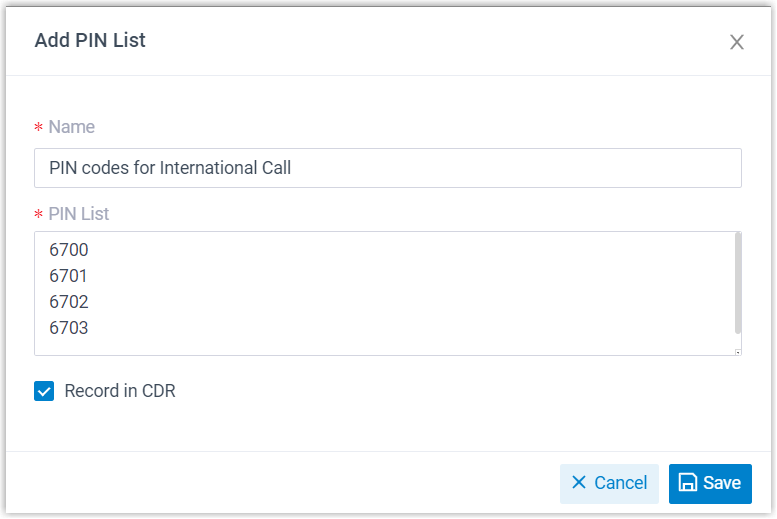
Setting Description Name A label that helps you recognize the list later. PIN List The codes themselves. Press Enter after each code to add another. Codes must be numeric and between 3 and 15 characters. Record in CDR Turn this on so the code used on each call is written to the call detail records. -
Click Save.
Step 2: Attach the list to an outbound route
Section titled “Step 2: Attach the list to an outbound route”-
In the PBX web portal, open Call Control > Outbound Route.
-
Click the edit icon
next to the route you want to protect. -
Scroll to the Trunk section and configure the password:

a. From the Outbound Route Password drop-down, choose PIN List.
b. From the PIN List drop-down, pick the list you created.
-
Click Save, then Apply.
Now callers must enter one of the codes from the assigned list to dial out through the route. Because each person uses their own code, you can tell their calls apart in the CDR even when they share an extension. Find the records under Reports and Recordings > CDR.

Usage example
Section titled “Usage example”Here is how placing a call through a PIN-protected route plays out for the caller:
- Extension 2000 dials an external number.
- The caller hears the prompt “Please enter your password followed by the pound key,” enters a PIN code, and presses
#.- If the code is valid, the call goes out through the outbound route.
- If the code is wrong, the caller hears “password incorrect” and is asked to try again. After three failed attempts, the system ends the call.
Question about this page?
Ask the AI assistant. It starts from this page, then searches the rest of the docs.
Ask Cloud Voice AI
Answers are AI-generated from the docs and may contain mistakes. Verify with the linked pages.