
Manually Provision an IP Phone
Manual provisioning links a physical IP (Internet Protocol) phone to Cloud Voice in two stages: you register the handset and its extension in the management portal, then tell the phone where to fetch its configuration. The steps below use a Grandstream GRP2602 running firmware 1.0.3.67 as the example, but the same process applies to any supported Grandstream model.
Supported IP phones
Section titled “Supported IP phones”These steps apply to the Grandstream models listed under Auto Provisioning - Supported Devices.
Before you start
Section titled “Before you start”-
Confirm the default template for your phone model has already been downloaded. You can find templates under Auto Provisioning > Resource Repository > Default Templates.
-
Have the phone’s details on hand: vendor, model, and MAC address (Media Access Control, the phone’s unique hardware address, usually printed on a label on the phone or its box).
-
If the phone was used previously, reset it to factory defaults first.
Step 1: Register the phone’s MAC address in Cloud Voice
Section titled “Step 1: Register the phone’s MAC address in Cloud Voice”-
Sign in to the Cloud Voice management portal and go to Auto Provisioning > Phones.
-
Click Add.
-
Under IP Phone, identify the handset:
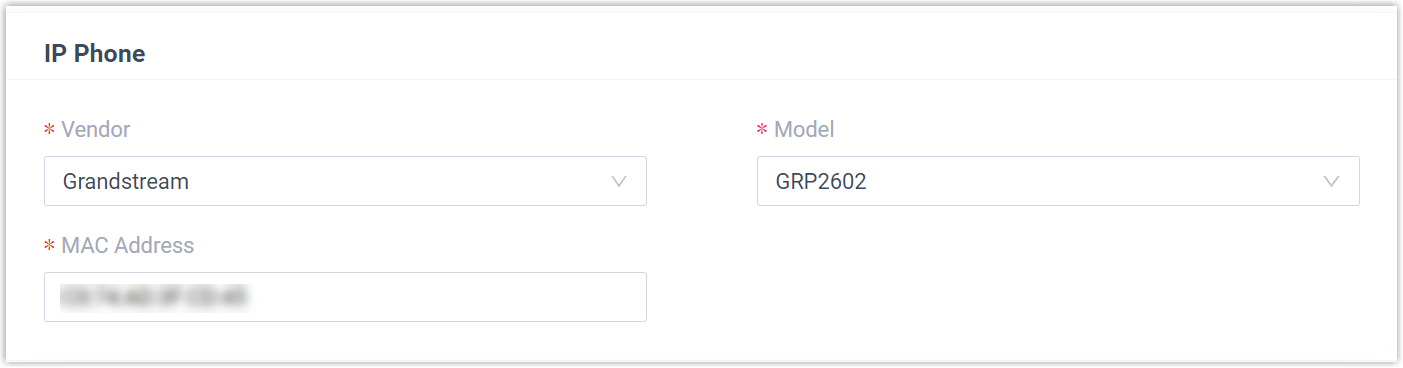
- Vendor: Choose the manufacturer. For this example, select Grandstream.
- Model: Choose the model. For this example, select GRP2602.
- MAC Address: Enter the phone’s MAC address.
-
Under Options, set the provisioning details:
-
Template: Pick a template from the drop-down list.
-
Provisioning Link: Cloud Voice generates a provisioning server URL automatically and shows it on the page.
-
-
Under Assign Extension, select the extension to bind to this phone.
-
Click Save. Cloud Voice builds a configuration file for the phone.
Step 2: Point the phone at the provisioning server
Section titled “Step 2: Point the phone at the provisioning server”-
Open the phone’s web interface by browsing to its IP address and signing in.
-
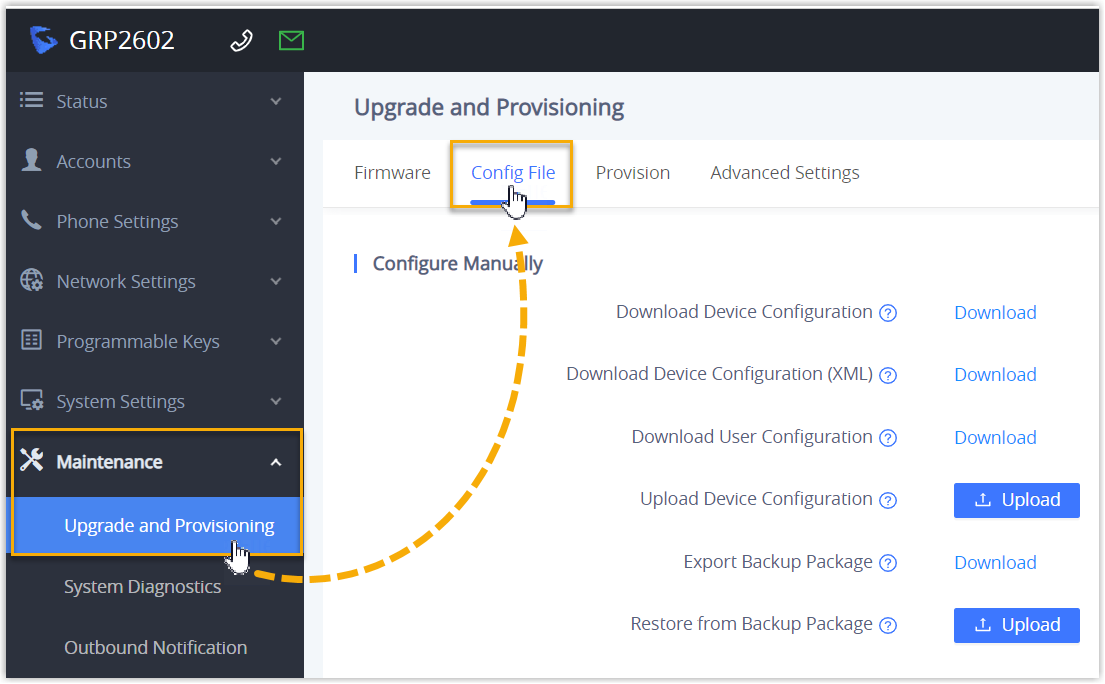
In the left navigation, go to Maintenance > Upgrade and Provisioning > Config File.
-
In the Configure via Network section, enter the server details:
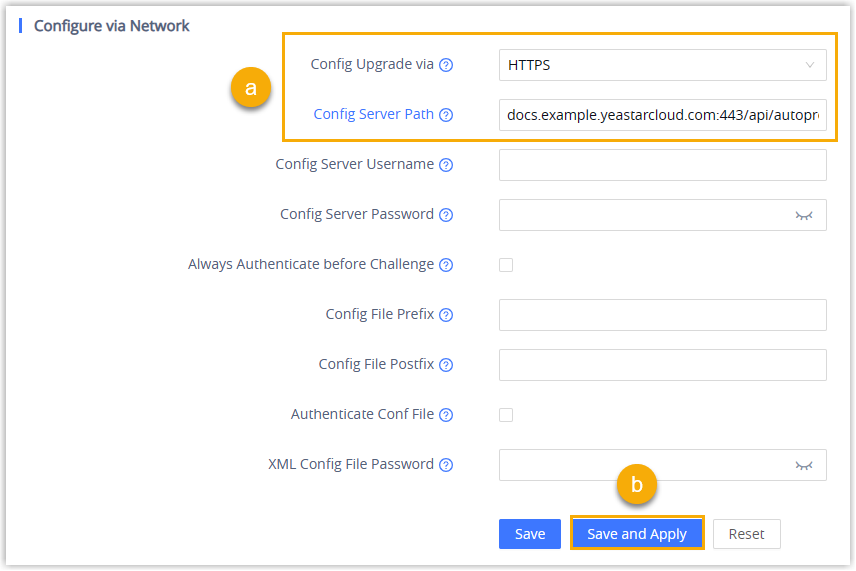
- Provide the provisioning server information:
-
Config Upgrade via: Select HTTPS (Hypertext Transfer Protocol Secure, the encrypted method the phone uses to fetch its configuration).
-
Config Server Path: Paste the provisioning link you copied from Cloud Voice.
-
- Click Save and Apply.
- Provide the provisioning server information:
Result
Section titled “Result”-
Back in the portal under Auto Provisioning > Phones, the phone’s registration status shows whether the assigned extension has come online:
 , The extension is registered on the phone.
 , The extension is not registered on the phone.

-
From now on, the phone pulls its configuration file from Cloud Voice automatically and applies those settings whenever it provisions.
Question about this page?
Ask the AI assistant. It starts from this page, then searches the rest of the docs.
Ask Cloud Voice AI
Answers are AI-generated from the docs and may contain mistakes. Verify with the linked pages.