
Configure Display Settings for a Provisioned Phone
When you provision an IP phone (Internet Protocol phone: a desk phone that connects over your data network instead of a traditional analog line) through Cloud Voice, you can control how its screen looks and behaves without ever touching the handset. From the phone’s settings page you can assign a wallpaper, set a screensaver and boot logo, adjust how long the backlight stays on, and decide whether the screensaver clears when a monitored line changes state. Doing this centrally means every phone can be styled consistently and reset remotely, which is useful when the device sits at a customer site you cannot reach. The steps below use a Yealink T54W as the example; the same workflow applies to other supported models.
Requirements
Section titled “Requirements”Your system must be running Cloud Voice firmware 84.20.0.21 or later.
Before you begin
Section titled “Before you begin”- Upload the image you want to use. See Upload an Image File for Auto Provisioning.
- Connect the phone to the PBX (Private Branch Exchange: the phone system itself) and bind it to an extension through auto provisioning. Depending on how the phone reaches your system, follow one of these guides:
Procedure
Section titled “Procedure”-
Sign in to the PBX web portal and open Auto Provisioning > Phones.
-
Locate the phone in the list and click the edit icon next to it.

The Phone settings page for the extension that owns the device opens.
-
Scroll to the Preference section and set the display options you want.
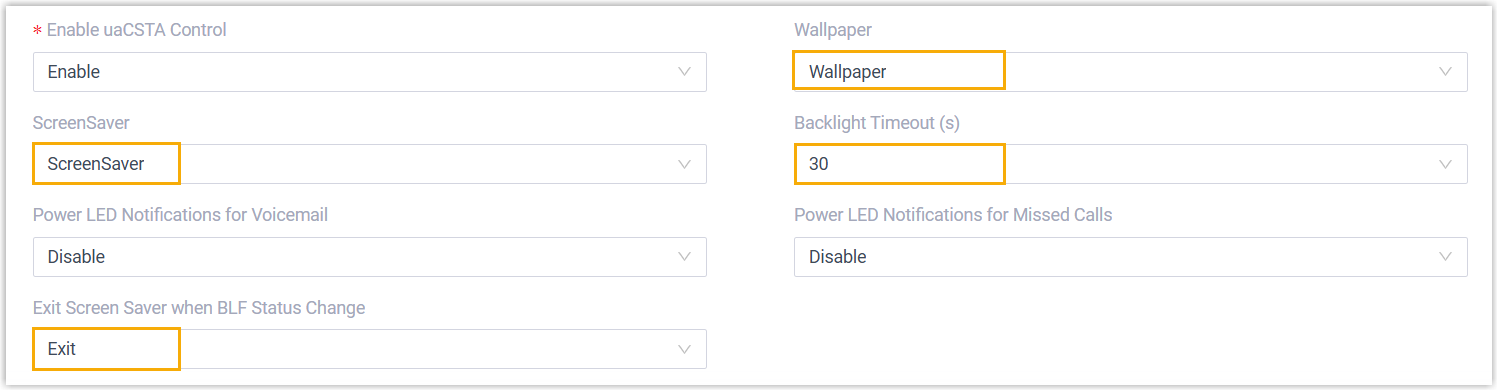
- Wallpaper: Choose one of the images you uploaded to use as the background.
- ScreenSaver: Choose an uploaded image to display while the phone is idle.
- Backlight Timeout (s): Enter how many seconds the phone can sit idle before the screensaver starts.
- Exit Screen Saver when BLF Status Change: Decide whether the phone wakes from the screensaver when a monitored line changes state.
-
Click Save.
-
Reprovision the phone so it picks up the new display settings.

- Click the reprovision icon next to the phone.
- Click OK in the confirmation dialog.
Question about this page?
Ask the AI assistant. It starts from this page, then searches the rest of the docs.
Ask Cloud Voice AI
Answers are AI-generated from the docs and may contain mistakes. Verify with the linked pages.