
Upload a Template for a Custom Phone Model
Cloud Voice can configure supported desk phones for you automatically, a process called auto provisioning: instead of programming each handset by hand, the system pushes a configuration file to it. Out of the box, Cloud Voice recognizes a fixed list of phone models. If you have a handset from a vendor that Cloud Voice supports but whose exact model isn’t on that list, you can add it yourself by uploading a custom template and giving the model your own name. Once the template exists, the phone becomes selectable during provisioning and Cloud Voice delivers your configuration file to it automatically.
Before you begin
Section titled “Before you begin”- Confirm your Cloud Voice system is running firmware 84.20.0.21 or later.
- Have the configuration file for the phone model ready. The file must be 5 MB or smaller.
Add the custom template
Section titled “Add the custom template”-
Sign in to the PBX web portal and open Auto Provisioning > Resource Repository > Custom Templates.
-
Click Add.
-
Fill in the fields in the Basic section.
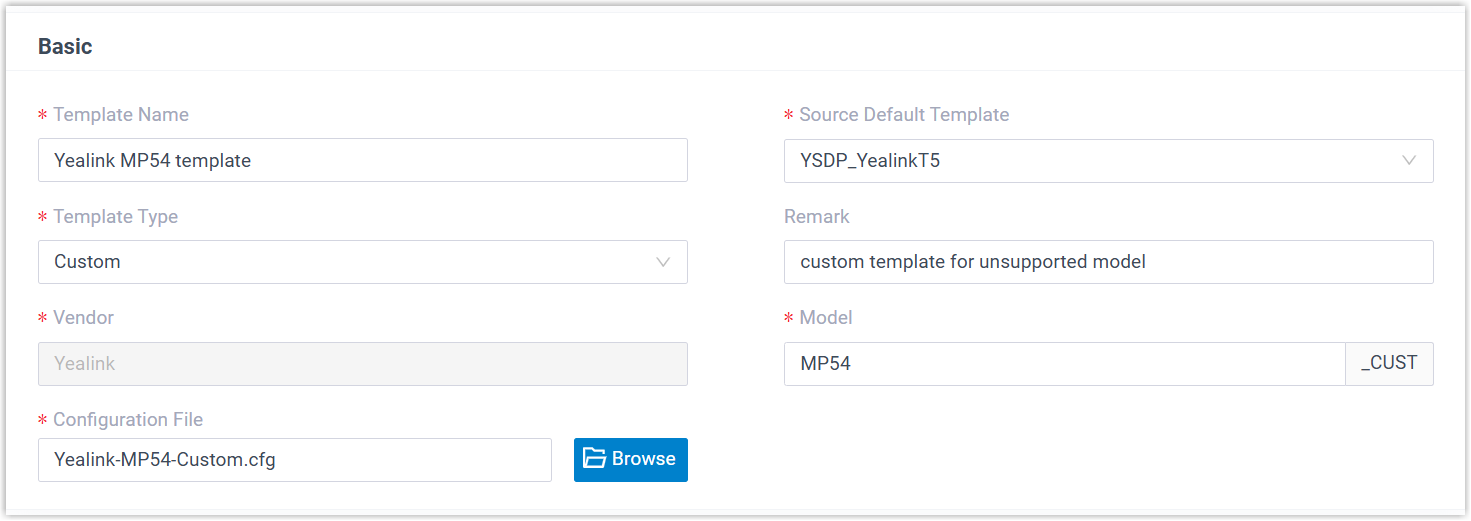
- Template Name: A label that helps you recognize this template later.
- Source Default Template: Choose an existing template that belongs to the same vendor as your phone. Cloud Voice reads the vendor and general settings from that source template so your custom model inherits the standard configuration.
- Template Type: Set this to Custom.
- Remark: Optional note for your own reference.
- Model: Type the model name you want to use. Cloud Voice appends the suffix
_CUSTto it, marking it as a custom model. - Configuration File: Click Browse and pick the configuration file to upload.
-
Click Save.
Result
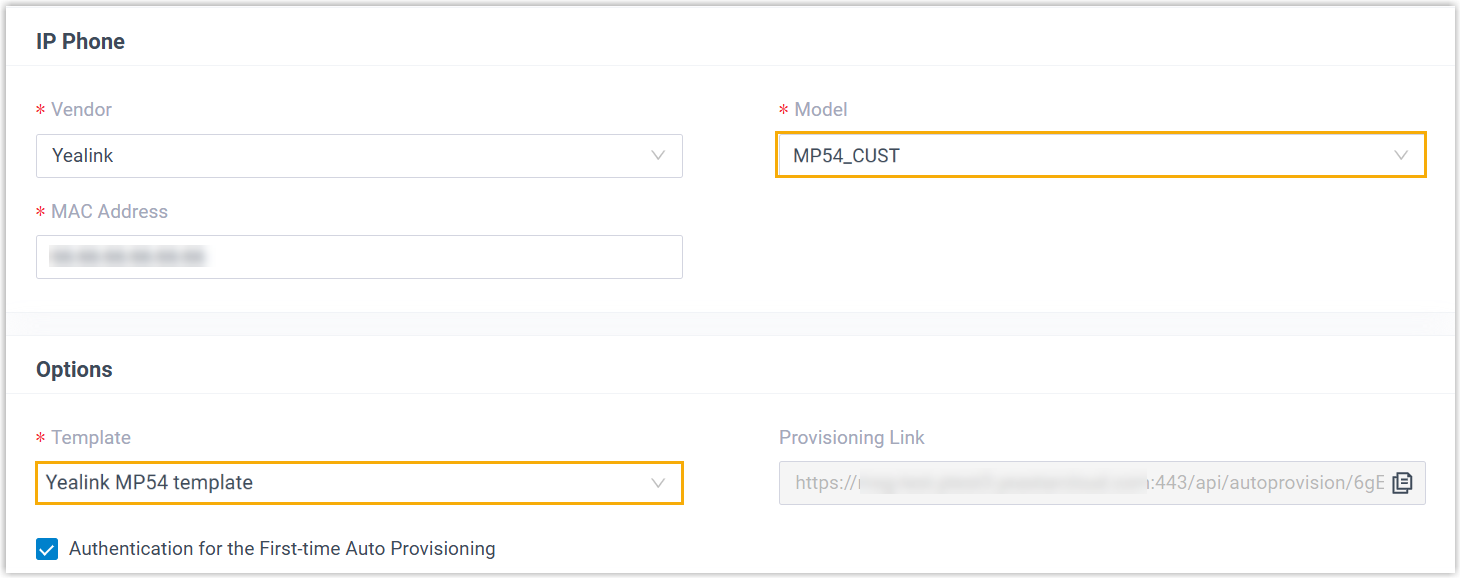
Section titled “Result”The new template appears in the Custom Templates list. When you add a phone, you can now select your custom model and its matching template, and Cloud Voice delivers the uploaded configuration file to the handset automatically.

Question about this page?
Ask the AI assistant. It starts from this page, then searches the rest of the docs.
Ask Cloud Voice AI
Answers are AI-generated from the docs and may contain mistakes. Verify with the linked pages.