
Add and Manage Company Contacts
Company contacts are a shared directory that authorized people can look up from the Cloud Voice App and from provisioned IP phones. This page covers how to build and maintain that directory from the management portal.
Who can manage company contacts
Section titled “Who can manage company contacts”Out of the box, only two kinds of user can create or change company contacts: whoever has full administrator access to the phone system’s management portal (reached by logging in to the Cloud Voice Dashboard), and any extension user who holds the Administrator role. Everyone else has no access to the directory at all.
If you want ordinary extension users to see or maintain company contacts from their own Cloud Voice App or desk phone, grant them the appropriate permission first. See Grant Company Contacts Permission to control visibility, and View Company Contacts from IP Phones to expose the directory on provisioned handsets.
Add a company contact
Section titled “Add a company contact”-
Sign in to the management portal and open Contacts > Company Contacts.
-
Click Add.

-
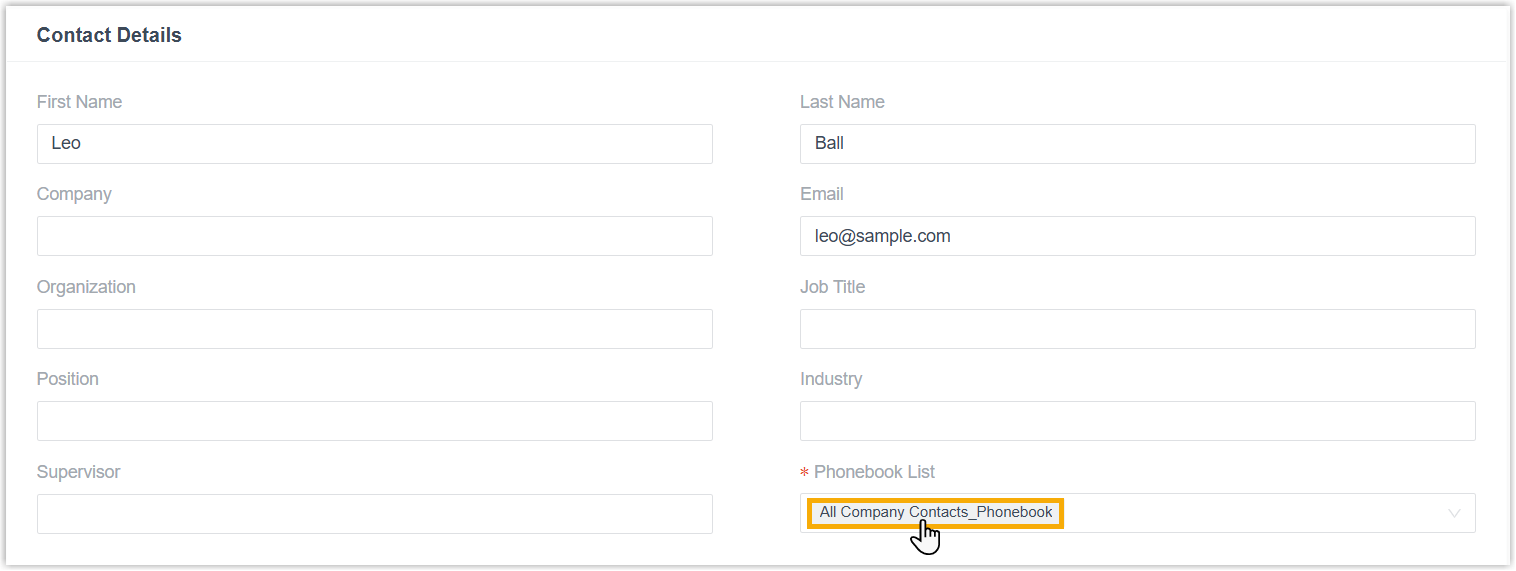
Fill in the contact’s details.
-
Click Save.
The entry is saved to the shared directory and becomes available to every authorized user through the Cloud Voice App and their IP phones.
Edit a company contact
Section titled “Edit a company contact”- Sign in to the management portal and open Contacts > Company Contacts.
- Click the edit icon
 next to the contact you want to change.
 - Update the details as needed.
- Click Save.
Delete company contacts
Section titled “Delete company contacts”-
Sign in to the management portal and open Contacts > Company Contacts.
-
To remove a single contact, click the delete icon
 next to it, then click OK.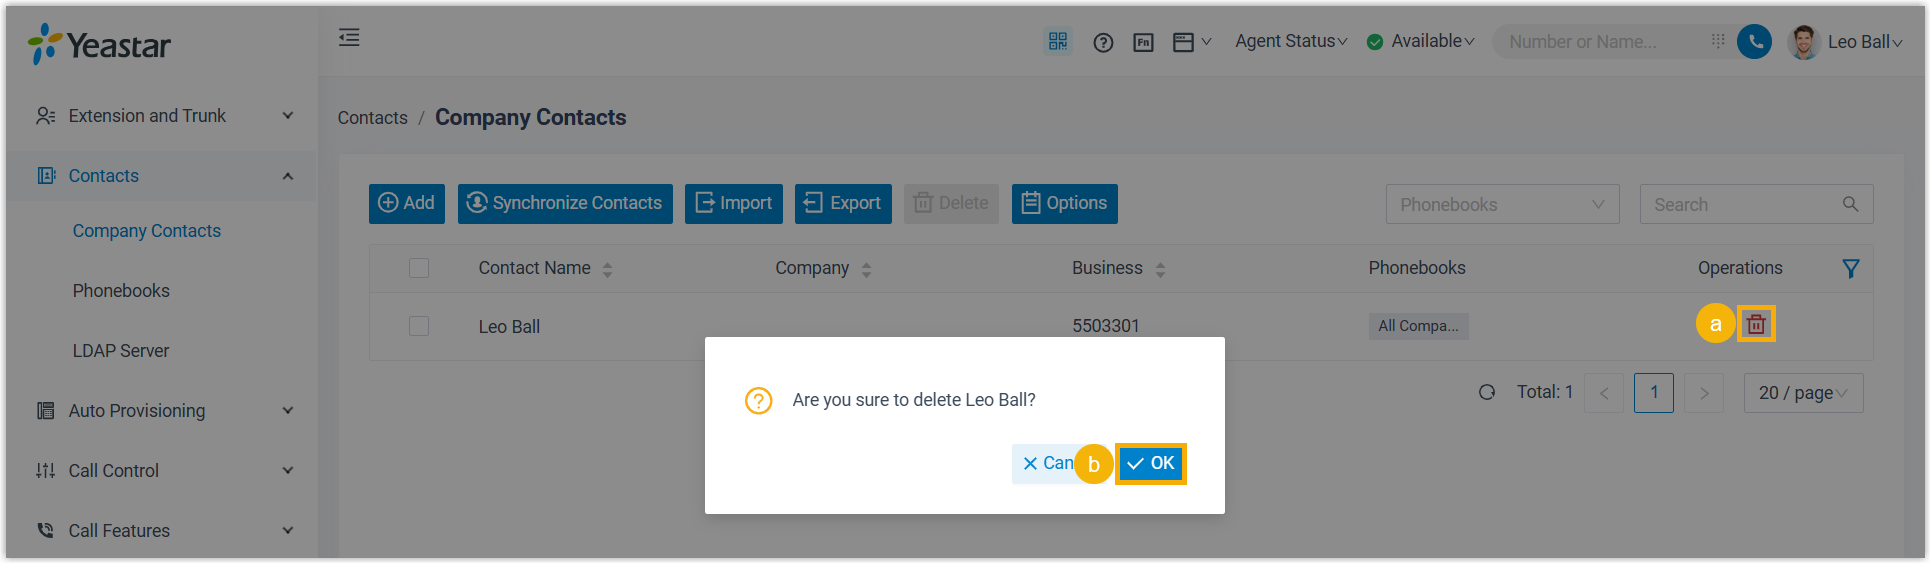
-
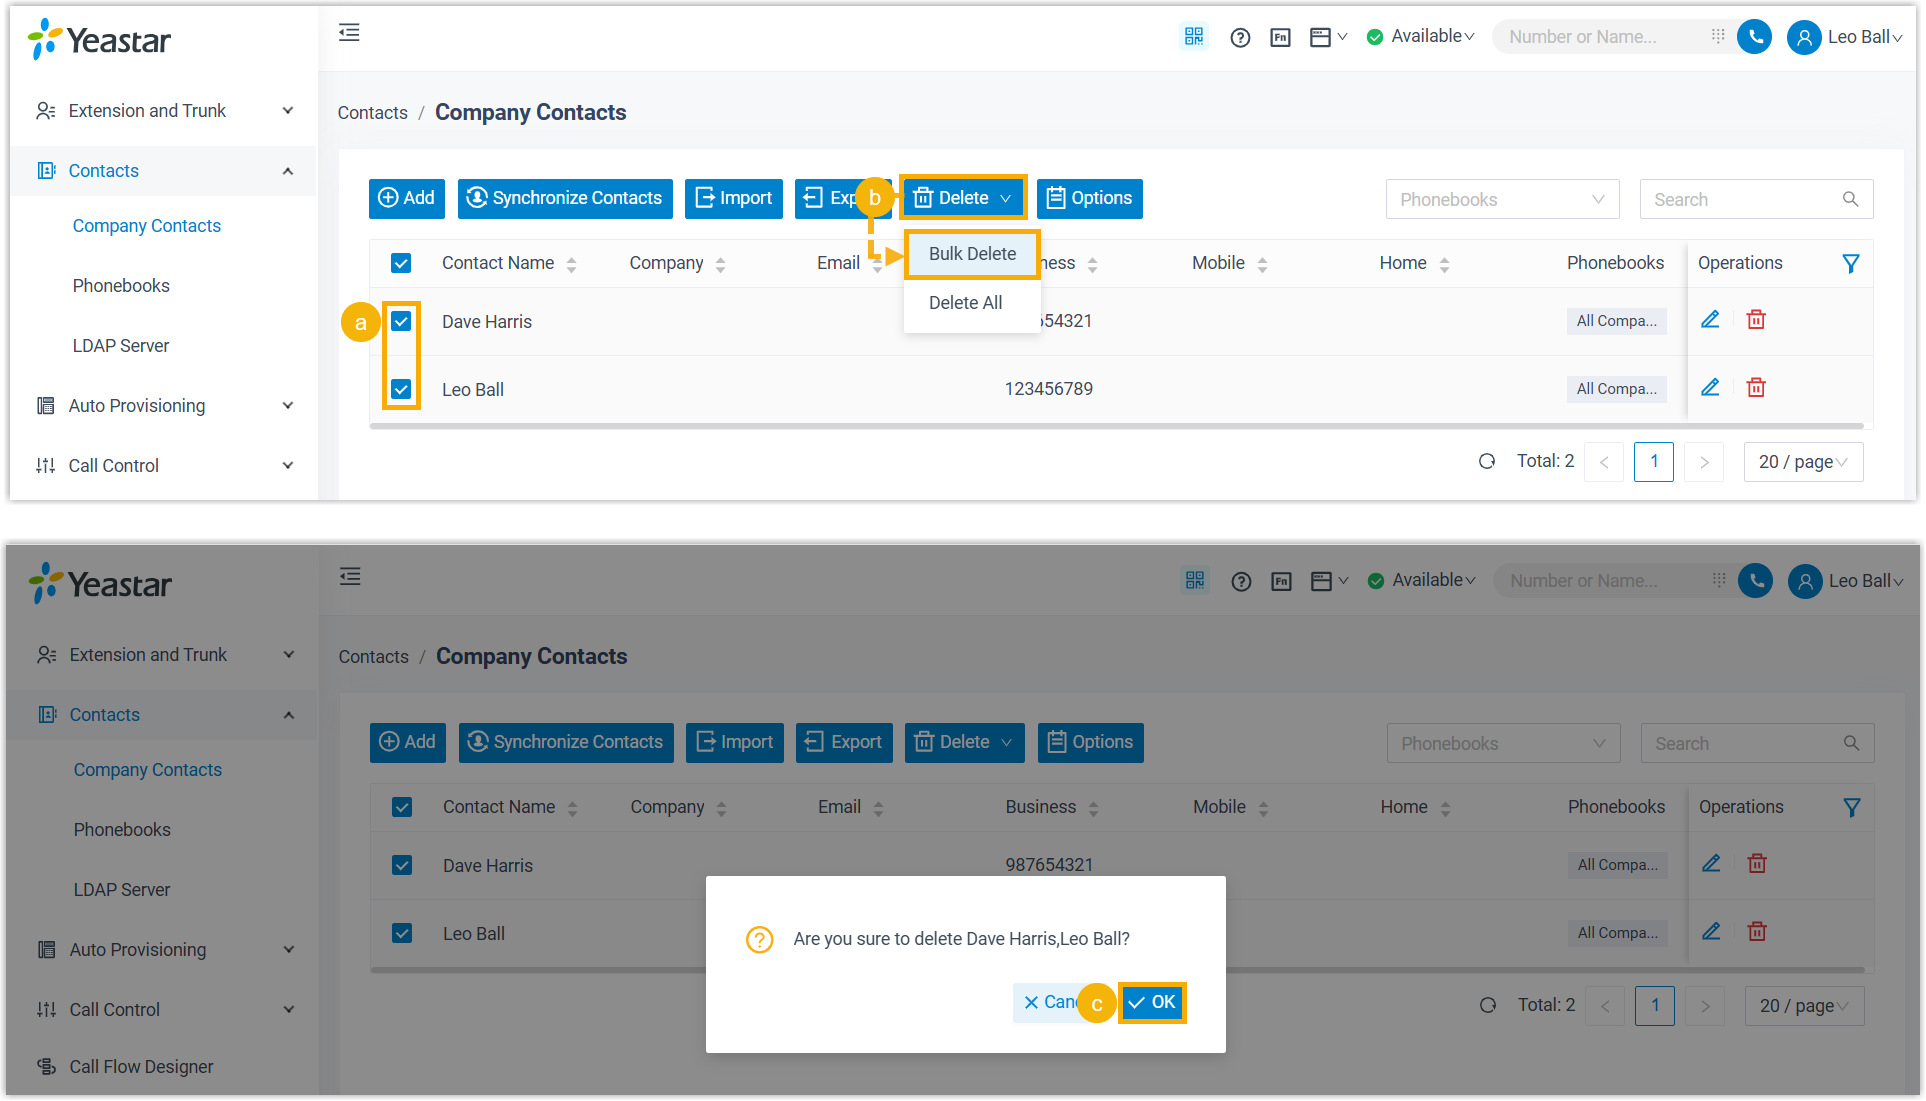
To remove several contacts at once, select their checkboxes, click Delete and choose Bulk Delete, then click OK.
-
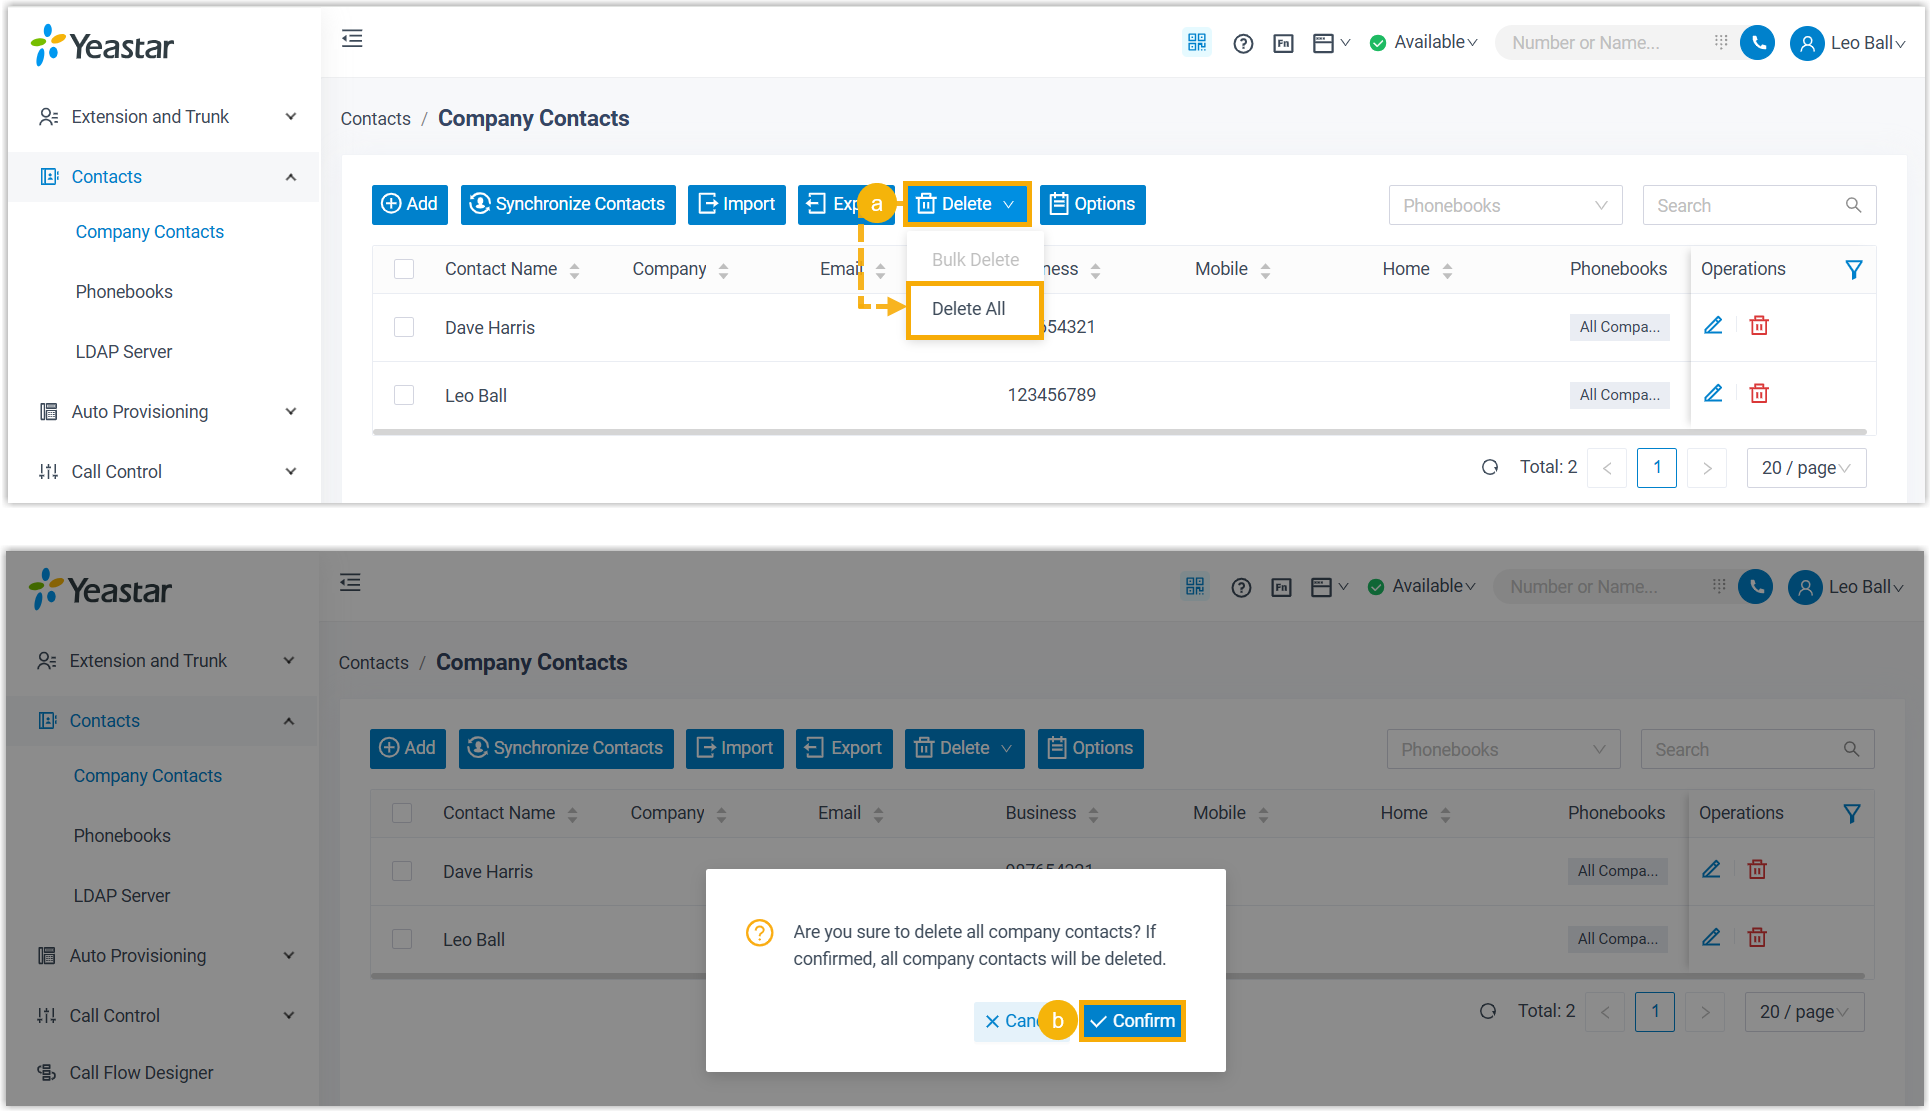
To clear the entire directory, click Delete and choose Delete All, then click Confirm.
Question about this page?
Ask the AI assistant. It starts from this page, then searches the rest of the docs.
Ask Cloud Voice AI
Answers are AI-generated from the docs and may contain mistakes. Verify with the linked pages.