
Archive Files to Google Cloud Storage
Cloud Voice can copy your call recordings and system backups to a Google Cloud Storage bucket, either as a one-off transfer or on a recurring schedule. This keeps a durable off-box copy of your files and, if you choose, frees up storage on the phone system. This page walks you through preparing the Google Cloud side, connecting the bucket to Cloud Voice as an archive server, and building a task that moves the files.
Requirements
Section titled “Requirements”| Item | Requirement |
|---|---|
| System firmware | Version 84.22.0.17 or later |
| Plan | Enterprise plan (self-managed phone systems) or Ultimate plan (Cloud Voice-hosted phone systems) |
Limits
Section titled “Limits”- Archive servers: up to 10
- Archive tasks: up to 200
How it works
Section titled “How it works”Archiving to Google Cloud Storage involves two sides of setup. On Google Cloud you provision the account and destination:
- A service account with full access to your Cloud Storage resources, plus a JSON access key that Cloud Voice uses to authenticate its upload requests.
- A bucket to hold the archived files.
On the phone system you connect and schedule:
- Register the bucket as an archive server.
- Build one or more archive tasks that define which files move and when.
When a task runs, Cloud Voice authenticates to Google Cloud with the service account’s access key and uploads the selected files to your bucket.
Step 1: Create a service account in Google Cloud
Section titled “Step 1: Create a service account in Google Cloud”-
Sign in to the Google Cloud Console.
-
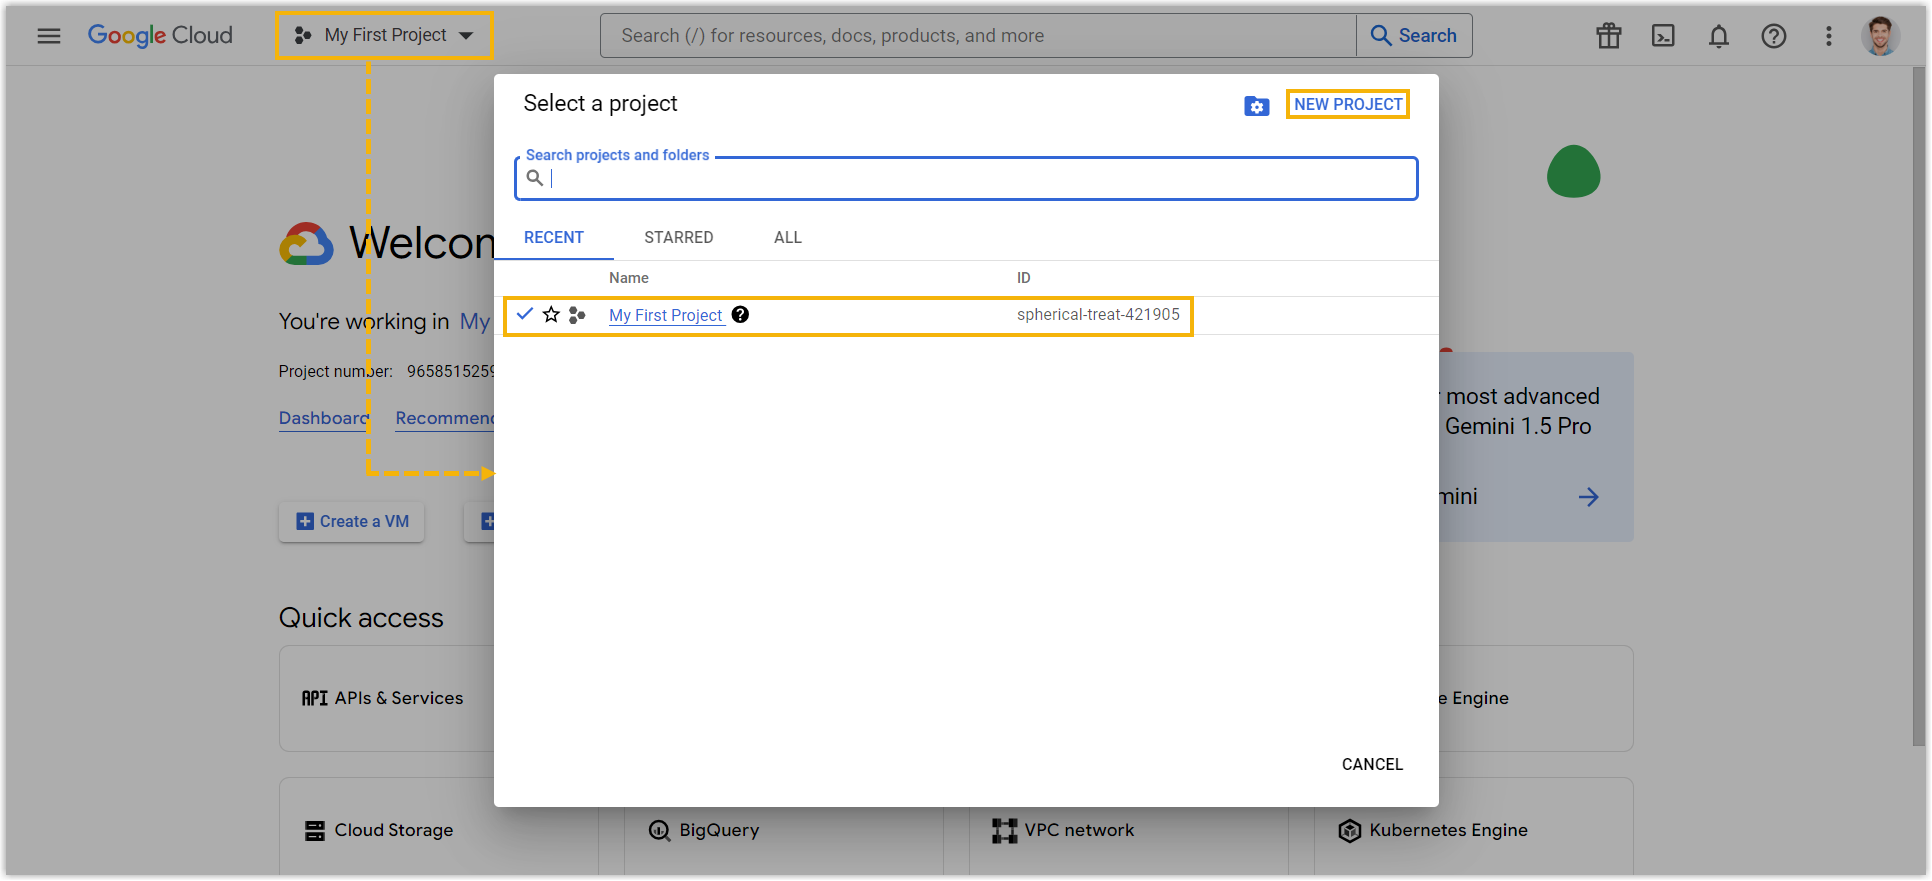
On the project selector, choose an existing project or create a new one. The example below uses a project named Cloud Voice.
-
Create the service account:
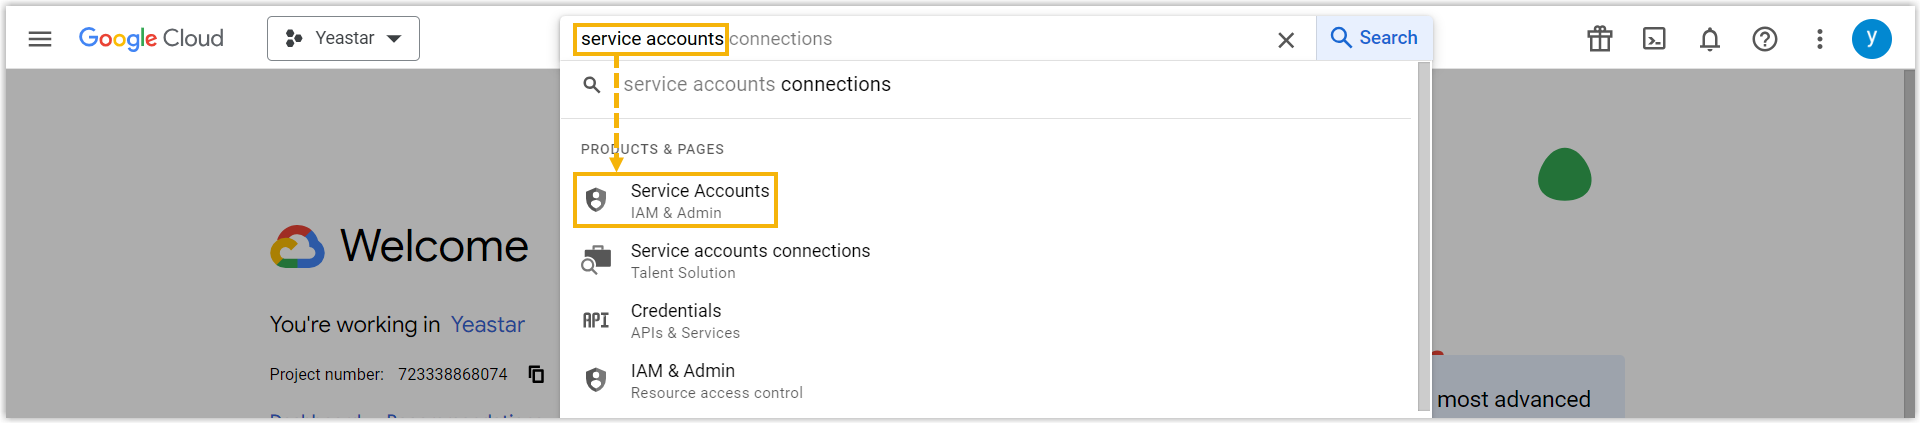
a. In the top search bar, look up and open Service Accounts.
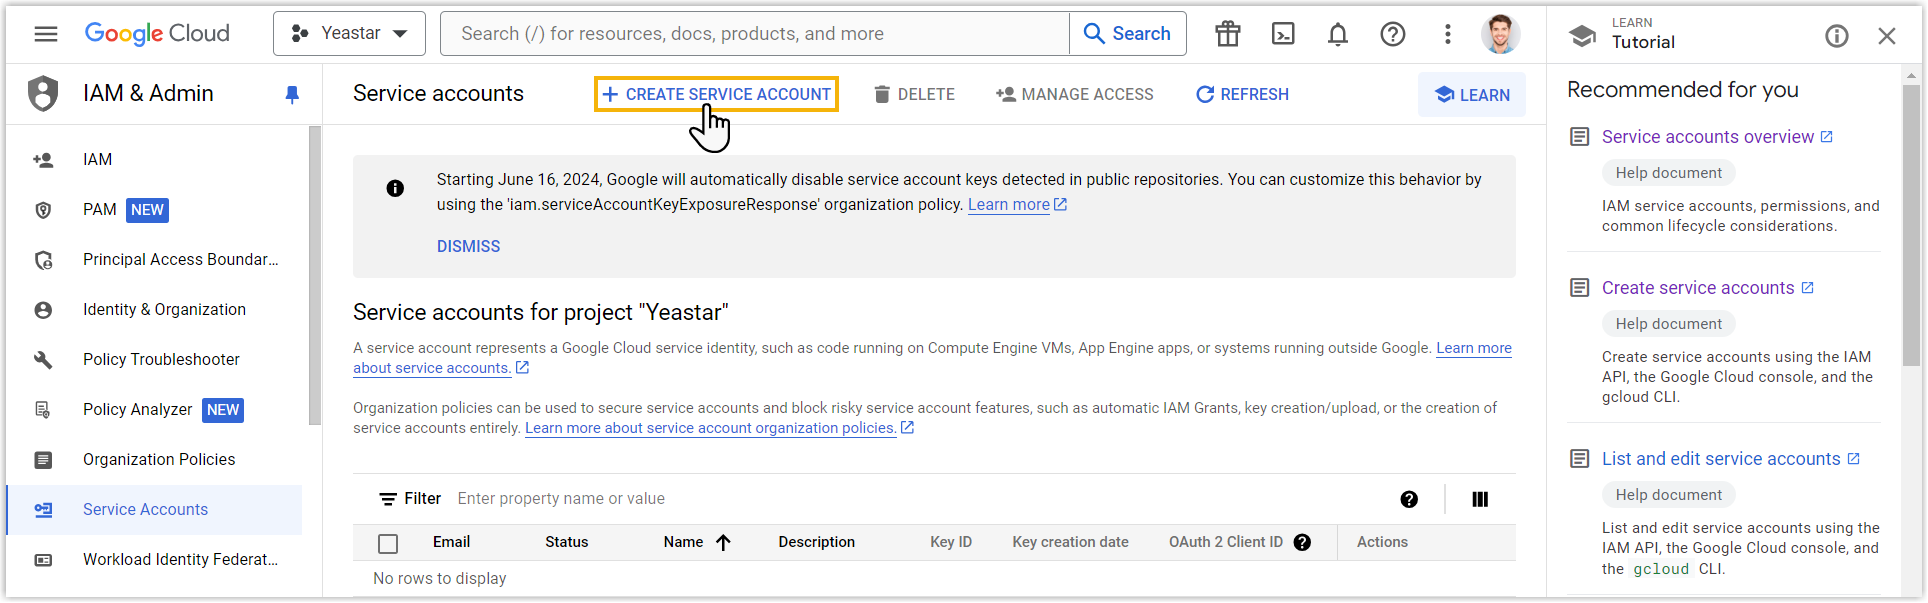
b. Click CREATE SERVICE ACCOUNT.
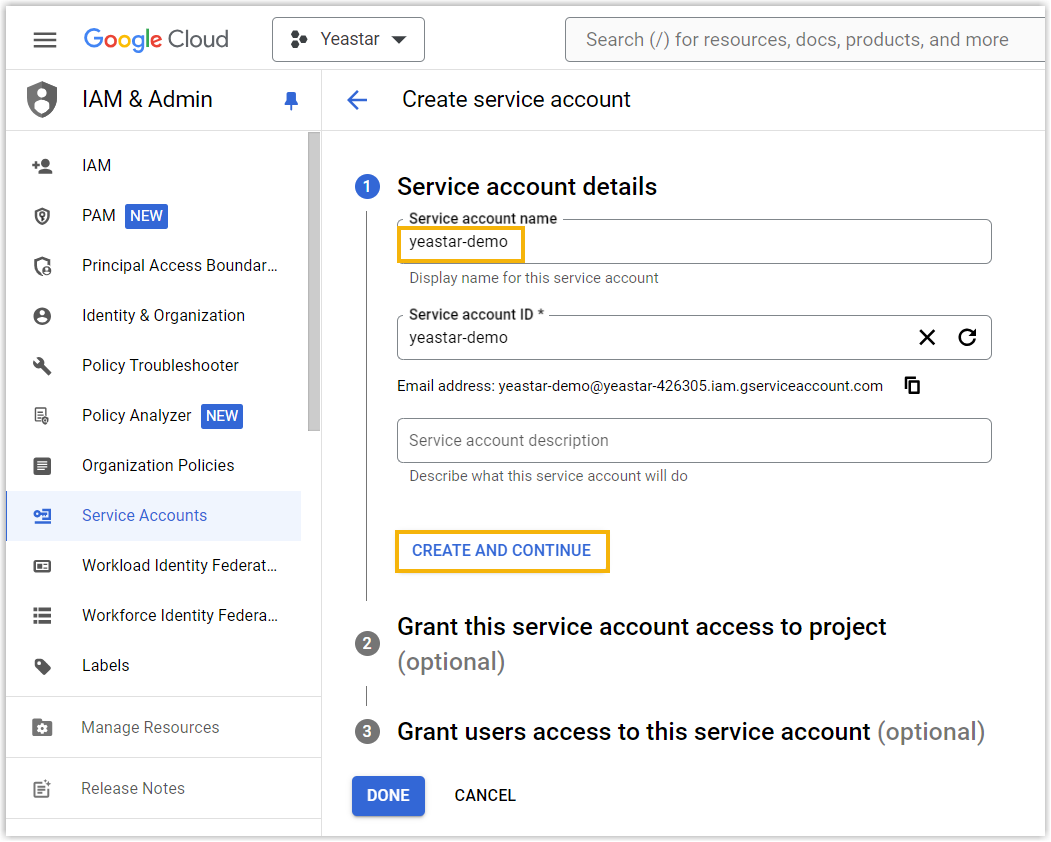
c. In Service account details, type a recognizable name in the Service account name field, then click CREATE AND CONTINUE.
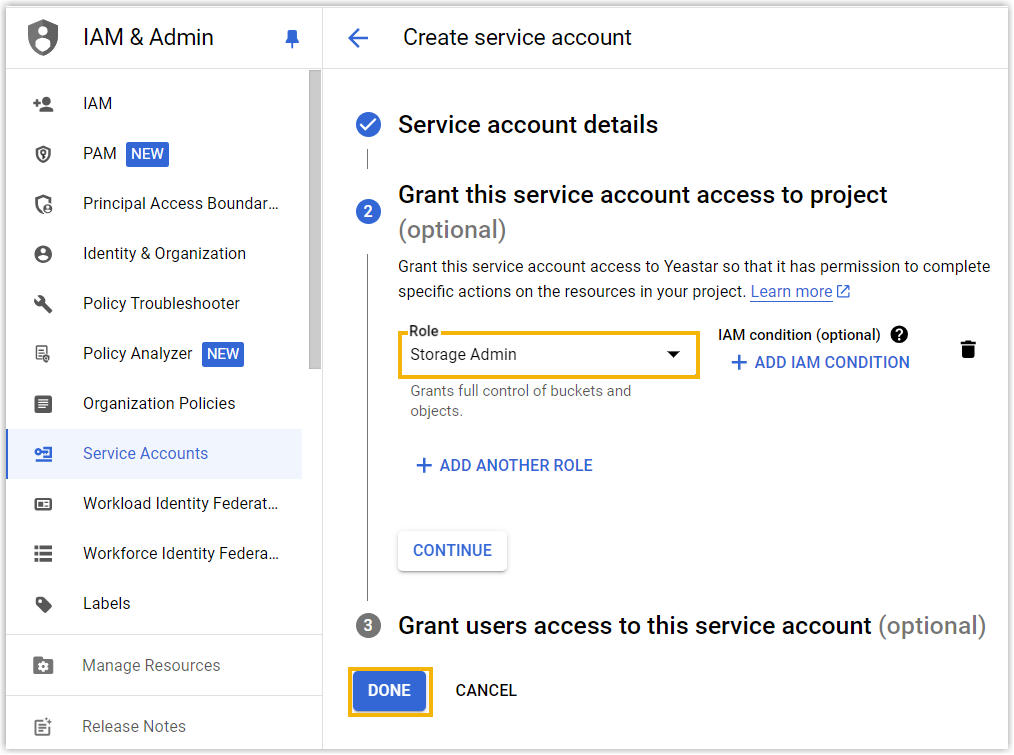
d. In Grant this service account access to project (optional), open the Role drop-down, find and select Storage Admin, then click DONE. The new service account appears in the list.
-
Generate an access key for the service account:
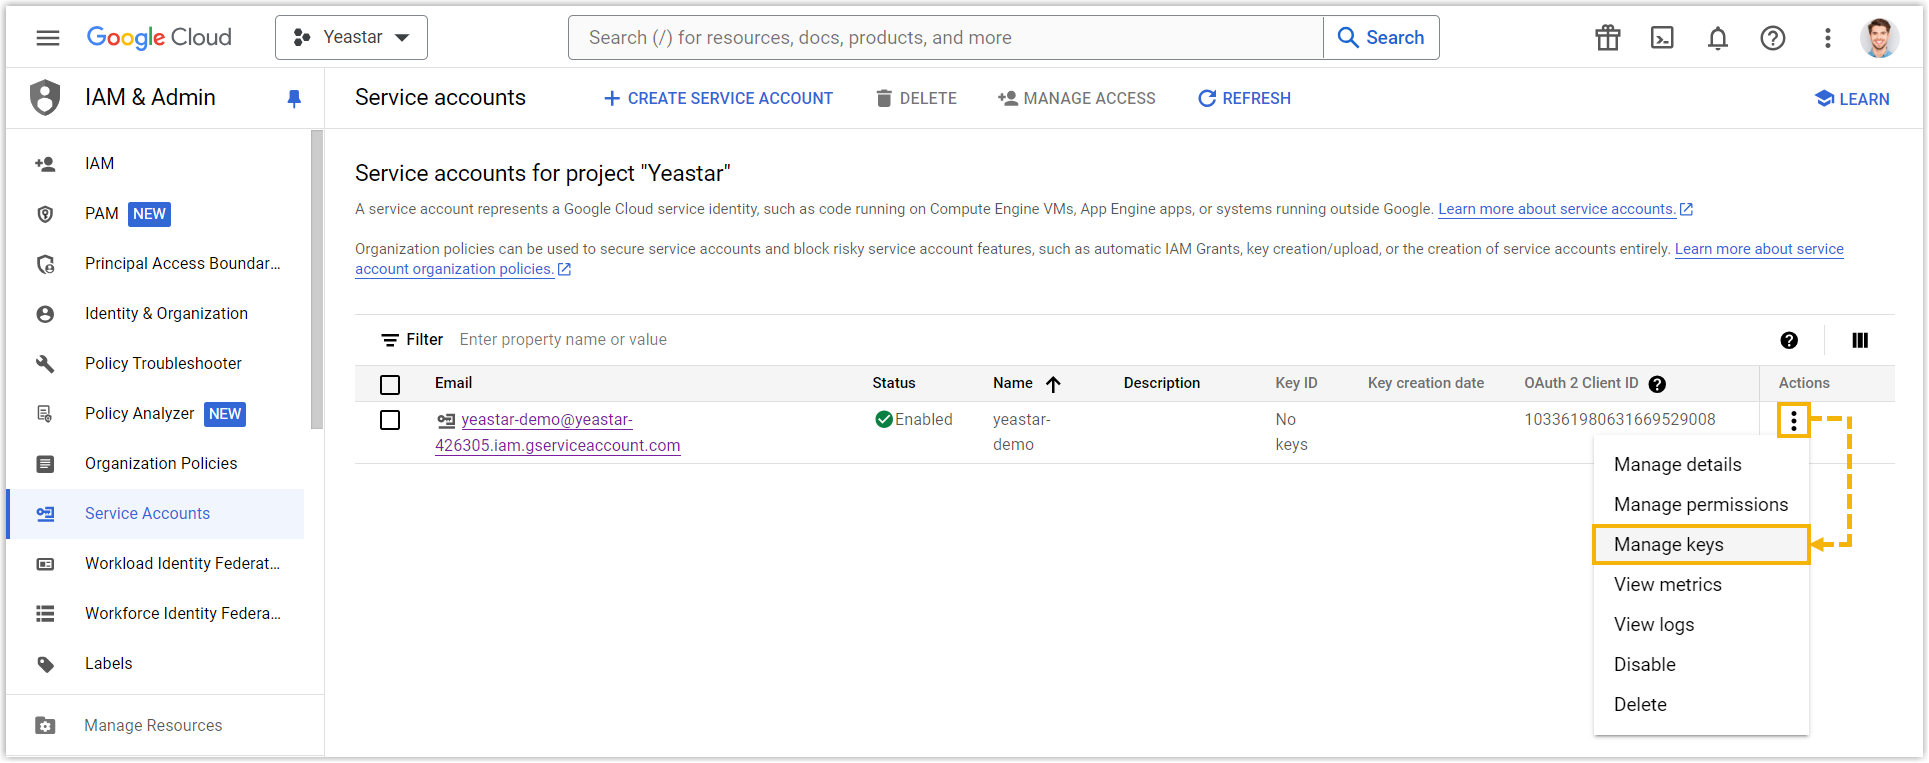
a. In the service accounts list, click the more-options icon (three vertical dots) next to your service account and choose Manage keys.
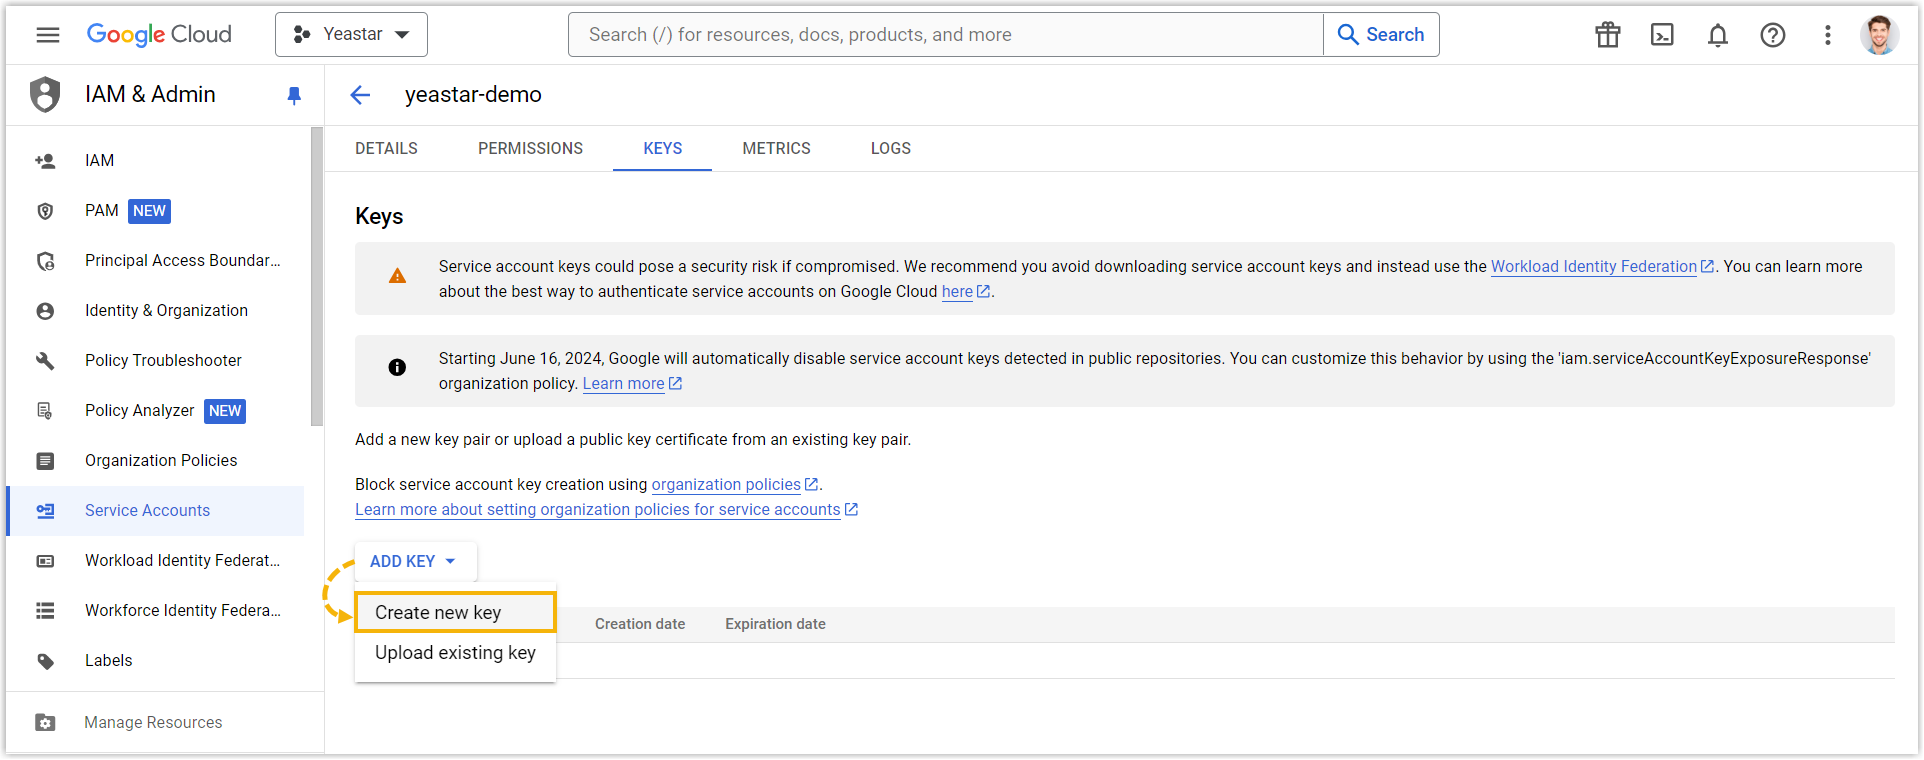
b. Click ADD KEY, then select Create new key.
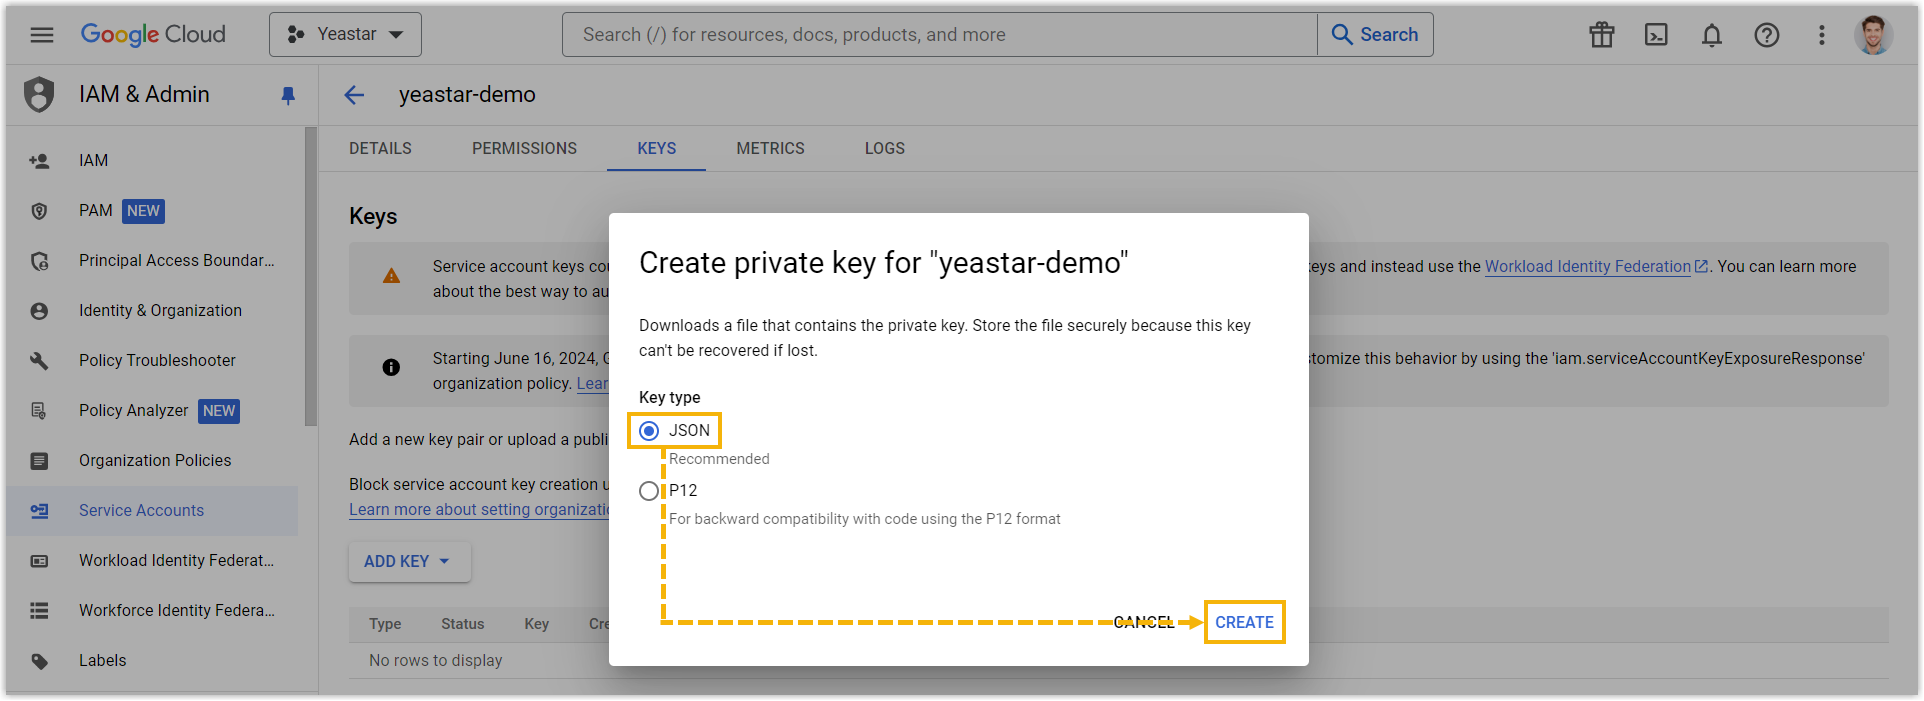
c. Set Key type to JSON (JavaScript Object Notation, a plain-text credential file) and click CREATE. The key downloads to your computer as a JSON file.
d. Click CLOSE to dismiss the dialog.
Step 2: Create a bucket in Cloud Storage
Section titled “Step 2: Create a bucket in Cloud Storage”-
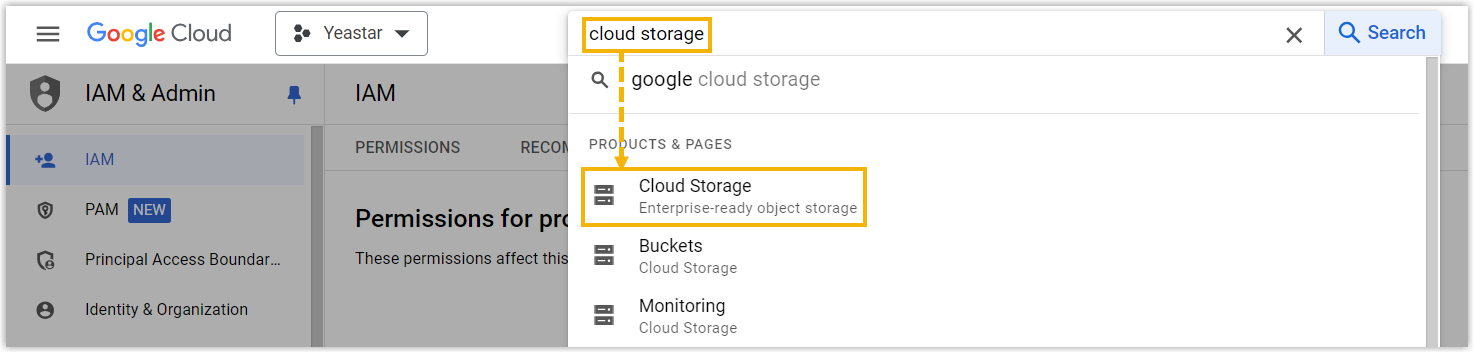
In the top search bar, look up and open Cloud Storage. This takes you to the buckets page.
-
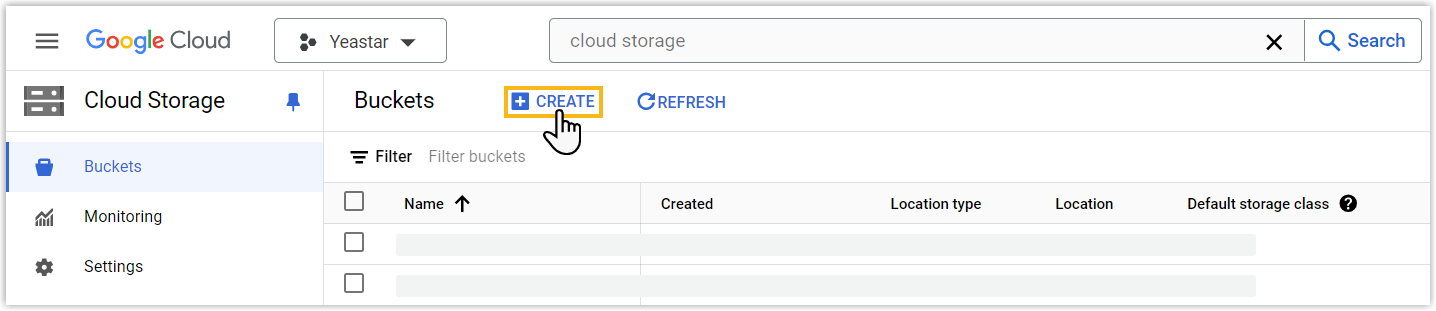
Click CREATE.
-
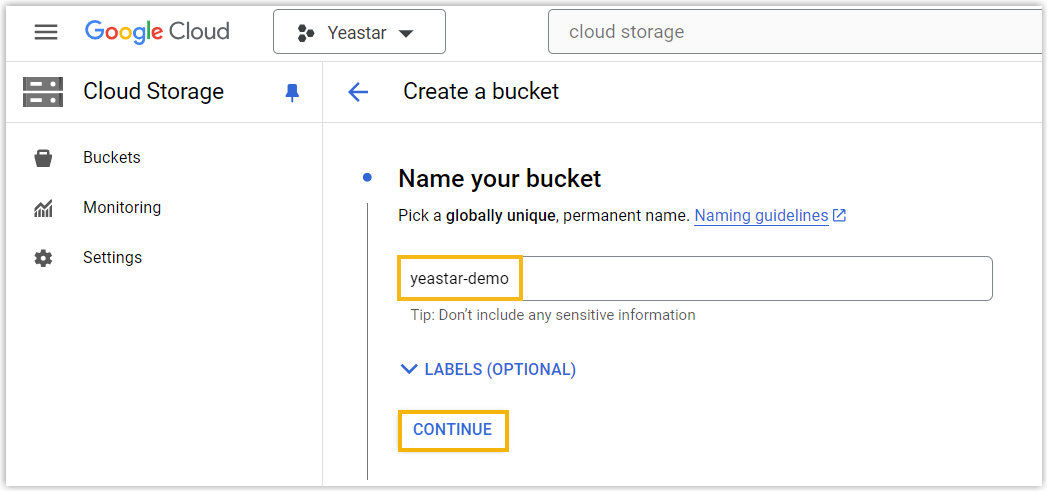
In Name your bucket, enter a recognizable name and click CONTINUE.
-
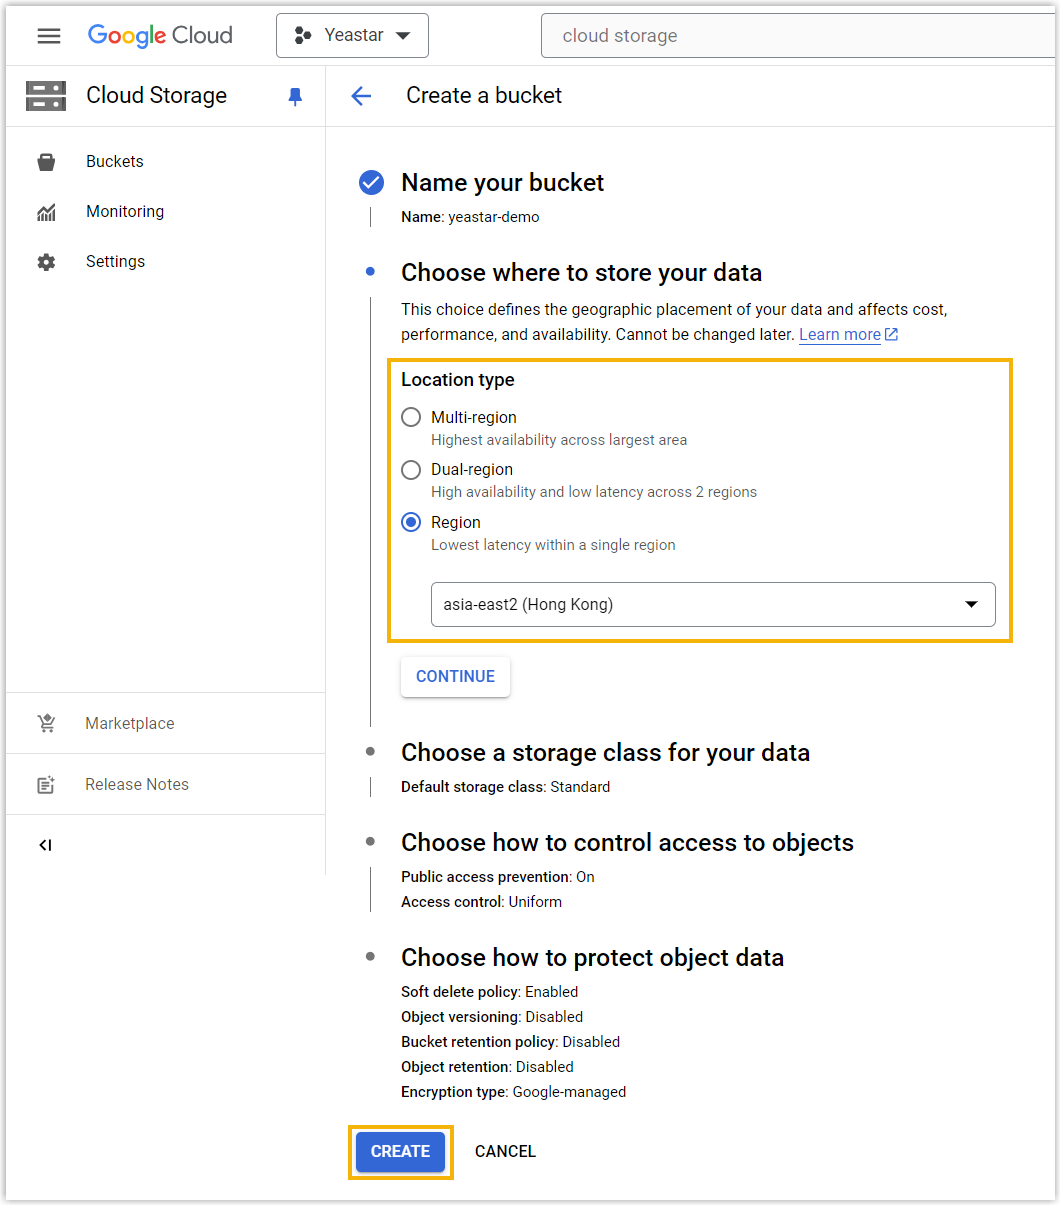
Under Choose where to store your data, pick the region for the bucket and click CREATE.
Step 3: Add the bucket as an archive server
Section titled “Step 3: Add the bucket as an archive server”-
Sign in to the PBX web portal (the Cloud Voice admin web interface) and go to System > Archive.
-
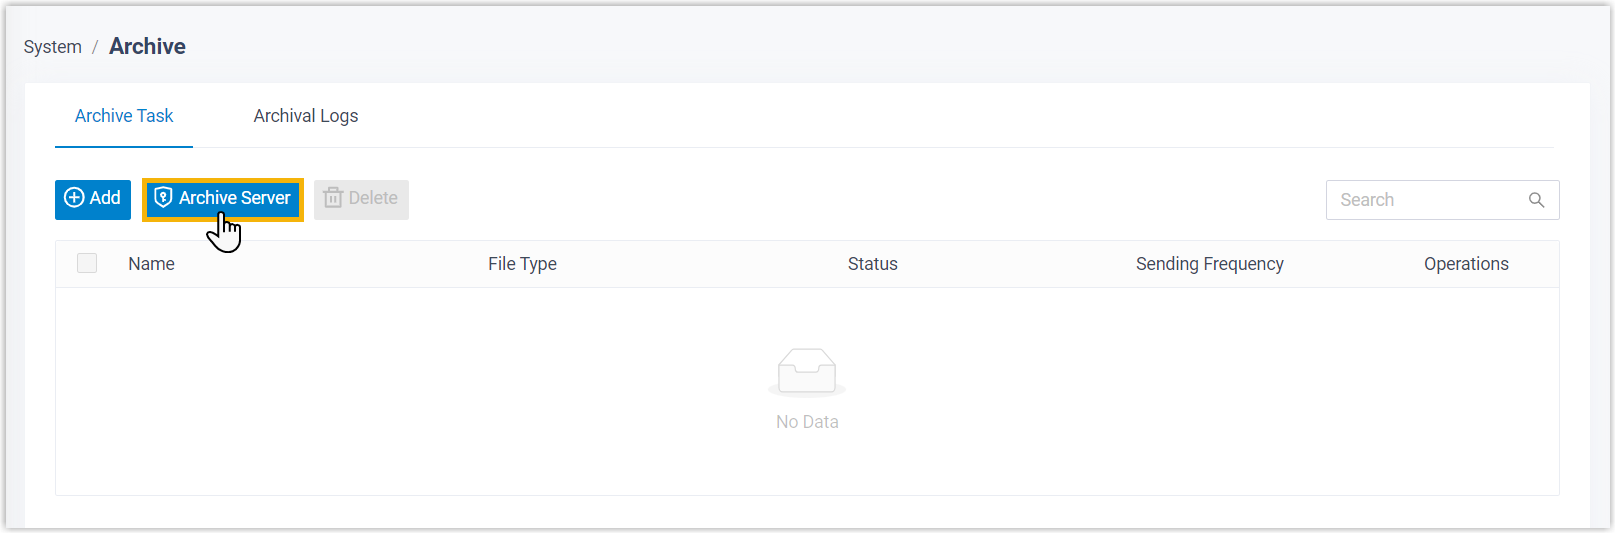
On the Archive Task tab, click Archive Server.
-
Add the bucket:
a. Click Add.
b. Fill in the dialog:
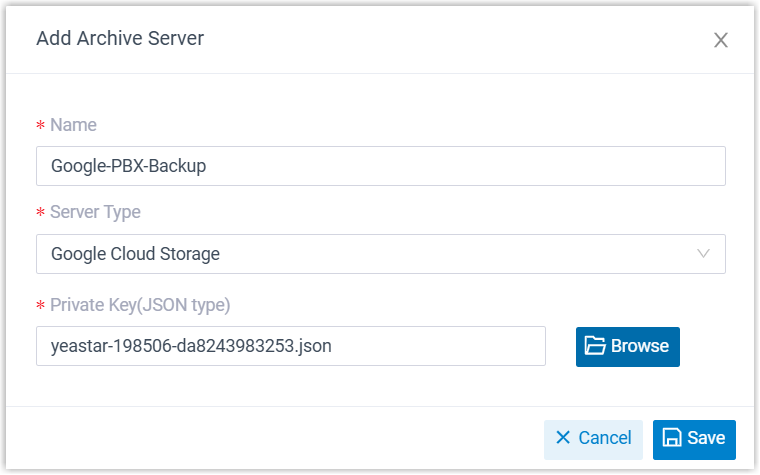
Setting Description Name A label that helps you recognize this server. Server Type Select Google Cloud Storage. Private Key (JSON type) Click Browse and upload the JSON key file you downloaded in Step 1. c. Click Save. The bucket now appears in the archive server list.
-
Close the window.
Step 4: Create an archive task
Section titled “Step 4: Create an archive task”-
On the Archive Task tab, click Add.
-
In Task Configuration, set the basics:

Setting Description Name A label that helps you recognize this task. File Type Choose Recording Files or Backup Files. Data Range The time span of files to archive. You can cover up to 31 days per task. Sync Frequency How often the task runs. See the options below. Recording File Format The format recordings are downloaded and stored in. Available only when the file type is recording files; every recording in the range is archived in the format you pick. Sync Frequency options:
- Once: Archives the files immediately after you save the task.
- Daily: Runs each day at the time you choose from the drop-down.
- Weekly: Runs on the weekday and time you choose.
- Monthly: Runs on the day of the month and time you choose.
-
In Storage Configuration, choose where the files land:
Setting Description Archive Server Select the Google Cloud Storage bucket you added in Step 3. Select Folder/Path Choose the bucket or a folder inside it as the destination. Storage Method Controls how files are foldered on the server (see below). Skip archived files Optional; recording files only. When on, files already archived are skipped. When off, they are archived again, their stored location is updated, and the earlier copy is left in place on the server. Delete local files after archiving Optional; recording files only. When on, local copies are removed after upload, they remain playable and downloadable from the PBX admin portal and the Cloud Voice App, but not from the third-party server or Dynamics 365. When off, local copies are kept. Organize Files by Date Optional. When on, files are placed in date-named subfolders ( YYYYMMDD, for example20260301). When off, files go straight into the selected path.Storage Method depends on how often the task runs:
- One-time task
- Create Task Folder: Creates a folder named
FileType-TaskNameunder the selected path and stores the files there. - Save Directly to Selected Path: Stores the files in the selected path without creating a folder.
- Create Task Folder: Creates a folder named
- Recurring task
- Create Folder per Execution: Each run creates a folder named
FileType-TaskName-ExecutionDateunder the selected path. - Create Task Folder Once and Reuse It: The first run creates a
FileType-TaskNamefolder, and later runs reuse it. - Save Directly to Selected Path: Each run stores files in the selected path without creating a folder.
- Create Folder per Execution: Each run creates a folder named
- One-time task
-
Optional. Set a retention policy so Cloud Voice prunes older files on the server.

Setting Description Retention Type Retention by Quantity keeps up to a set number of files or folders and deletes the oldest once that number is exceeded. Retention by Days keeps files or folders for a set period and deletes anything older. Retention Limit The maximum count (files/folders) or number of days, matching the retention type you chose. Retention Unit Folder counts the task folders created on the server; File counts individual archived files. -
Click Save.
Verify the result
Section titled “Verify the result”The selected files are uploaded to your bucket or folder either right away or at the scheduled time.
Confirm the outcome in either place:
-
In Cloud Voice: Go to System > Archive > Archival Logs. A Succeeded value in the Result column means the files reached Google Cloud Storage.
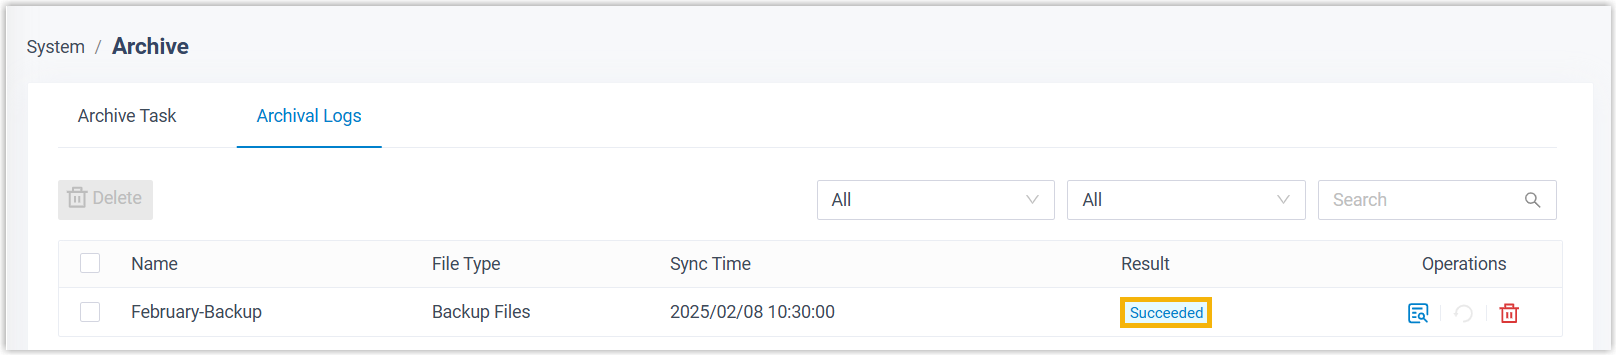
If a task fails, Cloud Voice raises a Failed to Archive File(s) event. Click the retry icon on that row to run it again.

-
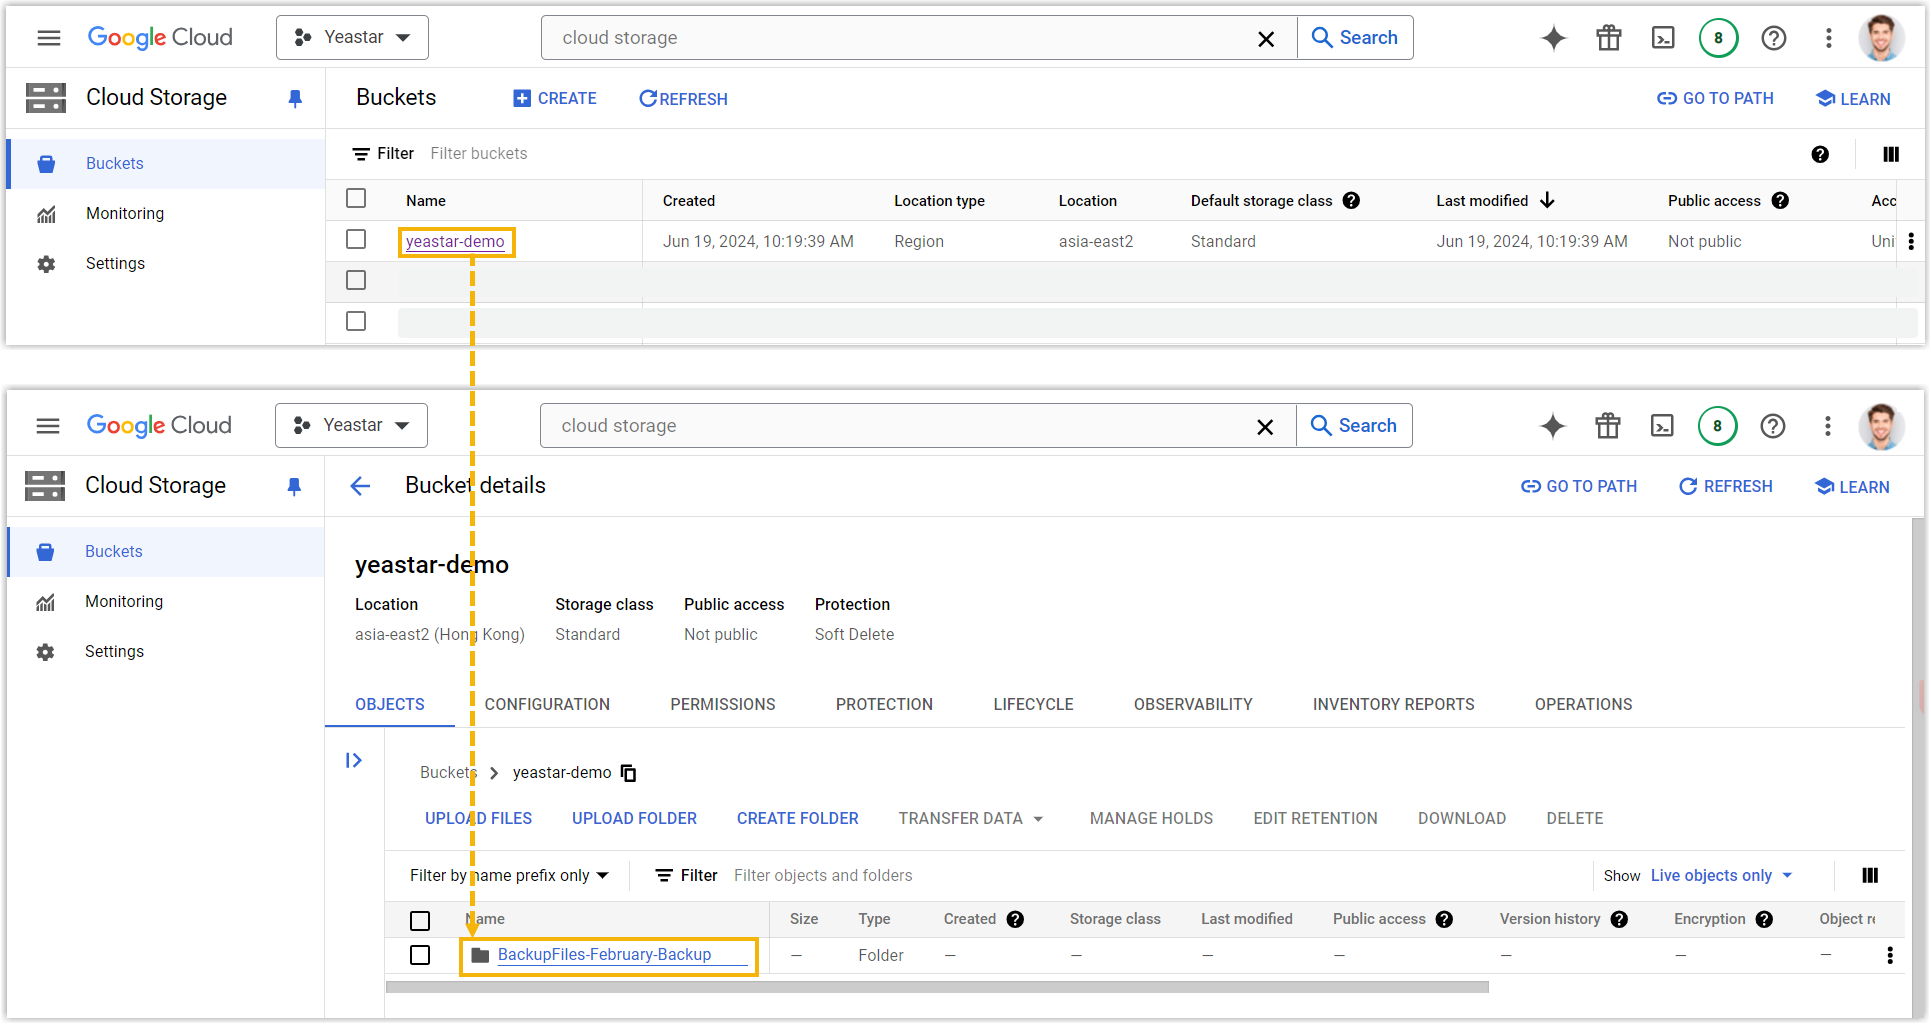
In Google Cloud: Open the bucket in the Google Cloud Console. The archived files appear in the list when the transfer succeeds.
Question about this page?
Ask the AI assistant. It starts from this page, then searches the rest of the docs.
Ask Cloud Voice AI
Answers are AI-generated from the docs and may contain mistakes. Verify with the linked pages.