
Enable Call Timeline for CDR
With the call timeline enabled, each Call Detail Record (CDR) lays out a call’s events in the order they happened, from the moment the call starts to the moment it ends. This chronological view gives you a clear picture of what took place during a call and makes it much faster to trace and resolve issues. Follow the steps below to switch it on.
Before you begin
Section titled “Before you begin”Your Cloud Voice system must be running firmware version 84.21.0.117 or later.
Enable the timeline
Section titled “Enable the timeline”-
Sign in to the PBX web portal (PBX stands for Private Branch Exchange, the phone system that runs your calls) and go to Reports and Recordings > CDR.
-
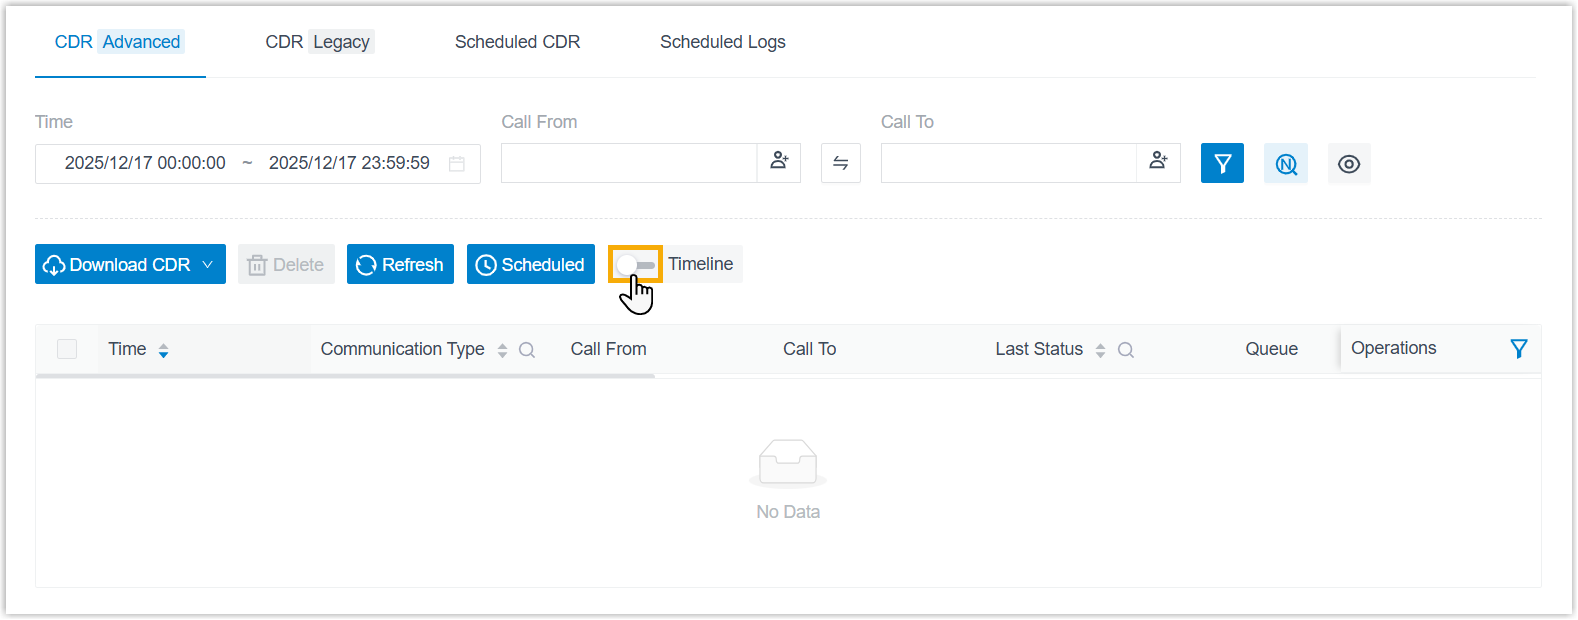
Open the CDR (Advanced) tab and turn on the Timeline switch.
-
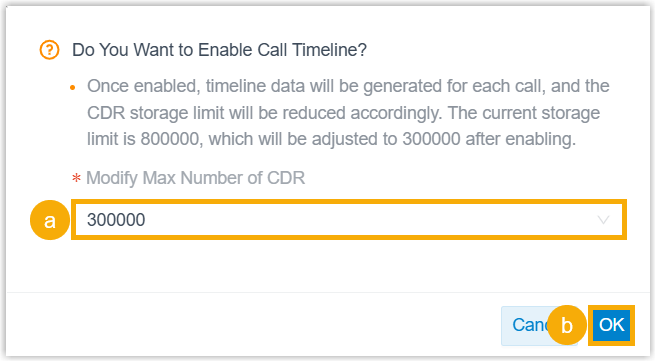
Confirm the change in the dialog that appears.
-
If the system asks you to adjust the CDR storage limit, either accept the recommended value or pick a different one from the Modify Max Number of CDR drop-down list.
-
Click OK.
-
What happens next
Section titled “What happens next”-
Timeline data is now captured for CDR. Any record generated from this point forward will include the full event timeline.
You can open new CDRs from the PBX web portal and review their key metrics whenever you need to.
-
If you changed the CDR storage limit while enabling the timeline, that value is copied automatically to the CDR auto cleanup rule at System > Storage > Auto Cleanup > CDR Auto Cleanup > Max Number of CDR. The new limit applies after the next system reboot, or at 00:00, whichever comes first.
Question about this page?
Ask the AI assistant. It starts from this page, then searches the rest of the docs.
Ask Cloud Voice AI
Answers are AI-generated from the docs and may contain mistakes. Verify with the linked pages.