
Dial by Number
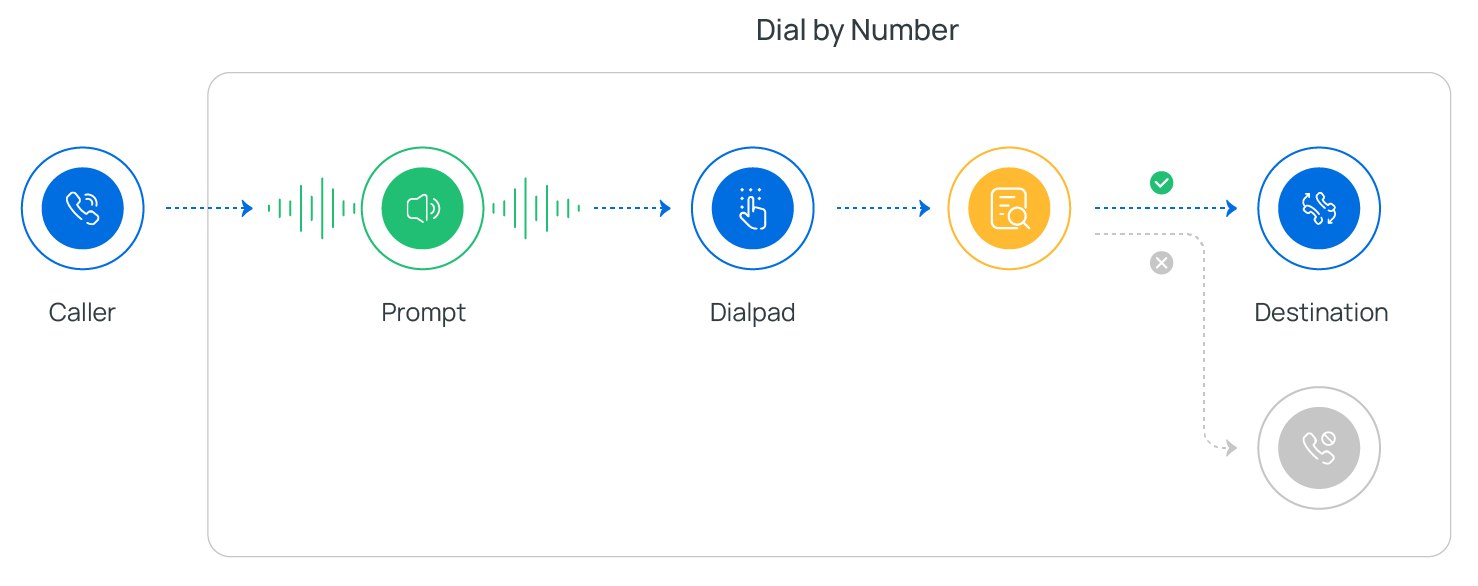
The Dial by Number component lets a caller reach a destination by dialing its number on the keypad, without waiting to be routed by a menu. This section explains what the component can reach, how to prompt callers for input, and how to configure the numbers it accepts.
Overview
Section titled “Overview”When a call reaches a Dial by Number component, the caller can dial a number to be connected to one of the following destinations:
- Extension
- Ring Group
- Queue
- Conference
- Call Flow
- Paging
- IVR (Interactive Voice Response, an automated menu)
- External Number
- Check Voicemail (extension voicemail or group voicemail)
Prompts
Section titled “Prompts”You can play a prompt to tell callers what to dial. Three prompt types are available.
| Prompt type | What it does |
|---|---|
| Custom Prompt | Plays one of your existing custom prompts, or a new one you record from an extension or upload as an audio file. |
| Music on Hold (MoH) | Plays an existing Music on Hold profile. Configure the profile you want under PBX Settings > Voice Prompt > Music on Hold before you select it here. |
| Text to Speech (TTS) | Reads out text you enter, converted to speech in the language and voice style you pick. Enable Text-to-Speech under Integrations > AI before you use it. |
End keys
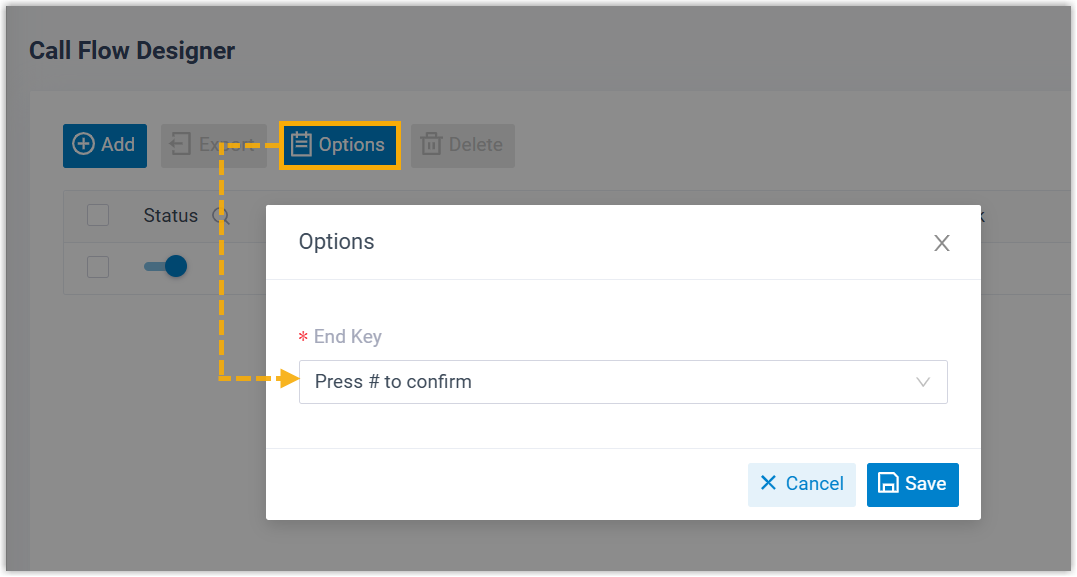
Section titled “End keys”An end key tells the system that the caller has finished entering a number, so it can stop collecting input and route the call. Supported end keys are #, *, a numeric key, or no key at all. Set the end key under Call Flow Designer > Options.
Configure the numbers callers can dial
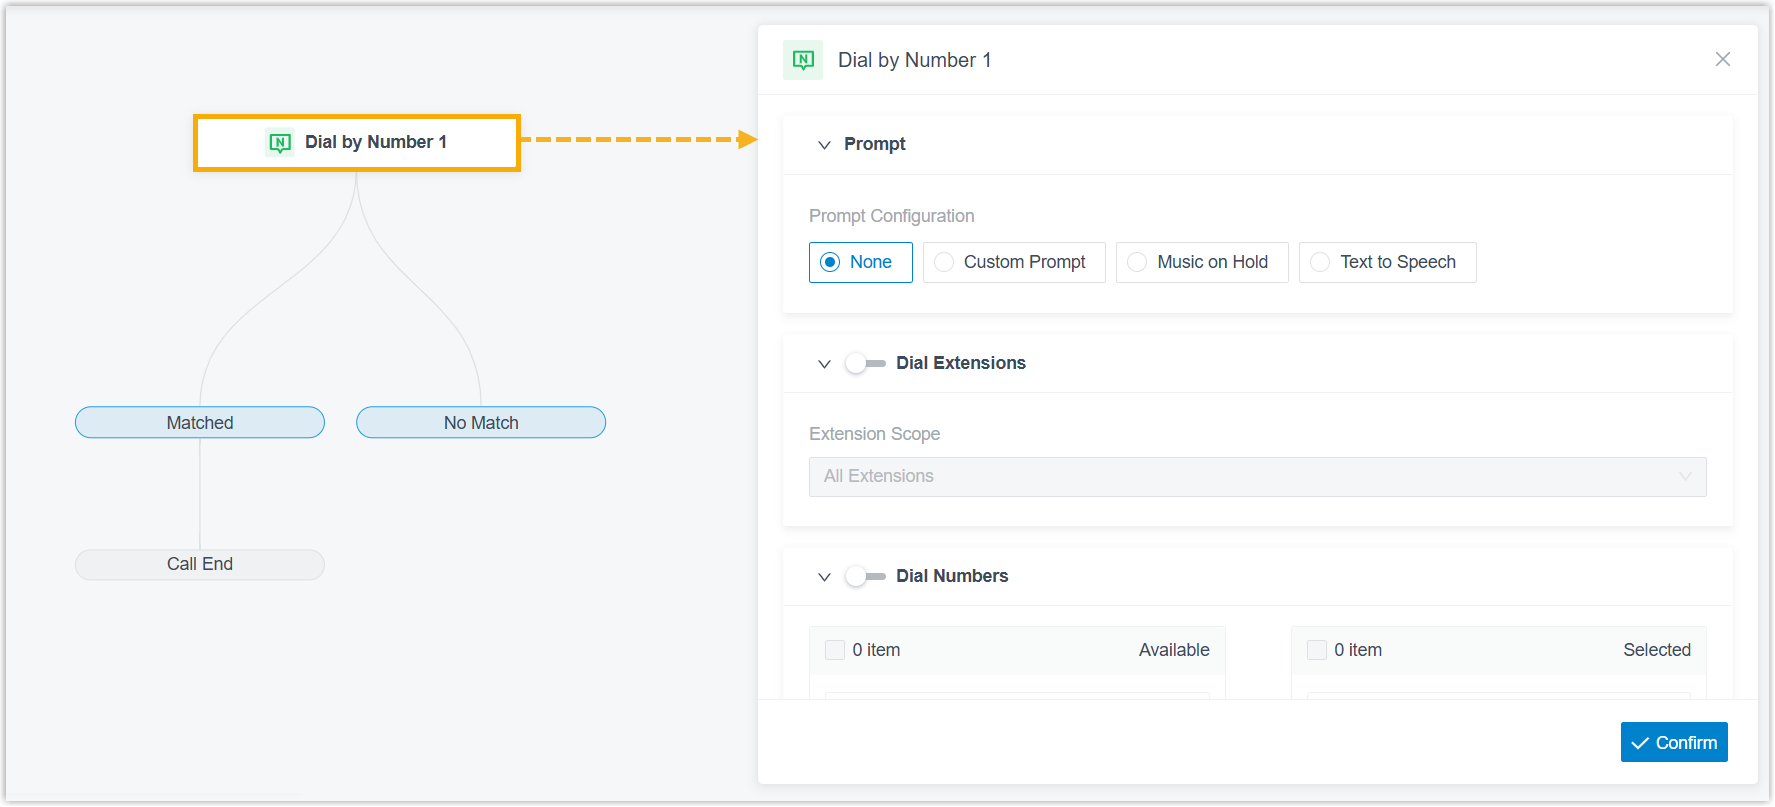
Section titled “Configure the numbers callers can dial”After you drop a Dial by Number component onto the canvas, click it to open its settings, then work through the prompt, the allowed numbers, and the input timeouts.
1. Set the prompt
Section titled “1. Set the prompt”Choose one prompt type and configure it.
Custom Prompt
-
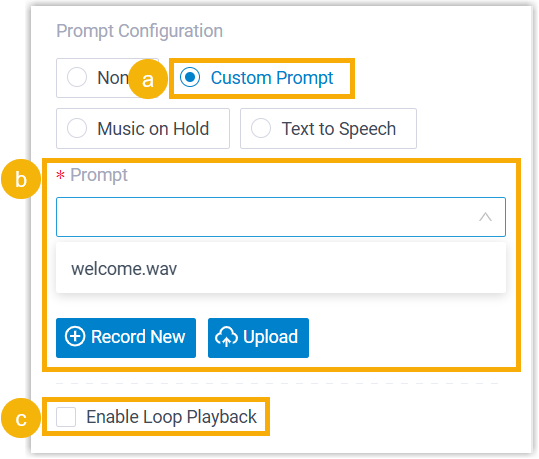
Click Custom Prompt.
-
Add up to 5 prompts. For each one, either pick an existing recording from the Prompt drop-down, or click Record New to capture it from an extension, or click Upload to add an audio file.
-
Optional: to repeat the prompt(s) continuously, select Enable Loop Playback.
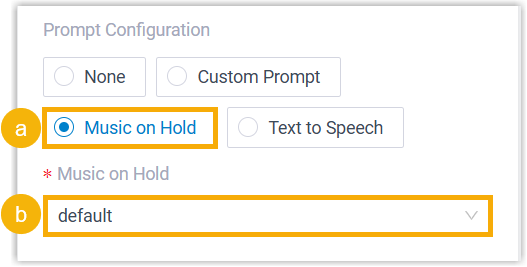
Music on Hold (MoH)
-
Select Music on Hold.
-
Pick an existing profile from the Music on Hold drop-down.
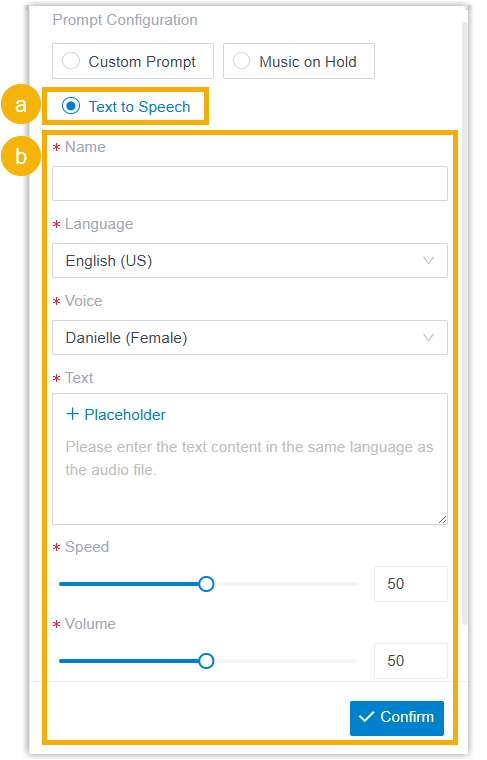
Text to Speech (TTS)
-
Select Text to Speech.
-
Fill in the rest of the fields to turn your text into speech. You can use static or dynamic text:
- Static text: type the words directly in the Text field.
- Dynamic text: type the words and insert placeholders backed by variables so the message is composed at call time. You can also set a generation timeout; if the speech is not ready within that window, the caller moves on to the next component without hearing the prompt.
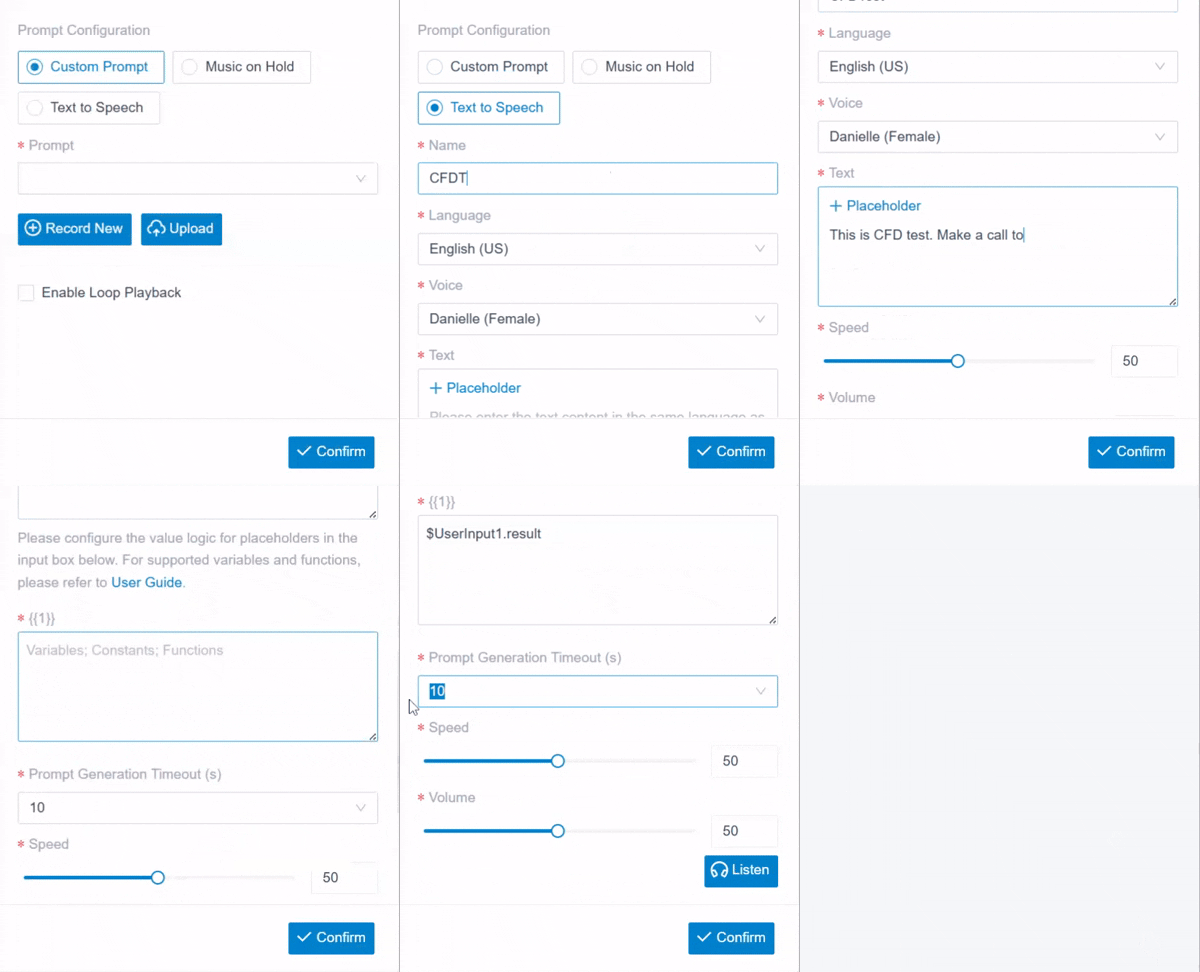
Generated speech is saved and synced to PBX Settings > Voice Prompt > Custom Prompt.
2. Choose which numbers are allowed
Section titled “2. Choose which numbers are allowed”Turn on any combination of the following options to control what callers can dial.
Dial Extensions
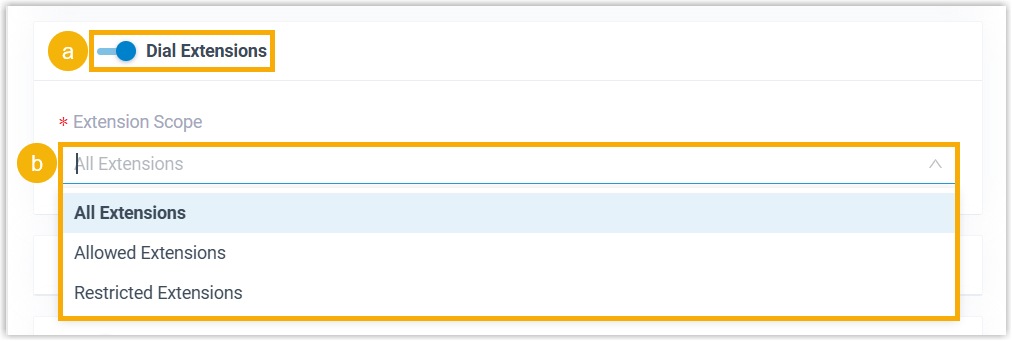
- Turn on Dial Extensions.
- Open the Extension Scope drop-down and select one:
- All Extensions: callers can dial any extension.
- Allowed Extensions: callers can dial only the extensions you move from the Available box to the Selected box.
- Restricted Extensions: callers can dial any extension except the ones you move from the Available box to the Selected box.
Dial Numbers
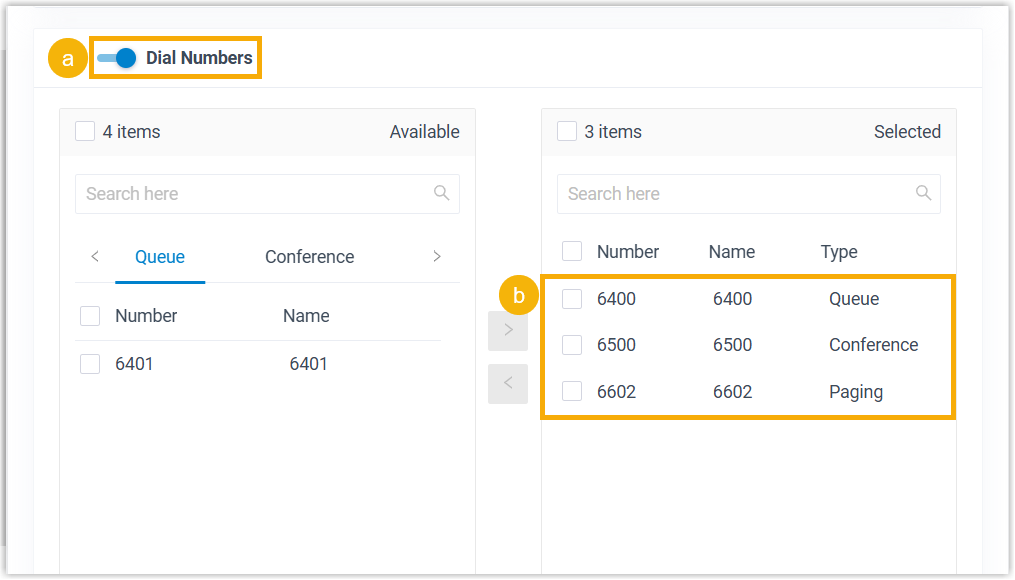
- Turn on Dial Numbers.
- Move the numbers you want to allow from the Available box to the Selected box.
Dial External Number
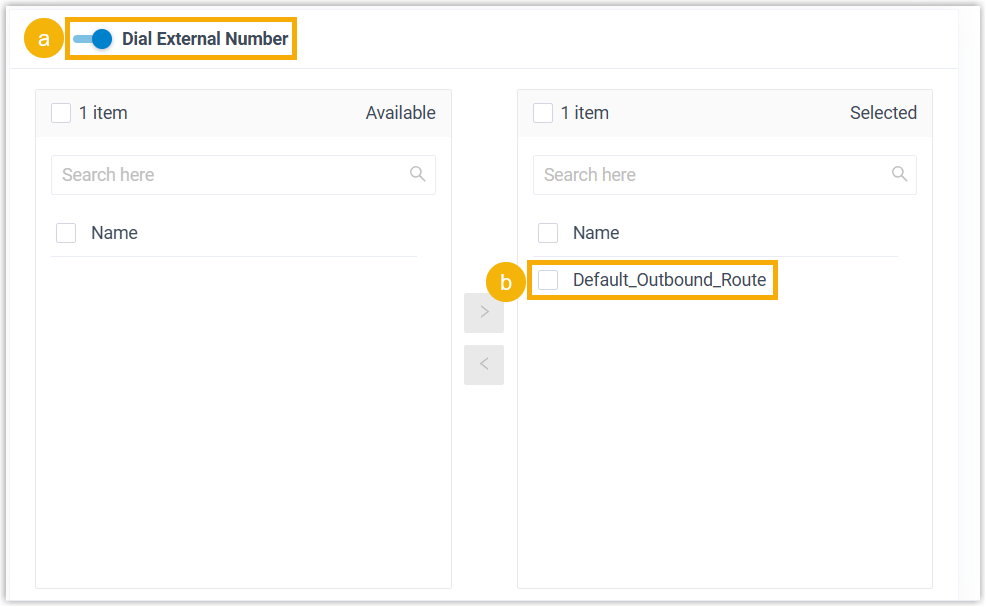
- Turn on Dial External Number.
- Move the outbound routes you want to allow from the Available box to the Selected box.
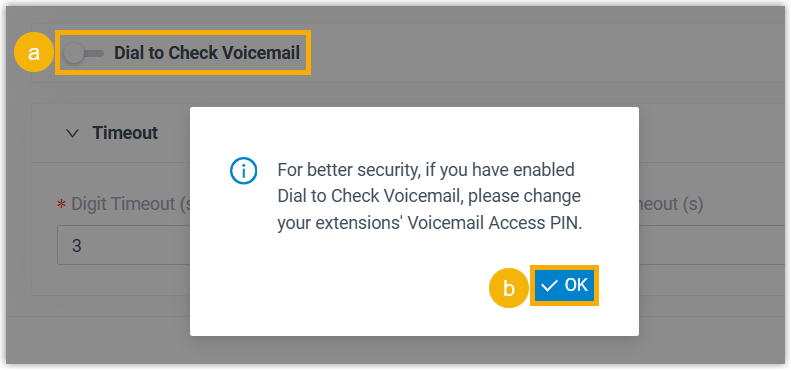
Dial to Check Voicemail
-
Turn on Dial to Check Voicemail.
-
Click OK in the confirmation window. Callers can then reach extension or group voicemail by dialing the Check Voicemail feature code plus the extension number or group voicemail number, followed by the voicemail access PIN.
3. Set the input timeouts
Section titled “3. Set the input timeouts”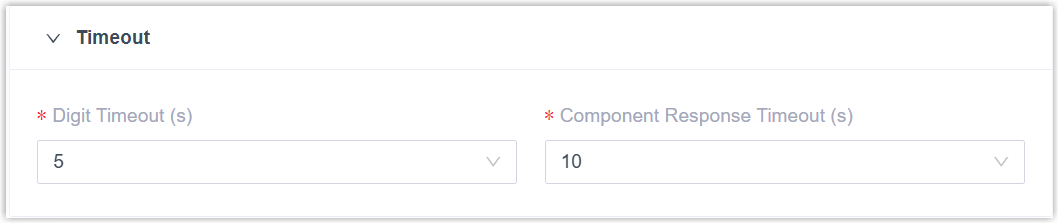
- Digit Timeout(s): how long the system waits for the caller to press the next digit. Pick a value from the drop-down or enter any value from 1 to 9999.
- Component Response Timeout(s): how long the system waits for the caller to act at all. Pick a value from the drop-down or enter any value from 1 to 9999.
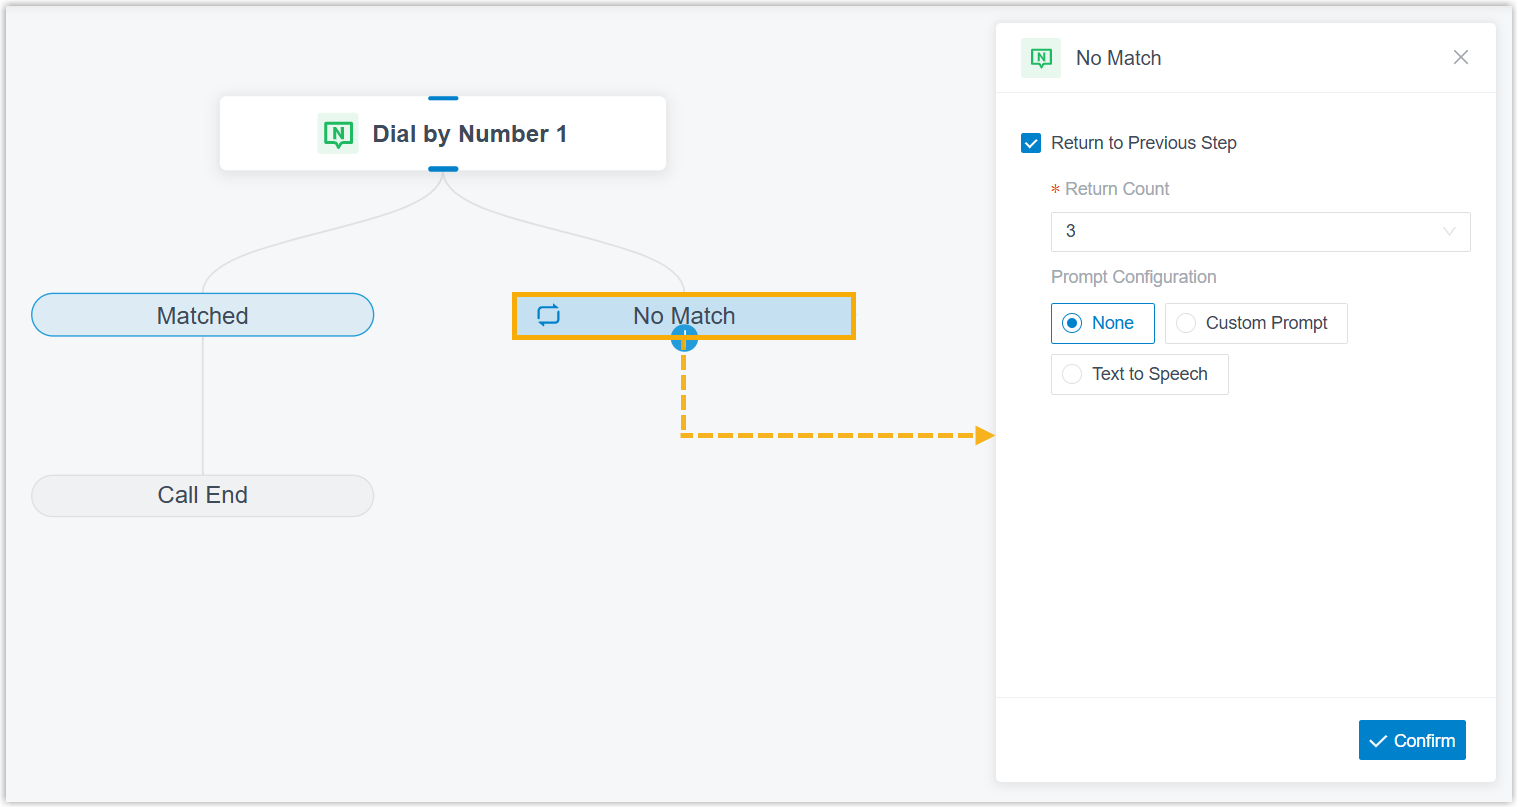
Set a retry strategy for no match
Section titled “Set a retry strategy for no match”Every Dial by Number component includes a No Match branch that handles input the component does not accept. You can give callers another chance instead of routing them straight down that branch.
-
Click the No Match branch.
-
Select Return to Previous Step.
-
In the Return Count drop-down, choose how many times a caller may be sent back to the component after a failed match.
-
Optional: add an audio prompt or a text-to-speech message that asks the caller to try dialing again.
-
Click Confirm in the bottom-right corner.
Component variable
Section titled “Component variable”When a Dial by Number component uses a TTS prompt, the system records the outcome in a variable. You can read that variable in components that support expressions, such as Condition, and route the call based on its value.
| Variable | Type | Description | Example |
|---|---|---|---|
$DialByNumber{index}.ttsResult | String | The text-to-speech outcome for the component. DialByNumberTTSResult.Success means the text was converted and played to the caller. DialByNumberTTSResult.Timeout means the speech was not ready in time, so the caller was routed to the next component without hearing it. | $DialByNumber1.ttsResult(STRING)=DialByNumberTTSResult.Success |
Connections
Section titled “Connections”The No Match branch can connect to a single downstream component, chosen from any of the following.
| Component | What it does |
|---|---|
| Prompt | Plays an audio prompt or a text-to-speech message to callers. See Prompt. |
| Business Hours | Routes calls to different destinations based on the time of day. See Business Hours. |
| Menu | Presents a set of menu options and routes calls by the DTMF (Dual-Tone Multi-Frequency, the tone a phone keypad sends) digit the caller presses. See Menu. |
| User Input | Collects DTMF digits from callers, usually paired with Condition to evaluate the input and route the call. See User Input. |
| Language | Changes the system prompt language for the components that follow. See Language. |
| Record | Starts recording once the caller is connected to another party, with optional prompts at the start and during the call, or disables recording for calls that would otherwise be recorded. See Record. |
| Dial by Number | Lets callers dial a number to reach a destination. See Dial by Number. |
| Dial by Name | A terminating component that lets callers reach an extension by entering the first three letters of a user’s name. See Dial by Name. |
| Transfer | A terminating component that sends callers to a set destination, with an optional prompt to announce the transfer. See Transfer. |
| Hang Up Call | A terminating component that disconnects the call. See Hang Up Call. |
| Condition | Routes calls based on logical expressions. See Condition. |
| Loop | Runs a group of components repeatedly, either a set number of times or until a condition is met. See Loop. |
| Internal Data Ops | Reads and writes data in the PBX’s own database. See Get Extension Presence Status, Set Extension Presence Status, Get Queue Agent, Get Queue Info, Get Agent Status, Set Agent Status, Get System Info, Get System Capacity, Get Extension Info, and Get Company Contact Info. |
| Email Sender | Sends email for real-time notifications, alerts, or user-specific details. See Email Sender. |
| Database Access | Runs SQL against a database during the call flow to retrieve or update records. See Database Access. |
| HTTP Request | Sends HTTP requests to outside web servers to exchange data with third-party services. See HTTP Request. |
Question about this page?
Ask the AI assistant. It starts from this page, then searches the rest of the docs.
Ask Cloud Voice AI
Answers are AI-generated from the docs and may contain mistakes. Verify with the linked pages.