
Create a WhatsApp Campaign
A WhatsApp campaign lets you deliver marketing, utility, and authentication messages straight to your contacts’ phones through WhatsApp, using approved message templates to reach large numbers of customers quickly. This page walks you through creating a campaign on a WhatsApp channel.
Requirements
Section titled “Requirements”Your system must be running firmware version 84.20.0.21 or later.
Before you begin
Section titled “Before you begin”Have the following in place before you build a campaign.
WhatsApp channel: Configure a channel that is linked to your WhatsApp Business Account. See Set up a WhatsApp Channel.

Message template: Create your templates in your WhatsApp Business Account ahead of time. WhatsApp must approve a template before it can be used, so allow time for review. Once approved, refresh the template list in Cloud Voice so the templates are synchronized and ready to select for your campaign. For details, see View WhatsApp Message Templates.
Contact list: Assemble the phone numbers you want to reach.
You can attach contacts to a campaign in any of these ways:
-
Type contact numbers in by hand.
-
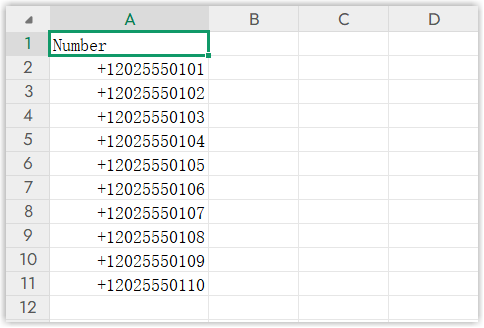
Import a CSV file (a plain-text spreadsheet where each value is separated by a comma) of phone numbers. The file must meet these conditions:
- Format: UTF-8 encoded
.CSV(UTF-8 is a text encoding that supports international characters) - Size: under 50 MB
- File name: fewer than 127 characters
- Columns: include a
Numberfield with phone numbers in E.164 format (the international standard: a plus sign, the country code, then the subscriber number, for example+1xxxxxxxxxx), as shown below.
- Format: UTF-8 encoded
-
Pull contacts directly from an existing company phonebook. Numbers stored in the phonebook must already be in E.164 format, as shown below.

Message routing target (optional): If you want the campaign to open sessions (conversation threads an agent can pick up and reply to) automatically, set up the destination in advance. This can be an extension (an individual user’s line) or a message queue.
Create the campaign
Section titled “Create the campaign”-
Sign in to the Cloud Voice management portal and go to Messaging > Message Campaign, then click Add.
-
Complete the Basic section:
- Name: A label that helps you recognize the campaign.
- Message Channel: The WhatsApp channel to use.
- Sender: The WhatsApp phone number that messages are sent from.
- Recipient: Choose recipients using one of the methods below.
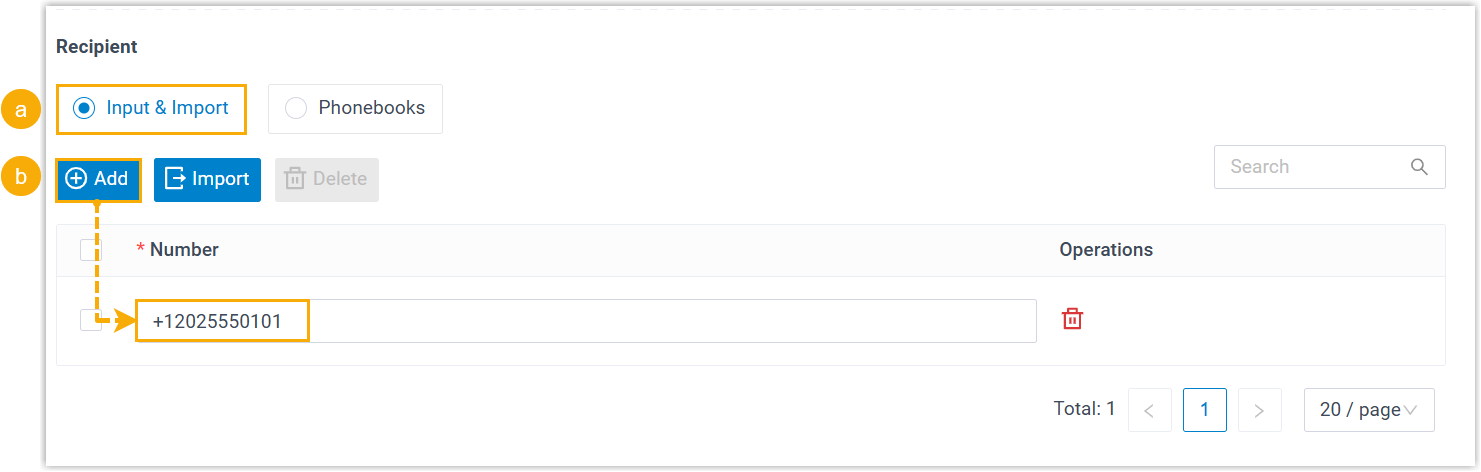
Enter numbers manually
- Select Input & Import.
- Click Add and type each phone number in E.164 format (for example,
+1xxxxxxxxxx).
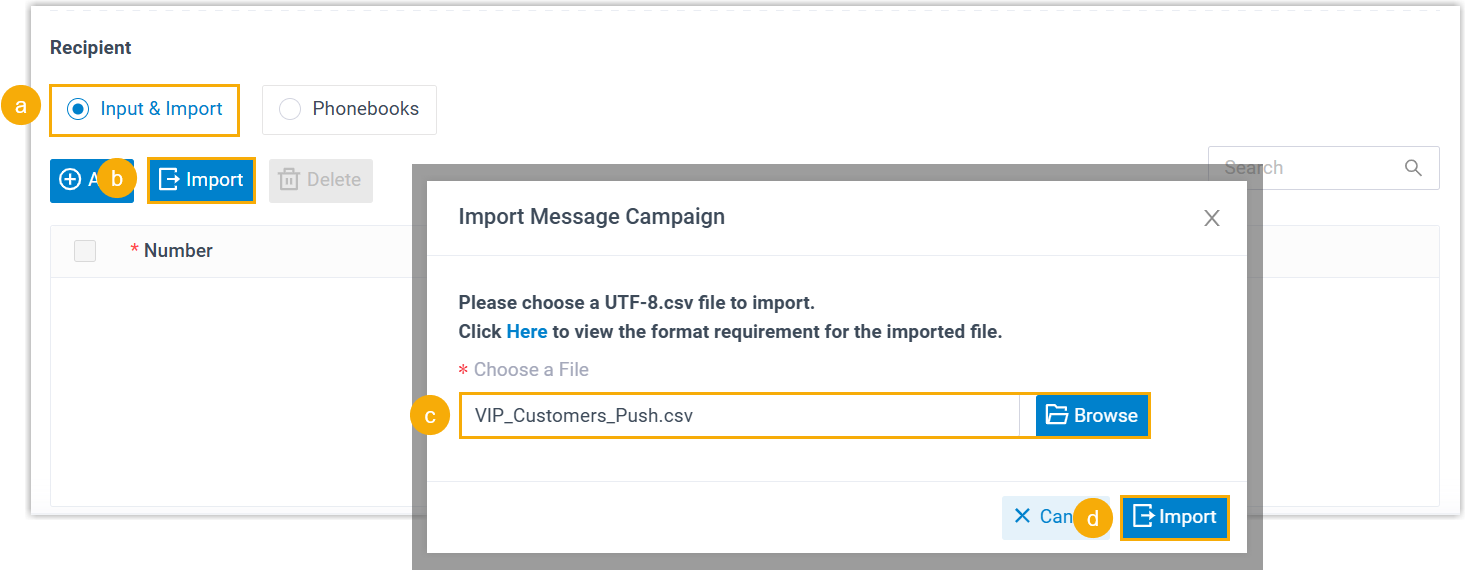
Import a CSV file
- Select Input & Import.
- Click Import.
- In the pop-up window, click Browse and choose your file.
- Click Import.
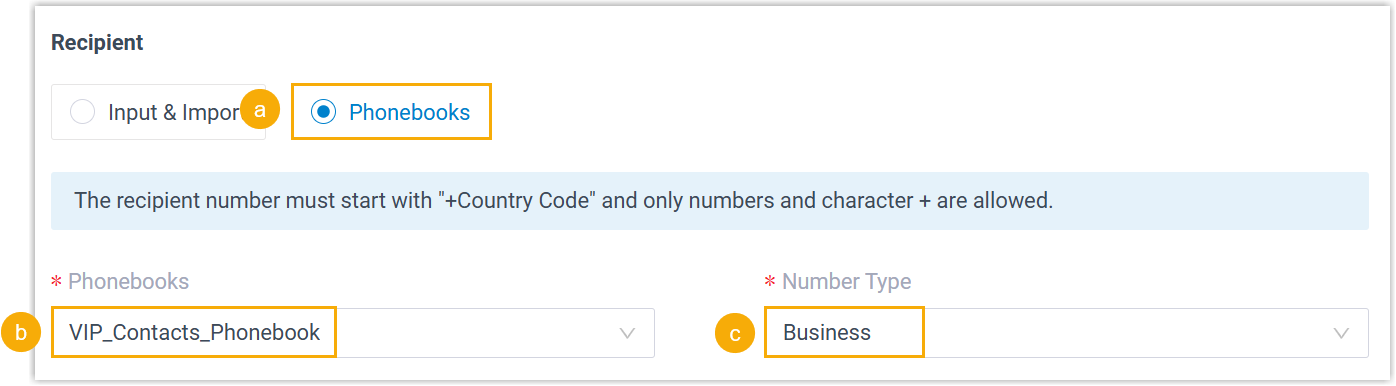
Use an existing phonebook
- Select Phonebooks.
- From the Phonebooks drop-down list, pick the phonebook you want.
- From the Number Type drop-down list, choose the number type. The system collects the phone numbers that match the selected types.
-
In the Message Content section, set up the template to send.
-
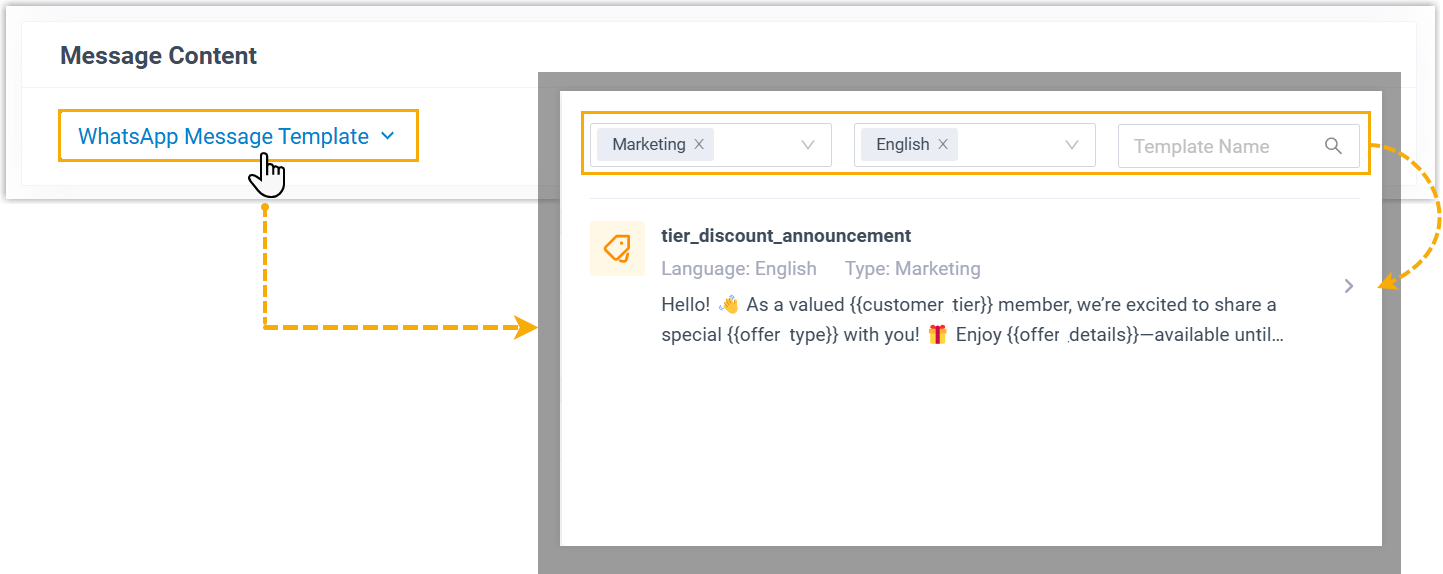
Click WhatsApp Message Template, then search for and select the template you want.
-
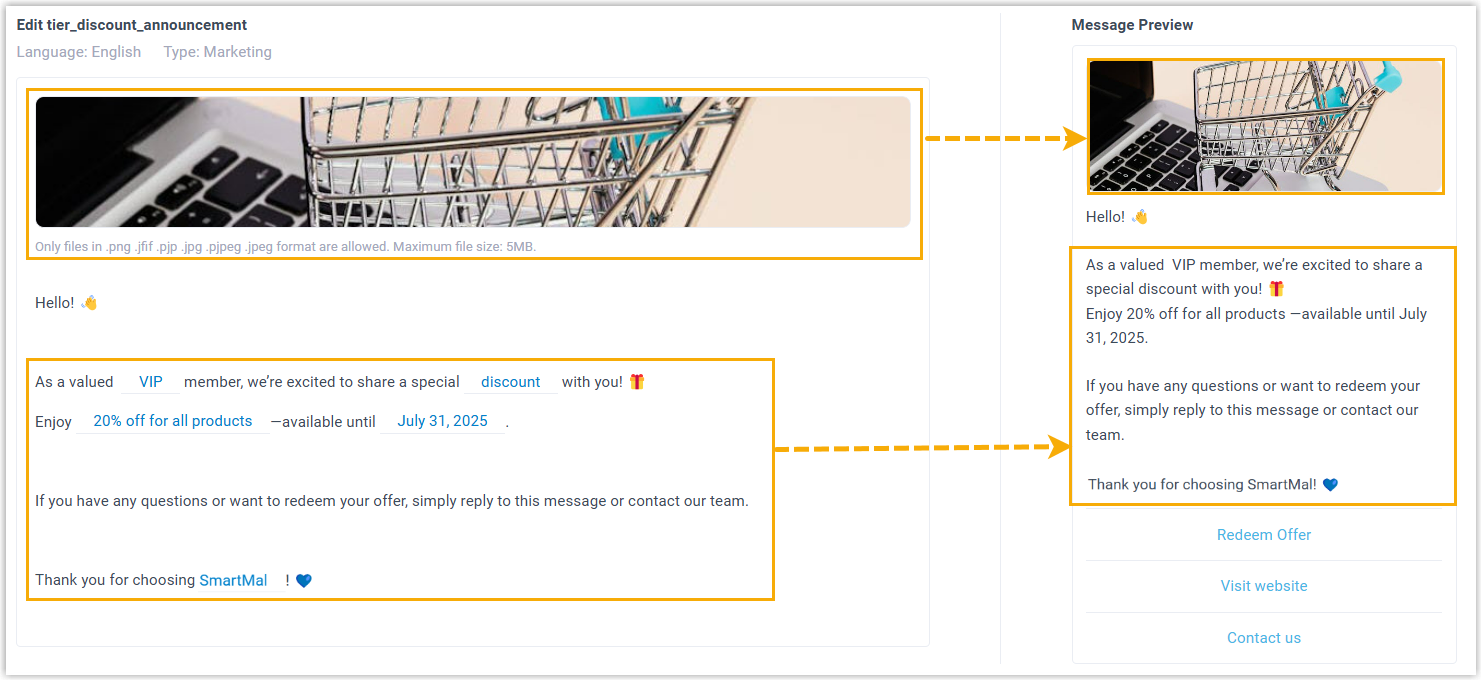
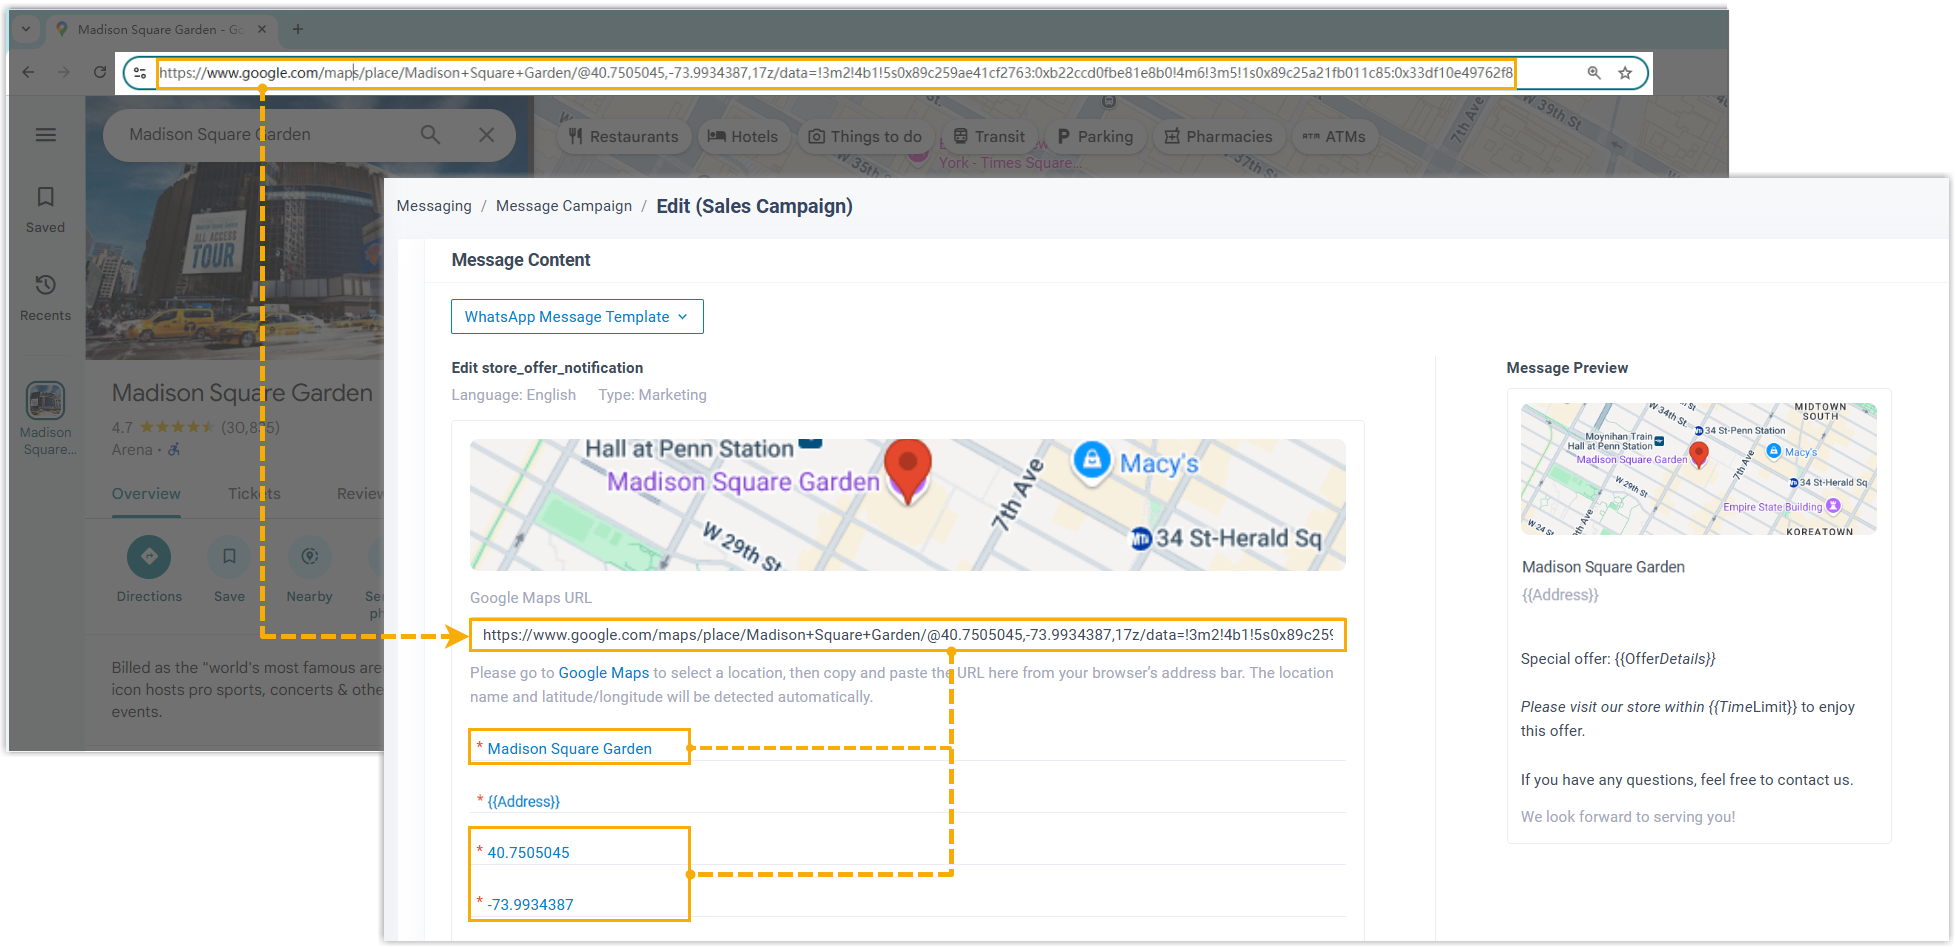
If the template contains media or variable placeholders, upload the media files and provide a value for every variable.
-
-
In the Sending Rules section, decide when the messages go out and how sessions are handled.
-
Under Send Time, choose one of the following:
Option What it does Send Now Sends the campaign as soon as you save it. Schedule Sending Sends the campaign at a date and time you set. Do NOT Send, Save as Draft Stores the campaign as a draft so you can edit or send it later. 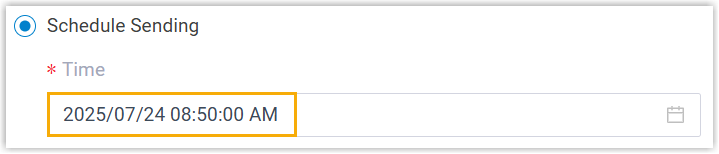
-
Under Send Mode, choose whether sessions are created:
Option What it does Create session and send message Opens a session for each contact when the campaign sends, and assigns it to the target you selected (an extension or a message queue). Send messages directly without creating session Sends the messages without opening any session. These messages do not appear in External Chat Logs. 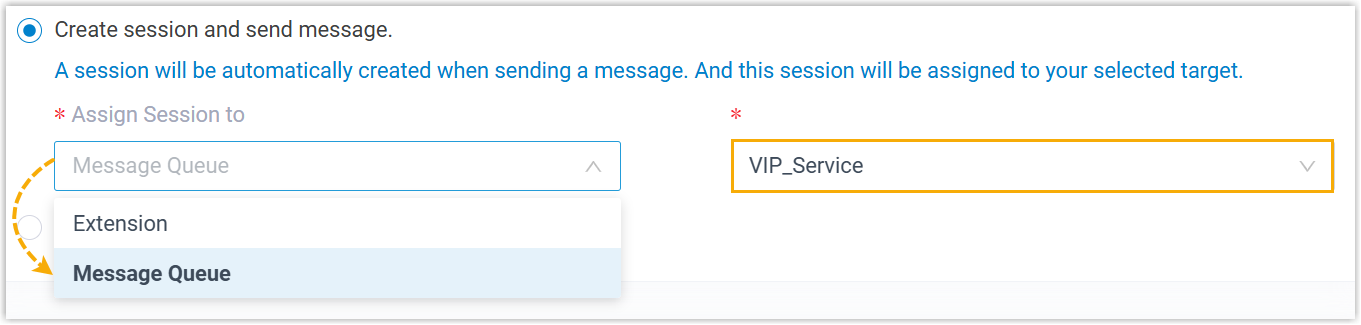
-
-
Click Save.
Result
Section titled “Result”The campaign is created and appears in the campaign list.
-
If you chose to send right away, the status shows Executing and messages go out to the listed numbers immediately.

-
If you scheduled the campaign, the status shows Scheduled and messages send automatically at the set time.

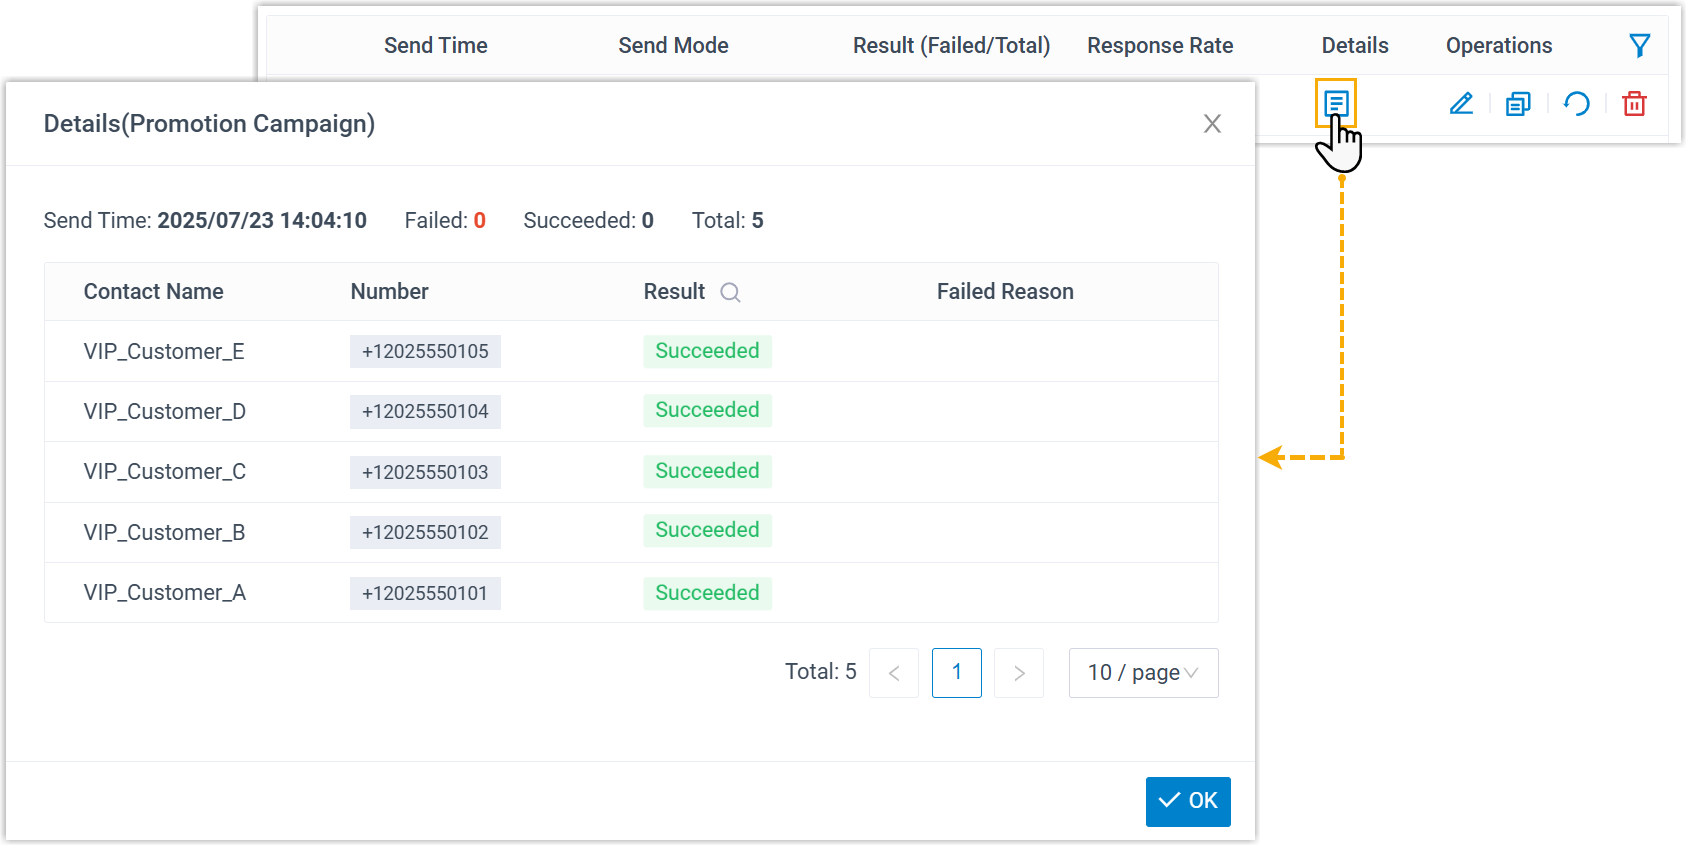
Once a campaign reaches Completed, you can review its outcome from the campaign list.
-
For a quick summary, look at the Result and Response Rate columns.

-
For a full delivery breakdown, click the details icon
 .
.
Question about this page?
Ask the AI assistant. It starts from this page, then searches the rest of the docs.
Ask Cloud Voice AI
Answers are AI-generated from the docs and may contain mistakes. Verify with the linked pages.