
Manually Switch Presence Status
Your presence tells colleagues whether you’re reachable and drives the call-handling rules tied to each status. You can change it yourself at any time, either as a status that stays until you change it again or as a temporary status that reverts on its own after a set time.
Set a status that stays until you change it
Section titled “Set a status that stays until you change it”-
Sign in to the Cloud Voice App on the desktop.
-
Open the presence drop-down list at the top of the window and choose the status you want.
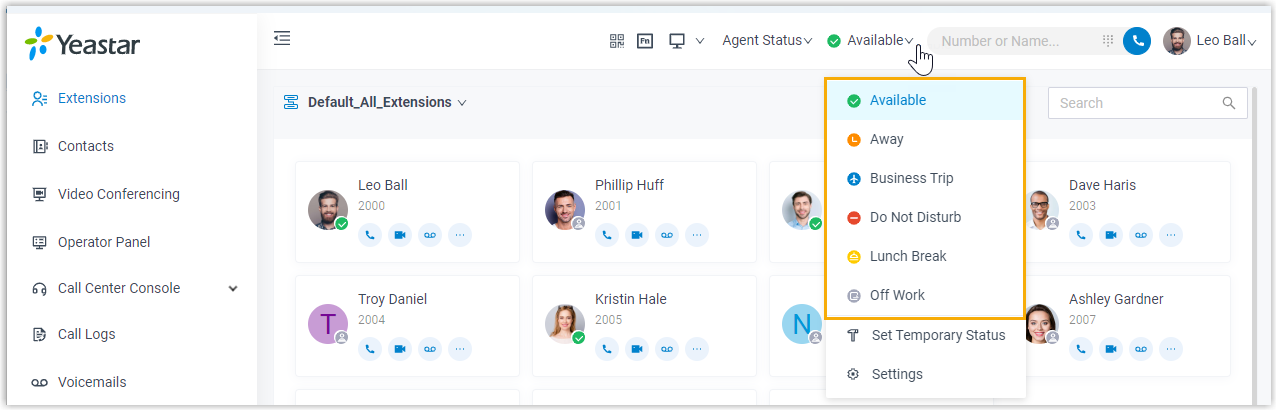
The new status, along with the presence settings associated with it, applies right away and remains in effect until you switch again.
Set a temporary status that reverts automatically
Section titled “Set a temporary status that reverts automatically”Say you’re stepping into a scheduled meeting where you can’t take calls, but you want your normal call routing to resume the moment you’re free. Rather than relying on yourself to switch back, set a temporary status and tell the app how long it should last.
-
Sign in to the Cloud Voice App on the desktop.
-
Open the presence drop-down list at the top of the window and choose Set Temporary Status.
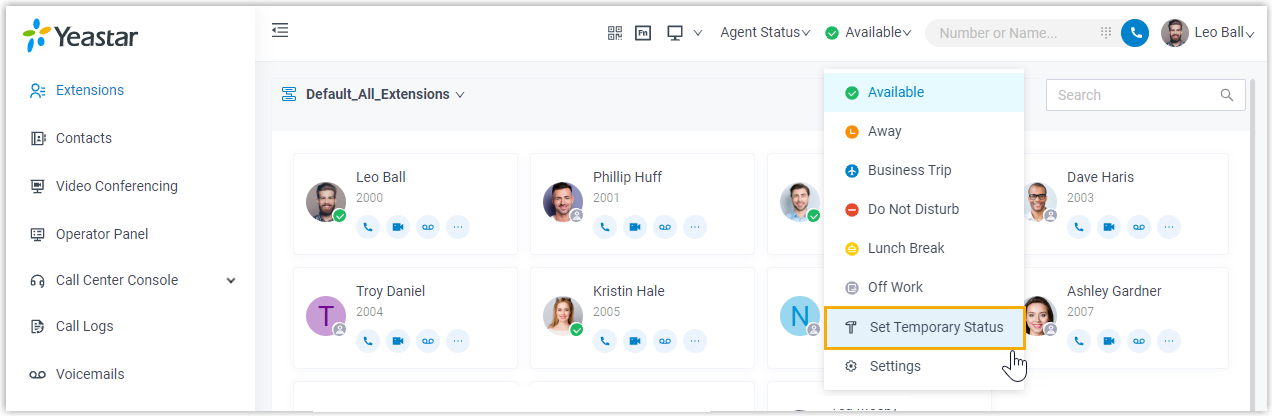
-
In the window that opens, fill in the following:
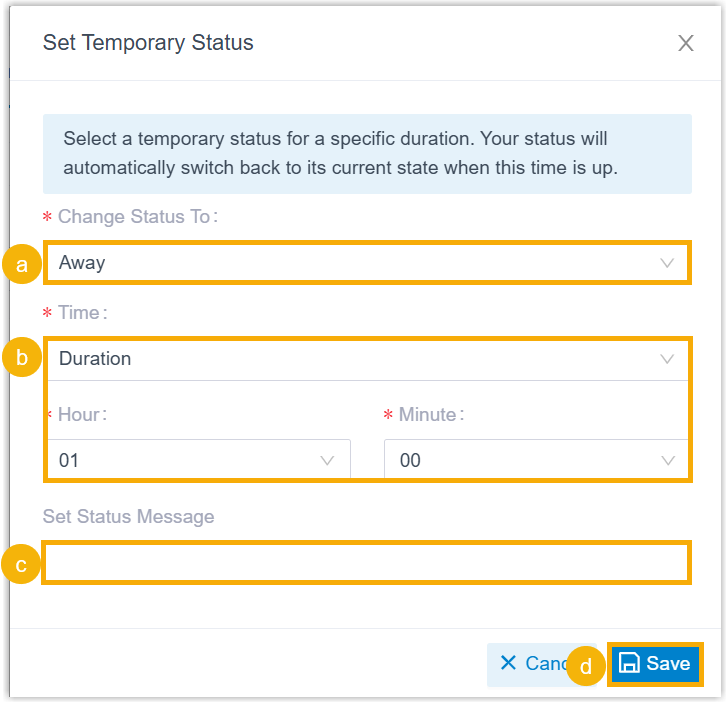
a. From the Change Status To list, pick the status to use temporarily.
b. From the Time list, choose how the status should expire and set the specifics:
- Duration: The status lasts for a fixed length of time. Set the length in the Hour and Minute lists.
- Date: The status lasts until a specific point in time. Set it in the Date field.
c. (Optional) Enter a note in the Set Status Message field.
d. Click Save.
The temporary status and its presence settings take effect immediately.
Question about this page?
Ask the AI assistant. It starts from this page, then searches the rest of the docs.
Ask Cloud Voice AI
Answers are AI-generated from the docs and may contain mistakes. Verify with the linked pages.