
Forward Fax to Email or Another Fax Number
Once a fax lands in your list, you can pass it along without leaving the app. Forwarding is handy when you need to get a document into a colleague’s inbox right away, hold onto a copy for later, or route it to a different fax line. A received fax can go to one or more email addresses, or on to another fax number.
Forward a fax to an email address
Section titled “Forward a fax to an email address”-
Open the fax list.
-
Sign in to the Cloud Voice App and go to Fax Management > Fax.
-
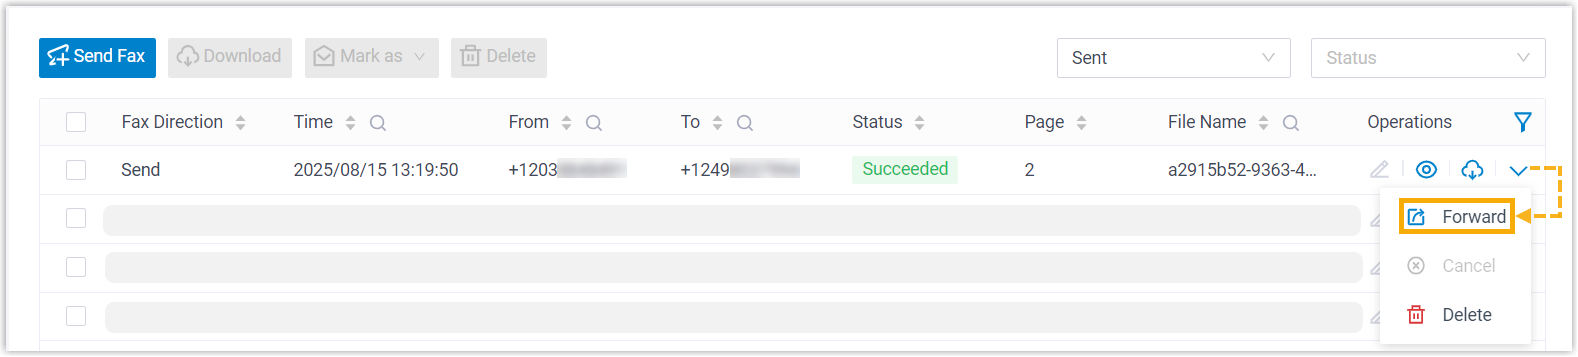
Find the fax you want to send on, click the drop-down arrow at the end of its row, and choose Forward.
-
-
In the dialog that appears, fill in the destination.
-
Set Forward To to Email.
-
Click Add, pick an email type, and enter where the fax should go.
Email Type Description Extension’s Email Delivers the fax as an email attachment to the mailboxes of the extension users you choose. Select the extensions from the Extension/Email drop-down list. Specified Email Delivers the fax as an email attachment to an address you type in. Enter the address in the Extension/Email field. -
Click Save.
-
The fax is delivered to each destination as an email attachment.
Forward a fax to another fax number
Section titled “Forward a fax to another fax number”You can hand a received fax off to a different fax number.
-
Open the fax list.
-
Sign in to the Cloud Voice App and go to Fax Management > Fax.
-
Find the fax you want to send on, click the drop-down arrow at the end of its row, and choose Forward.
-
-
In the dialog, set Forward To to Fax, then click Save.
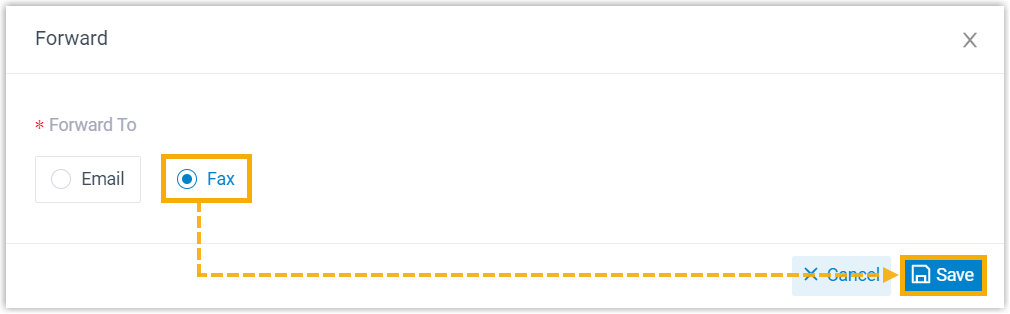
The app takes you to the fax sending page.
-
Finish the remaining fields on that page to send the fax on.
Question about this page?
Ask the AI assistant. It starts from this page, then searches the rest of the docs.
Ask Cloud Voice AI
Answers are AI-generated from the docs and may contain mistakes. Verify with the linked pages.