
Manage Chat Sessions
Over time your internal chat list can fill up with conversations you no longer need in view. From the Cloud Voice App desktop client you can drop a session from the list, wipe a conversation’s messages on your own device, or erase every record of a chat everywhere. This page walks through each option and explains what happens to your history in each case.
Every task below starts the same way: sign in to the Cloud Voice App desktop client, then open Chat from the left navigation bar and switch to the Internal Chat tab.
Remove a session from your chat list
Section titled “Remove a session from your chat list”Use this when you simply want a conversation to stop showing up in your internal chat list.
-
Open Chat in the left navigation bar, then select the Internal Chat tab.
-
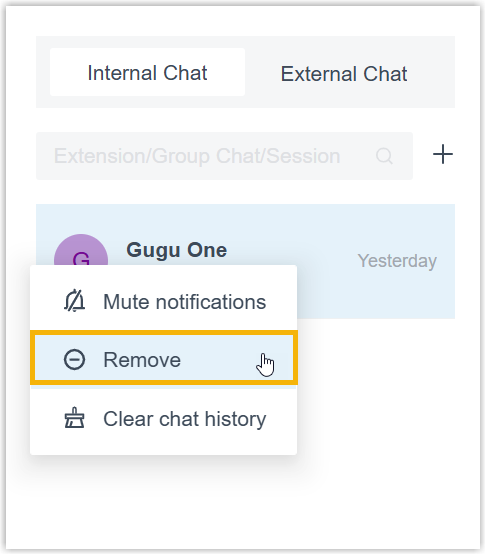
Right-click the session you want to hide and choose Remove.
-
Confirm by clicking OK in the dialog.
The conversation drops off the list right away. It comes back, together with all of its earlier messages, the next time you message that contact or they message you.
Clear a conversation’s history on your device
Section titled “Clear a conversation’s history on your device”Choose this if you want to empty a chat window now but keep the option to look the messages up again later.
-
Open Chat in the left navigation bar, then select the Internal Chat tab.
-
Clear the conversation:
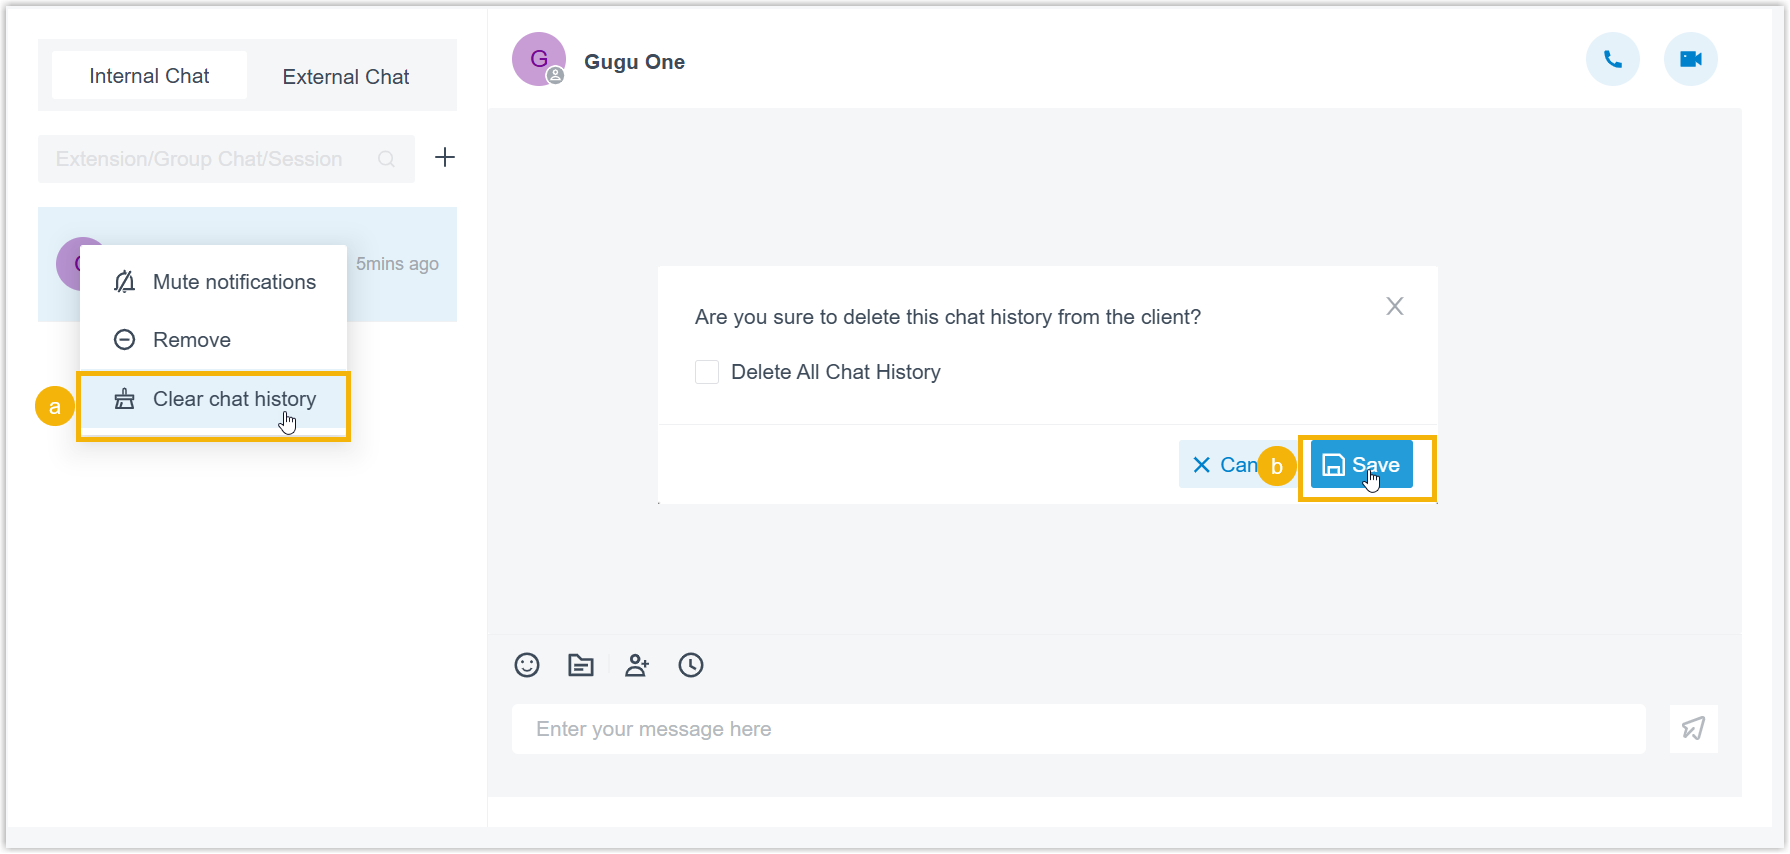
- Right-click the session and choose Clear chat history.
- Click OK in the confirmation dialog.
The messages disappear from the current chat window.
Delete a conversation’s history everywhere
Section titled “Delete a conversation’s history everywhere”When privacy or security calls for it, you can erase a conversation’s messages for good.
-
Open Chat in the left navigation bar, then select the Internal Chat tab.
-
Delete the history:
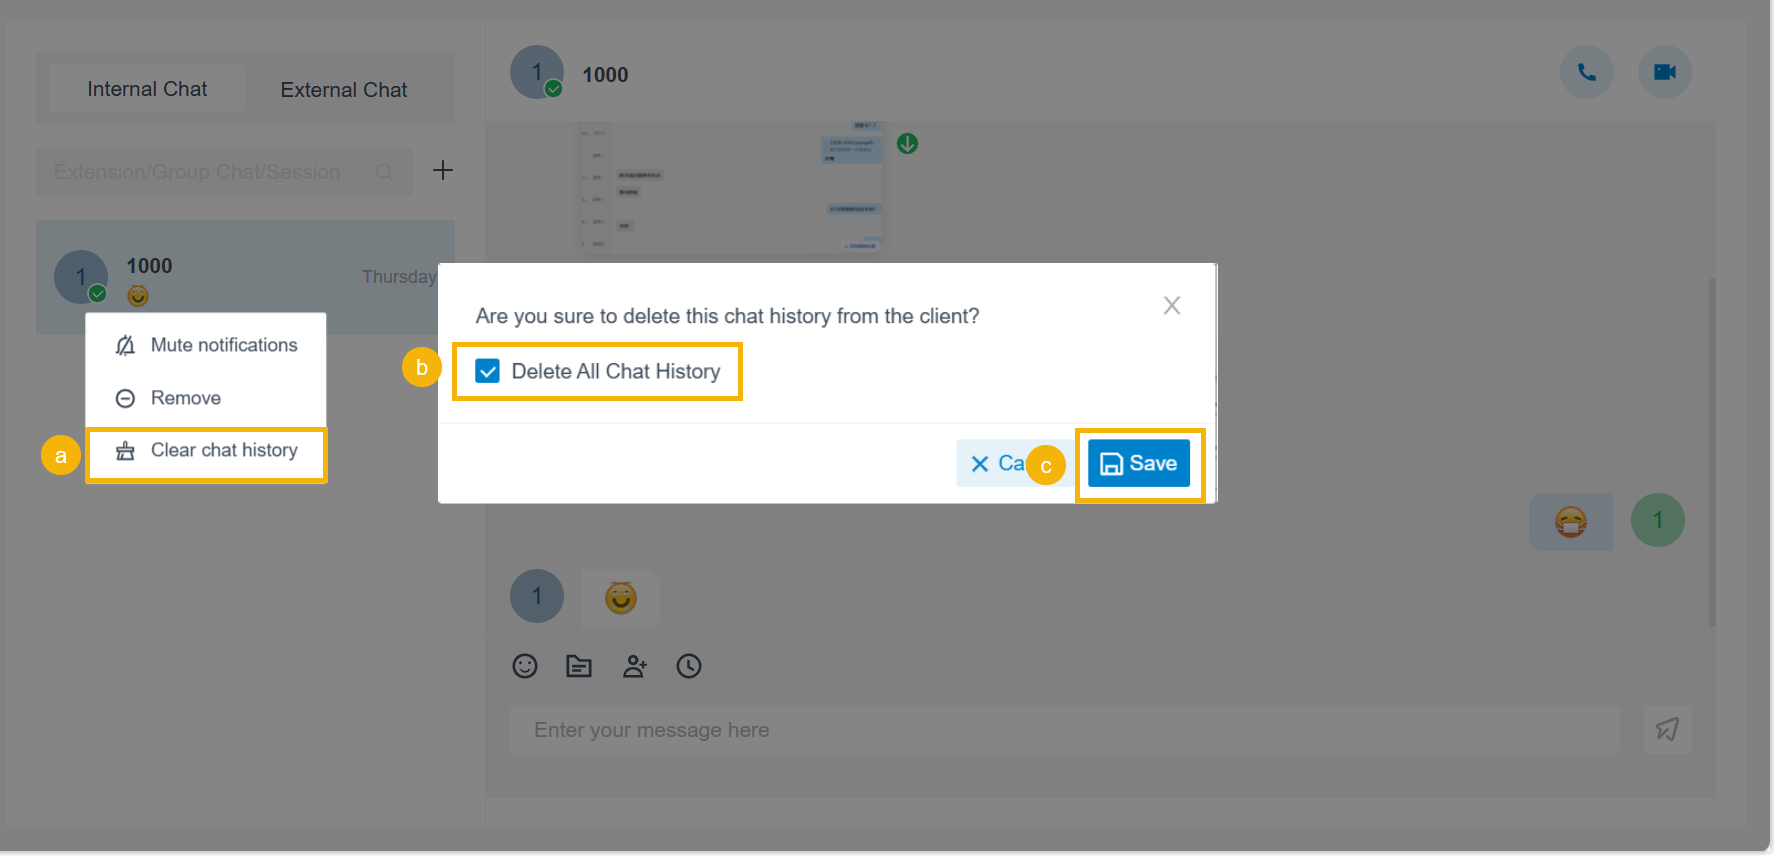
- Right-click the conversation and choose Remove chat history.
- Select the Delete All Chat History checkbox.
- Click Save in the dialog.
Question about this page?
Ask the AI assistant. It starts from this page, then searches the rest of the docs.
Ask Cloud Voice AI
Answers are AI-generated from the docs and may contain mistakes. Verify with the linked pages.