
Integrate a Headset with the Web Client (Before v84.7.0.17)
On supported builds of the Cloud Voice App Web Client, you can pair a Jabra headset as your audio device and then handle calls directly from the headset controls instead of clicking on screen. This page covers the setup for Web Client versions released before v84.7.0.17.
Requirements
Section titled “Requirements”Confirm that your setup meets all of the following before you begin.
| Item | Requirement |
|---|---|
| Web Client version | v84.6.0.24, v84.6.0.25, or v84.6.0.47 |
| Web browser | Google Chrome, version 87 or later |
| Headset | Jabra Evolve, Pro, Speak, Engage, or Biz series |
How it works
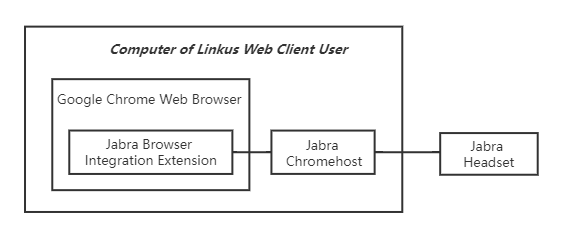
Section titled “How it works”Advanced call control from the headset relies on two Jabra components working together with Chrome:
- Jabra Chromehost: a small application installed on your computer that lets software talk to the headset.
- Jabra Browser Integration Extension: a Chrome extension that bridges the browser to Jabra Chromehost.
Once both are in place, you select the headset as your audio device in the Web Client. The setup has three stages: install Jabra Chromehost, add the Chrome extension, then point the Web Client at the headset.
Step 1: Install Jabra Chromehost
Section titled “Step 1: Install Jabra Chromehost”-
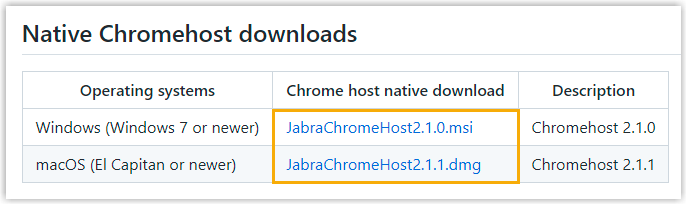
Scroll to the Native Chromehost downloads section.
-
In the Chrome host native download column, choose the installer that matches your operating system.
-
Run the installer you downloaded:
-
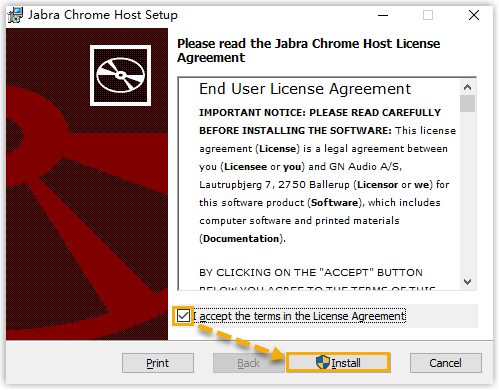
Double-click the downloaded package.
-
Select the acknowledgement checkbox, then click Install.
-
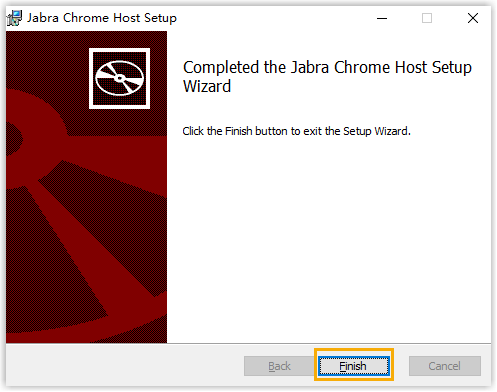
When installation finishes, click Finish to close the setup wizard.
-
Step 2: Add the Jabra Browser Integration Extension to Chrome
Section titled “Step 2: Add the Jabra Browser Integration Extension to Chrome”-
On the same computer, open the Chrome Web Store.
-
Search for
Jabra Browser Integration Extensionand press Enter.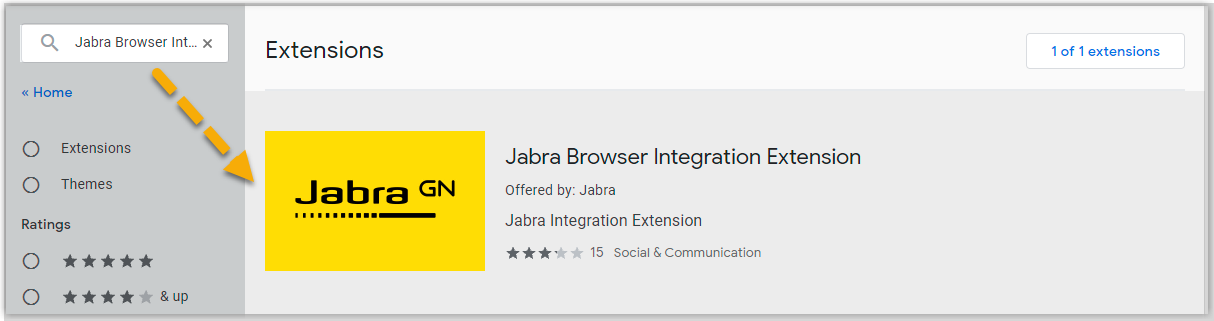
-
Click the Jabra Browser Integration Extension result.
-
Click Add to Chrome.

-
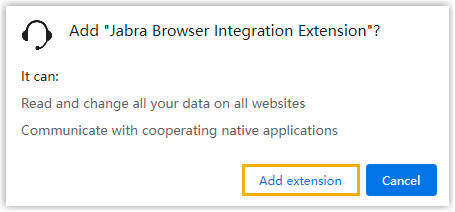
Review the permissions the extension requests, then click Add extension.
Step 3: Set the headset as your Web Client audio device
Section titled “Step 3: Set the headset as your Web Client audio device”-
Make sure the Web Client is running in Web Client mode.
-
Log in to the Cloud Voice App Web Client.
-
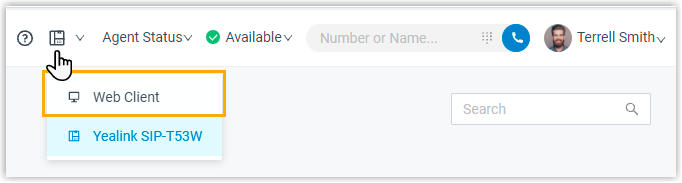
Look at the toolbar for the monitor icon
 .
.
If it is not shown, open the mode drop-down list and choose Web Client.
-
-
Connect the headset:
-
Plug the Jabra headset into a USB port on your computer.
-
In the Web Client, go to Preferences > Audio & Video.
-
Open the Headset Integration drop-down and select Jabra.
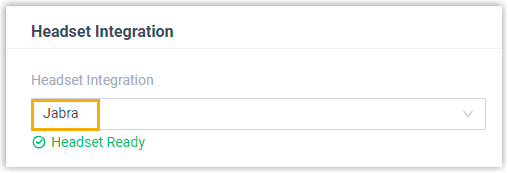
When your browser environment meets the requirements, the page shows Headset Ready.
-
-
Under Multimedia Device, choose the headset for each audio channel:
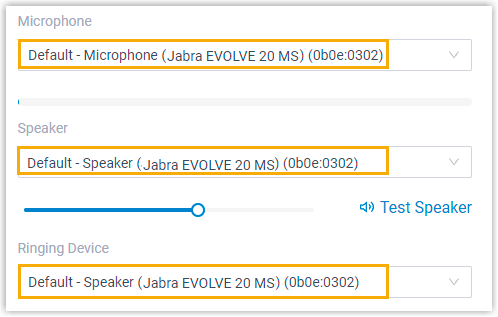
- Microphone: Select the Jabra headset.
- Speaker: Select the Jabra headset.
- Ringing Device: Select the Jabra headset, or another device if you prefer to hear ringing elsewhere.
-
Click Save.
Result
Section titled “Result”You can now manage calls from the headset. The following controls are supported:
- Answer or reject a call
- Answer or reject a second call
- End a call
- Hold or resume a call
- Mute or unmute a call
- Adjust the system volume
Question about this page?
Ask the AI assistant. It starts from this page, then searches the rest of the docs.
Ask Cloud Voice AI
Answers are AI-generated from the docs and may contain mistakes. Verify with the linked pages.