
Allow web browser notifications for the Cloud Voice App Web Client
The first time you sign in to the Cloud Voice App Web Client, your browser asks whether the site may send notifications. If you dismissed that prompt or chose to block it, the web client stays silent and no alerts appear for incoming calls, chats, or voicemails.
To start receiving alerts again, grant the site permission in your browser. The exact steps depend on which browser you use, and on whether you simply ignored the original prompt or actively blocked it.
Google Chrome
Section titled “Google Chrome”If you have not answered the notification prompt yet
Section titled “If you have not answered the notification prompt yet”- Sign in to the Cloud Voice App Web Client.
- Grant permission to send notifications:
- In the Chrome address bar, click the site information control, the lock icon or the Not secure warning icon.
- In the pop-up, click Site settings. Chrome opens its settings page for the site.
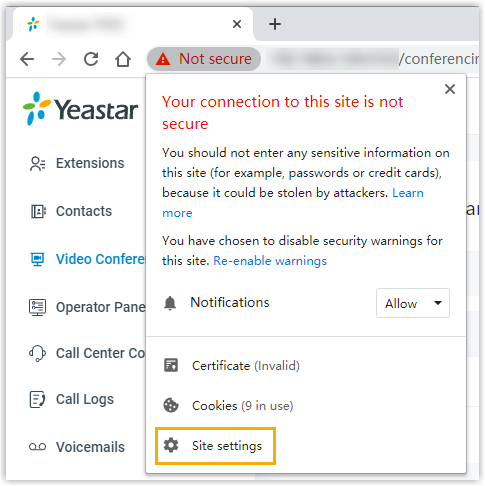
- Scroll to Permissions and locate Notifications.
- In the Notifications drop-down list, select Allow.
- Apply the change to the web client:
-
Switch back to the Cloud Voice App Web Client tab.
-
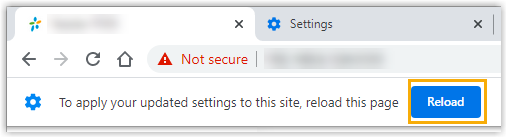
At the top of the page, click Reload.
-
If you previously blocked notifications
Section titled “If you previously blocked notifications”-
Sign in to the Cloud Voice App Web Client.
-
Grant permission to send notifications:
- In the Chrome address bar, click the lock icon or the Not secure warning icon.
- In the Notifications drop-down list, select Allow.
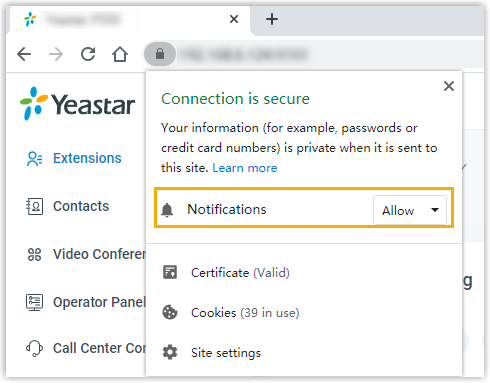
- Click any empty area of the page to confirm.
-
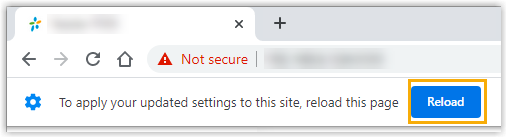
On the Cloud Voice App Web Client, click Reload.
Microsoft Edge
Section titled “Microsoft Edge”If you have not answered the notification prompt yet
Section titled “If you have not answered the notification prompt yet”- Sign in to the Cloud Voice App Web Client.
- Grant permission to send notifications:
-
In the address bar, click the lock icon or the Not secure warning icon.
-
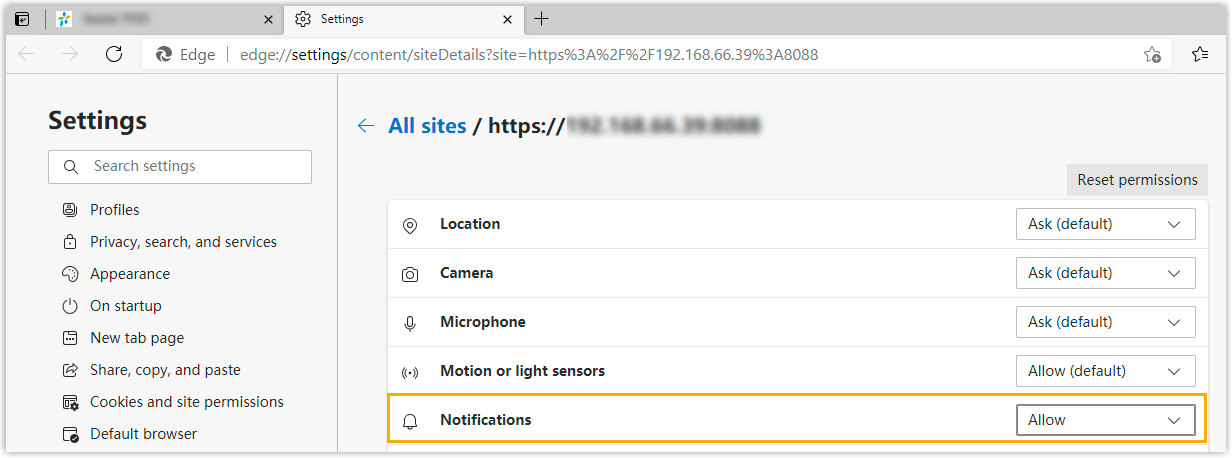
Select Permissions for this site from the drop-down. Edge opens its Settings page for the site.
-
In the Notifications drop-down list, select Allow.
-
- Apply the change to the web client:
-
Switch back to the Cloud Voice App Web Client tab.
-
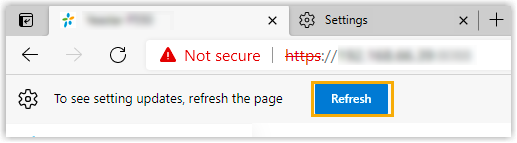
At the top of the page, click Refresh.
-
If you previously blocked notifications
Section titled “If you previously blocked notifications”-
Sign in to the Cloud Voice App Web Client.
-
Grant permission to send notifications:
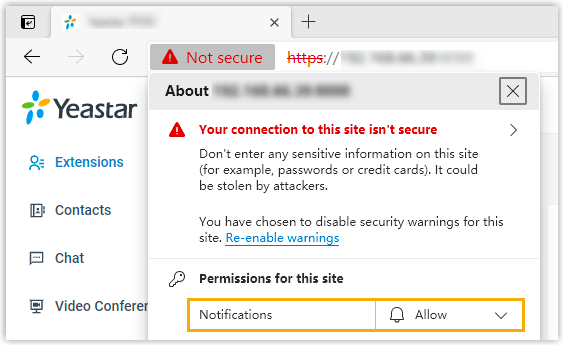
- In the address bar, click the lock icon or the Not secure warning icon.
- In the Notifications drop-down list, select Allow.
- Click any empty area of the page to confirm.
-
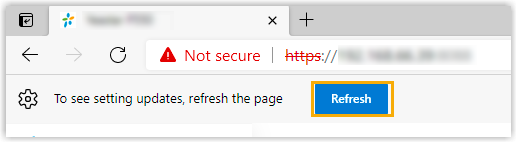
On the Cloud Voice App Web Client, click Refresh.
If you have not answered the notification prompt yet
Section titled “If you have not answered the notification prompt yet”- Sign in to the Cloud Voice App Web Client.
- Grant permission to send notifications:
-
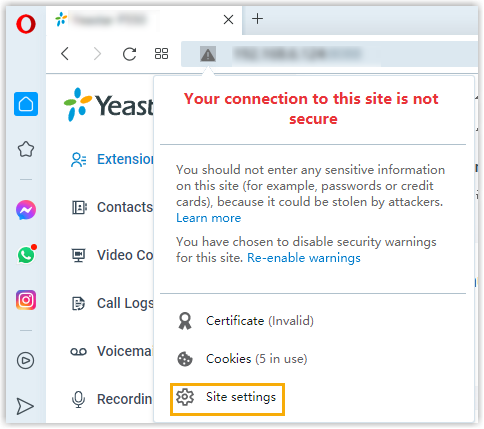
In the address bar, click the site information control or the lock icon.
-
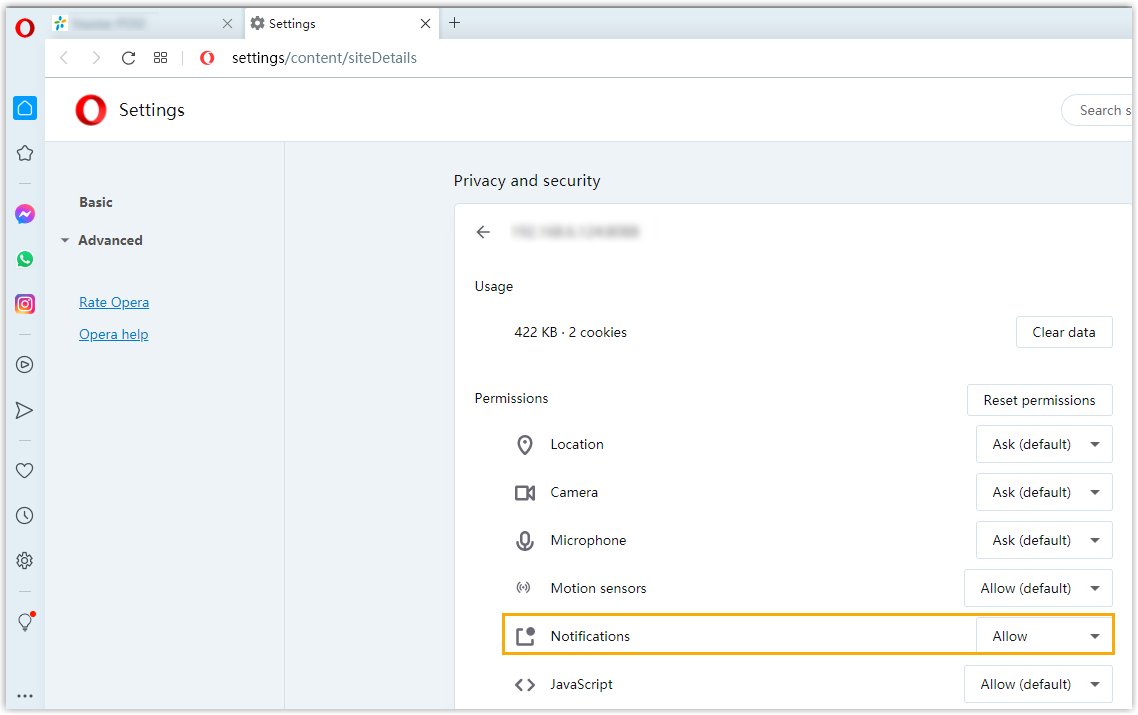
In the pop-up, click Site settings. Opera opens its settings page for the site.
-
In the Notifications drop-down list, select Allow.
-
- Apply the change to the web client:
- Switch back to the Cloud Voice App Web Client tab.
- At the top of the page, click Reload.

If you previously blocked notifications
Section titled “If you previously blocked notifications”- Sign in to the Cloud Voice App Web Client.
- Grant permission to send notifications:
-
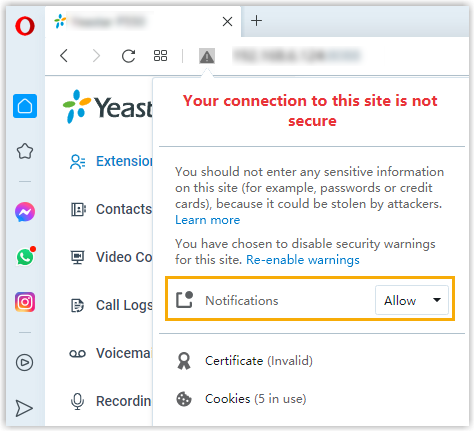
In the Opera address bar, click the site information control or the lock icon.
-
In the Notifications drop-down list, select Allow.
-
Click any empty area of the page to confirm.
-
- At the top of the Cloud Voice App Web Client, click Reload.

Question about this page?
Ask the AI assistant. It starts from this page, then searches the rest of the docs.
Ask Cloud Voice AI
Answers are AI-generated from the docs and may contain mistakes. Verify with the linked pages.