
Check In
When guests arrive at the property, front-desk staff can register them into a room directly from the Cloud Voice App. This page covers both single-guest check-ins and tour-group check-ins, using the Room Panel in Hotel Management.
Check in an individual guest
Section titled “Check in an individual guest”-
Sign in to the Cloud Voice App (Desktop or Web) and open Hotel Management > Room Panel.
-
Locate an available room.
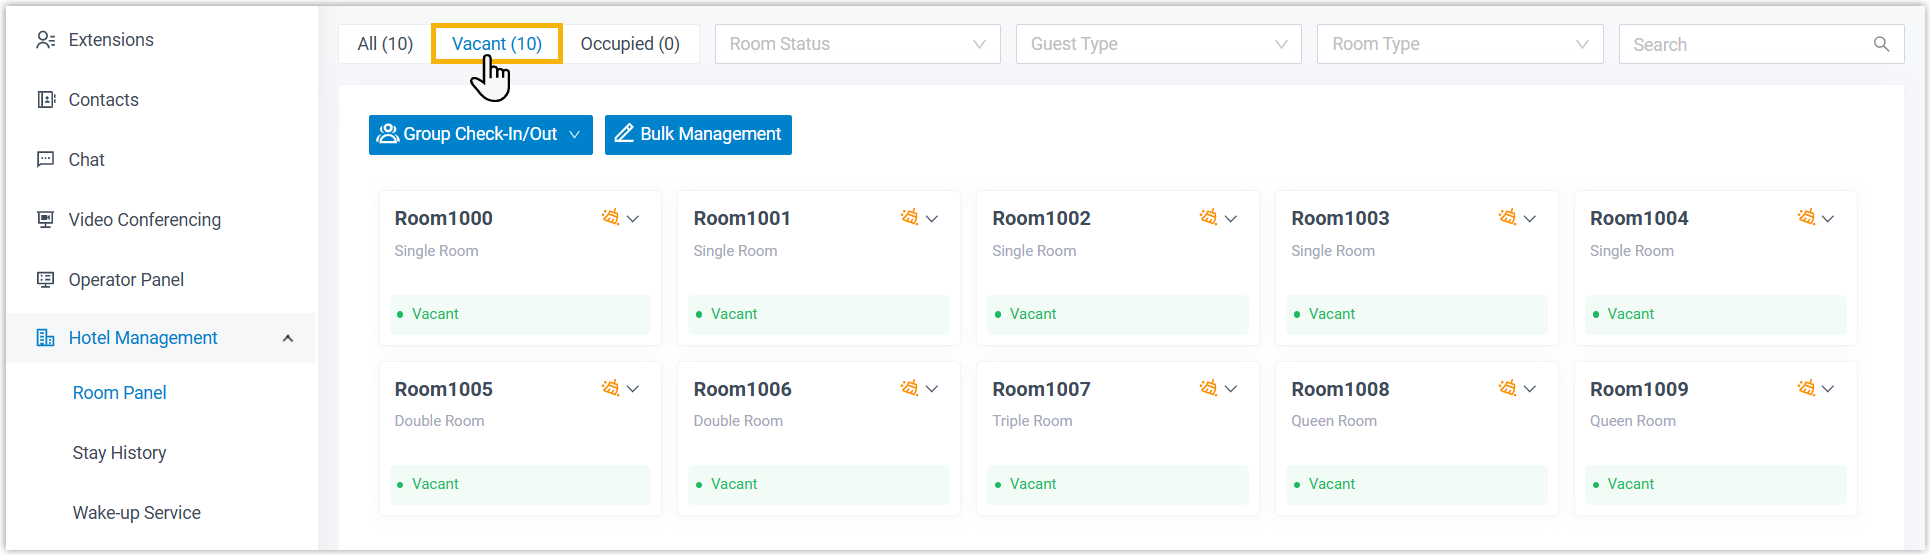
a. Select the Vacant tab to show only rooms that are free.
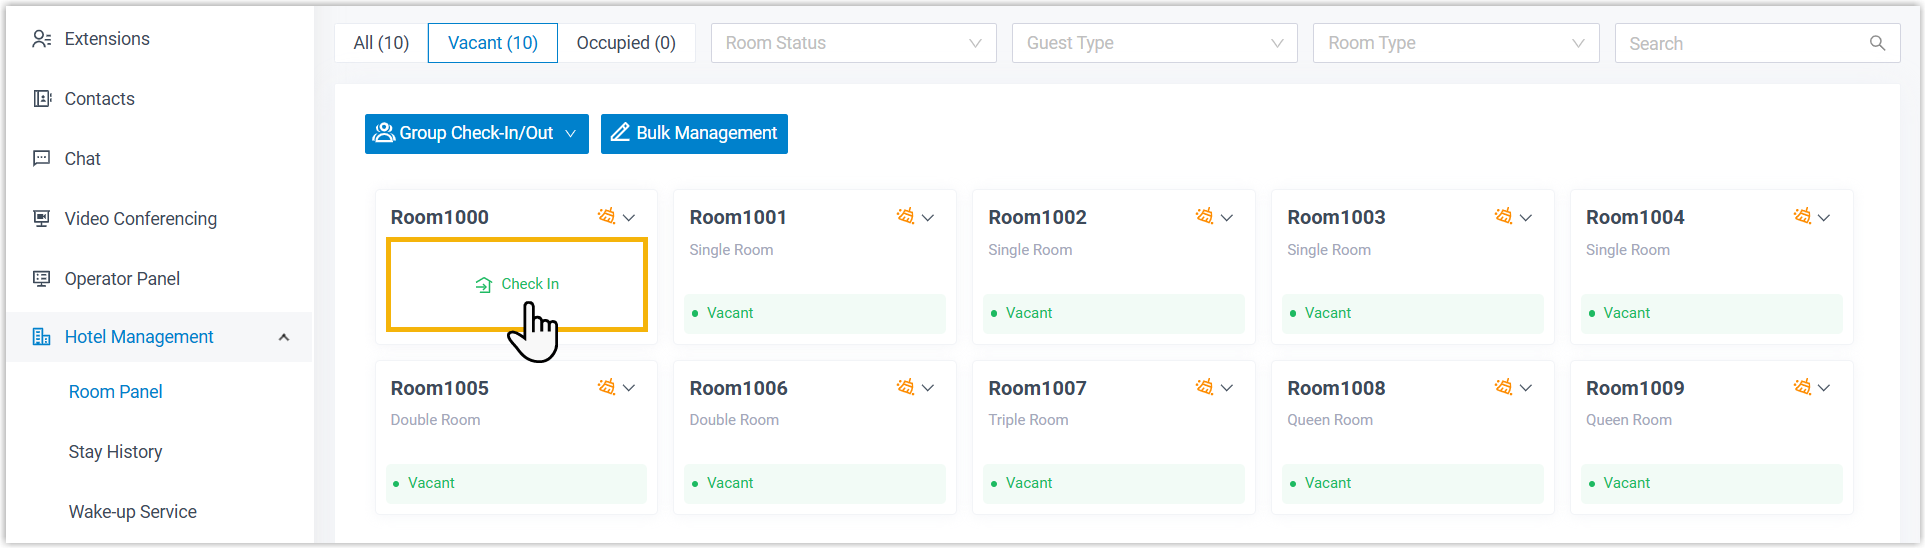
b. Point to the room you want, then click Check In.
-
Enter the guest’s stay details across the following sections.
Basic
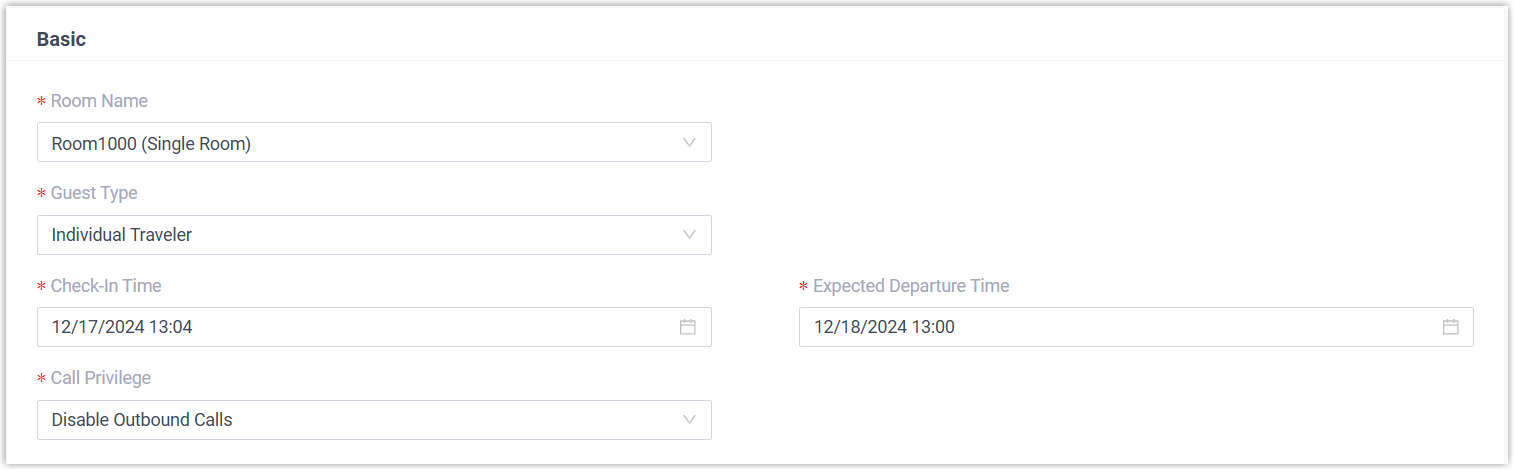
Setting Description Room Name Filled in for you with the room you selected. Guest Type Select Individual Traveler. Check-In Time Defaults to the current time. Adjust it if needed. Expected Departure Time Uses the default checkout time. Adjust it if needed. Call Privilege Sets whether the guest can place outbound calls from the room phone. Choose one of the options below. The Call Privilege options are:
- Disable Outbound Calls (default)
- Allow Domestic Calls
- Allow International Calls
Guest Information
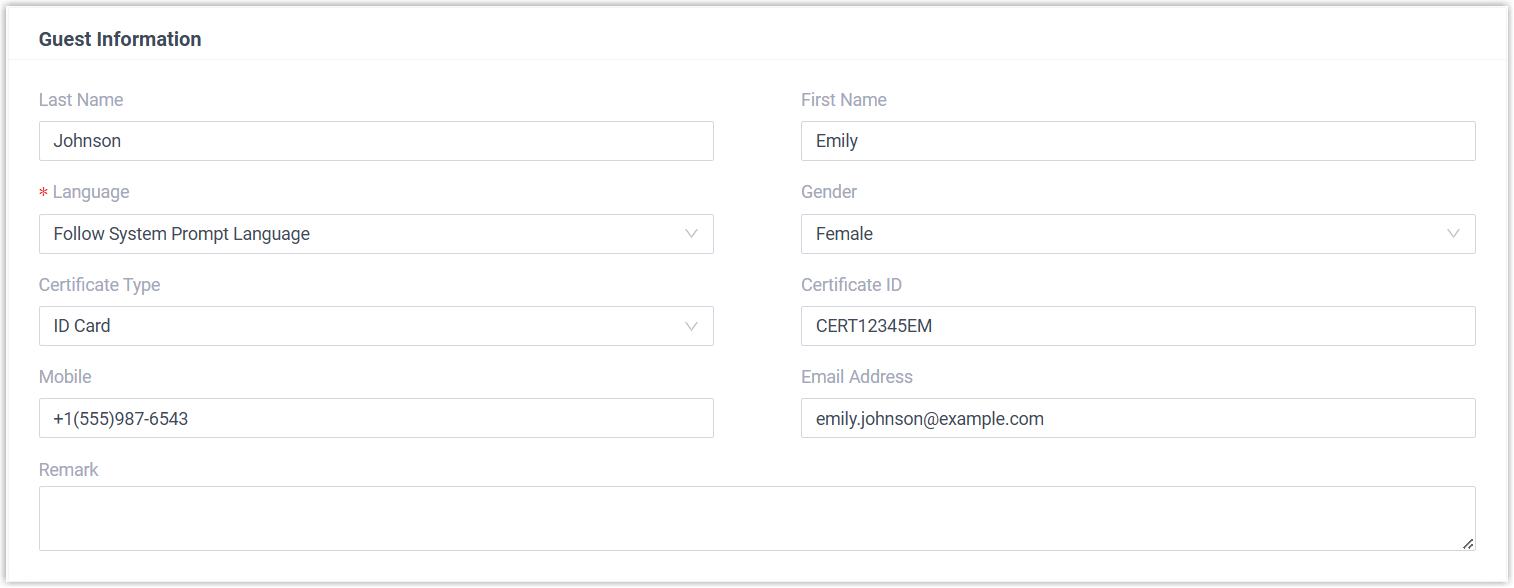
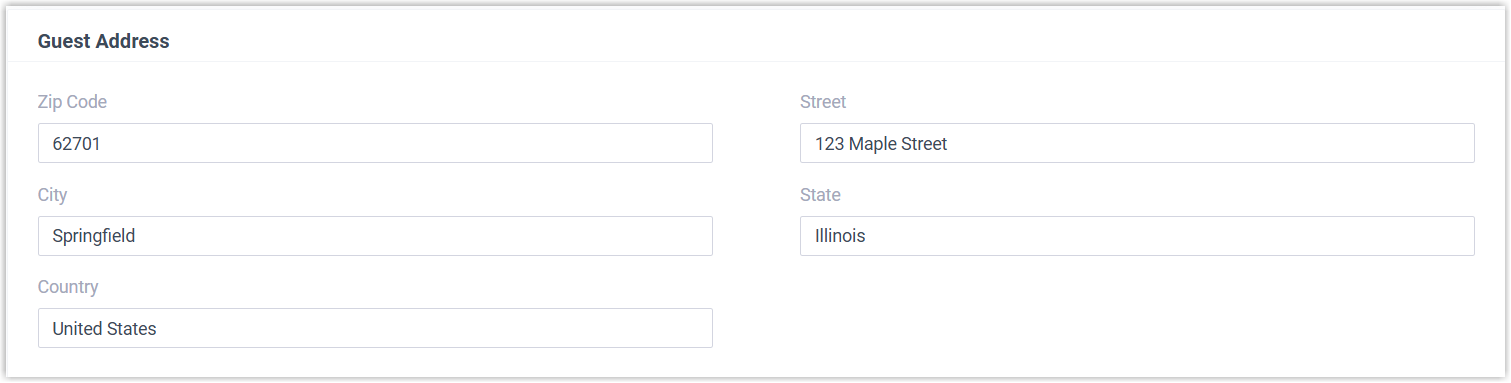
Guest Address
-
Click Save.
Result
Section titled “Result”The guest is now checked into the room, and the following happens:
-
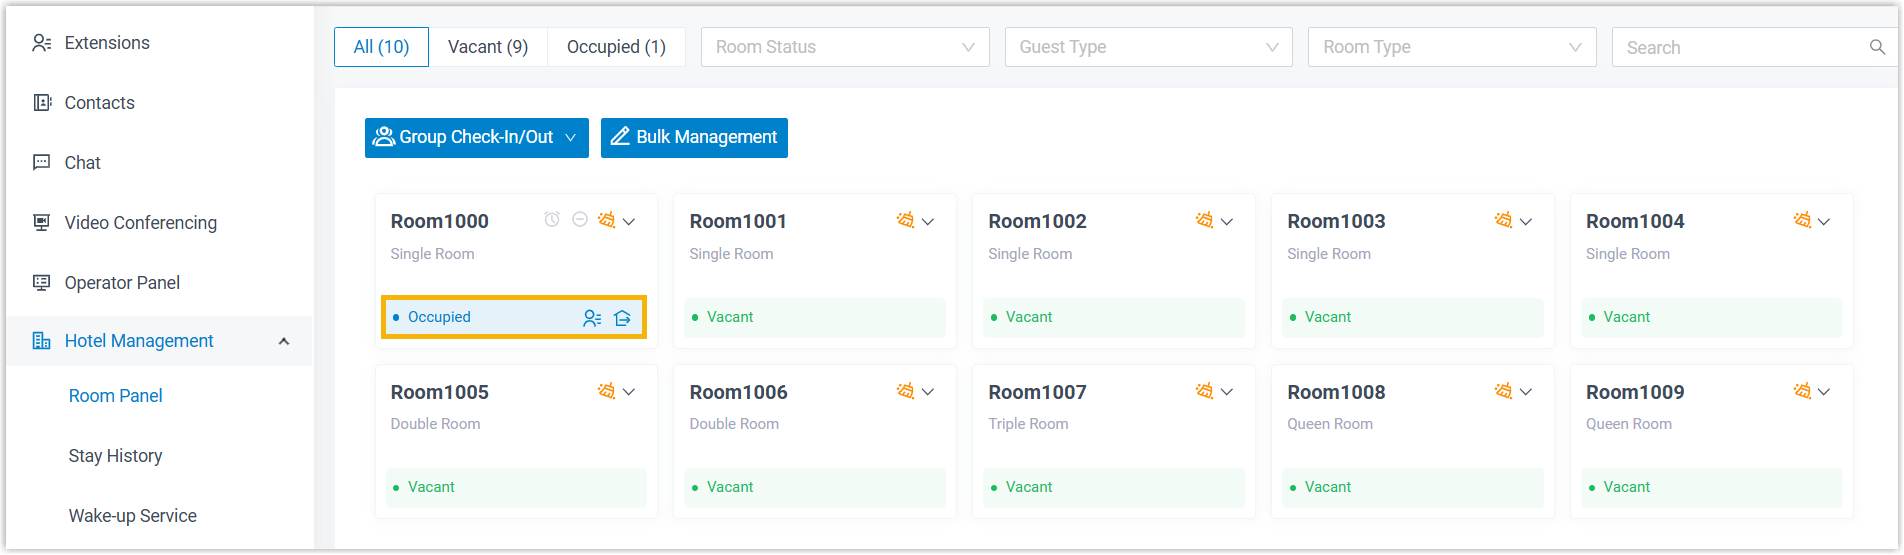
The room’s status changes to Occupied.
-
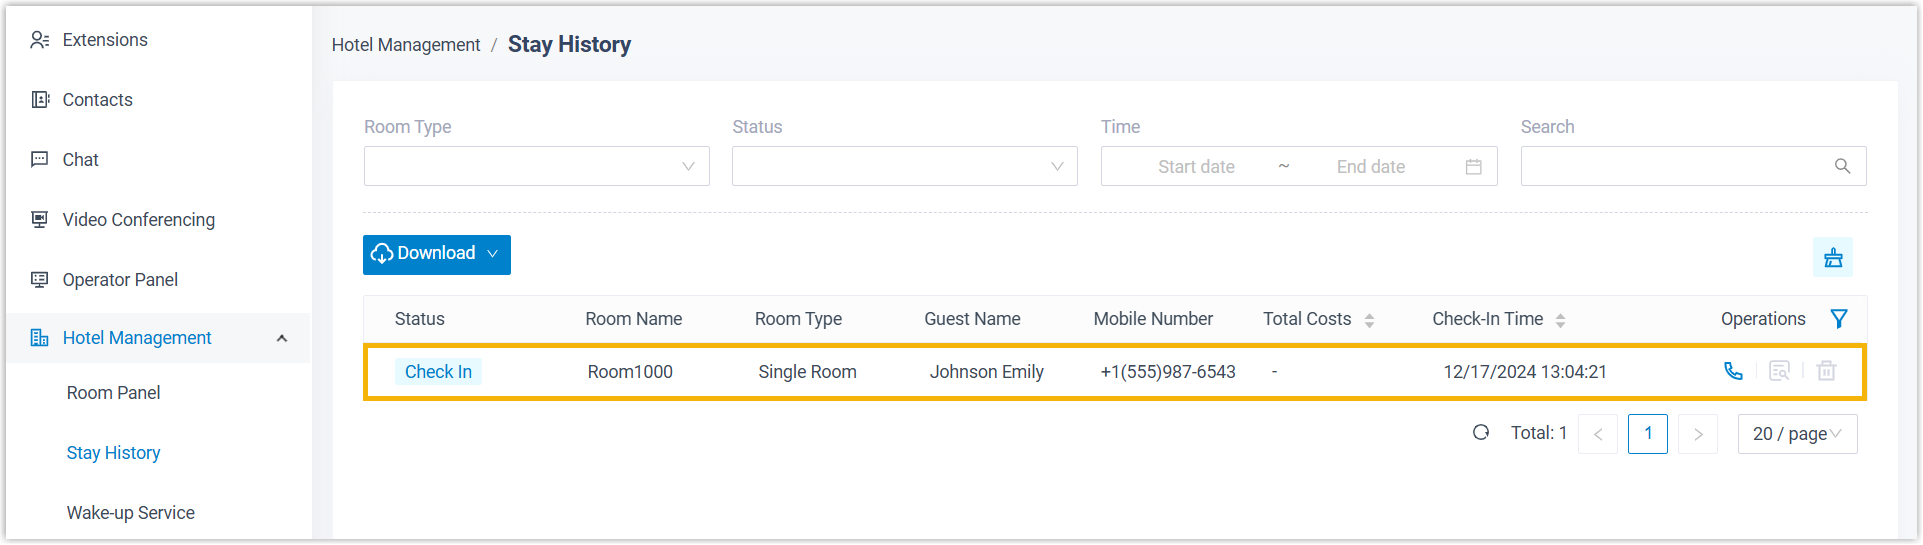
A stay record is created for the guest so the visit can be tracked.
Check in a tour group
Section titled “Check in a tour group”-
Sign in to the Cloud Voice App (Desktop or Web) and open Hotel Management > Room Panel.
-
Open the group check-in page. You can either pick the rooms first or pick them as part of check-in.
To choose rooms before starting check-in:
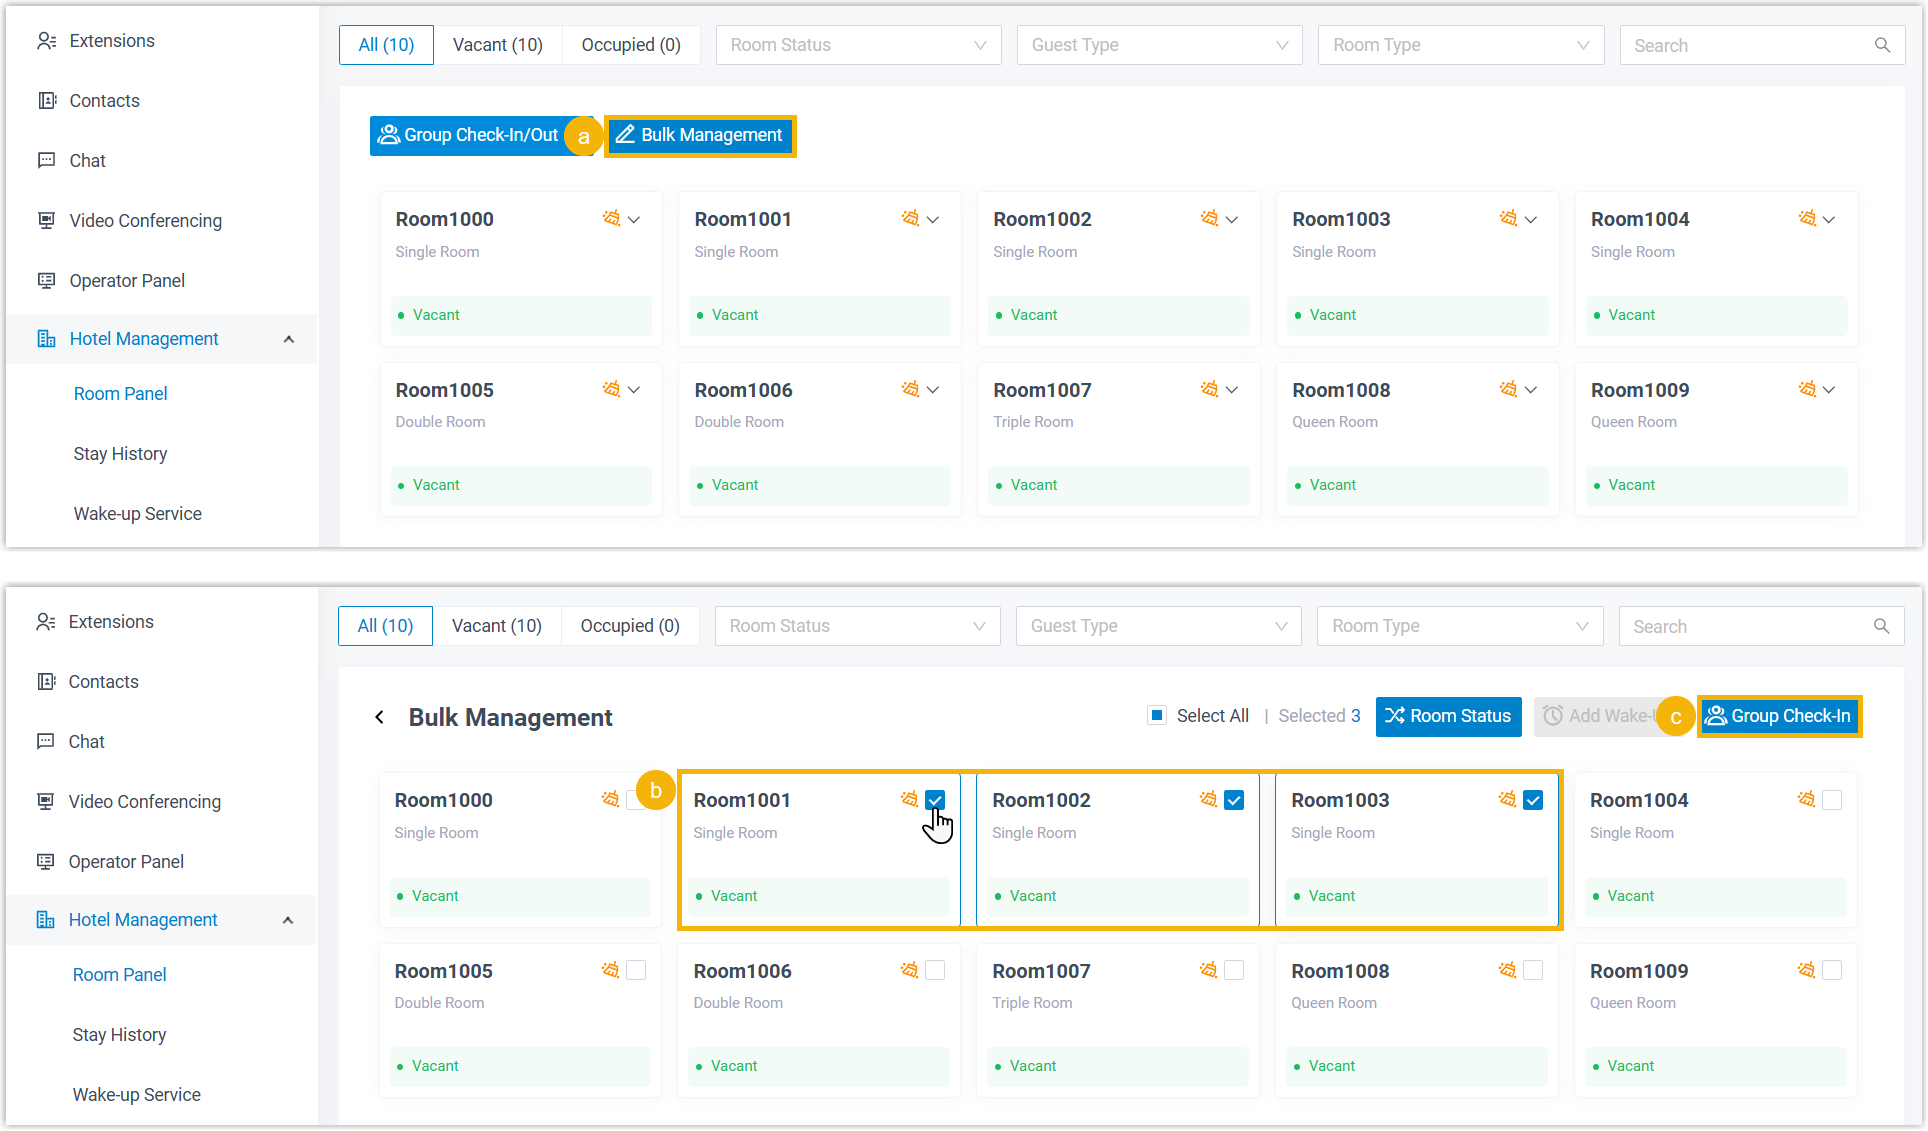
a. In the top-left corner, click Bulk Management.
b. Select the checkbox for each room you want to assign to the group.
c. In the top-right corner, click Group Check-In.
To choose rooms during check-in instead:
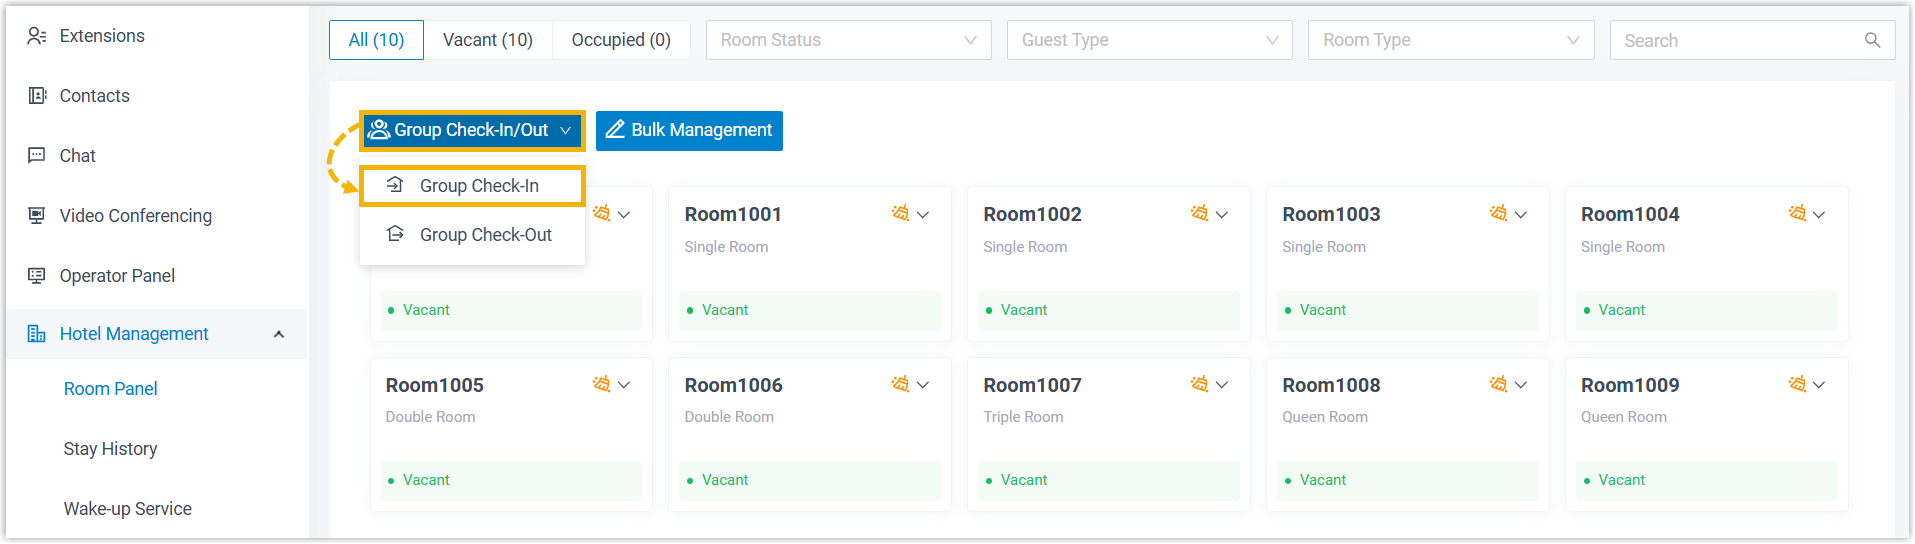
a. In the top-left corner, click Group Check-In/Out, then select Group Check-In.
-
Enter the group’s stay details across the following sections.
Basic
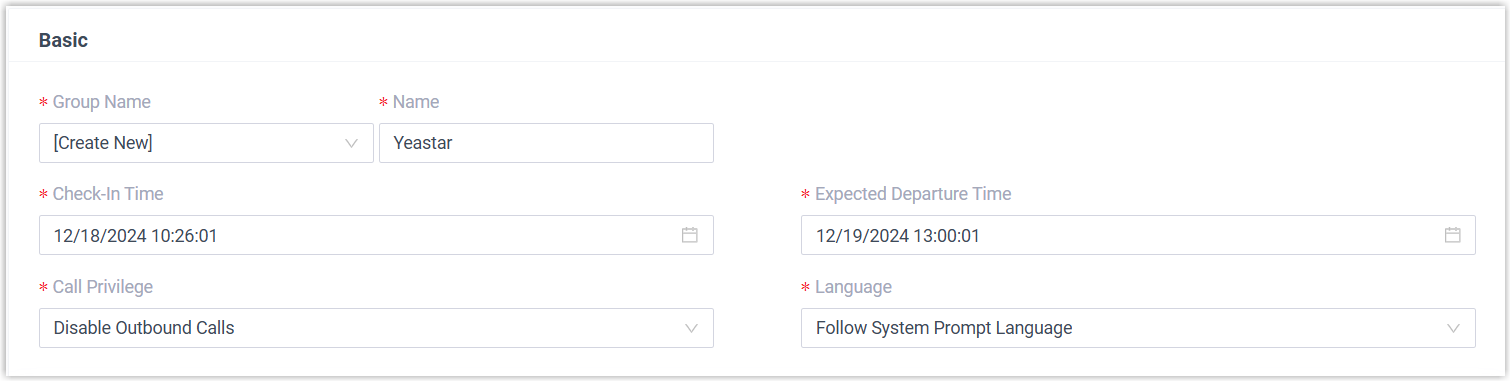
Setting Description Group Name Click Create New to create the group. Check-In Time Defaults to the current time. Adjust it if needed. Expected Departure Time Uses the default checkout time. Adjust it if needed. Call Privilege Sets whether the group can place outbound calls from the room phones. Choose one of the options below. Language Select the language used for system prompts played to the group’s guests, such as wake-up calls, voicemail, and IVR menus. The Call Privilege options are:
- Disable Outbound Calls (default)
- Allow Domestic Calls
- Allow International Calls
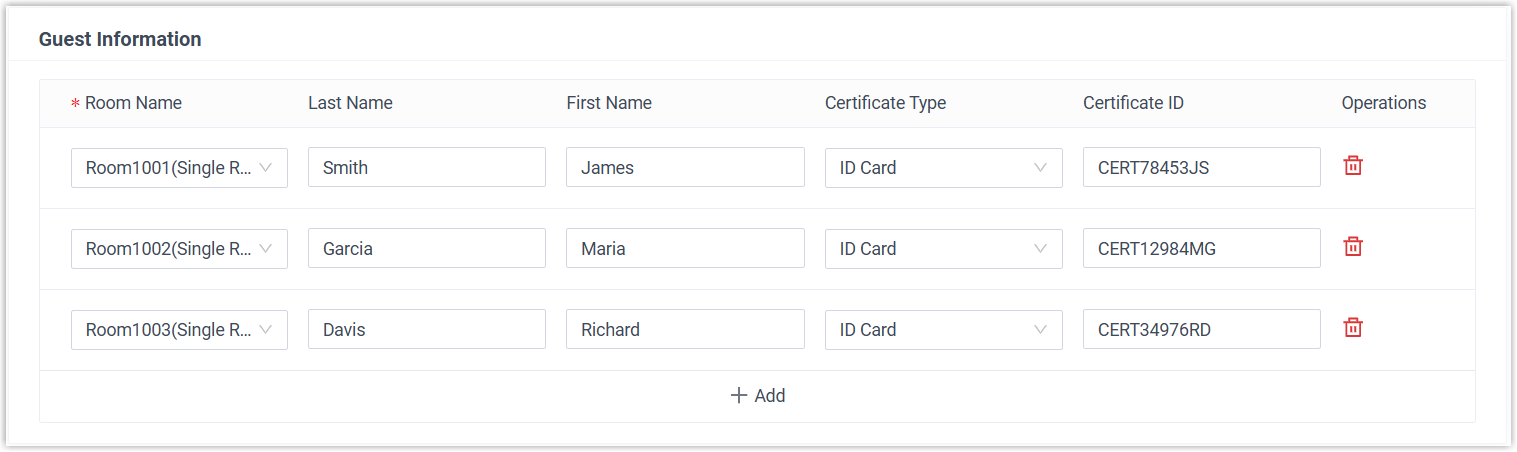
Guest Information
-
Click Save.
Result
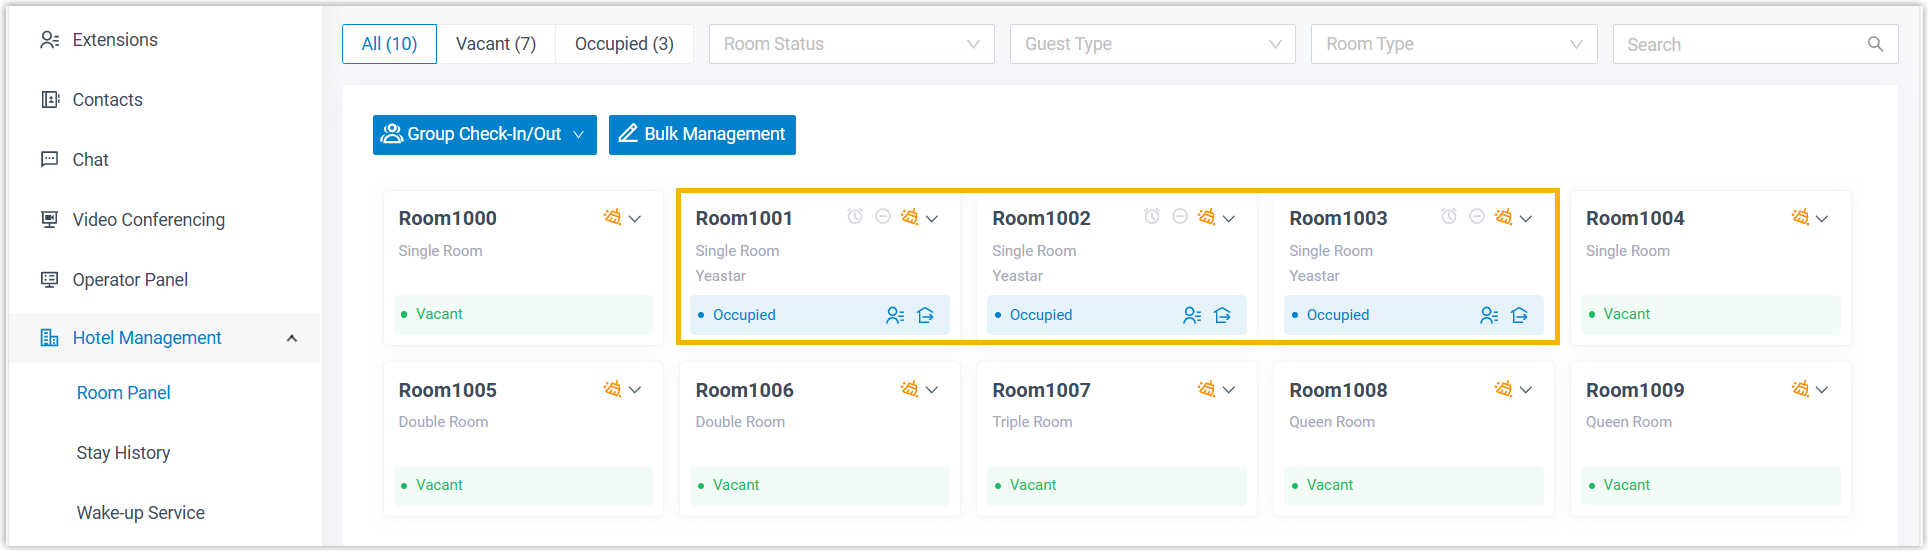
Section titled “Result”The tour group is now checked into the assigned rooms, and the following happens:
-
Each room’s status changes to Occupied.
-
A stay record is created for each guest so the visit can be tracked.
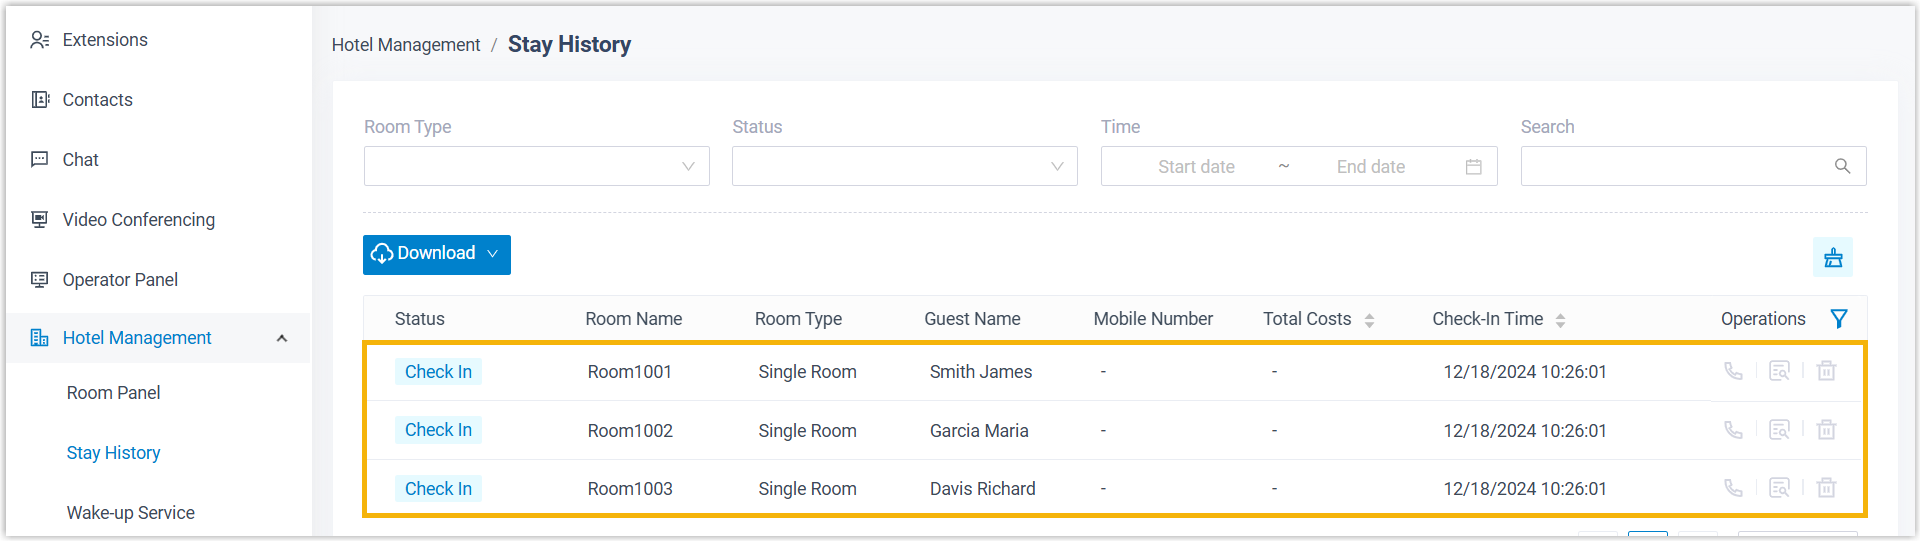
-
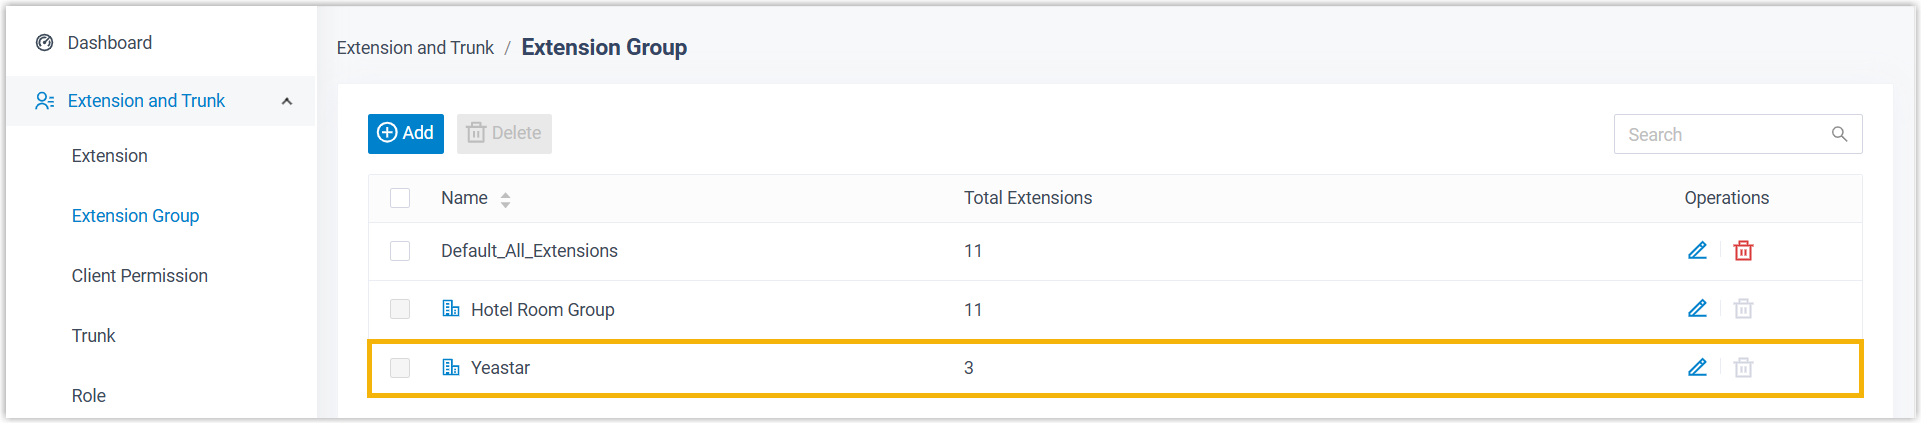
A temporary extension group is created automatically. Every extension tied to the group’s rooms is added to it, so you can manage the group’s call permissions in one place.
Question about this page?
Ask the AI assistant. It starts from this page, then searches the rest of the docs.
Ask Cloud Voice AI
Answers are AI-generated from the docs and may contain mistakes. Verify with the linked pages.