
Set up Call Recording
Cloud Voice can record calls automatically for the parts of your phone system that matter most. Choose which trunks, extensions, paging/intercom groups, conferences, queues, and IVRs (Interactive Voice Response menus, the automated menus that ask callers to press a key) are covered, and the system captures those calls without any action from your users. Every recording option lives in one place: sign in to the PBX (Private Branch Exchange, the system that routes your calls) web portal and go to Call Features > Recording.
After you change any setting on this page, click Save and then Apply. Save stores your changes, but they do not take effect on live calls until you click Apply.
Trunks
Section titled “Trunks”When you record a trunk (the connection that carries calls between your phone system and the outside telephone network), Cloud Voice captures the external calls that pass over it.
-
Go to Call Features > Recording.
-
In the Record Trunks section, move each trunk you want to record from the Available box into the Selected box.
-
(Optional) Play a periodic beep during recording so both parties are reminded the call is being captured:
a. In the Selected box, click the edit icon next to the trunk.
b. Select Play Beep Tone Periodically During Call Recording.
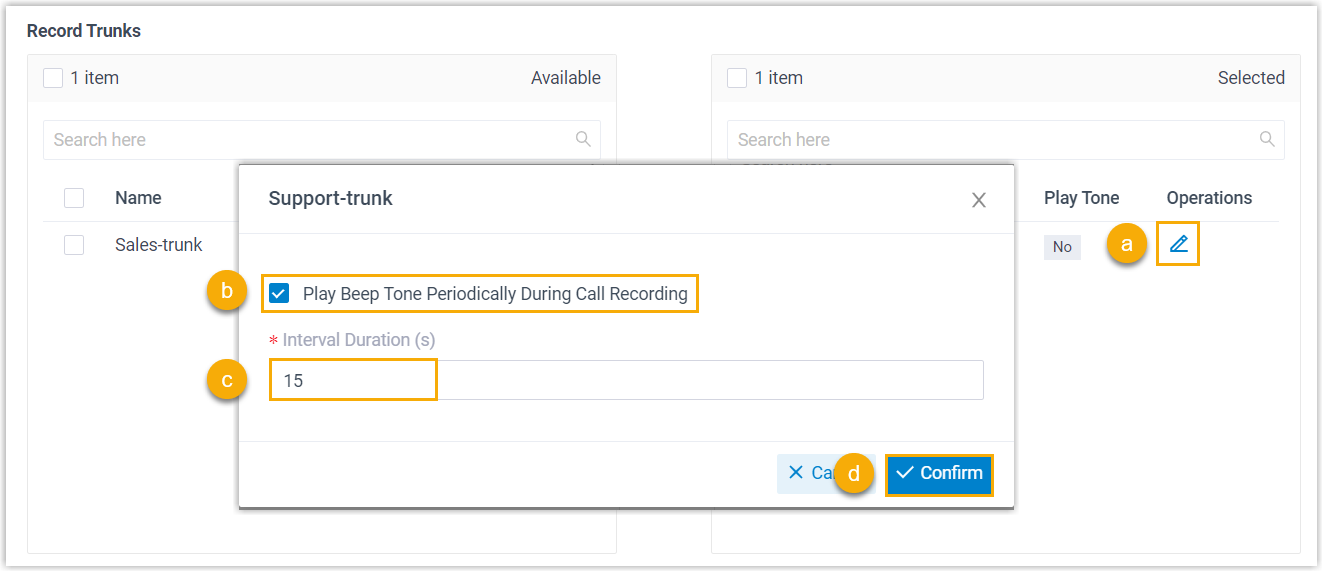
c. In Interval Duration (s), enter how many seconds should pass between beeps.
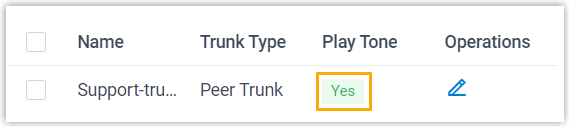
d. Click Confirm. The trunk’s Play Tone value changes to Yes, confirming the periodic beep is on.
-
Click Save, then Apply.
Extensions
Section titled “Extensions”Recording an extension captures both its internal and external calls.
-
Go to Call Features > Recording.
-
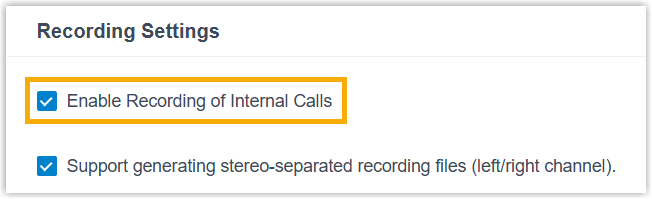
(Optional) In the Recording Settings section, select Enable Recording of Internal Calls to include calls between extensions.
-
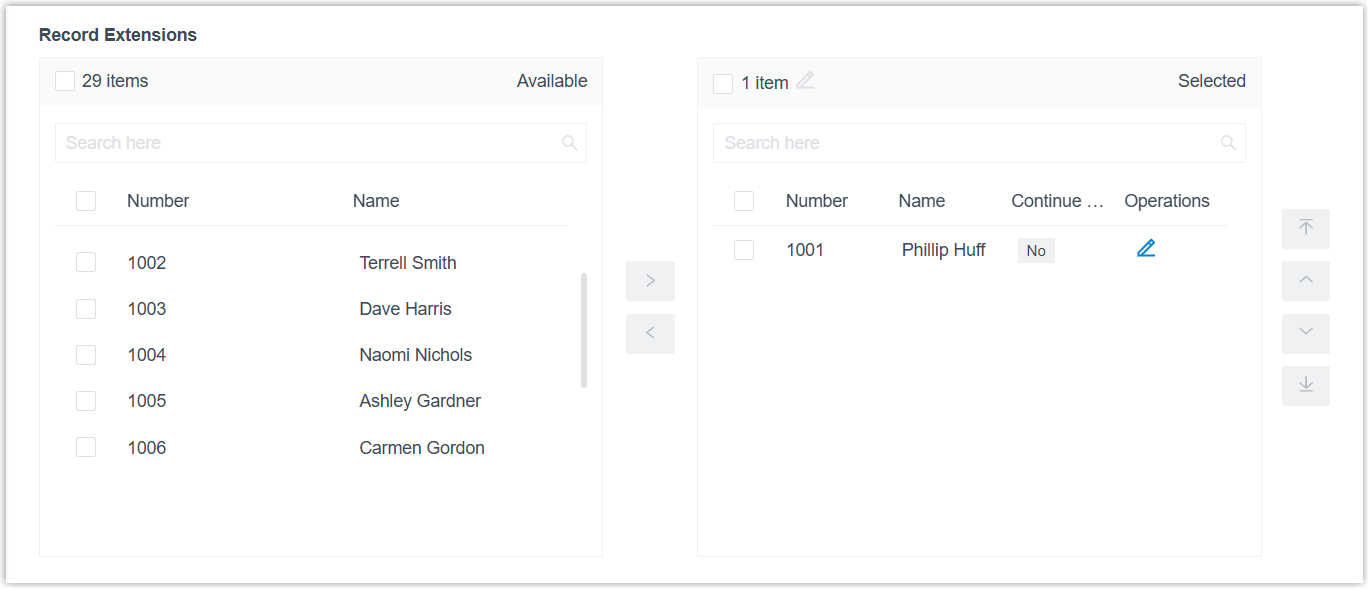
In the Record Extensions section, move each extension you want to record from the Available box into the Selected box.
-
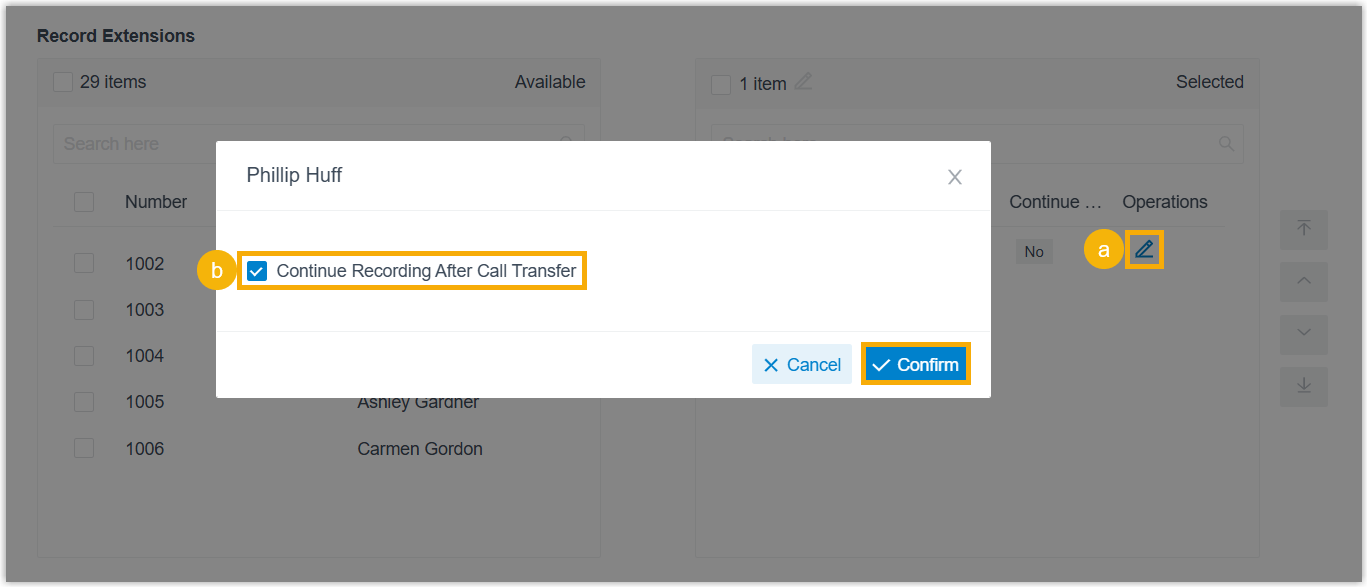
(Optional) Keep recording a call after the extension transfers it elsewhere:
a. In the Selected box, click the edit icon next to the extension.
b. Select Continue Recording After Call Transfer, then click Confirm.
-
Click Save, then Apply.
Paging and intercom
Section titled “Paging and intercom”You can record every paging and intercom call with a single setting.
-
Go to Call Features > Recording.
-
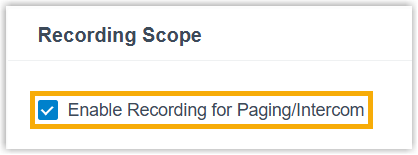
In the Recording Scope section, select Enable Recording for Paging/Intercom.
-
Click Save, then Apply.
Conferences
Section titled “Conferences”Recording a conference captures the calls held on it.
- Go to Call Features > Recording.
- In the Record Conferences section, move each conference you want to record from the Available box into the Selected box.
- Click Save, then Apply.
Queues
Section titled “Queues”Recording a queue captures the calls its agents handle.
-
Go to Call Features > Recording.
-
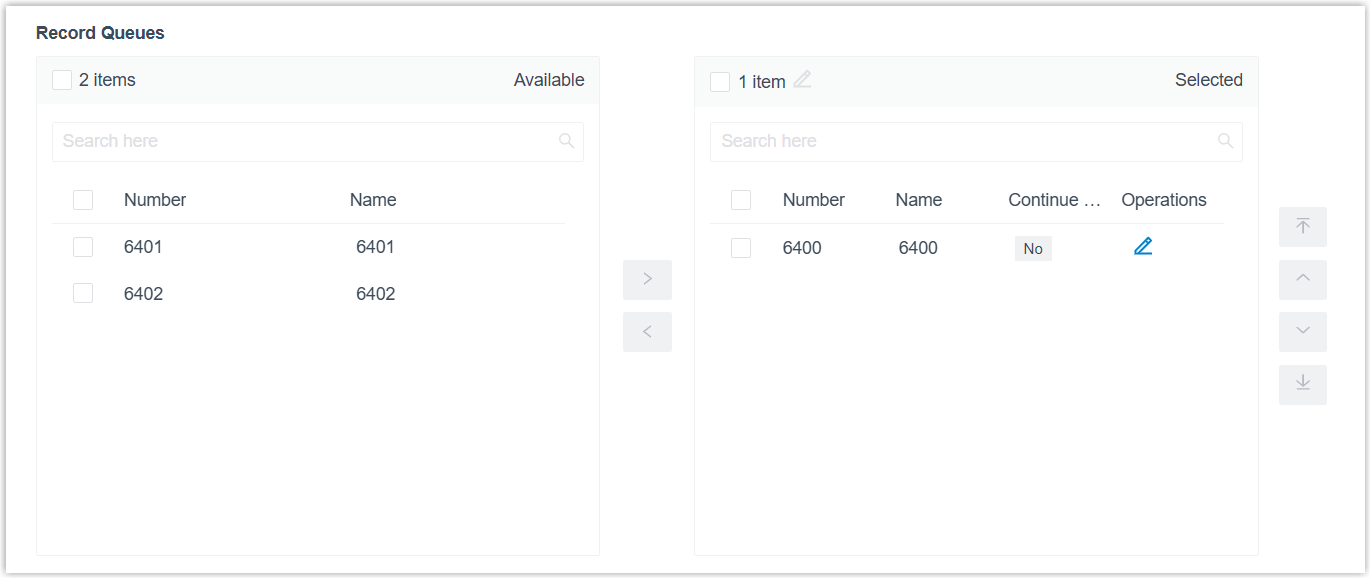
In the Record Queues section, move each queue you want to record from the Available box into the Selected box.
-
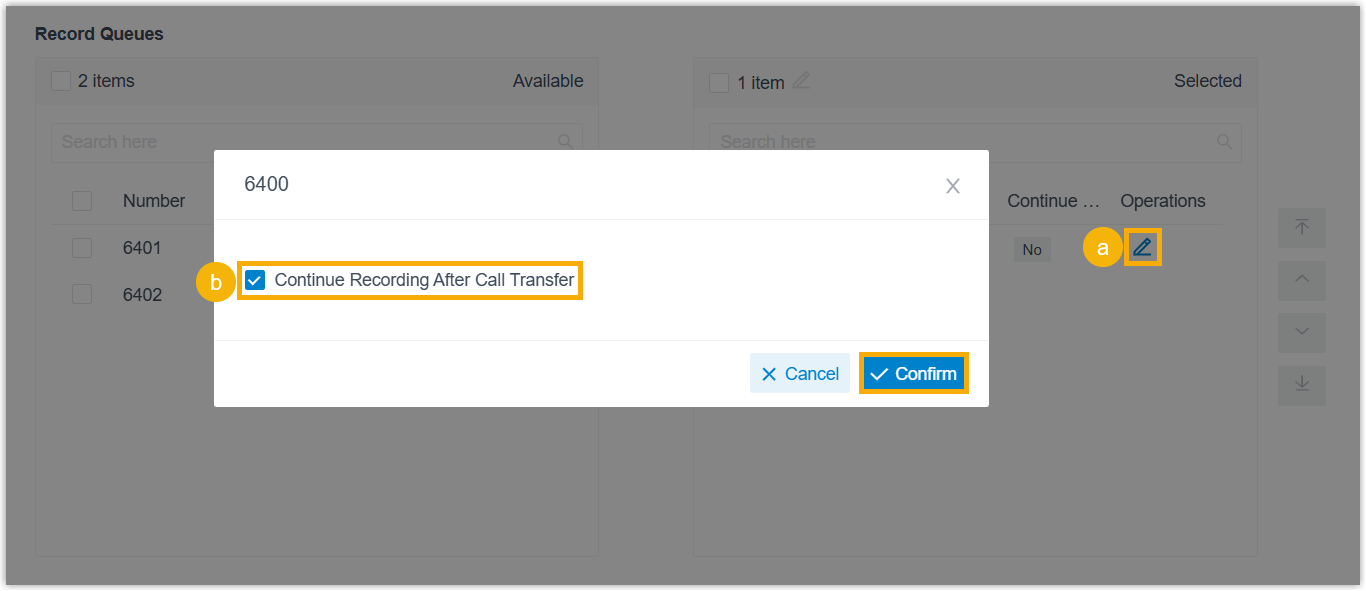
(Optional) Keep recording a call after an agent transfers it elsewhere:
a. In the Selected box, click the edit icon next to the queue.
b. Select Continue Recording After Call Transfer, then click Confirm.
-
Click Save, then Apply.
Recording an IVR captures the calls routed through it.
- Go to Call Features > Recording.
- In the Record IVR section, move each IVR you want to record from the Available box into the Selected box.
- Click Save, then Apply.
Question about this page?
Ask the AI assistant. It starts from this page, then searches the rest of the docs.
Ask Cloud Voice AI
Answers are AI-generated from the docs and may contain mistakes. Verify with the linked pages.