
CRM Integration FAQ
When Cloud Voice syncs contacts with a CRM (Customer Relationship Management) system such as Zoho or Salesforce, the results depend on how that CRM’s fields are configured on your side. The questions below cover the two problems customers report most often and how to resolve each one.
Why did Cloud Voice fail to synchronize existing contacts in Zoho CRM?
Section titled “Why did Cloud Voice fail to synchronize existing contacts in Zoho CRM?”The usual cause is a field access permission problem. If Cloud Voice cannot reach the fields it needs inside the modules you are syncing from, contact synchronization fails. Start by confirming that the required fields listed below exist and are configured correctly in Zoho CRM. Check every module you sync from (Accounts, Leads, and Contacts), not just one, because a missing or unreadable field in any of them can stop synchronization.
| Module | Required fields |
|---|---|
| Accounts | Phone, Fax |
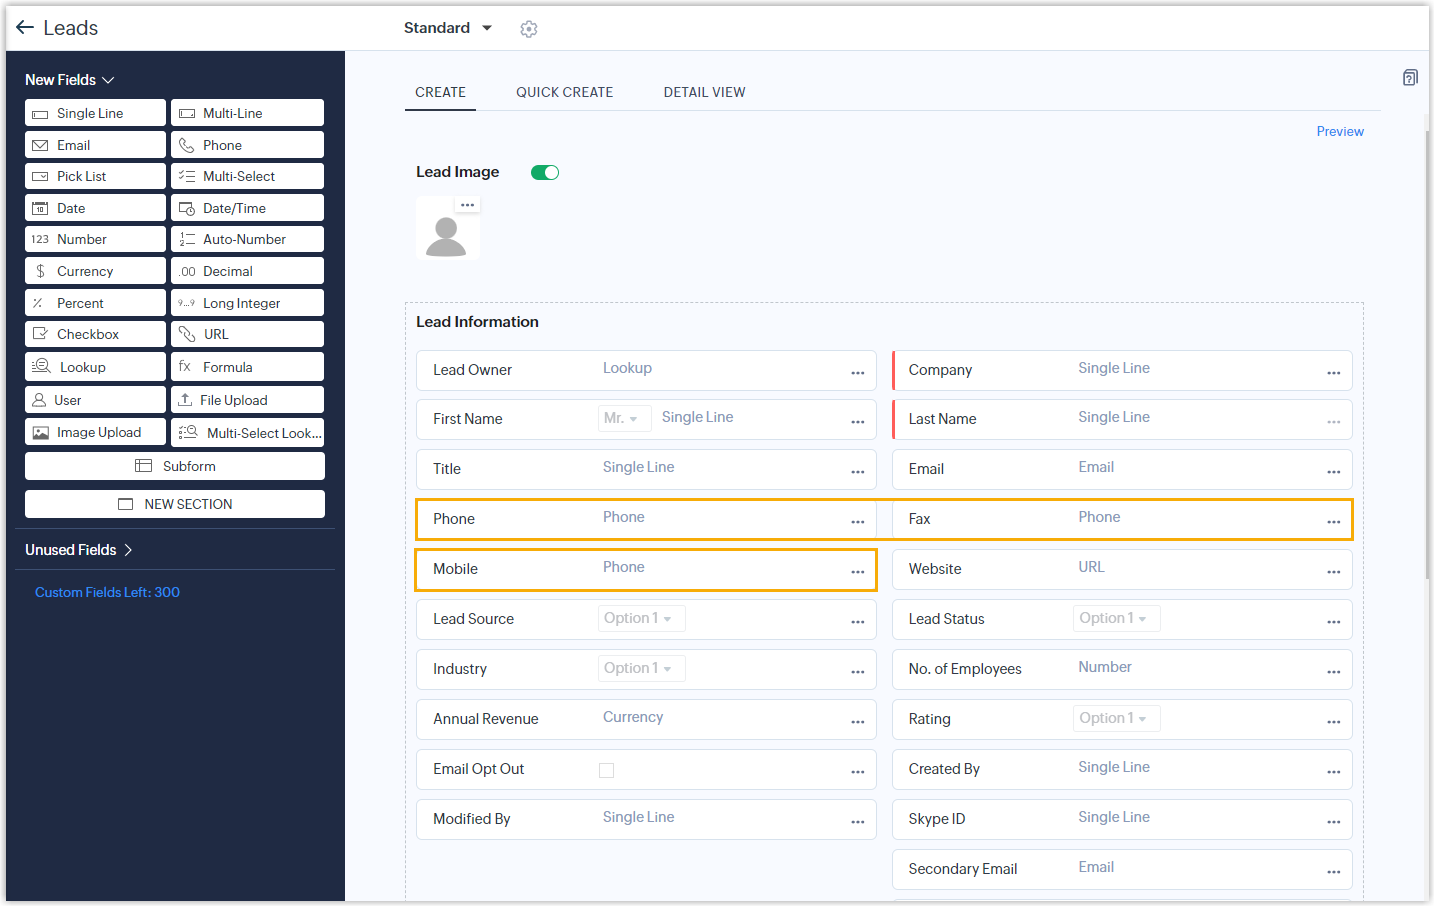
| Leads | Phone, Mobile, Fax |
| Contacts | Phone, Home Phone, Other Phone, Asst Phone, Mobile, Fax |
There are two things to verify: that every required field has been created in each module, and that each field’s permission is set to Read and Write.
Confirm the required fields exist in each module
Section titled “Confirm the required fields exist in each module”-
Sign in to Zoho CRM and click the settings icon
 in the top-right corner.
-
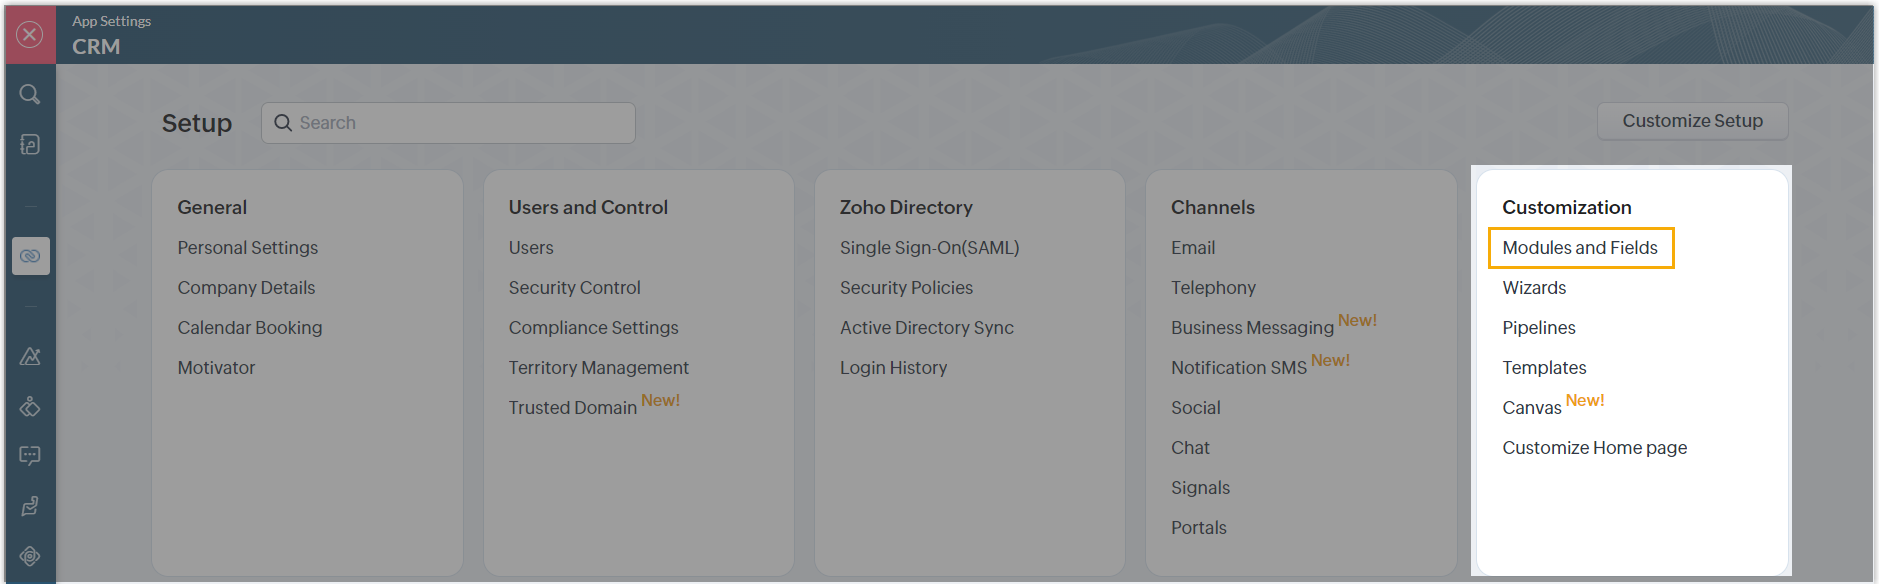
Under Customization, click Modules and Fields.
-
Check whether the required fields for the module have been created.
a. Hover over the more icon
 next to the module you want, then click Fields.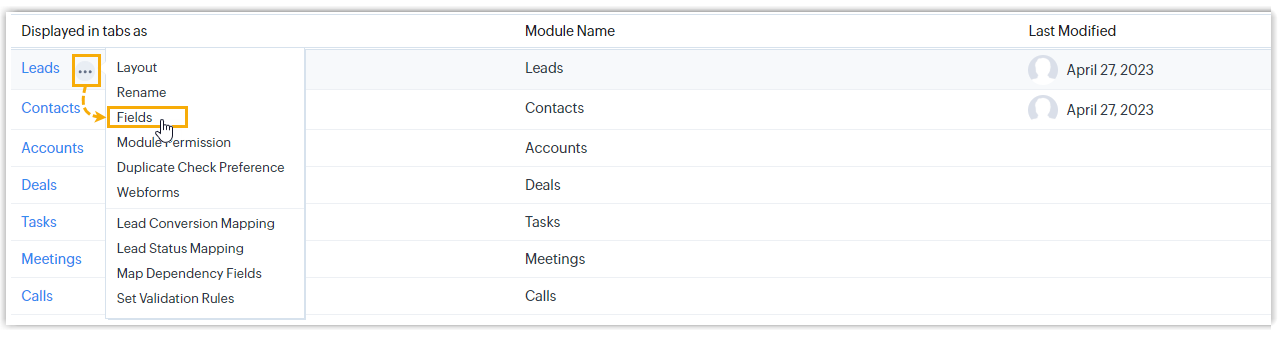
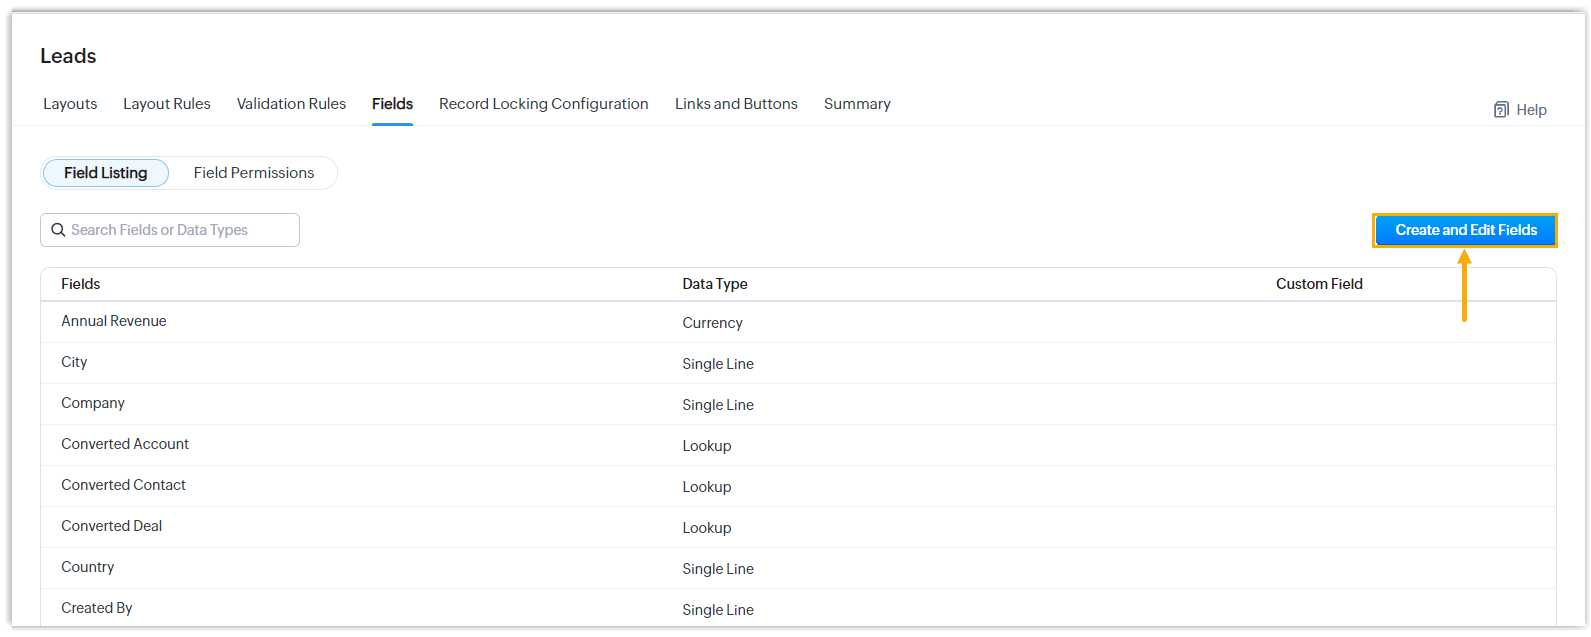
b. In the top-right corner of the field list, click Create and Edit Fields.
c. In the module information section, verify that the required fields are shown.
Confirm each required field is set to Read and Write
Section titled “Confirm each required field is set to Read and Write”-
Sign in to Zoho CRM and click the settings icon
in the top-right corner. -
Under Customization, click Modules and Fields.
-
Review the permission on each required field.
a. Hover over the more icon
next to the module you want, then click Fields.b. Open the Field Permissions tab and select the Standard profile.
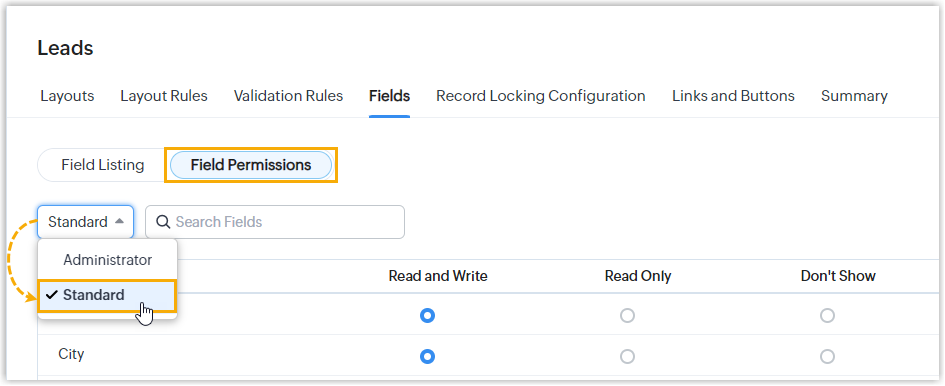
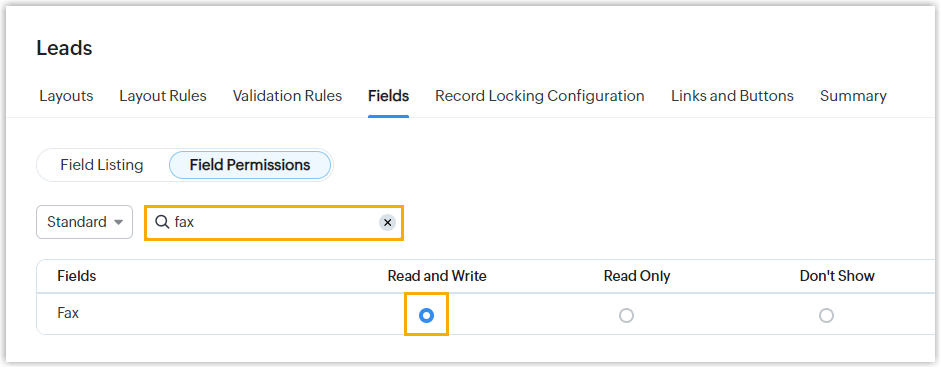
c. Find the required field and confirm its permission is set to Read and Write.
Why does Cloud Voice create a new contact on an incoming call when the contact already exists in Salesforce CRM?
Section titled “Why does Cloud Voice create a new contact on an incoming call when the contact already exists in Salesforce CRM?”This typically comes down to a field permission issue: when a required field is not visible, Cloud Voice has no read or write access to it on the object you are syncing from, so it cannot match the incoming caller to the existing record. Because the match fails, Cloud Voice treats the caller as unknown and creates a duplicate contact. To fix this, adjust the field accessibility settings for the fields below on the Account and Contacts objects in Salesforce CRM.
| Object | Required fields |
|---|---|
| Account | Account Name, Phone, Fax, Description |
| Lead | Name, Phone, Fax, Email, Description |
| Contact | Name, Account Name, Phone, Home Phone, Mobile Phone, Other Phone, Asst. Phone, Fax, Email, Mailing Address, Description |
The steps below use the Home Phone field on the Contact object as an example of how to review a field’s permission.
-
Sign in to Salesforce CRM, click the settings icon
 in the top-right corner, then click Setup.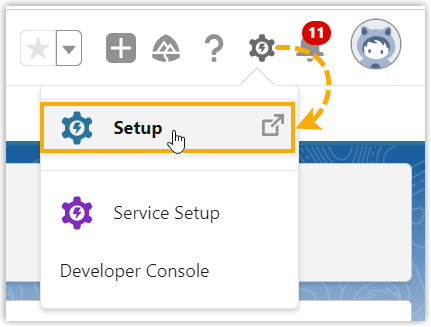
-
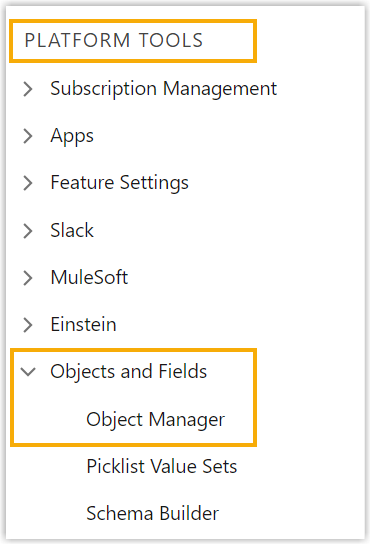
In the left navigation bar, go to PLATFORM TOOLS > Objects and Fields > Object Manager.
-
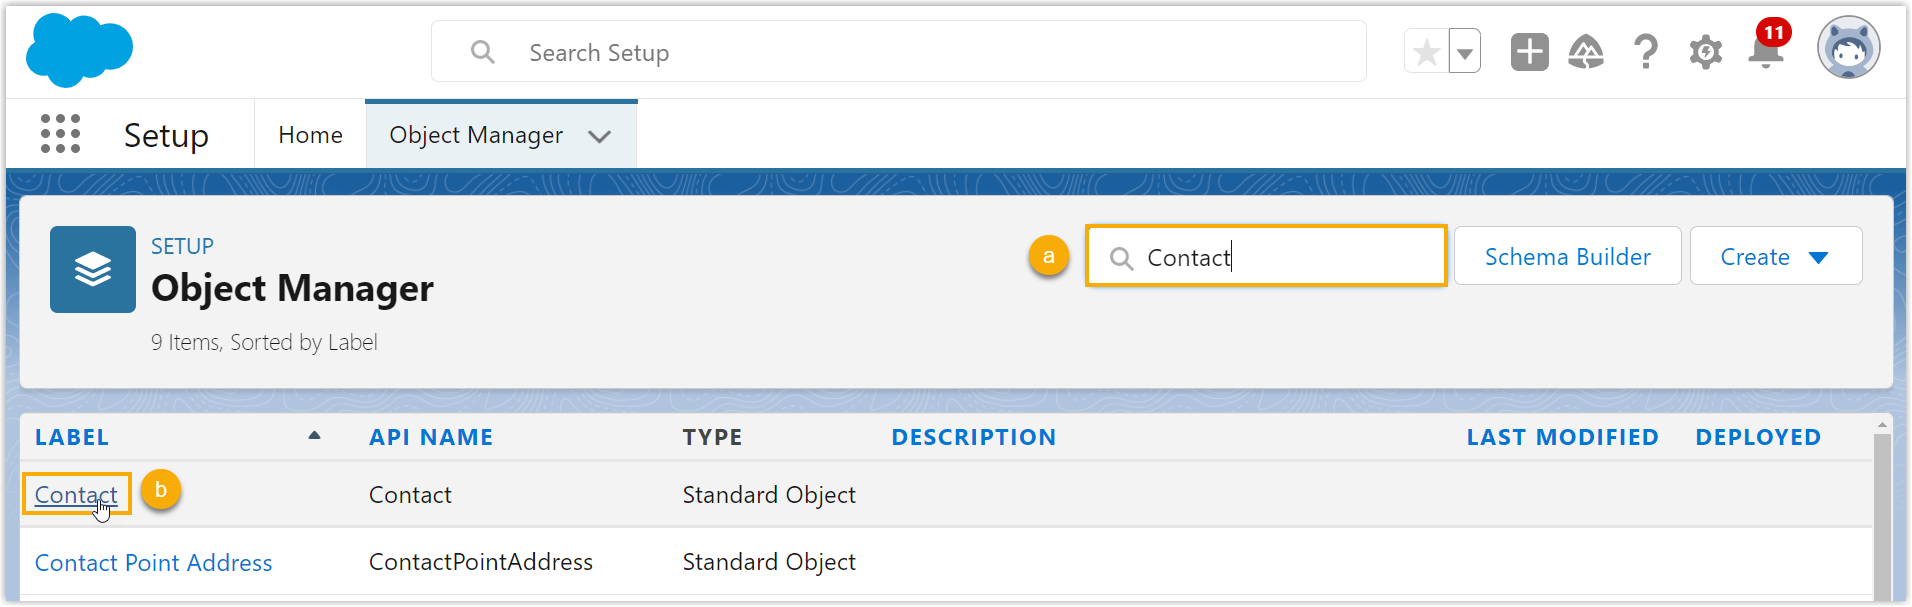
Search for the object you want, then click its label to open the object details page.
-
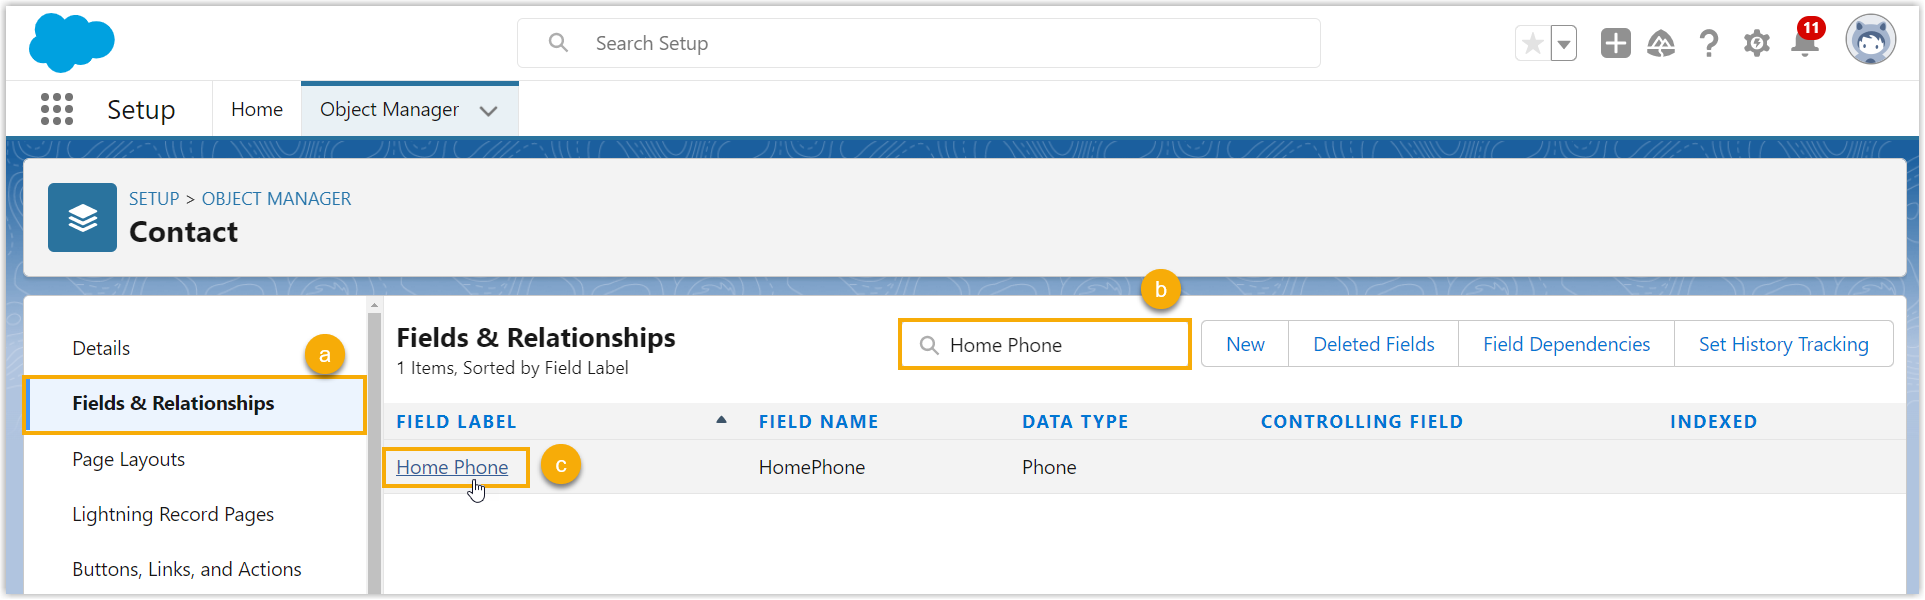
Open the Fields & Relationships tab, search for the field, then click its label to open the field details page.
-
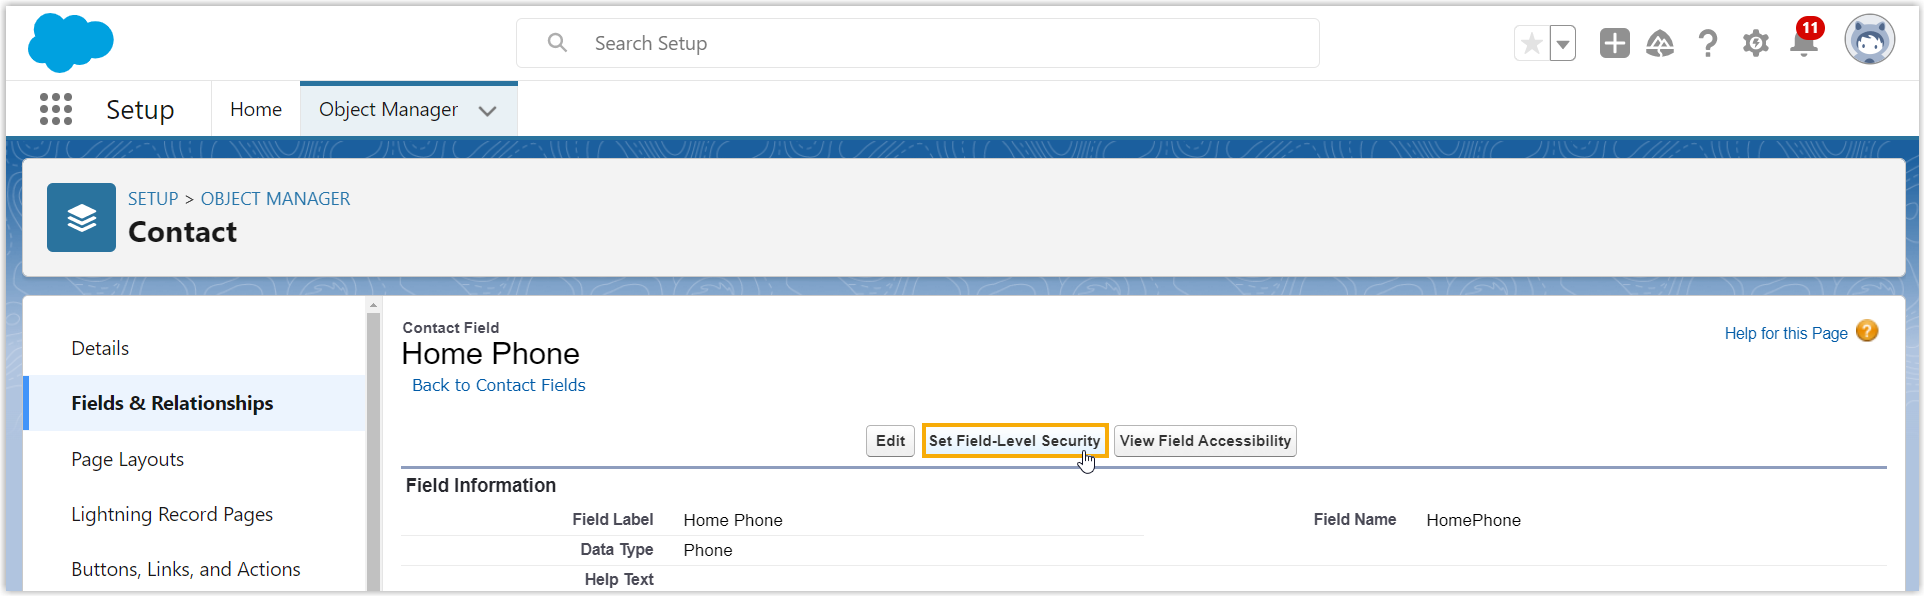
Click Set Field-Level Security.
-
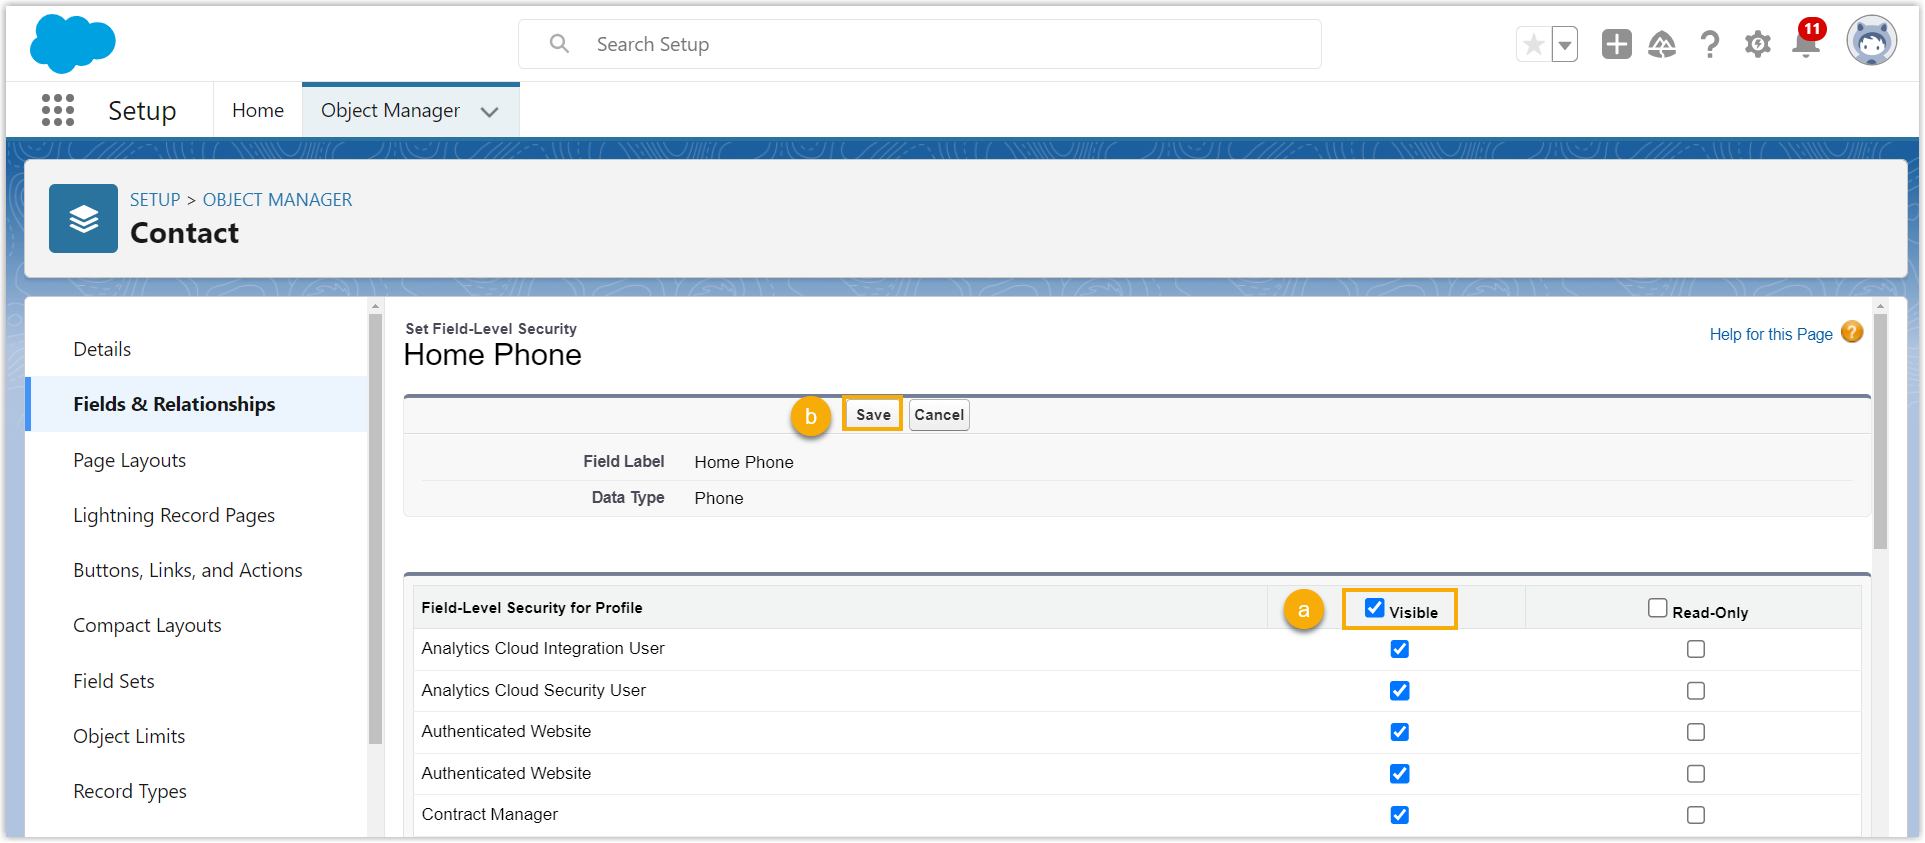
In the Field-Level Security for Profile section, select the Visible checkbox, then click Save.
Question about this page?
Ask the AI assistant. It starts from this page, then searches the rest of the docs.
Ask Cloud Voice AI
Answers are AI-generated from the docs and may contain mistakes. Verify with the linked pages.