
Manually Register an Akuvox Intercom Device with Cloud Voice
Cloud Voice can manage Akuvox intercom hardware as ordinary SIP (Session Initiation Protocol, the standard that carries voice calls over the network) endpoints. This page walks through registering an extension on an Akuvox door phone and indoor monitor manually, using the Akuvox E16C V2.0 as the reference model. Once each device holds a registered extension, the PBX (Private Branch Exchange, your phone system) routes a door-phone call straight to the indoor monitor, letting the extension user pick up and release the door lock from a distance.
Before you begin
Section titled “Before you begin”Intercom device
- Confirm the device speaks SIP.
- If the unit was in service before, reset it to factory defaults first.
- Give the device a valid IP (Internet Protocol) address, either from DHCP (Dynamic Host Configuration Protocol, automatic addressing) or a static assignment.
Local computer
- Install the Akuvox IP Scanner on a computer that sits on the same subnet as the intercom device. The tool is available from Akuvox’s documentation site.
Cloud Voice
- Note the credentials for the SIP extension you plan to assign to the device: the extension number, registration name, and registration password. You’ll find these under Extension and Trunk > Extension > Extension Information.
Register the extension
Section titled “Register the extension”-
Find the IP address of the Akuvox device.
-
Launch the Akuvox IP Scanner.
-
Click Refresh on the toolbar.
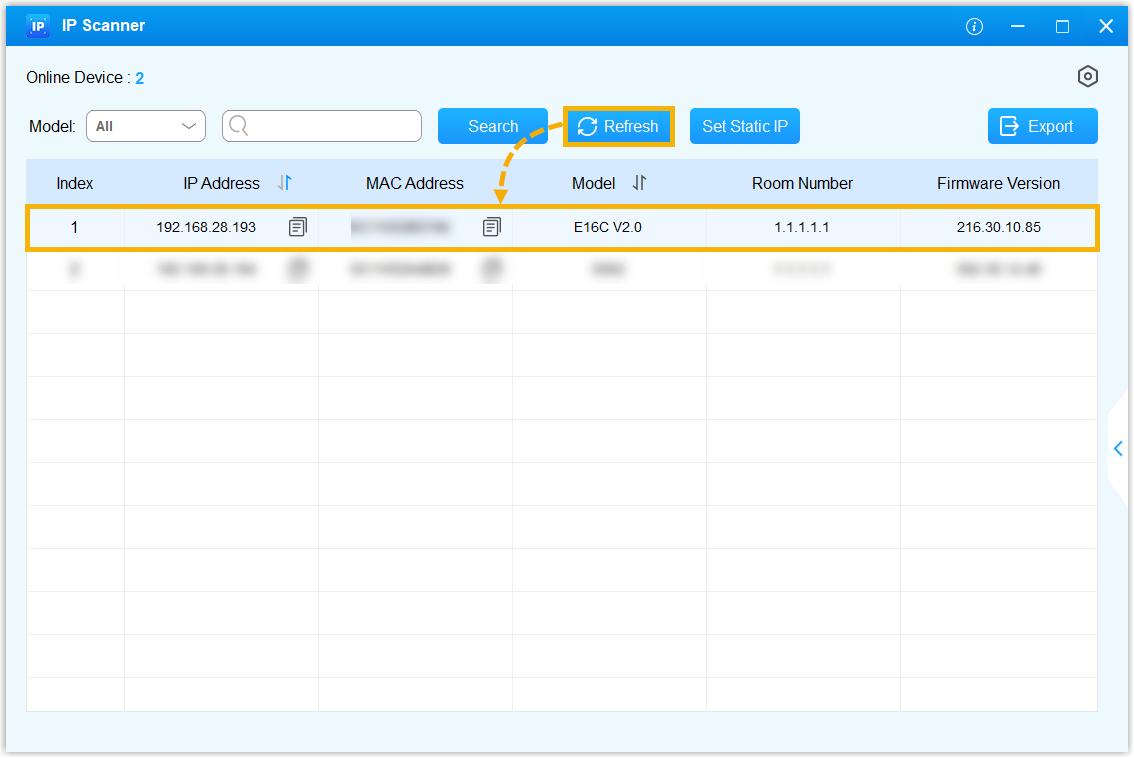
The detected device appears in the list together with its IP address.
-
-
Open the device’s web interface.
-
Type the device’s IP address into your browser’s address bar.
-
Enter the username and password, then click Login.
-
-
Navigate to Account > Basic.
-
Under SIP Account, fill in the following fields.
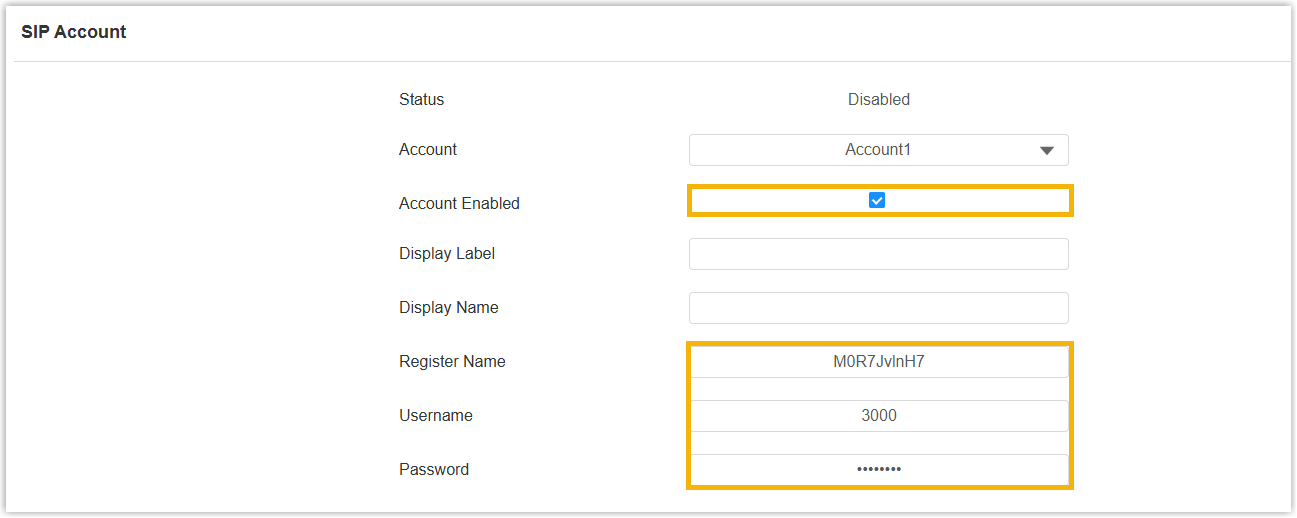
- Account Enabled: Select the checkbox to turn the SIP account on.
- Register Name: Enter the extension’s registration name.
- Username: Enter the extension number.
- Password: Enter the registration password.
-
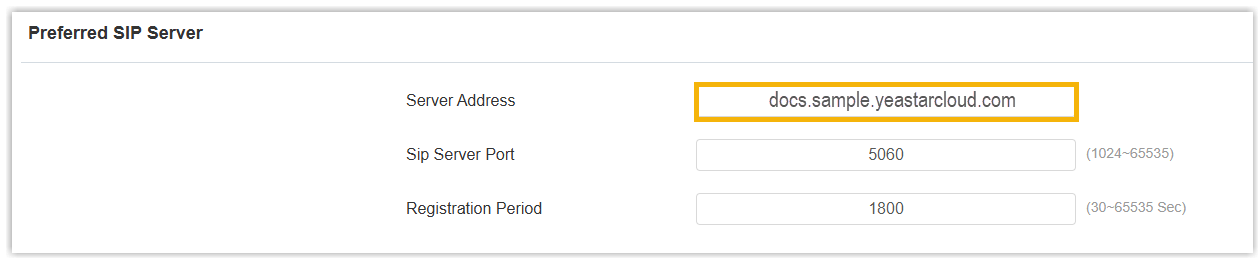
Scroll to Preferred SIP Server and enter your PBX’s domain name in the Server Address field.
-
Click Submit at the bottom of the page.
Result
Section titled “Result”The extension is now registered on the intercom device. To confirm, open Extension and Trunk > Extension > Online Status in the PBX web portal, where the endpoint shows a registered SIP status  indicator.

Question about this page?
Ask the AI assistant. It starts from this page, then searches the rest of the docs.
Ask Cloud Voice AI
Answers are AI-generated from the docs and may contain mistakes. Verify with the linked pages.