
Integrate Cloud Voice with IZT Cloud Fax
Linking Cloud Voice to IZT Cloud Fax gives your team secure, Internet-based faxing. Once the integration is in place, extension users send and receive faxes straight from the Cloud Voice App on their desktop or in the browser, with delivery handled over IZT Cloud’s communications network.
How the integration works
Section titled “How the integration works”The connection relies on two pieces working together: the Cloud Voice Webhook (a URL that IZT Cloud automatically calls to notify Cloud Voice when something happens, such as a fax arriving) and the IZT Cloud Fax API (Application Programming Interface: the set of endpoints Cloud Voice calls to submit and retrieve faxes).
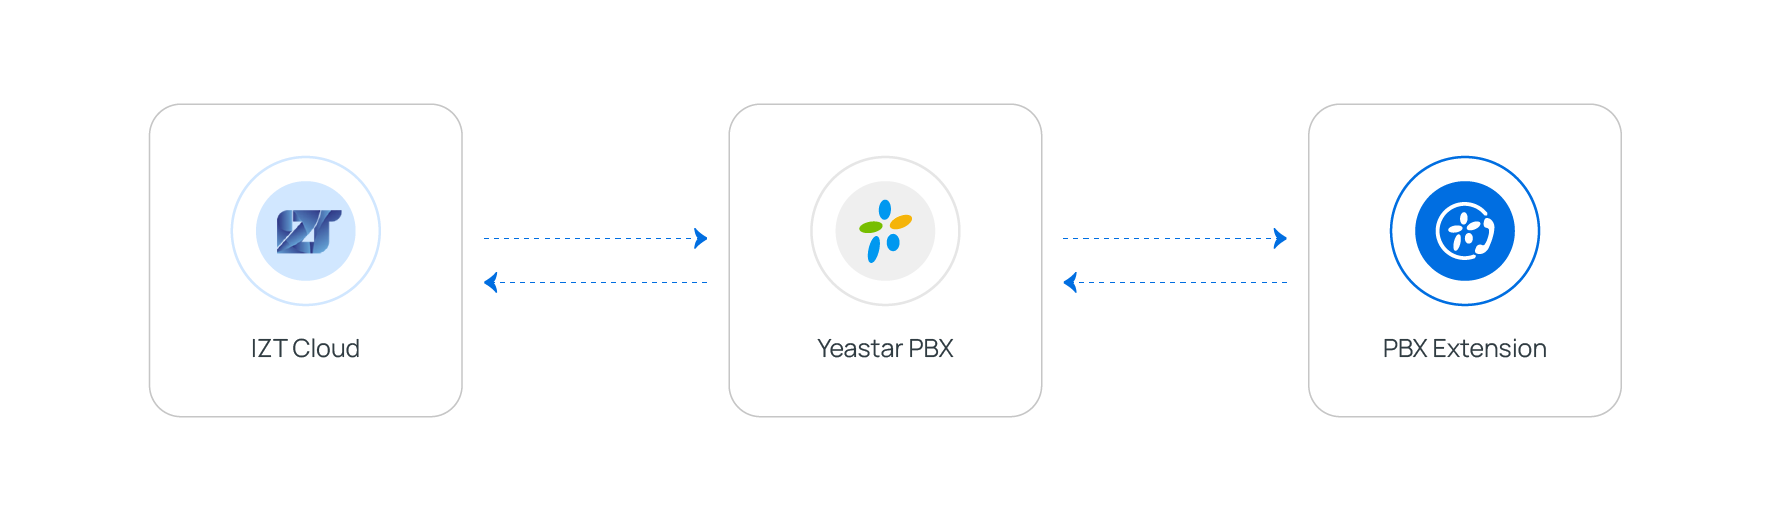
-
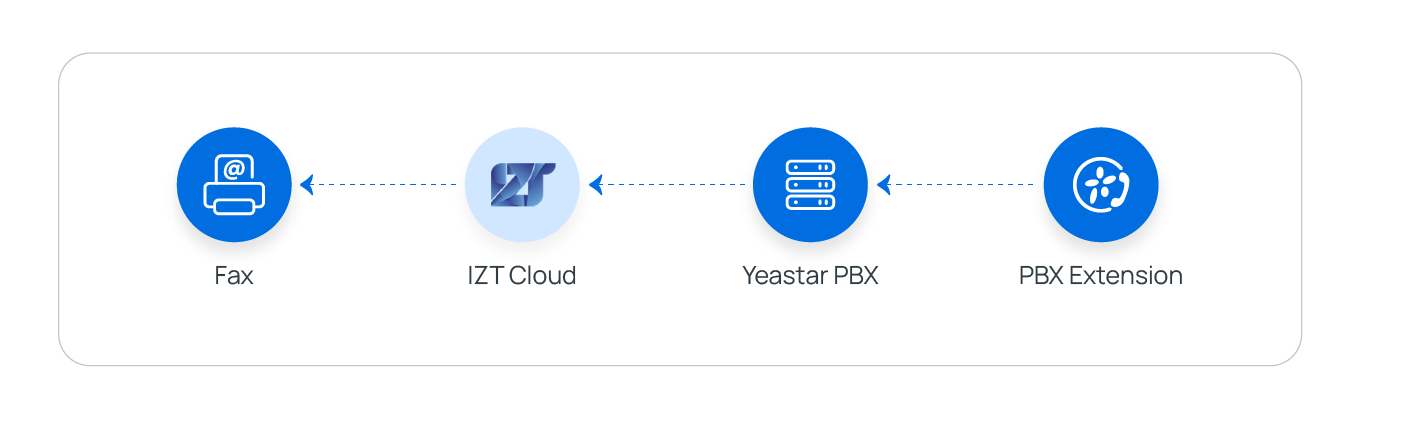
Outbound. When an extension user sends a fax from the Cloud Voice App, Cloud Voice calls the IZT Cloud API to hand the fax off for delivery.
-
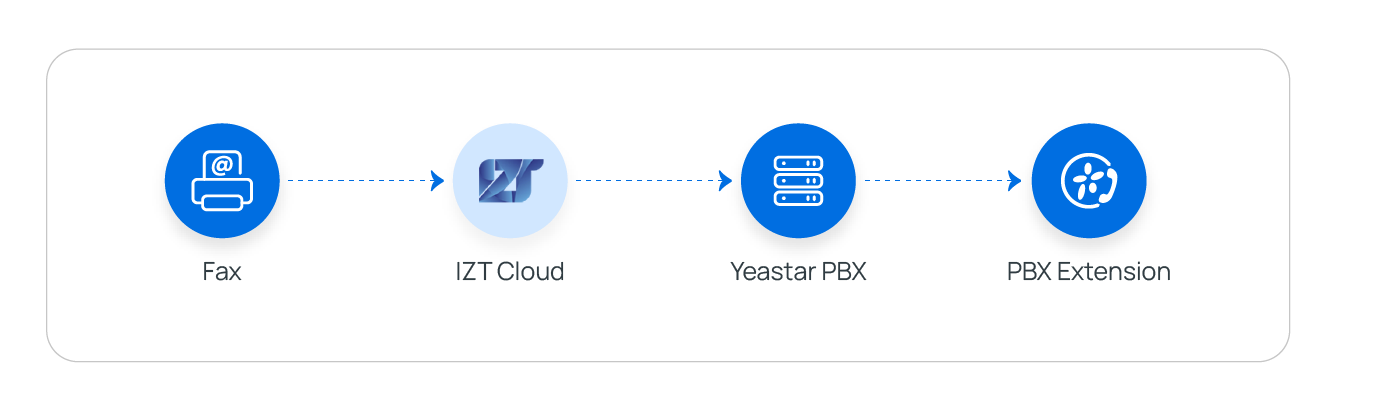
Inbound. When a fax reaches your IZT Cloud fax number, IZT Cloud posts a webhook notification back to Cloud Voice. Cloud Voice then pulls the fax file through the API and routes it to the extension users you designated.
Setting this up comes down to three stages:
- Copy a Webhook URL out of Cloud Voice.
- In IZT Cloud, create the resources you’ll need and collect their credentials:
- A fax-enabled phone number for sending and receiving.
- An API key that authenticates your account against the IZT Cloud API.
- A notification group that carries the webhook notifications.
- Enter those credentials back in Cloud Voice and finish the fax settings.
Requirements
Section titled “Requirements”Before you begin, confirm your Cloud Voice system meets both of these:
- Firmware: version 84.20.0.74 or later.
- Plan: Enterprise or Ultimate.
Before you start
Section titled “Before you start”Purchase one or more fax numbers from IZT Cloud.
Step 1. Copy the Webhook URL from Cloud Voice
Section titled “Step 1. Copy the Webhook URL from Cloud Voice”You’ll need this URL later, when you build the notification group in IZT Cloud, so grab it first.
-
Open the fax integration screen.
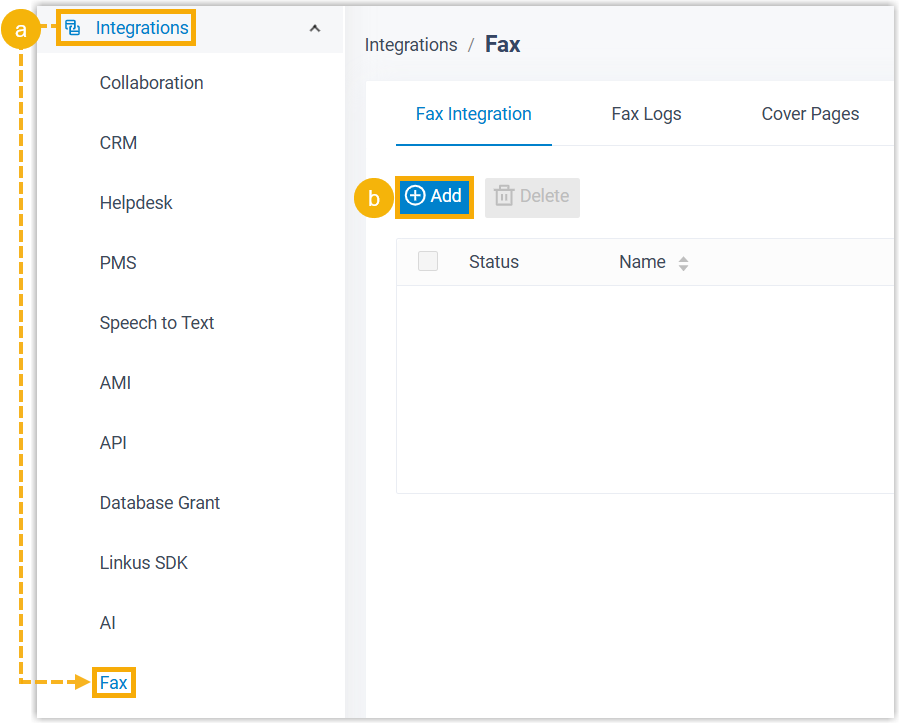
a. Sign in to the Cloud Voice admin portal and go to Integrations > Fax.
b. On the Fax Integration tab, click Add.
-
Retrieve the Webhook URL for IZT Cloud Fax.
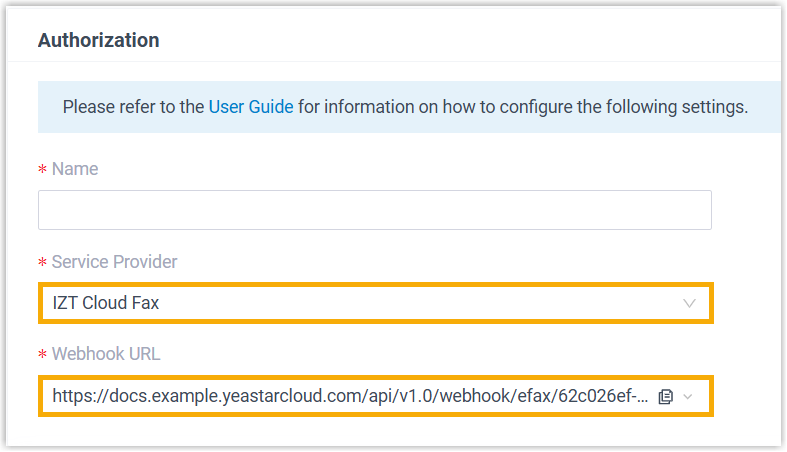
a. In the Service Provider list, choose IZT Cloud Fax.
b. In the Webhook URL field, click the copy icon
 and keep the URL somewhere handy for the next step.
Step 2. Create resources and collect credentials in IZT Cloud
Section titled “Step 2. Create resources and collect credentials in IZT Cloud”These tasks all happen in the IZT Cloud portal and produce the credentials Cloud Voice uses to authenticate:
- Create an API key.
- Create a notification group.
- Attach the notification group to your fax number.
1. Create an API key
Section titled “1. Create an API key”-
Open the API key page.
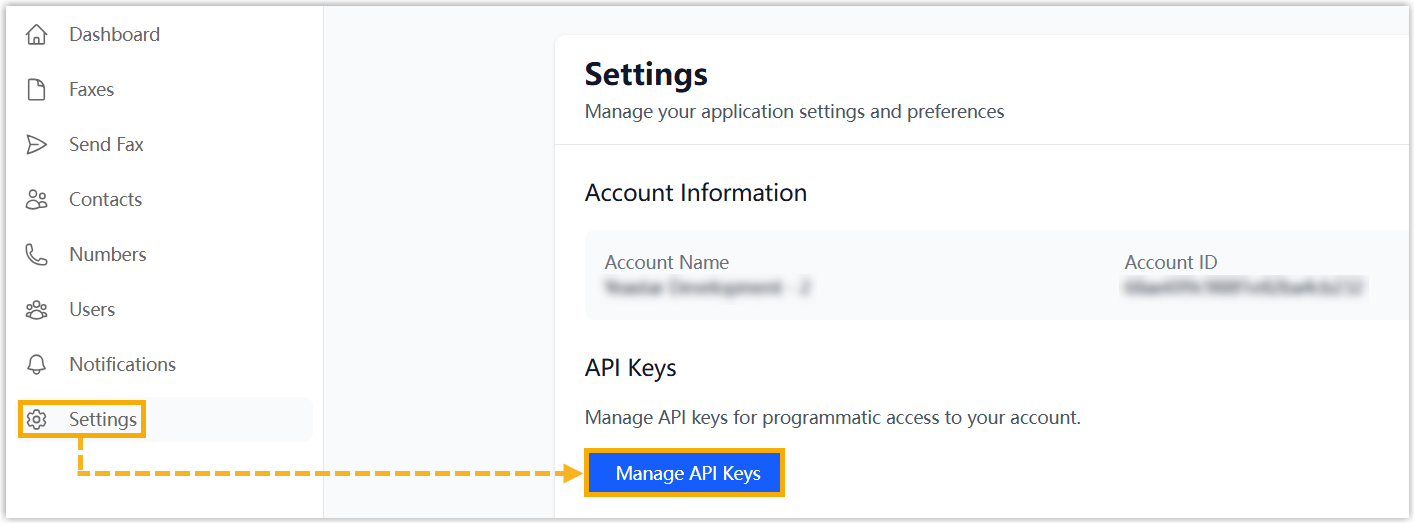
a. Sign in to the IZT Cloud Fax portal.
b. Go to Settings > API Keys, then click Manage API Keys.
-
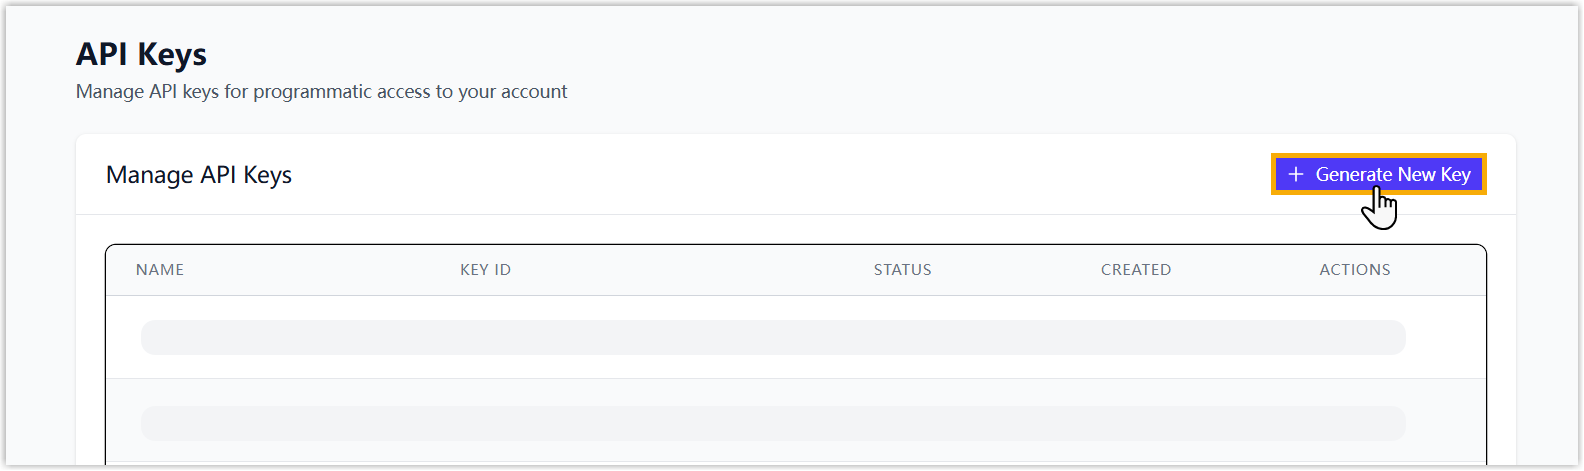
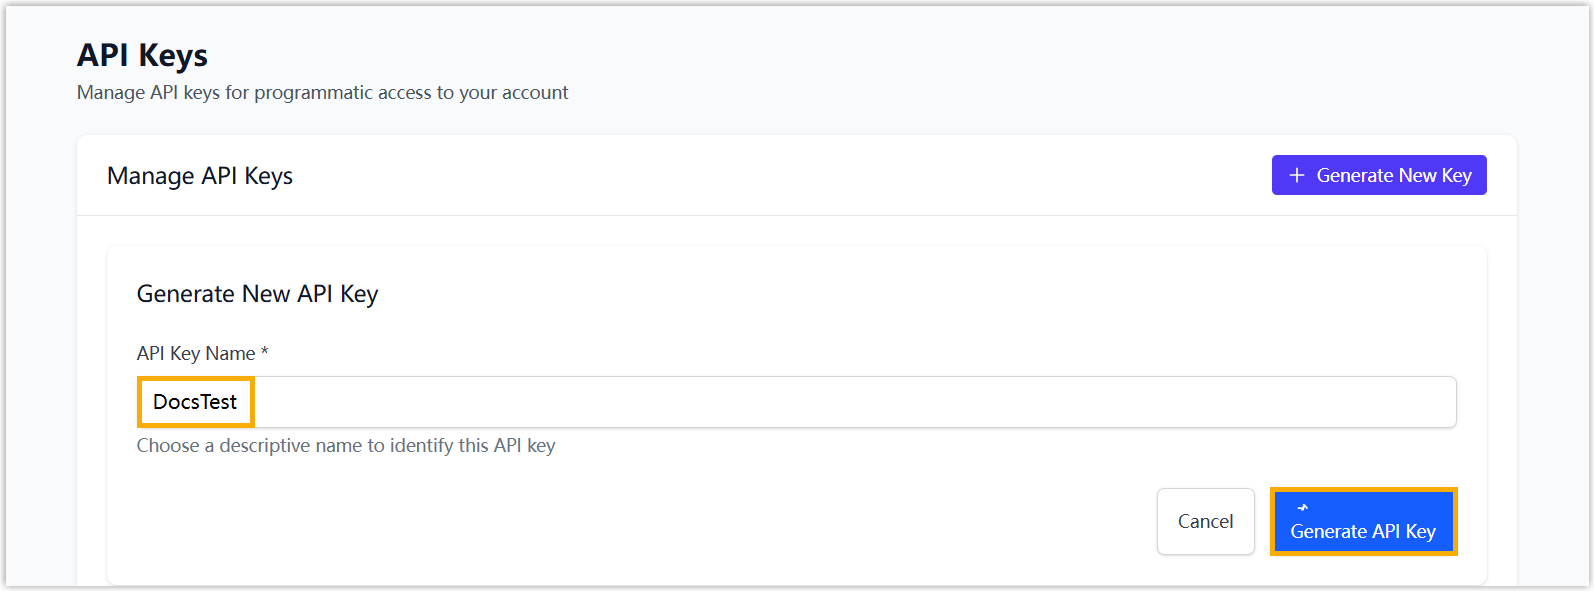
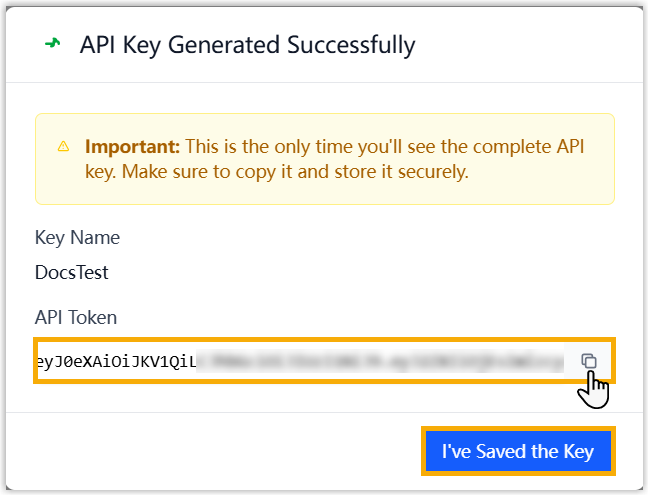
Generate the key.
a. In the top-right corner, click Generate New Key.
b. In the API Key Name field, type a name you’ll recognize, then click Generate API Key.
The key is created and shown on screen.
c. Copy the key and store it for later, then click I’ve Saved the Key to dismiss the window.
2. Create a notification group
Section titled “2. Create a notification group”-
Open the notification group page.
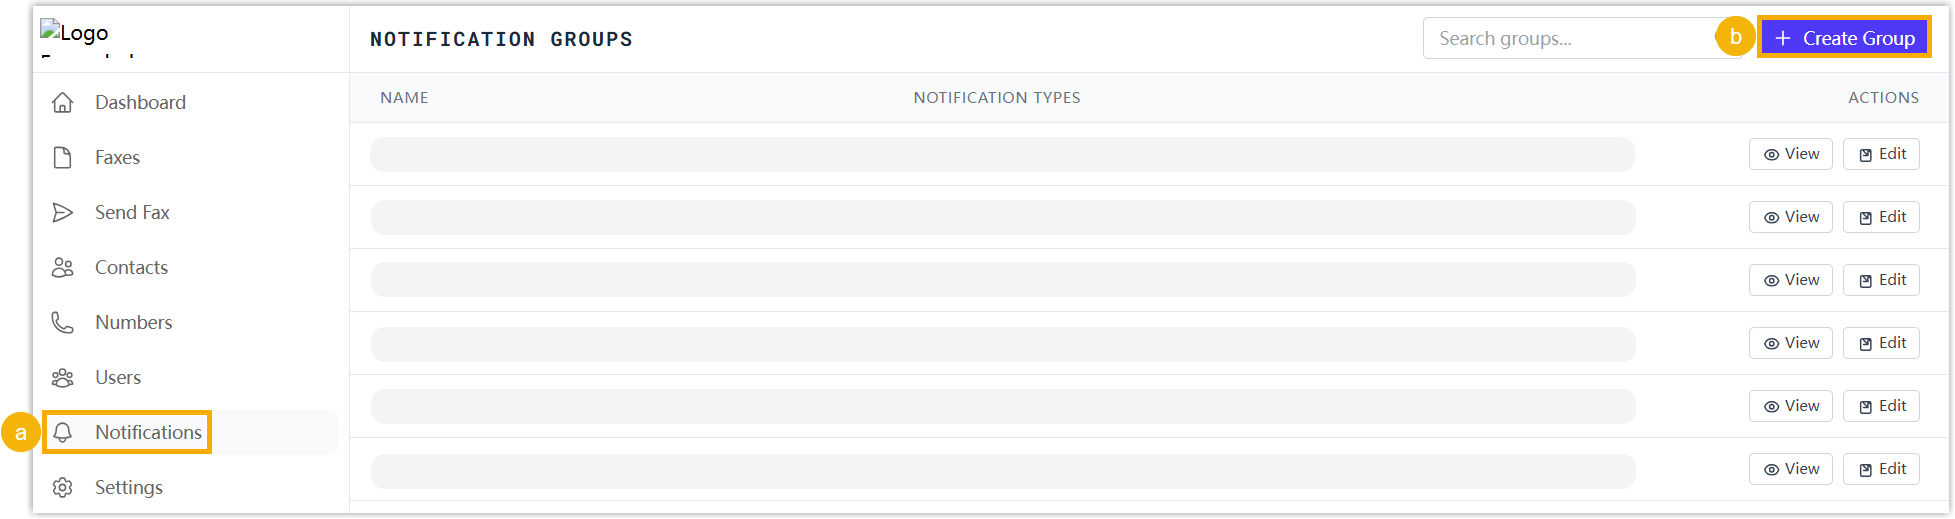
a. In the left navigation bar, click Notifications.
b. In the top-right corner, click Create Group.
-
Fill in the group and click Create Group.
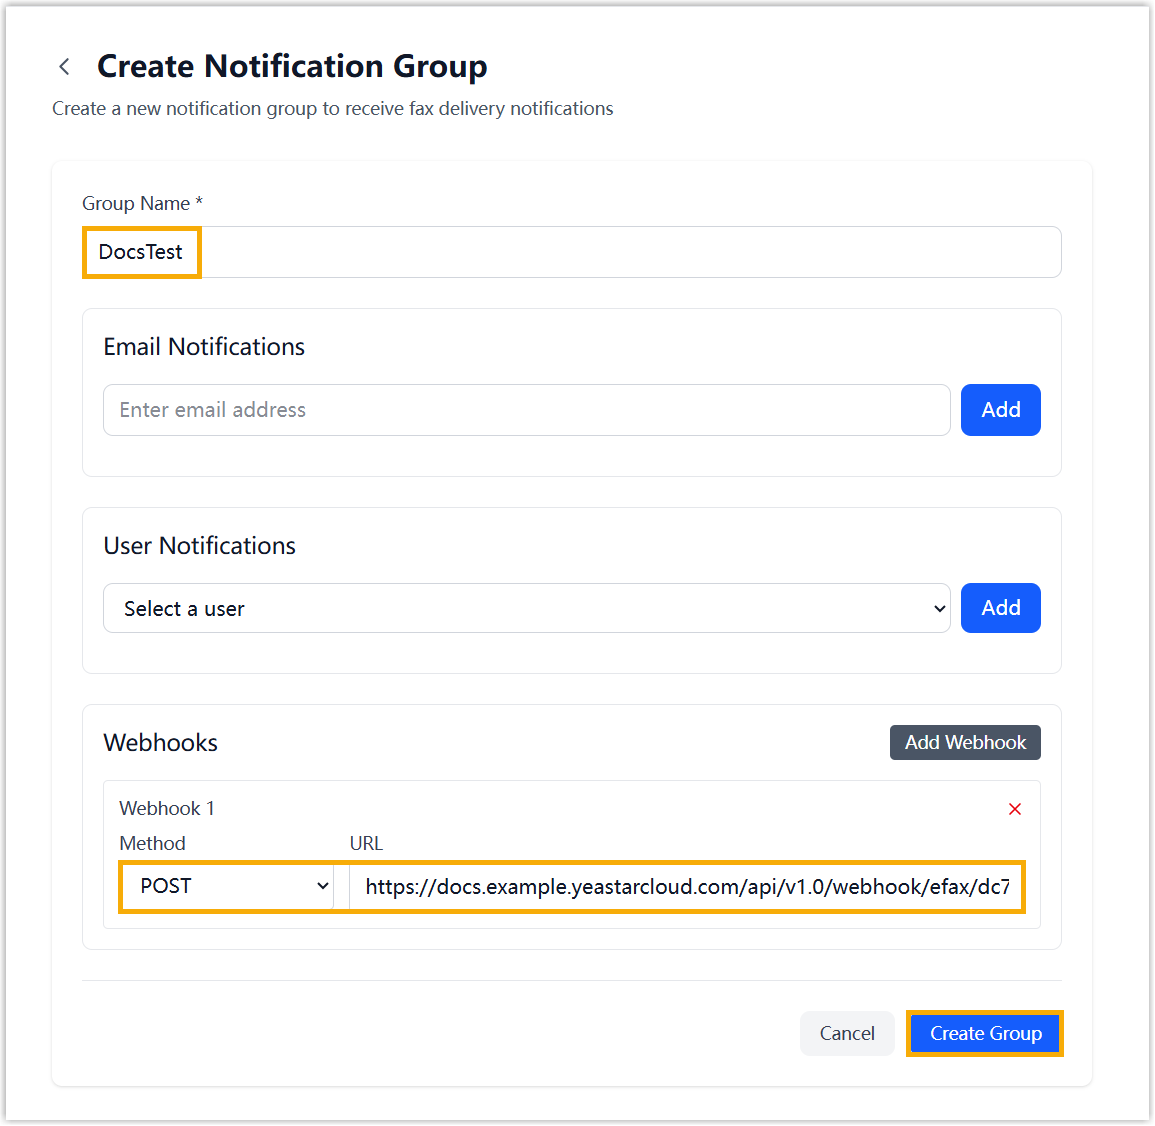
Setting What to enter Group Name A name that helps you identify the group. Email Notifications Leave as-is or adjust to suit your needs. User Notifications Leave as-is or adjust to suit your needs. Webhooks Click Add Webhook and paste the Webhook URL you copied from Cloud Voice in Step 1.
3. Attach the notification group to your fax number
Section titled “3. Attach the notification group to your fax number”-
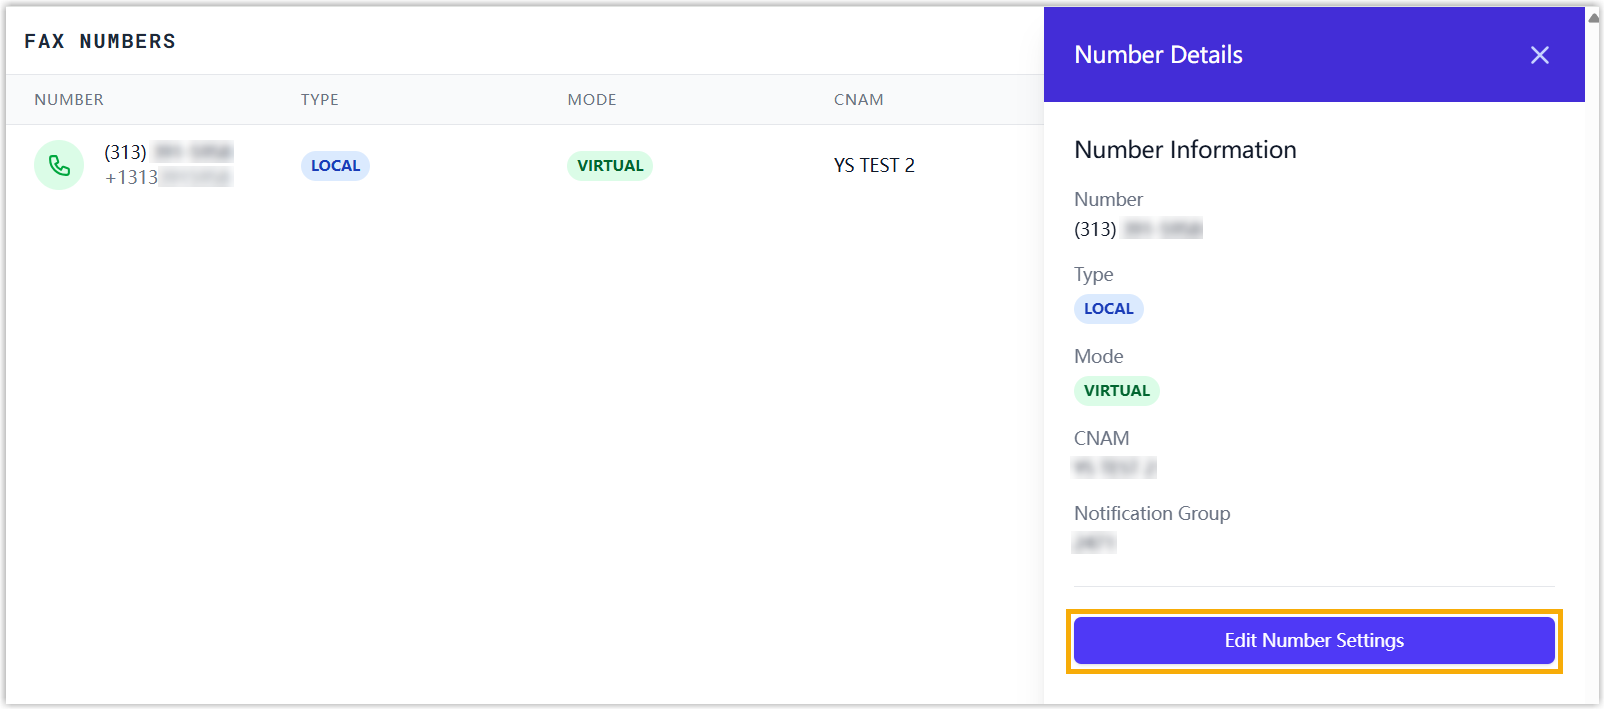
Open the fax number’s settings.
a. In the left navigation bar, click Numbers, then click View next to the number you want.
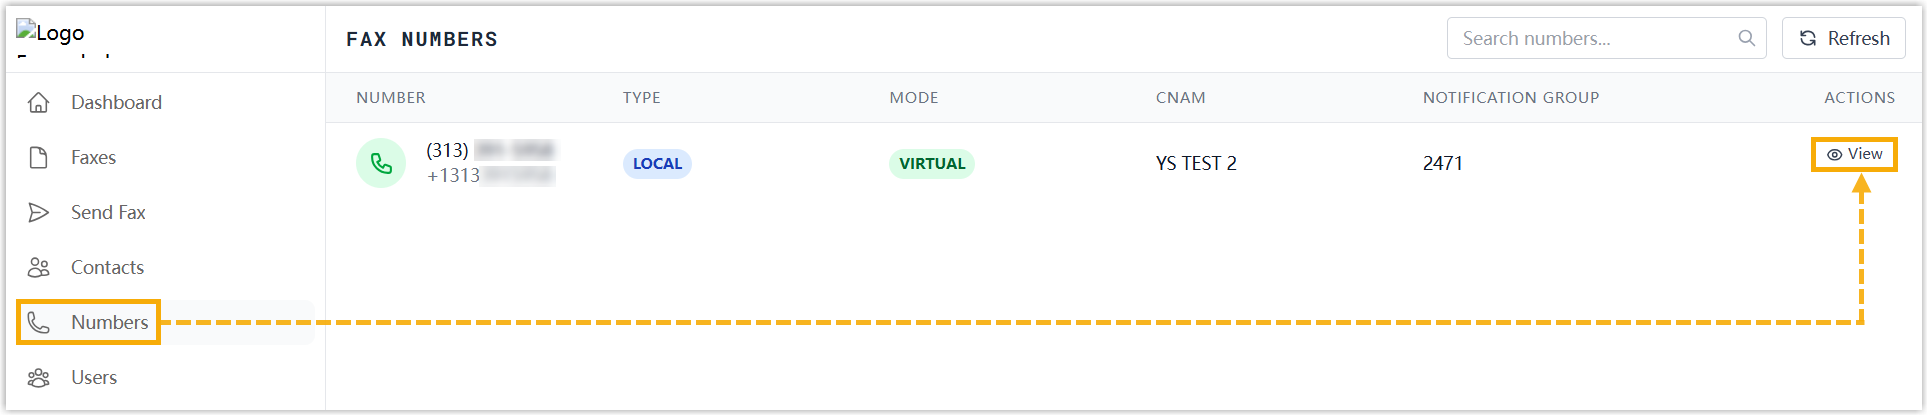
b. In the side panel, click Edit Number Settings.
-
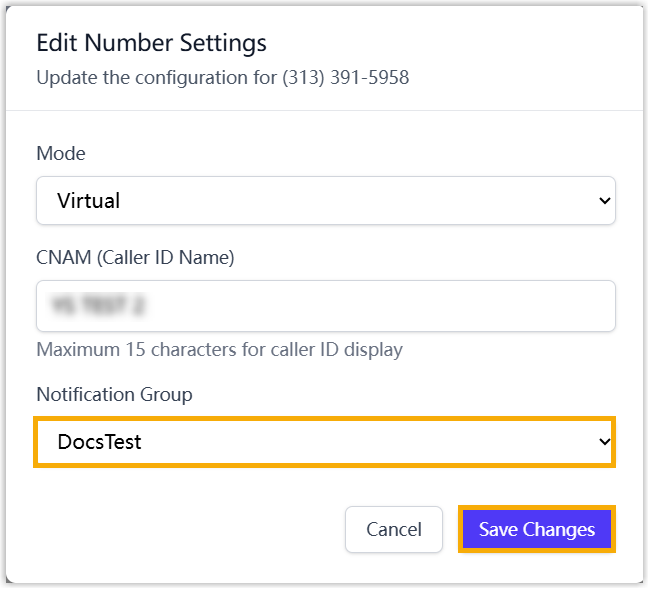
In the Notification Group list, select the group you just created, then click Save Changes.
Step 3. Enter the credentials and configure fax settings in Cloud Voice
Section titled “Step 3. Enter the credentials and configure fax settings in Cloud Voice”Back in Cloud Voice, supply the credentials you gathered from IZT Cloud and finish the fax options.
-
Open the fax integration screen.
a. Sign in to the Cloud Voice admin portal and go to Integrations > Fax.
b. On the Fax Integration tab, click Add.
-
In the Authorization section, complete the fields.
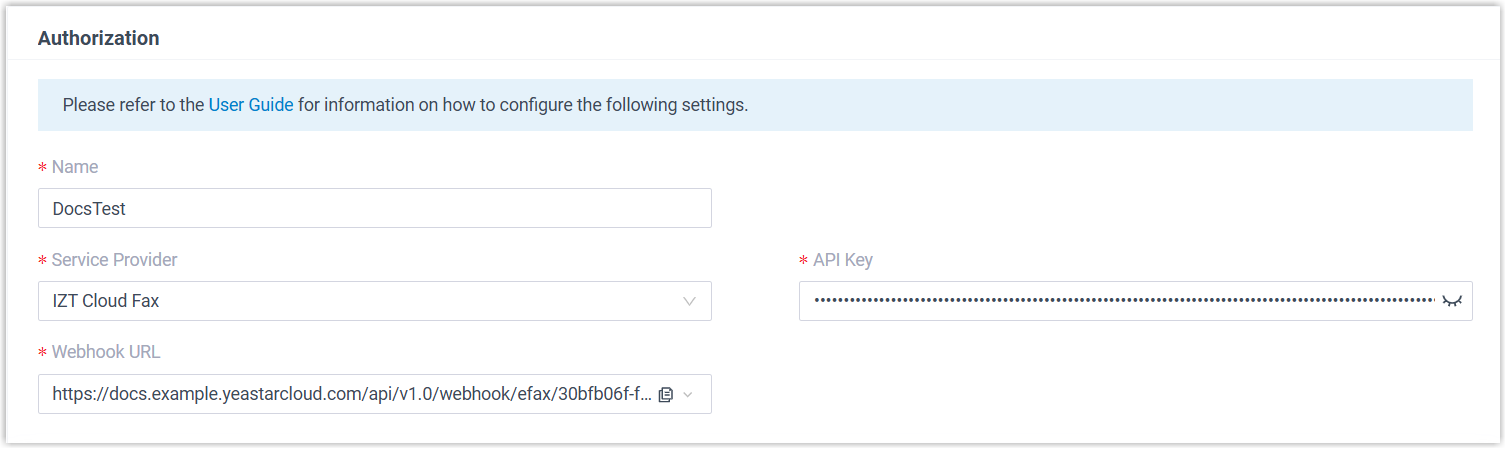
Setting What to enter Name A label that helps you identify this integration. Service Provider Select IZT Cloud Fax. API Key Paste the API key you created in IZT Cloud. -
Optional. To also deliver inbound faxes as email attachments, set up one or more email destinations.
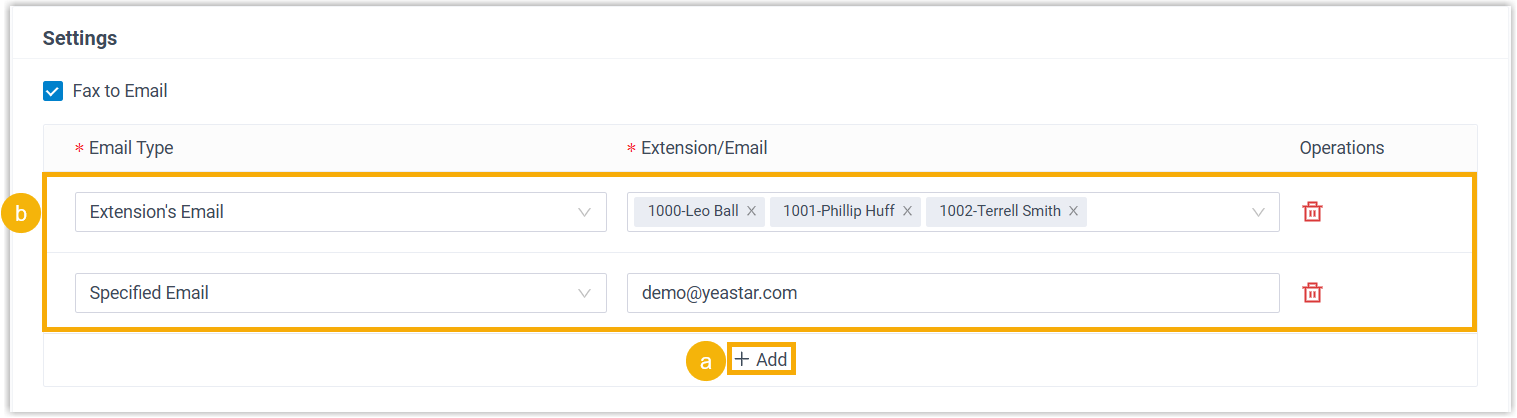
a. In the Settings section, click Add.
b. In the Email Type list, pick how the address is resolved and fill in the matching field:
-
Extension’s Email: sends inbound faxes to the mailboxes of the extension users you choose. Select those extensions from the Extension/Email list.
-
Specified Email: sends inbound faxes to a fixed address. Type that address in the Extension/Email field.
-
-
Add your fax numbers and set who may send and receive on each.
a. In the Fax Number section, click Add.
b. In the pop-up, complete the settings below, then click Save.
Setting What to enter Fax Number The fax number in E.164 format (the international standard: a plus sign, the country code, then the number, with no spaces or punctuation), for example +12498037994.Fax Reception Destination The extensions or extension groups allowed to receive inbound faxes. They read incoming faxes in the Cloud Voice App under Fax Management > Fax. Extensions Allowed to Send Fax The extensions or extension groups allowed to send faxes. They send from the Cloud Voice App under Fax Management > Fax. c. Repeat steps a and b for each additional fax number.
-
Click Save.
Result
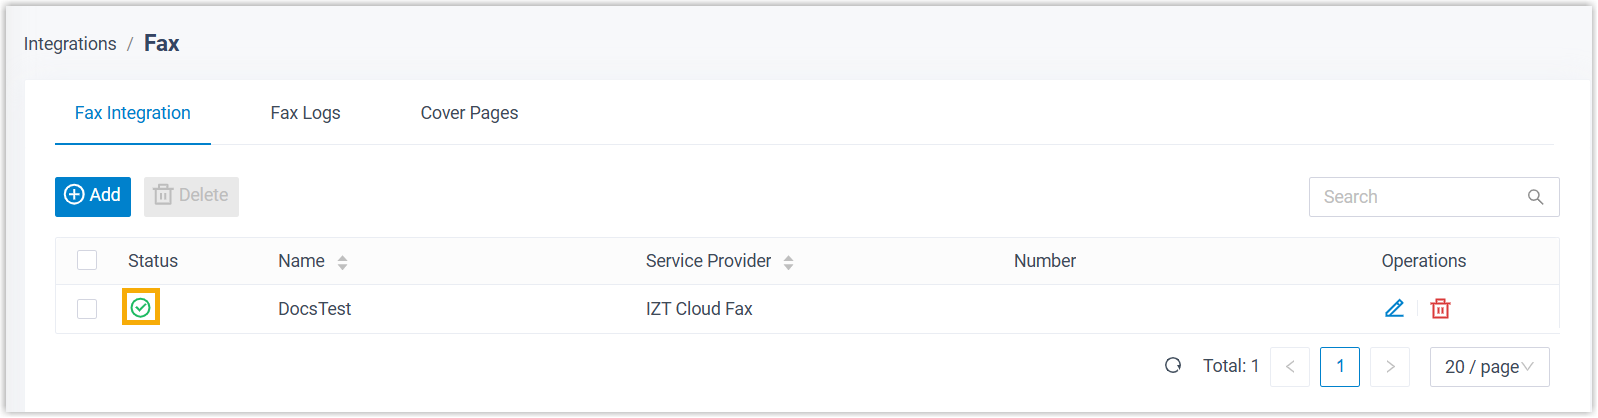
Section titled “Result”When the Status shows the green OK indicator  , the IZT Cloud Fax integration is live.
What to do next
Section titled “What to do next”- (Optional) Build cover pages. Design cover pages that extension users can attach to outbound faxes. See Add a Fax Cover Page.
- Show your users the ropes. Let extension users know they can send new faxes and open received ones from the Cloud Voice App, under Fax Management > Fax, on both the desktop and web clients.
Question about this page?
Ask the AI assistant. It starts from this page, then searches the rest of the docs.
Ask Cloud Voice AI
Answers are AI-generated from the docs and may contain mistakes. Verify with the linked pages.