
Connect Cloud Voice to a TA100/200 FXS Gateway
A TA100/200 FXS gateway lets you bring analog endpoints, such as desk phones or fax machines, onto Cloud Voice. FXS (Foreign Exchange Station) is the type of port an analog device plugs into. Each FXS port on the gateway registers to the PBX (Private Branch Exchange, the phone system) as a standard SIP (Session Initiation Protocol) extension, so the connected device behaves like any other phone on your system.
Linking the two sides takes two passes: first define the extension on Cloud Voice, then point an FXS port at it on the gateway.
Step 1: Create the extension on Cloud Voice
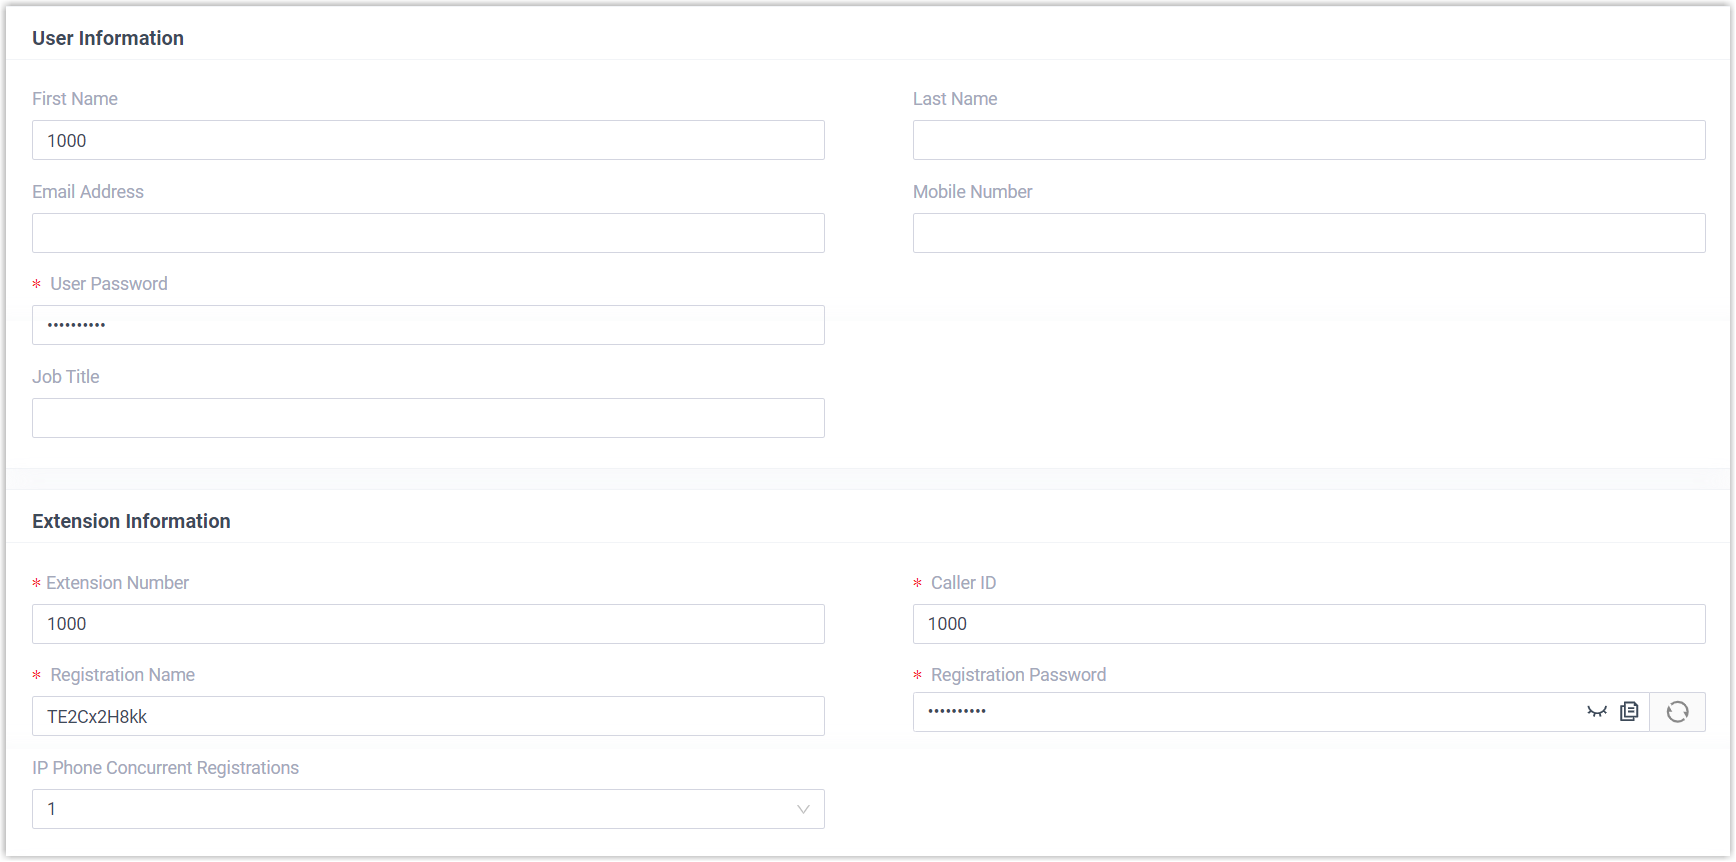
Section titled “Step 1: Create the extension on Cloud Voice”Add a dedicated extension for the FXS port you plan to use. This example uses extension 1000.
-
Sign in to the PBX web portal and go to Extension and Trunk > Extension.
-
Click Add and create the extension.
-
Click Save, then Apply.
Step 2: Register the FXS port with the extension
Section titled “Step 2: Register the FXS port with the extension”On the gateway, bind an FXS port to the extension you just created.
-
Sign in to the gateway web interface and go to Gateway > Port Settings > FXS Port, then edit the port you want to use.
-
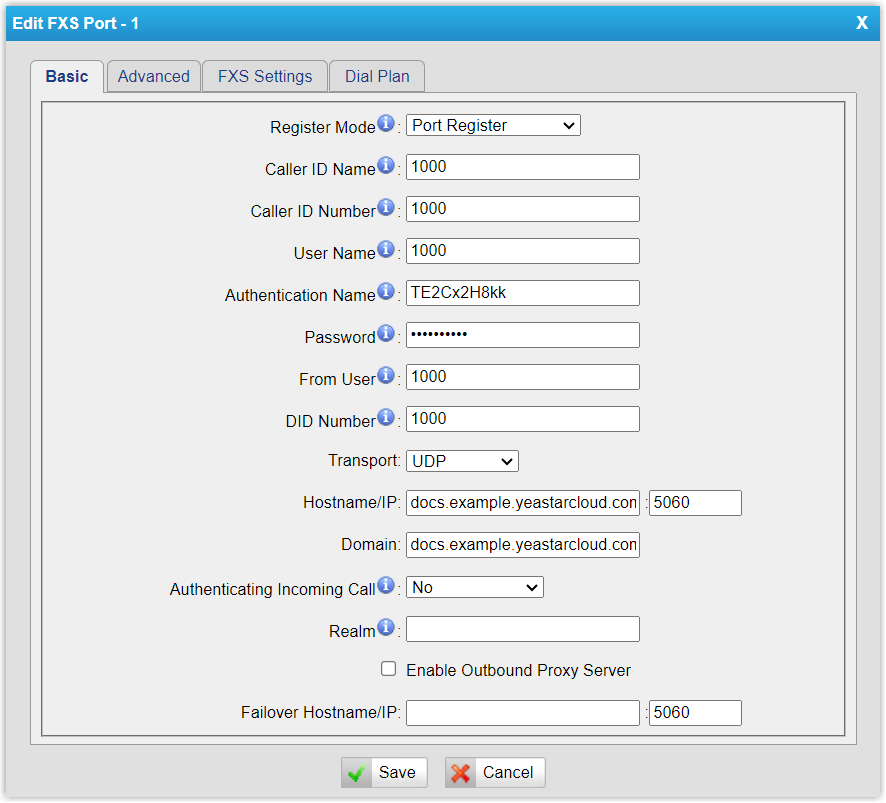
In the port window, set the following:
- Register Mode: Select Port Register.
- Caller ID Name: A label that helps you recognize this FXS port.
- Caller ID Number: The extension number (1000 in this example).
- User Name: The extension number.
- Authentication Name: The extension’s registration name.
- Password: The extension’s registration password.
- From User: The extension number.
- DID Number: The extension number. DID (Direct Inward Dialing) is the number tied directly to this port.
- Transport: Select UDP (User Datagram Protocol, the transport SIP uses to carry the registration).
- Hostname/IP: The PBX domain name followed by its SIP port.
- Domain: The PBX domain name.
-
Click Save, then Apply Changes.
Confirm the registration
Section titled “Confirm the registration”Once the port registers, verify the connection from both sides.
-
On the PBX web portal, open Extension and Trunk > Extension. A registered extension shows the SIP registration icon
 .
.
-
On the gateway, go to Status > System Status > FXS Port Status. A registered port reports OK.

With the port registered, the analog phone attached to it can place and answer internal calls across your Cloud Voice system.
Next steps
Section titled “Next steps”- To let the analog phone dial external numbers through a trunk, see Make Outbound Calls from an Analog Phone Connected to a TA100/200 FXS Gateway.
- To route incoming calls to the analog phone, see Receive Inbound Calls on an Analog Phone Connected to a TA100/200 FXS Gateway.
Question about this page?
Ask the AI assistant. It starts from this page, then searches the rest of the docs.
Ask Cloud Voice AI
Answers are AI-generated from the docs and may contain mistakes. Verify with the linked pages.