
Integrate Cloud Voice with Red Hat SSO
Linking Cloud Voice to Red Hat SSO (single sign-on) lets your organization manage voice-service identities alongside the rest of your Red Hat accounts. Once the trust is established, staff sign in to the Cloud Voice App with their Red Hat credentials, and you can pull those user records into Cloud Voice. This guide covers the full setup: preparing resources in Red Hat SSO, importing that configuration into Cloud Voice, and registering Cloud Voice back as a SAML client. SAML (Security Assertion Markup Language) is the standard the two systems use to exchange the sign-in information that proves who a user is.
Requirements
Section titled “Requirements”| Platform | Requirement |
|---|---|
| Red Hat SSO | Version 7.6 or later recommended |
| Cloud Voice | Firmware: 84.21.0.16 or later (see the firmware dependency reference for feature-specific minimums) Plan: Enterprise or Ultimate |
Step 1: Prepare resources and credentials in Red Hat SSO
Section titled “Step 1: Prepare resources and credentials in Red Hat SSO”Before Cloud Voice can talk to Red Hat SSO, you need to build out a few resources on the Red Hat side and collect the credentials that authorize the two systems to exchange data. Working in the Red Hat SSO admin console, you will:
- Create a realm and add signing keys.
- Add the users who will sign in to the Cloud Voice App with Red Hat credentials.
- Create an OpenID Connect (OIDC) client so Cloud Voice can synchronize users.
- Export the realm metadata for later import into Cloud Voice.
Create a realm and add realm keys
Section titled “Create a realm and add realm keys”A realm gives you a dedicated space to manage user identities and single sign-on.
- Sign in to the Red Hat SSO admin console with an administrator account.
- Create the realm:
-
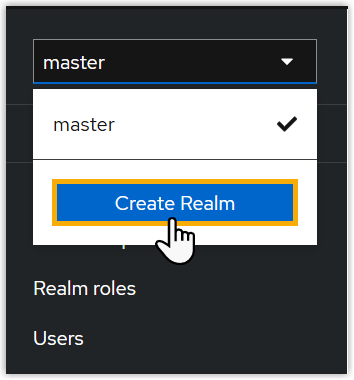
At the top of the left pane, click master, then choose Create Realm.
-
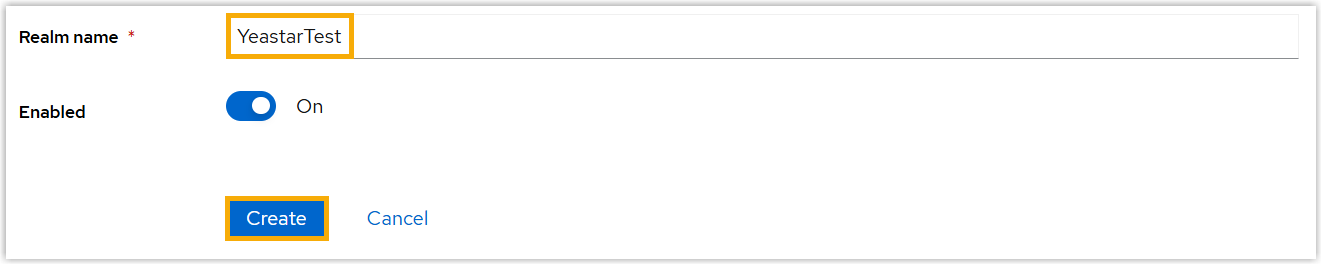
Type a name in the Realm name field and click Create. The console switches to the new realm automatically.
-
- Add realm keys so the realm can sign and encrypt messages:
-
In the left navigation bar, click Realm settings.
-
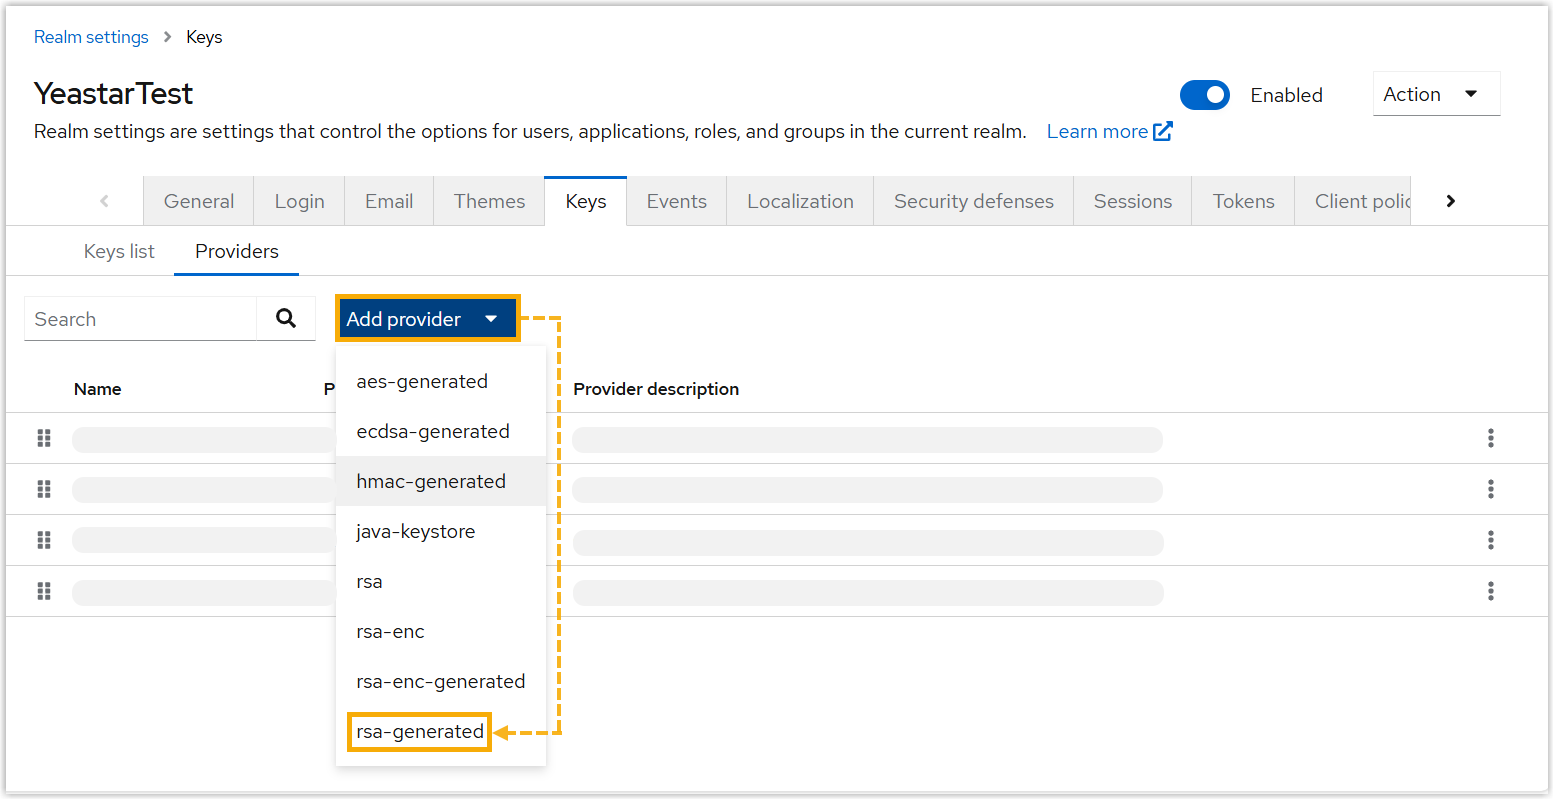
Open the Keys tab and click Providers.
-
Click Add provider and select rsa-generated to create an RSA key pair with a self-signed certificate.
-
Add users
Section titled “Add users”-
In the left navigation bar, click Users.
-
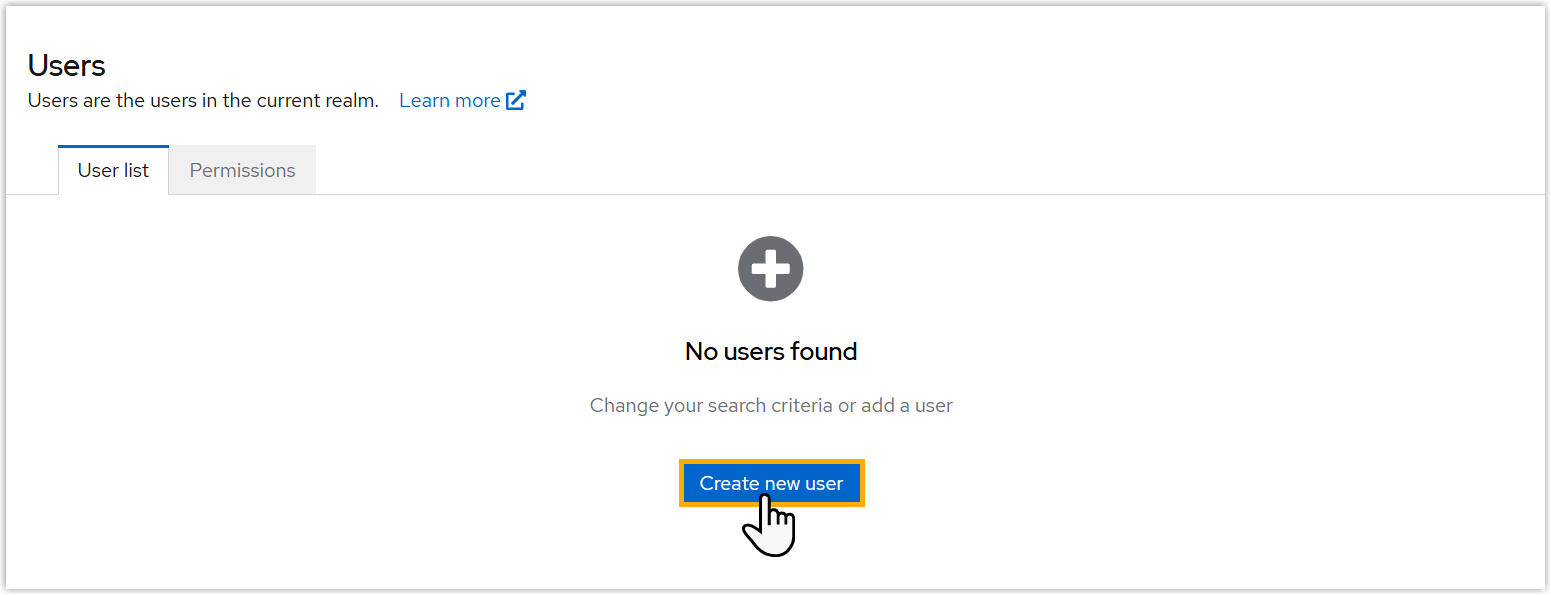
On the User list tab, click Create new user.
-
Fill in the details for the user.
-
Click Save.
Create an OIDC client
Section titled “Create an OIDC client”The OIDC client is what allows Cloud Voice to synchronize users from Red Hat SSO.
- In the left navigation bar, click Clients.
- Create the client:
-
On the Clients list tab, click Create client.

-
Configure the client using the values below, then click Save.
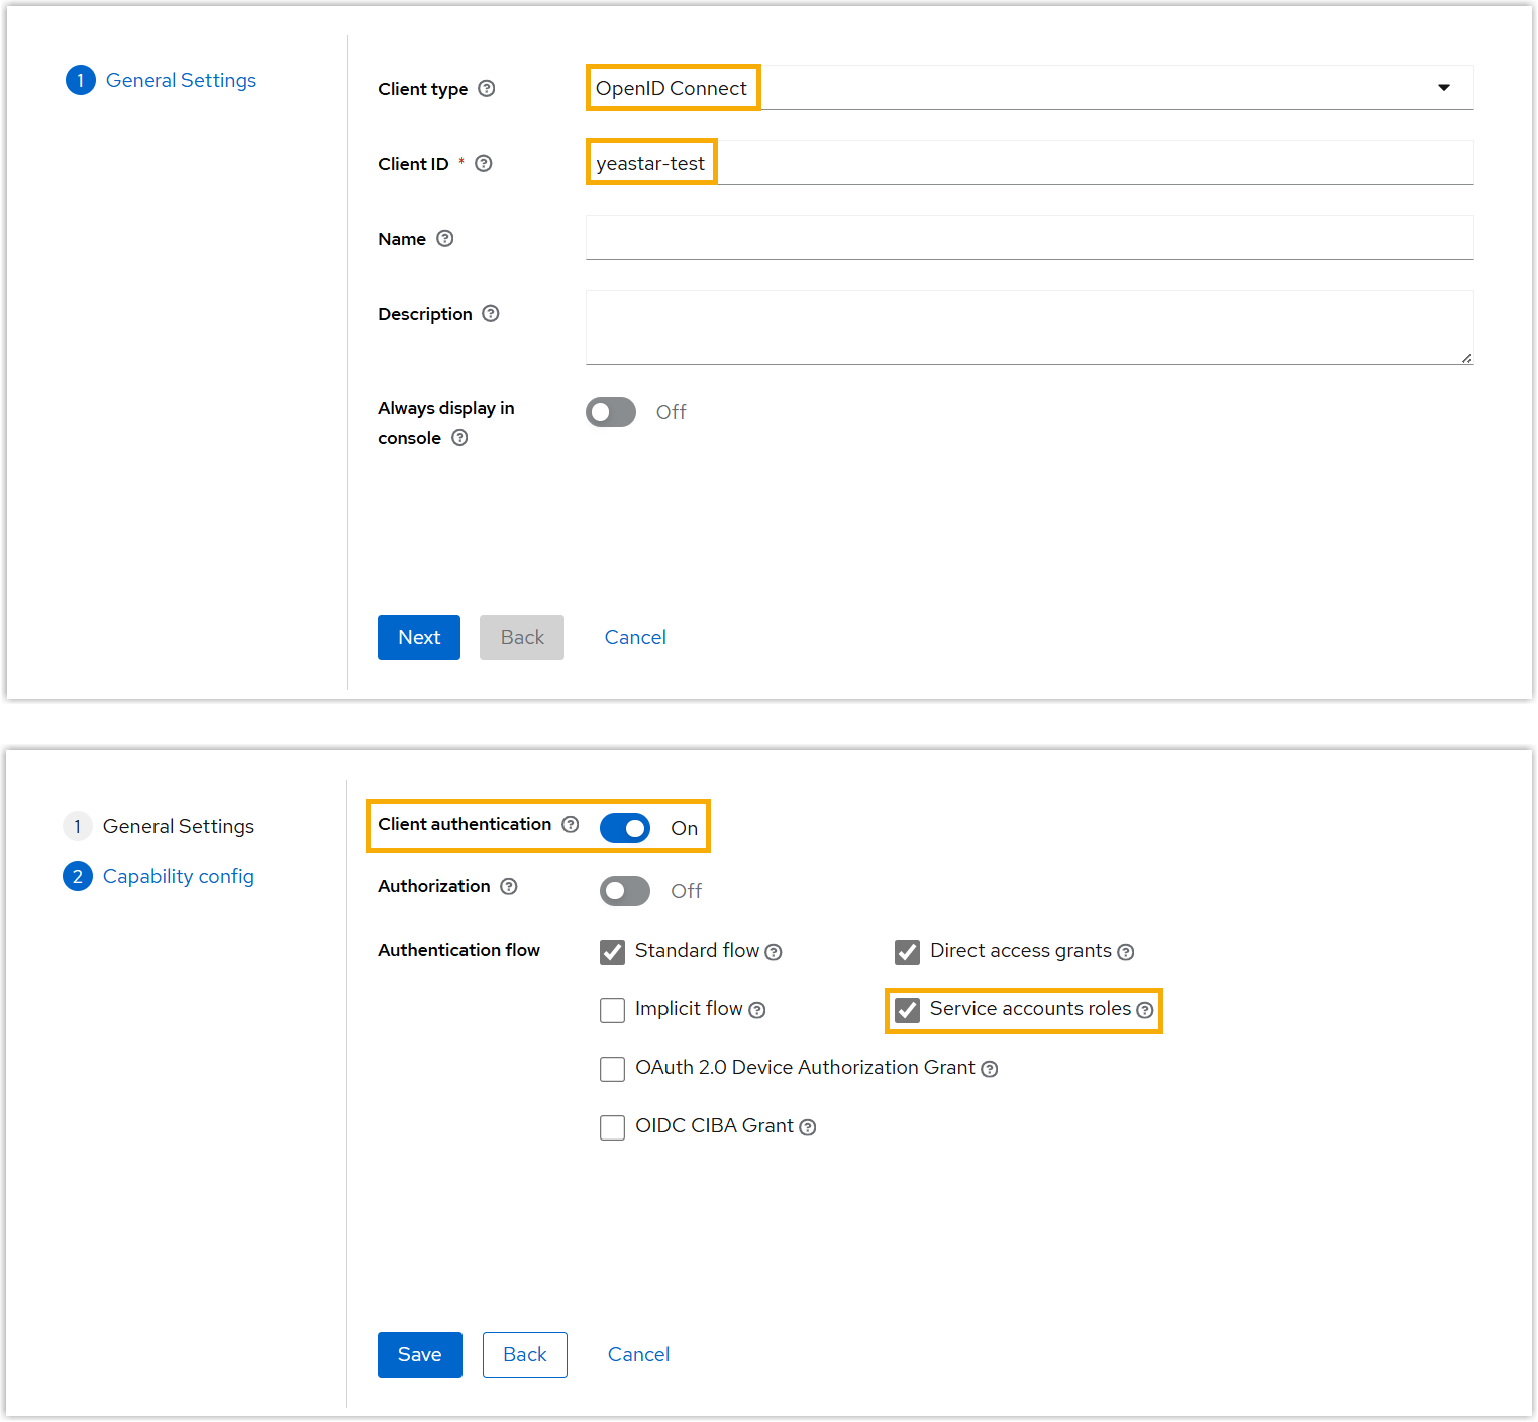
Setting Value Client type Choose OpenID Connect. Client ID Enter a name that identifies the client. Client authentication Turn this on. Authentication flow Select Service accounts roles so the client can obtain an access token.
-
- Record the client credentials:
-
Client ID: copy it from the Settings tab.
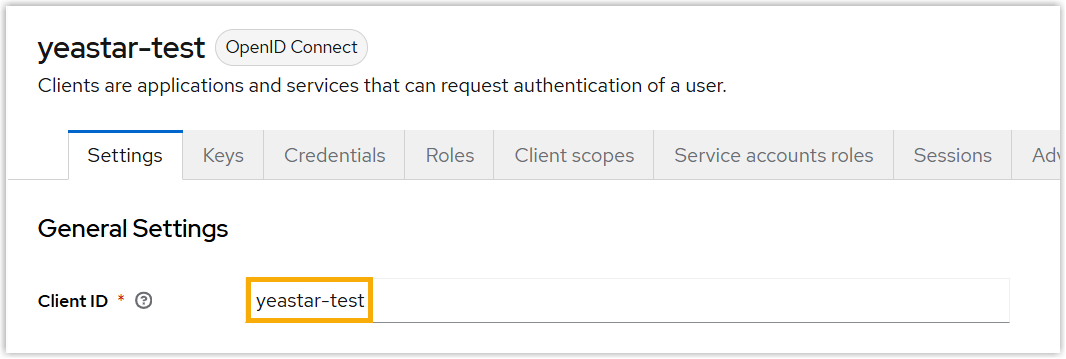
-
Client Secret: copy it from the Credentials tab.
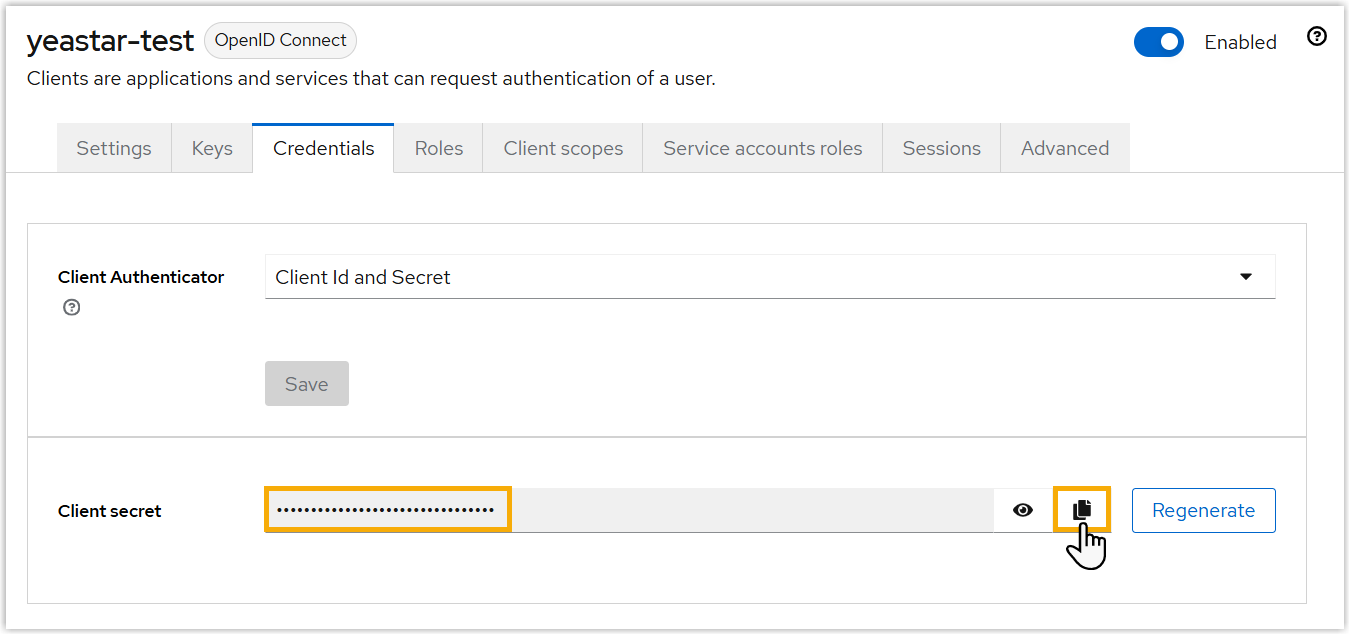
-
- Grant the service account its permissions:
-
On the Service accounts roles tab, click Assign role.
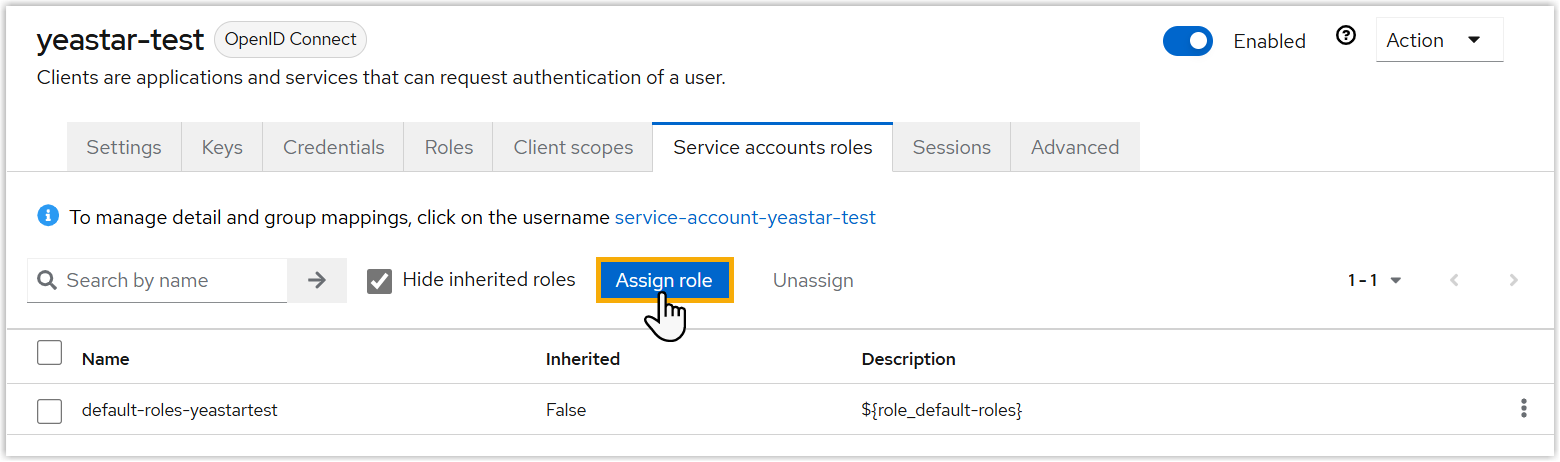
-
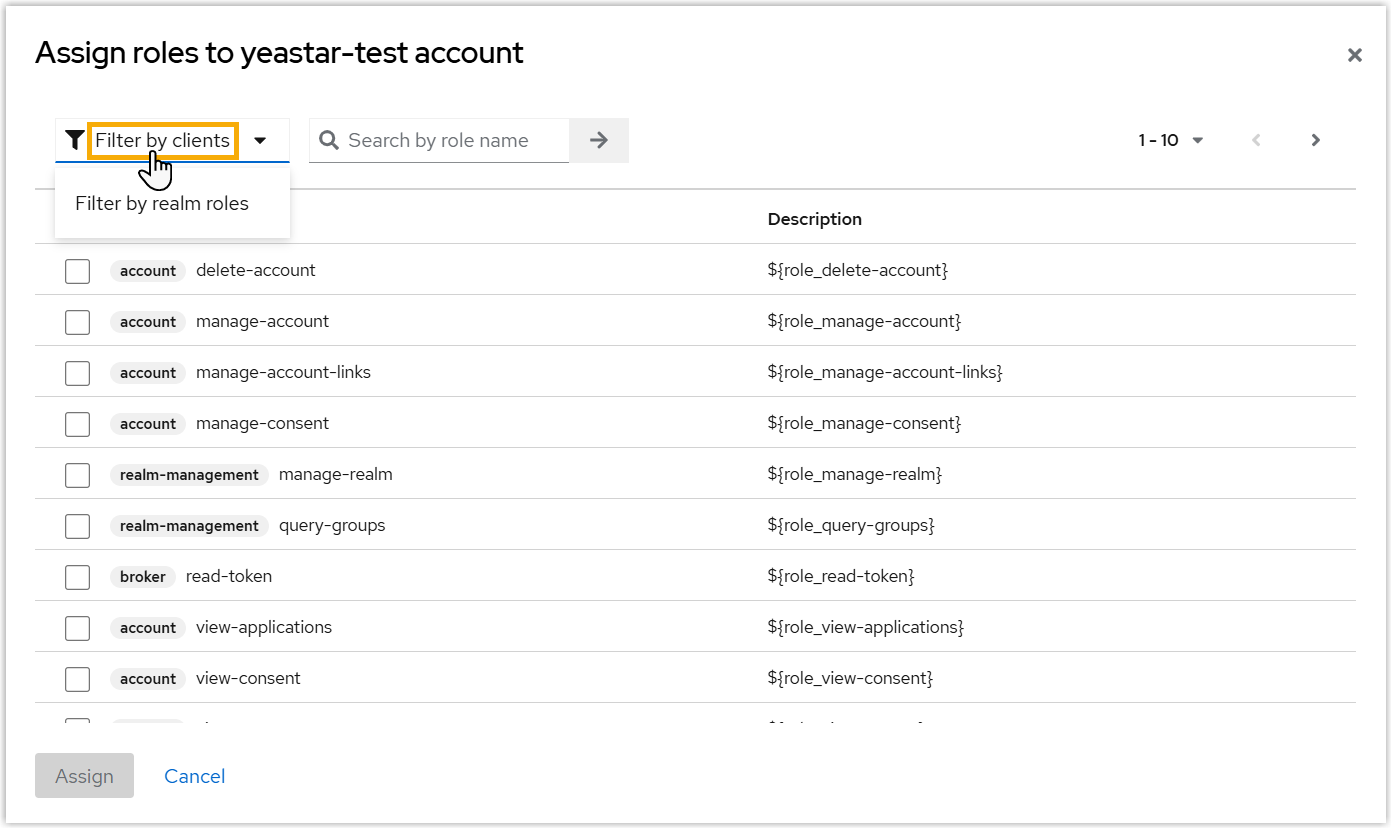
In the top-left corner, choose Filter by clients from the drop-down.
-
Find and select each of these roles:
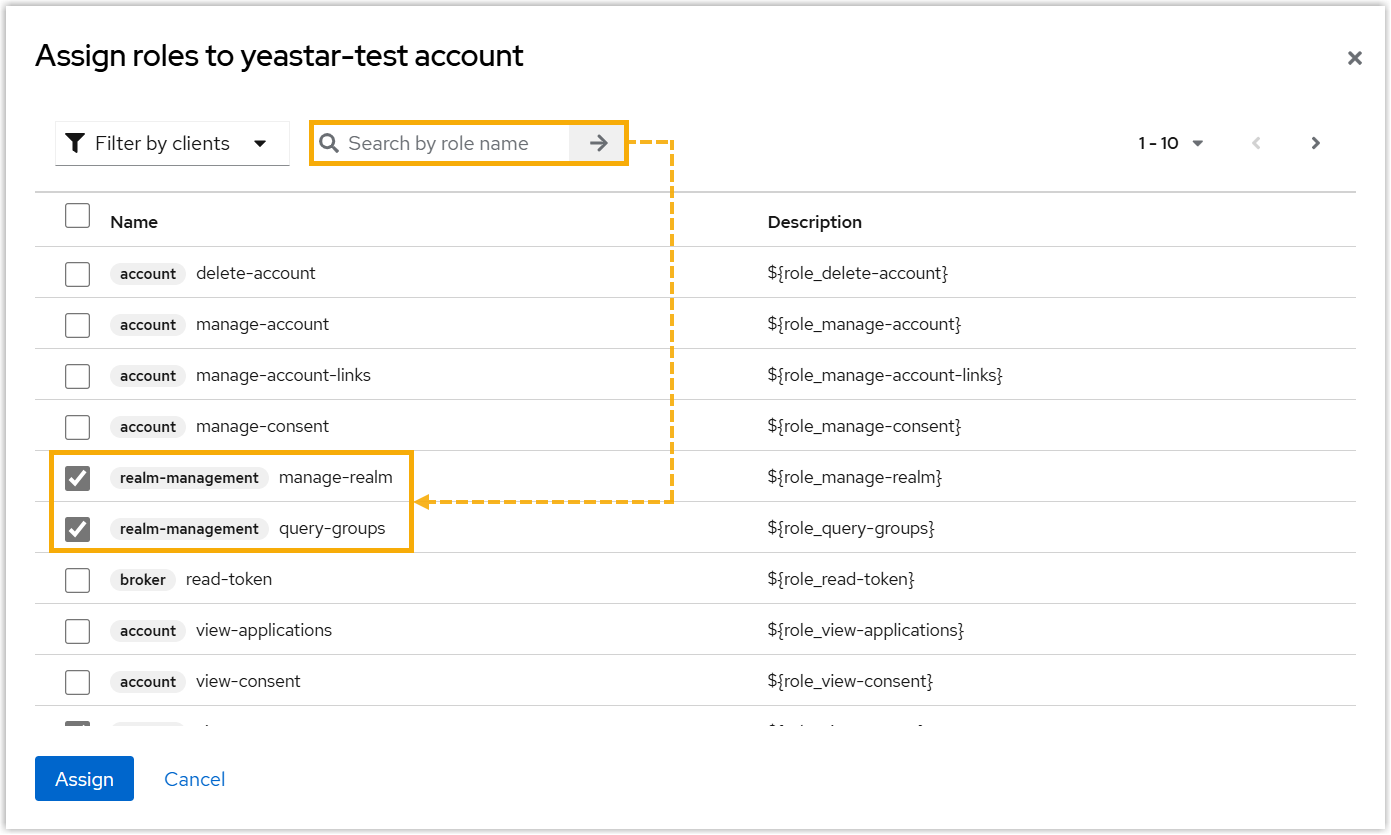
- query-groups
- query-users
- view-groups
- view-users
- manage-realm
-
Click Assign.
-
Export the realm metadata
Section titled “Export the realm metadata”-
In the left navigation bar, click Realm settings.
-
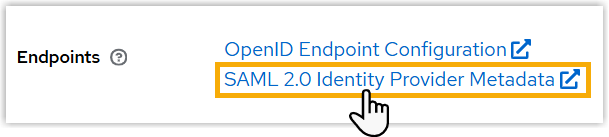
Scroll to the bottom and click SAML 2.0 Identity Provider Metadata.
-
Capture the metadata one of two ways:
- Copy the metadata URL from your browser’s address bar, or
- Save the metadata XML file to your computer.
Step 2: Import the metadata and configure Cloud Voice
Section titled “Step 2: Import the metadata and configure Cloud Voice”-
Open the Red Hat SSO integration page in Cloud Voice.
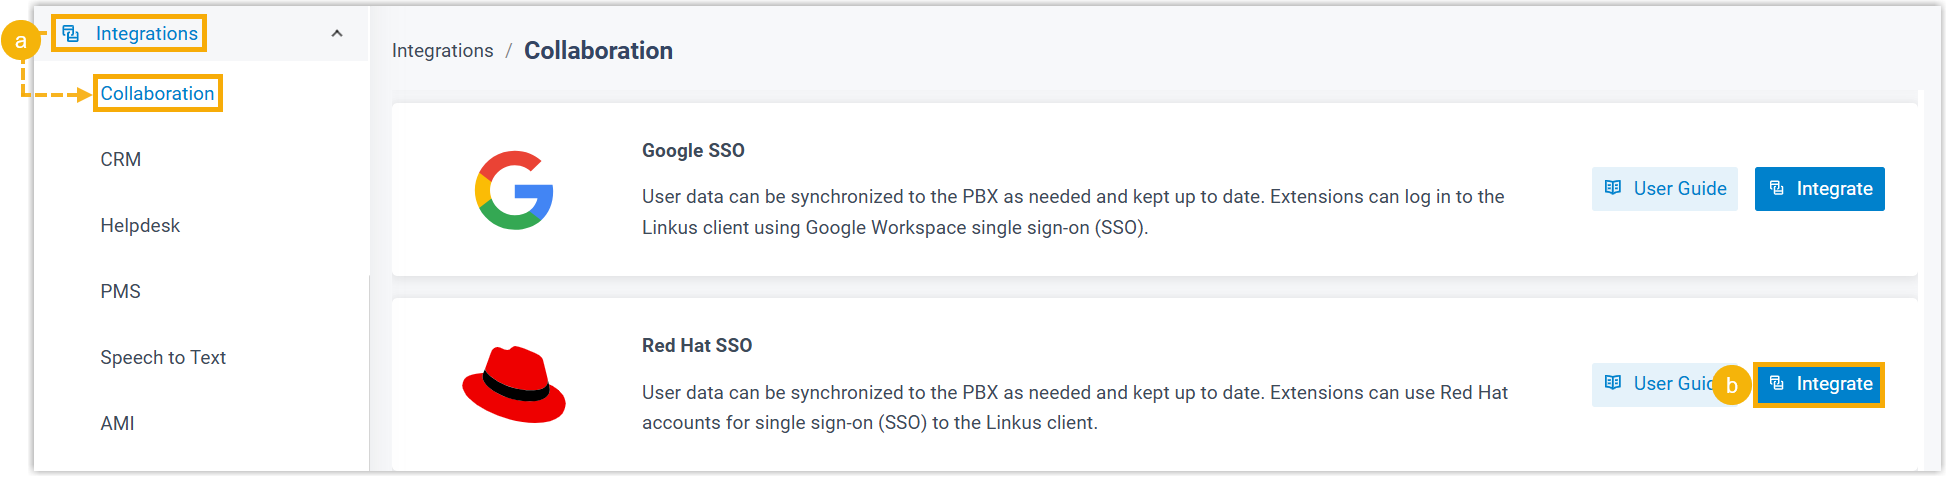
- Sign in to the Cloud Voice web portal and go to Integrations > Collaboration.
- Next to Red Hat SSO, click Integrate.
-
Bring in the Red Hat SSO configuration using either the metadata file or the metadata URL. Either method parses the key details and fills them in automatically.
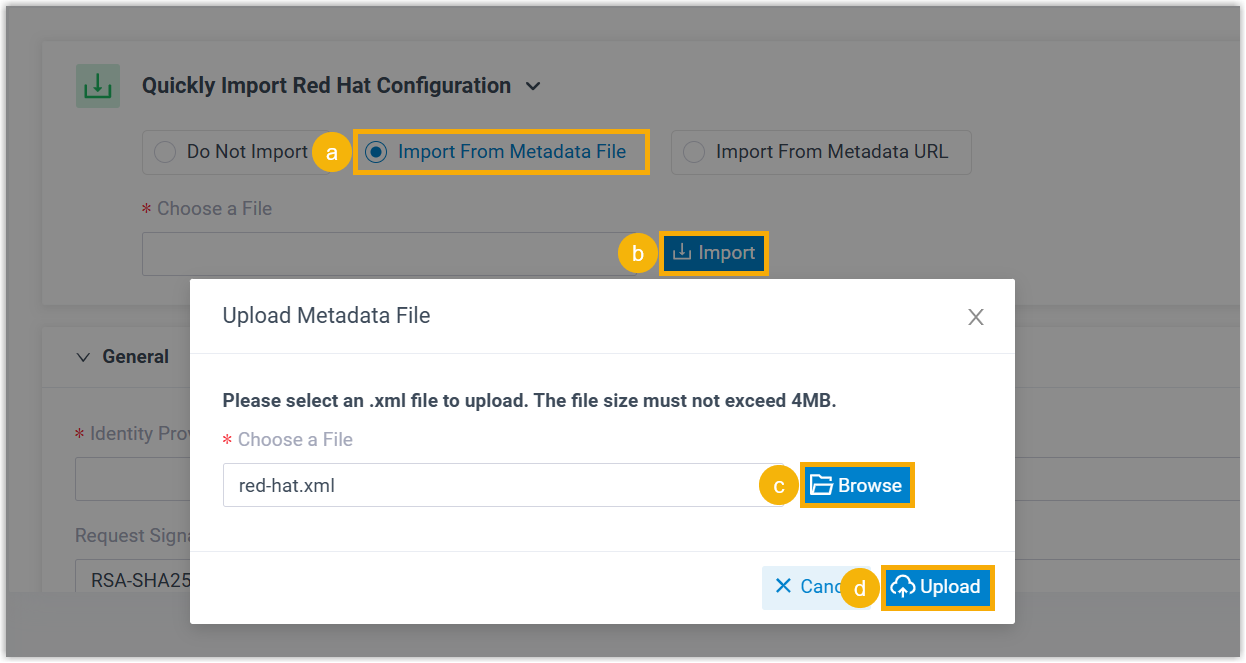
From a metadata file
-
In the Quickly Import Red Hat Configuration section, choose Import From Metadata File.
-
Click Import.
-
Click Browse and pick the
.xmlfile. -
Click Upload.
From a metadata URL
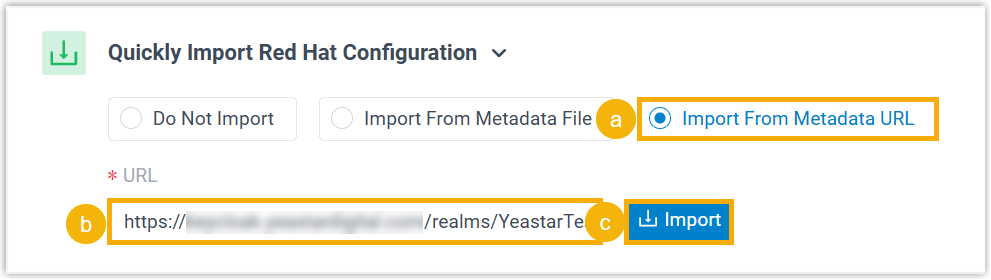
- In the Quickly Import Red Hat Configuration section, choose Import From Metadata URL.
- Enter the metadata URL in the URL field.
- Click Import.
-
-
Review and finish the fields in the General section.
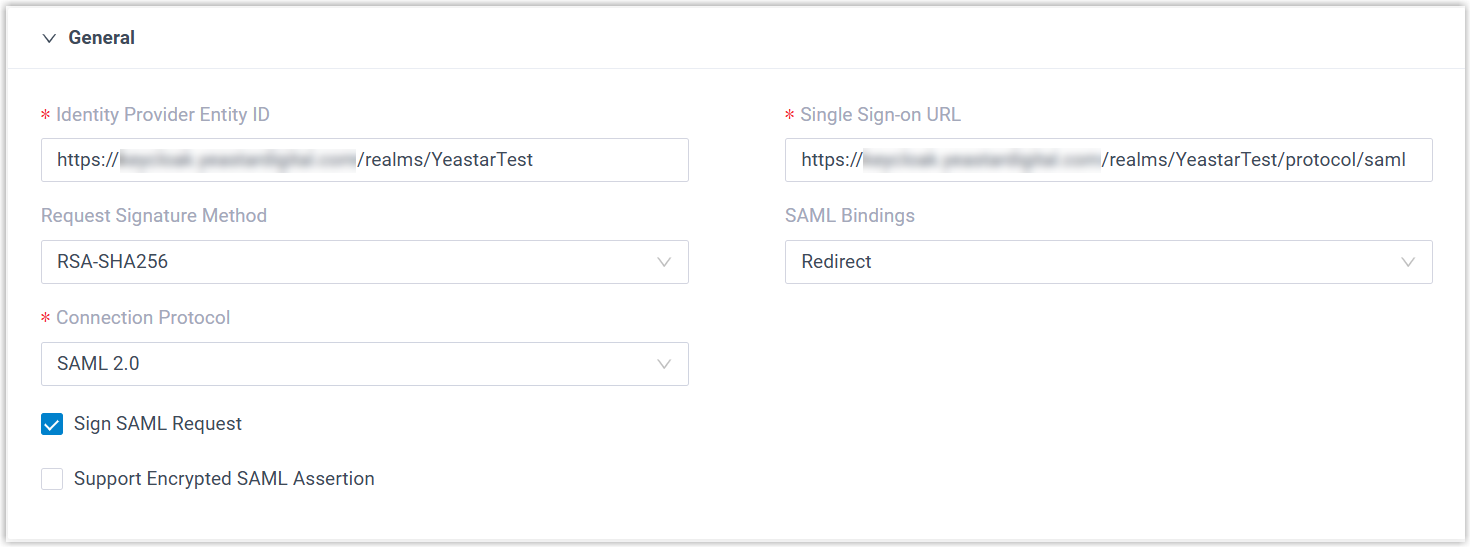
Setting Description Identity Provider Entity ID The unique identifier for Red Hat SSO. Parsed from the metadata and filled in automatically. Single Sign-on URL The endpoint of Red Hat’s SAML SSO service where Cloud Voice sends authentication requests. Parsed from the metadata and filled in automatically. Request Signature Method The hashing algorithm used to sign SAML requests. SAML Bindings The mechanism for exchanging SAML messages between Cloud Voice and Red Hat SSO. Only Redirect binding is supported today: when a Red Hat user signs in to the Cloud Voice App, Cloud Voice sends base64- and URL-encoded SAML messages as URL parameters. Connection Protocol The protocol used to exchange authentication and authorization data with Red Hat SSO. Sign SAML Request Whether to sign SAML requests and responses. Support Encrypted SAML Assertion Whether to encrypt SAML assertions. -
In the Attribute Mapping section, choose the attribute that identifies Red Hat users for SSO. This must match the choice you made when adding users.
-
For the built-in Email field, select SAML_SUBJECT and confirm every user has an email address in Red Hat SSO.

-
For a custom email attribute, select Custom and configure the same attribute in both Cloud Voice and the Red Hat SSO user settings.

-
-
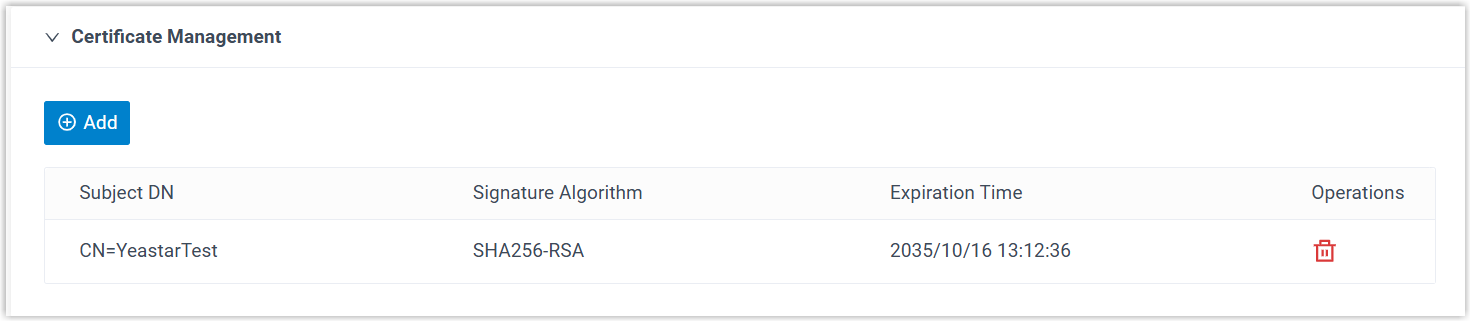
Optional: In the Certificate Management section, add or manage certificates.
-
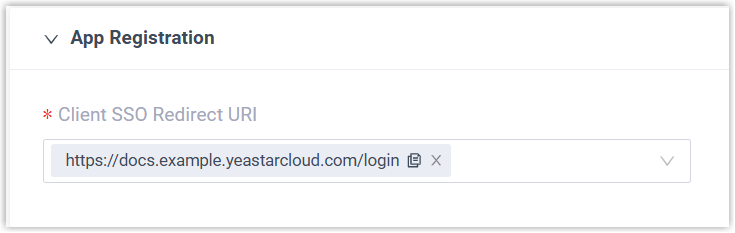
In the App Registration section, pick the URL that users will use to sign in to the Cloud Voice App with their Red Hat credentials.
-
In the User Synchronization section, paste the Client ID and Client Secret from the OIDC client you created earlier.

-
Click Save.
-
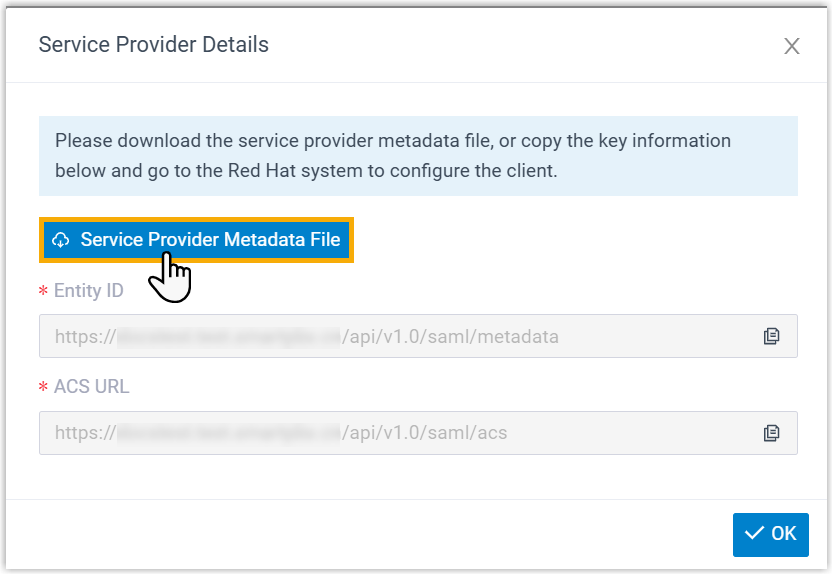
In the pop-up, click Service Provider Metadata File to download the metadata you will need to register Cloud Voice as a SAML client in Red Hat SSO.
Step 3: Register Cloud Voice as a SAML client in Red Hat SSO
Section titled “Step 3: Register Cloud Voice as a SAML client in Red Hat SSO”-
In the left navigation bar, click Clients.
-
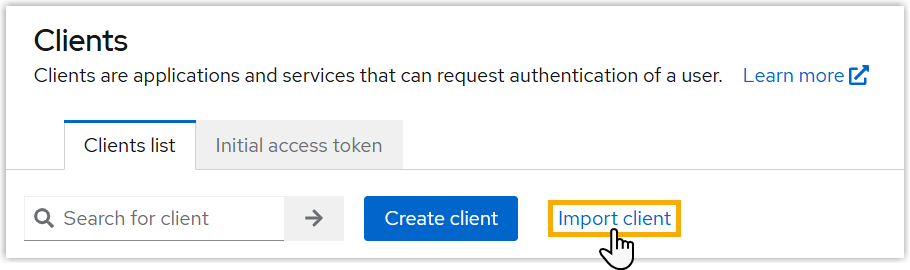
On the Clients list tab, click Import client.
-
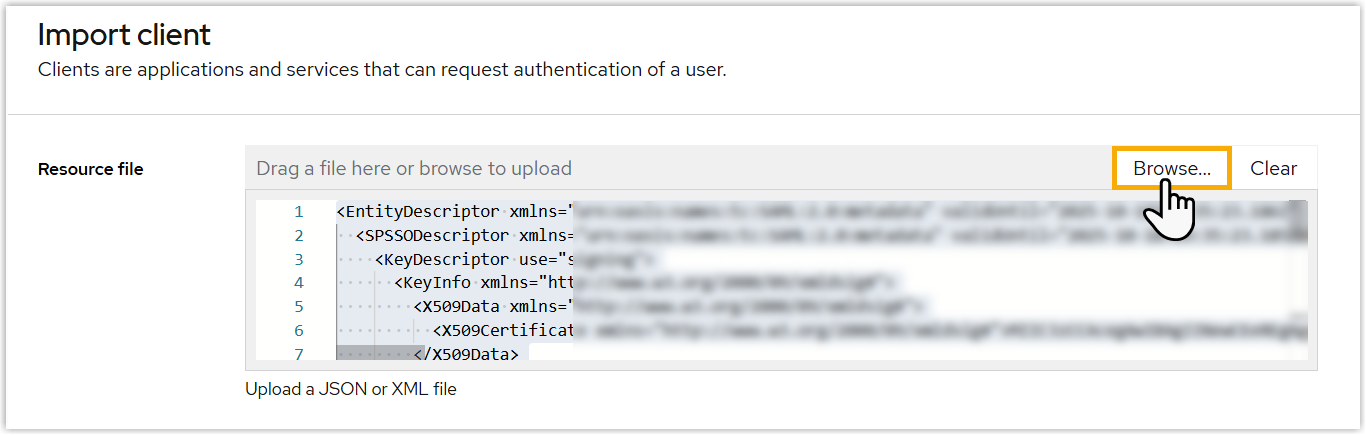
In the Resource file section, click Browse and upload the service provider metadata file you downloaded from Cloud Voice.
-
Click Save.
-
Set the user attribute for the SAML client:
-
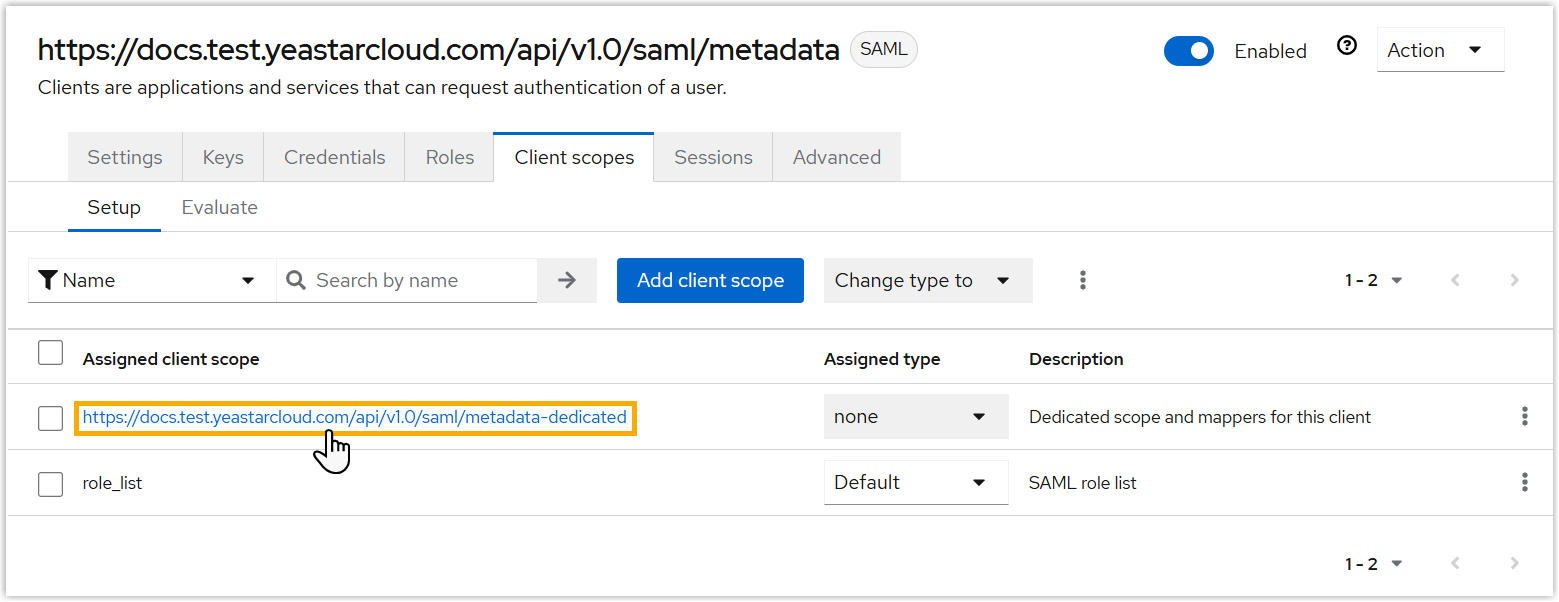
On the Client scopes tab, open the client’s dedicated scope and mappers.
-
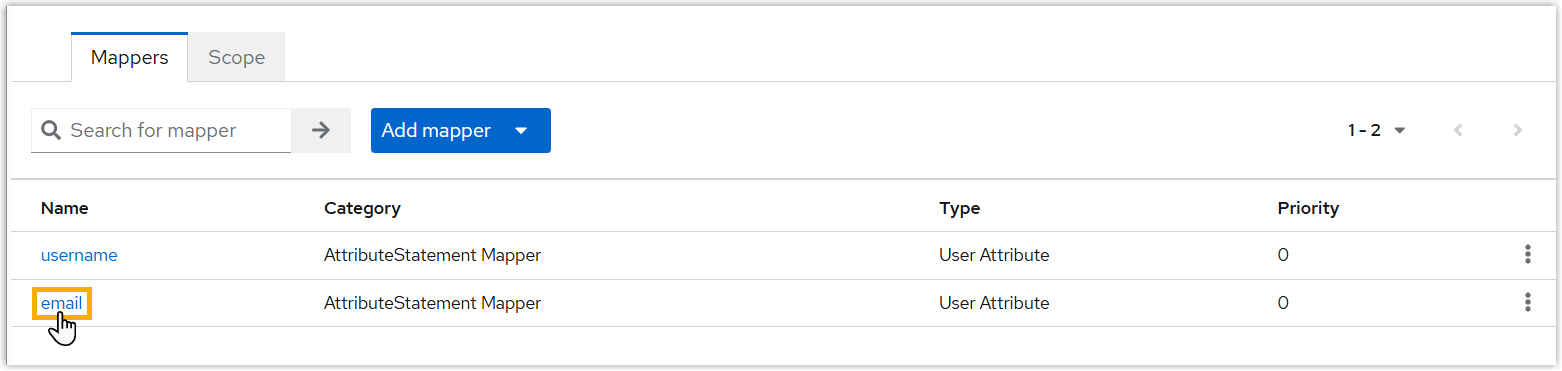
On the Mappers tab, open the email attribute (built-in or custom).
-
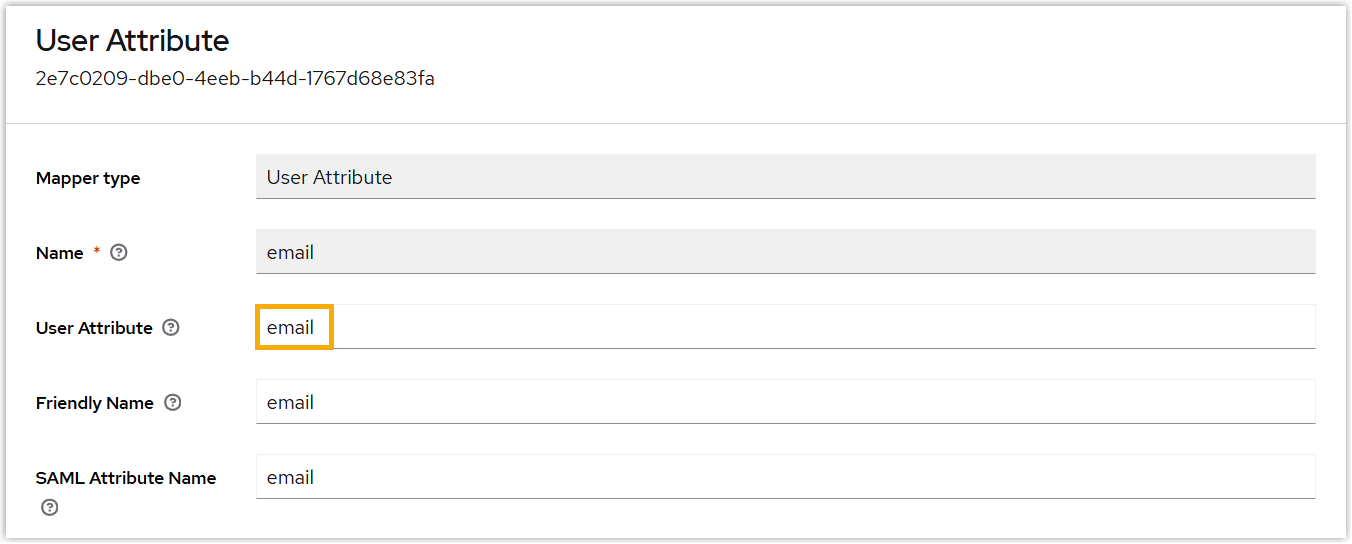
Enter the attribute in the User Attribute field.
-
Click Save.
-
Result
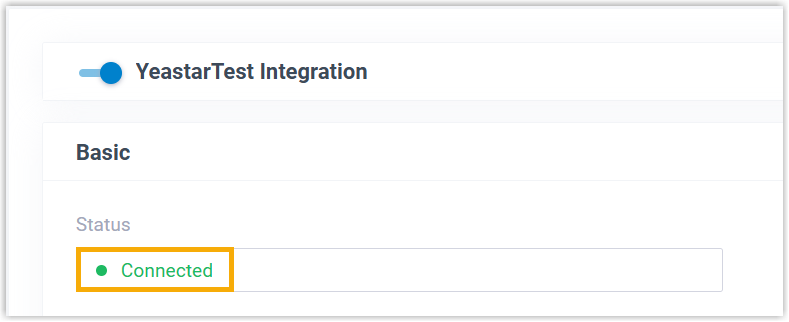
Section titled “Result”The integration status shows Connected, confirming that Cloud Voice is linked to Red Hat SSO.
What to do next
Section titled “What to do next”- Synchronize Red Hat SSO users to Cloud Voice and assign extensions so they can use their office extensions.
- Enable Red Hat SSO so users can sign in to the Cloud Voice App with their Red Hat credentials.
Question about this page?
Ask the AI assistant. It starts from this page, then searches the rest of the docs.
Ask Cloud Voice AI
Answers are AI-generated from the docs and may contain mistakes. Verify with the linked pages.