
Outbound Call Security
Outbound call controls are the final safeguard in a layered security plan. Even if an attacker slips past your other defenses, tightly scoped dialing rules cap how much damage a compromised extension or trunk (the connection to your phone carrier) can do. The main threat these controls guard against is toll fraud: unauthorized use of your phone system to place calls that run up charges, usually to premium-rate or international destinations. Cloud Voice lets you constrain outbound calling along several dimensions at once, so combine the controls below to match how your business actually uses the phone system.
The controls covered here are outbound route permissions, PIN (Personal Identification Number) codes, time conditions, allowed countries/regions, blocked numbers, call frequency limits, concurrent-call caps, and maximum call duration.
Limit dialing with outbound route permissions
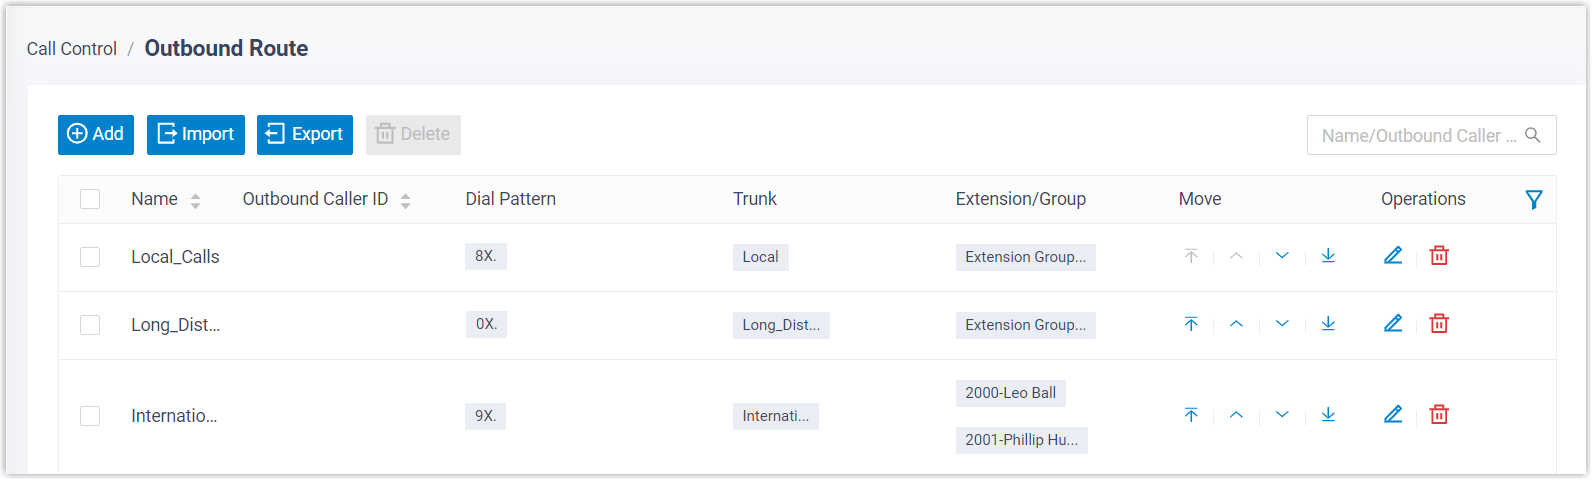
Section titled “Limit dialing with outbound route permissions”Not every employee needs to place every kind of call. An outbound route is the rule that decides which trunk a dialed number leaves through. A good starting point is to separate your traffic into distinct outbound routes, for example local, long-distance, and international, each tied to the appropriate trunk. You can then grant permission for a route only to the extensions whose jobs require it, so most users can never reach a costlier route in the first place.
Require a PIN code before dialing
Section titled “Require a PIN code before dialing”Adding a password to an outbound route forces the caller to enter a PIN (Personal Identification Number) before the call is placed. The route rejects the call unless a valid PIN is supplied. You can protect a route with either one shared PIN or a list of individual PINs.
Use a single PIN
Section titled “Use a single PIN”-
Go to Call Control > Outbound Route and open the route you want to protect.
-
In the Outbound Route Password drop-down, choose Single PIN and enter a PIN code.

-
Click Save, then Apply.
Use multiple PINs
Section titled “Use multiple PINs”-
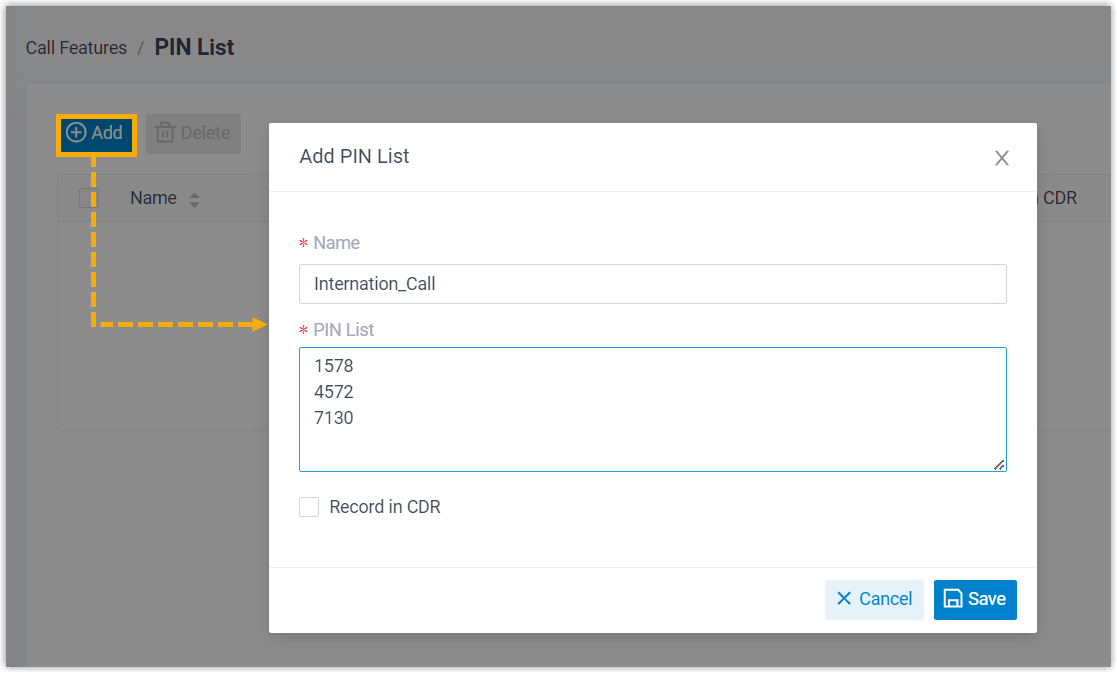
Build a PIN list under Call Features > PIN List.
-
Attach the PIN list to the route under Call Control > Outbound Route > Outbound Route Password.

-
Click Save, then Apply.
Restrict dialing by time of day
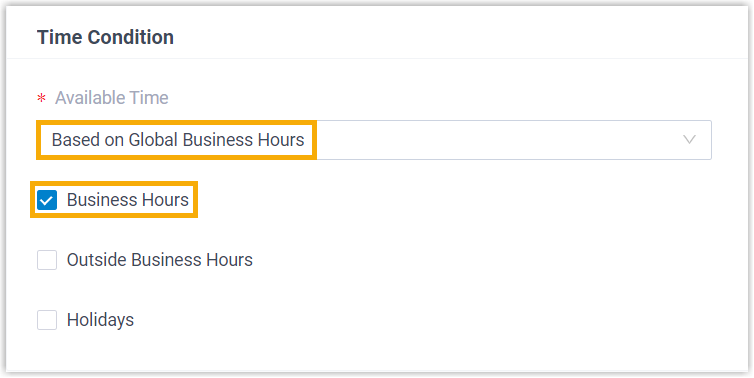
Section titled “Restrict dialing by time of day”Fraud attempts tend to cluster in the hours when nobody is watching: nights, weekends, and holidays. By pairing a time condition with an outbound route, you can allow calls only during the periods you expect legitimate traffic. A common approach is to define a “Business Hours” condition and permit outbound calls on a route only while it is active.
-
Define a time condition under Call Control > Business Hours and Holidays.

-
Apply the time condition to an outbound route: a. Go to Call Control > Outbound Route. b. In the Time Condition section, pick the condition that should govern when the route can be used.
 c. Click Save, then Apply.
Restrict dialing by country or region
Section titled “Restrict dialing by country or region”If your team works with partners or customers abroad, you will need international dialing enabled, but that capability is a prime target for international toll fraud, which can run up large bills quickly. Keep the exposure small by allowing international calls only for the users who need them and only to the destinations they actually reach.
-
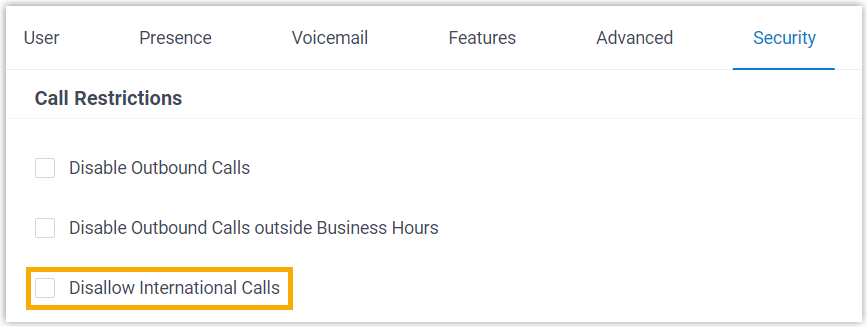
Grant international dialing permission to the right extension: a. Go to Extension and Trunk > Extension and open the extension. b. On the Security tab, clear the Disallow International Calls checkbox.
 c. Click Save, then Apply.
 -
Turn on dialing to the specific countries or regions you need.
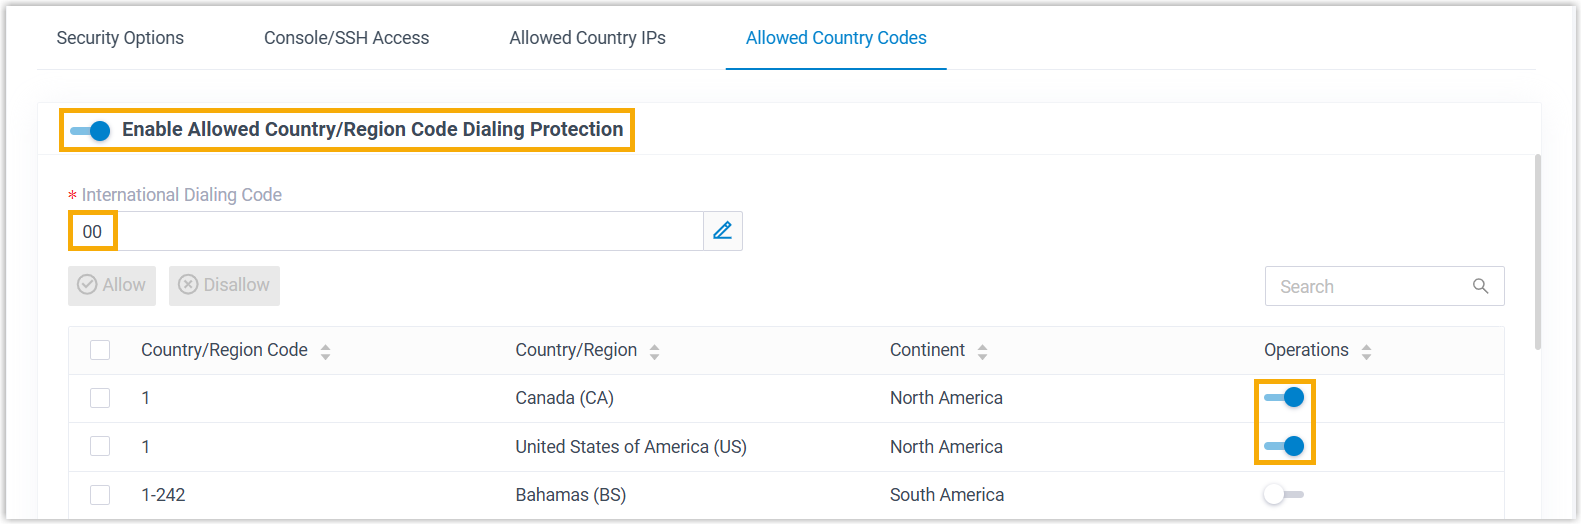 a. Go to Security > Security Settings > Allowed Country Codes.
b. Turn on Enable Allowed Country/Region Code Dialing Protection.
c. In International Dialing Code, enter your country’s international call prefix.
d. In the Operations column, enable each country or region you want to allow.
e. Click Apply.
a. Go to Security > Security Settings > Allowed Country Codes.
b. Turn on Enable Allowed Country/Region Code Dialing Protection.
c. In International Dialing Code, enter your country’s international call prefix.
d. In the Operations column, enable each country or region you want to allow.
e. Click Apply. -
Confirm that at least one outbound route matches the international dialing code and is available to the extension, so the permitted calls can actually leave the system.

Block specific phone numbers
Section titled “Block specific phone numbers”Toll fraud often works by pushing a flood of calls to premium-rate numbers (numbers that bill a high per-minute rate, part of which the number’s owner collects). The fraudster takes the revenue and you receive the bill. Blocking those destinations shuts down that path. You can block individual numbers or whole ranges using number patterns.
-
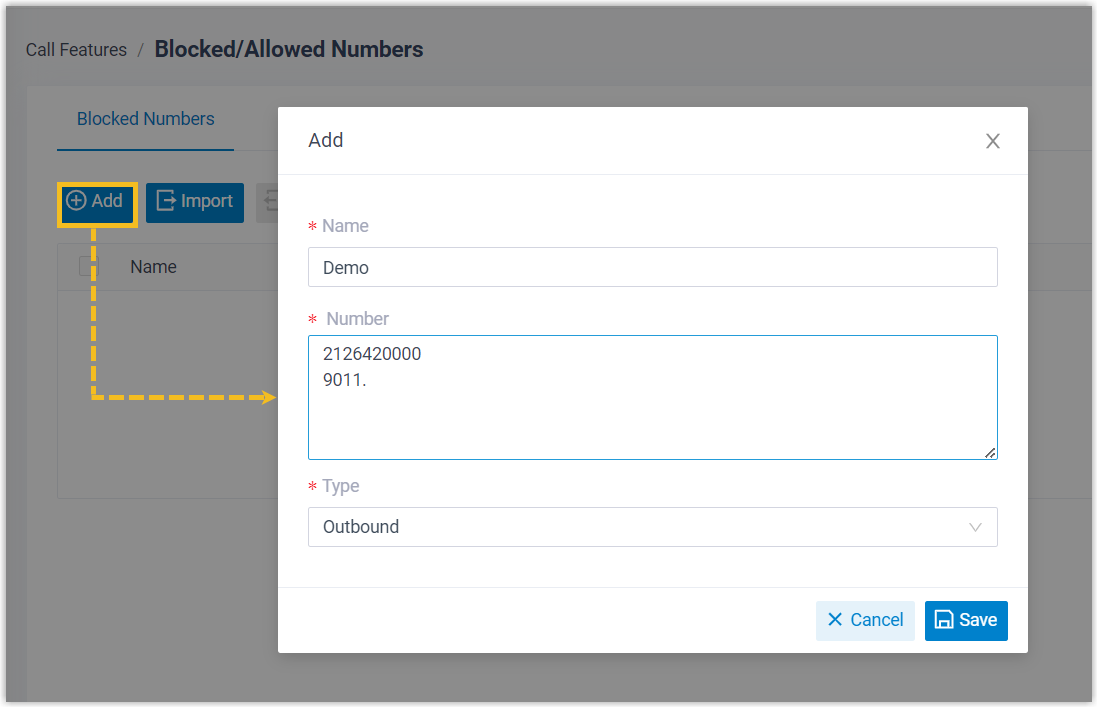
Go to Call Features > Blocked/Allowed Numbers > Blocked Numbers.
-
Click Add and enter the numbers users must not be able to dial.
-
Click Save, then Apply.
Limit how often users can dial out
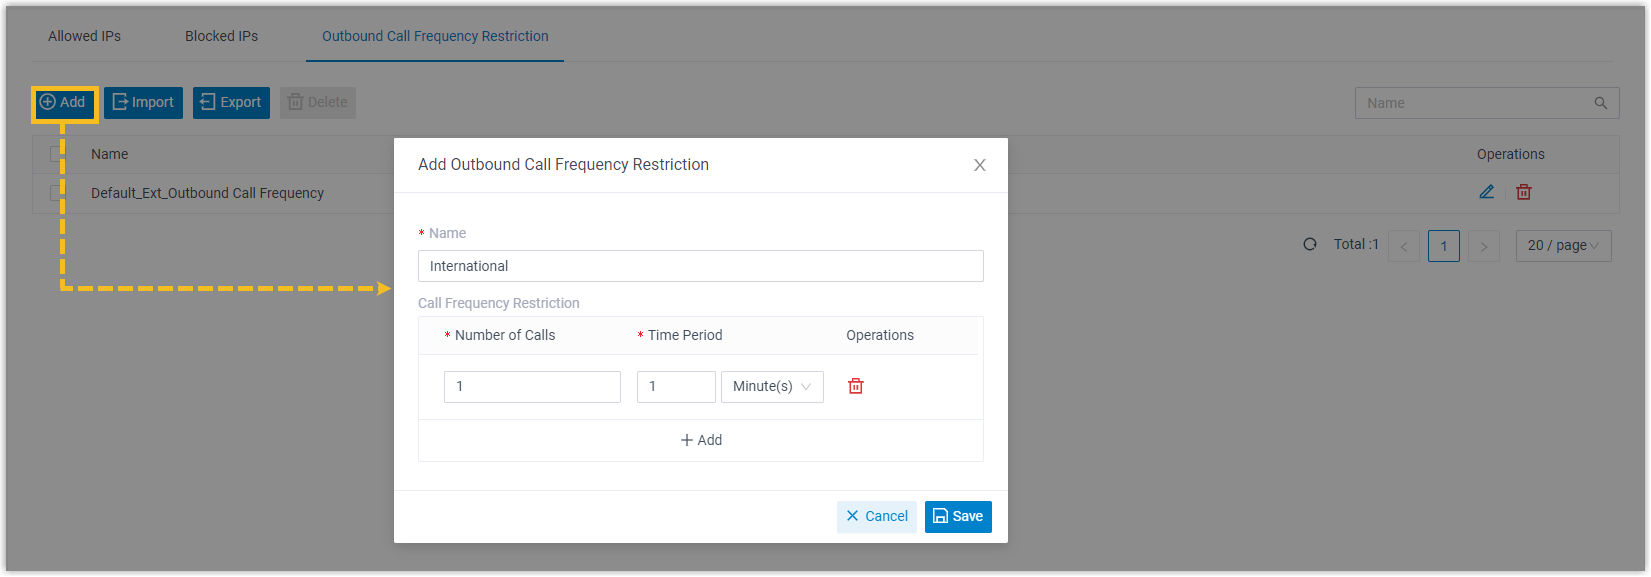
Section titled “Limit how often users can dial out”Capping the number of outbound calls an extension can place in a given window stops a compromised account from generating traffic at machine speed: once the limit is hit, further calls are refused. Cloud Voice ships with a default rule of up to 5 outbound calls per second per extension. You can rely on that default or create your own rule and assign it to specific users.
-
Create a custom frequency rule: a. Go to Security > Security Rules > Outbound Call Frequency Restriction. b. Click Add to define the rule.
 c. Click Save.
 -
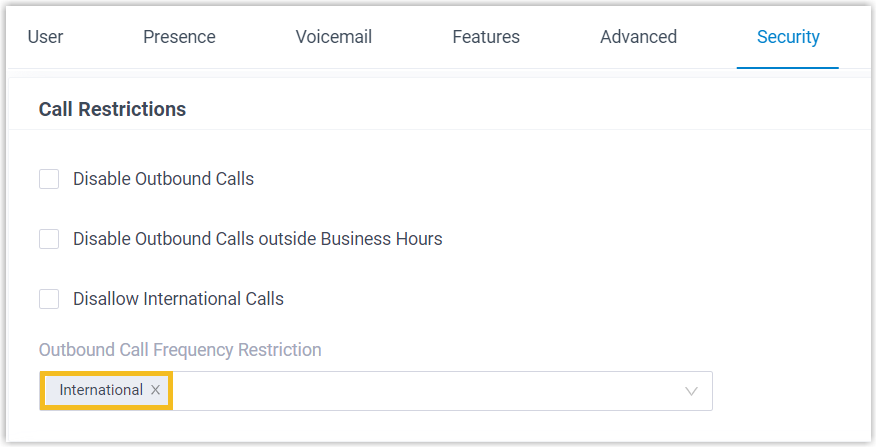
Apply the rule to the relevant extensions: a. Go to Extension and Trunk > Extension and open the extension. b. On the Security tab, choose your rule from the Outbound Call Frequency Restriction drop-down.
 c. Click Save, then Apply.
Cap concurrent calls on a trunk
Section titled “Cap concurrent calls on a trunk”Limiting how many outbound calls can run at the same time over a SIP trunk (a carrier connection that uses SIP, the Session Initiation Protocol, to set up calls) keeps an attacker from launching a large volume of simultaneous calls through it.
-
Go to Extension and Trunk > Trunk and open the SIP trunk.
-
On the Advanced tab, set a value for Maximum Concurrent Calls.

-
Click Save, then Apply.
Cap outbound call duration
Section titled “Cap outbound call duration”Automatically ending calls once they reach a set length limits both accidental misuse and runaway costs from a fraudulent call left connected. You can enforce a limit for everyone at once or for individual users.
For all users (global setting)
Section titled “For all users (global setting)”-
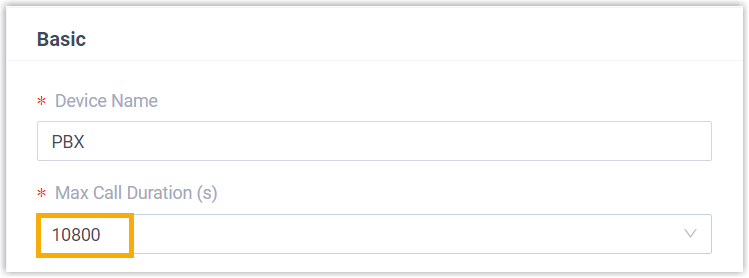
Go to PBX Settings > Preferences.
-
In the Basic section, set a value for Max Call Duration (s).
-
Click Save, then Apply.
For specific users (per-user setting)
Section titled “For specific users (per-user setting)”-
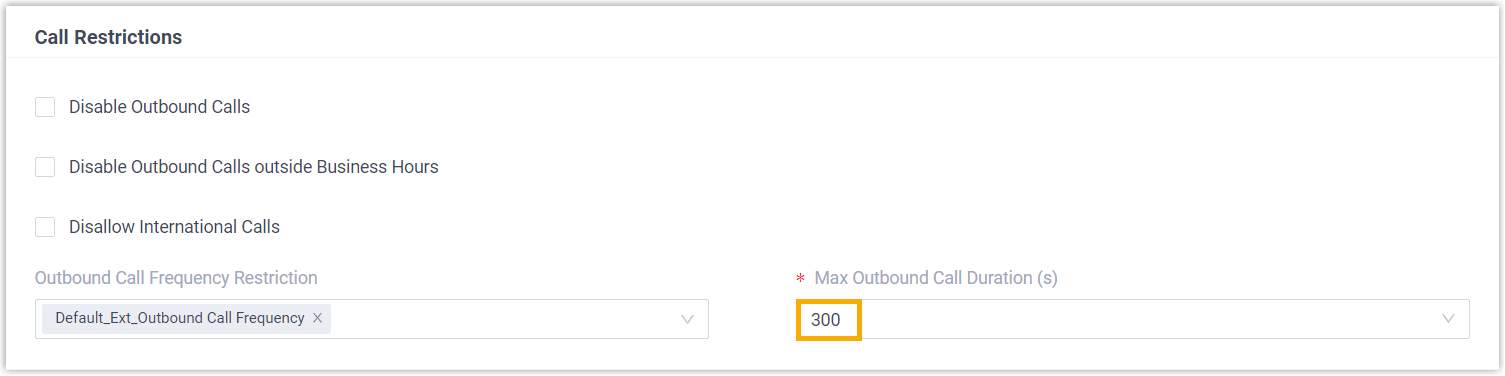
Go to Extension and Trunk > Extension and open the extension.
-
On the Security tab, pick a value from the Max Outbound Call Duration (s) drop-down.
-
Click Save, then Apply.
Question about this page?
Ask the AI assistant. It starts from this page, then searches the rest of the docs.
Ask Cloud Voice AI
Answers are AI-generated from the docs and may contain mistakes. Verify with the linked pages.